Root for Your Roots!
By Mitch Lippencott
ISA Certified Arborist® OH-6715A
October 30, 2025
A tree is only as healthy as its roots. Luckily, Russell Tree Experts offers a variety of root-health services! The powerhouse of our root-health services is the air spade. This excavating tool, when attached to a powerful air compressor, is capable of removing soil without damaging tree roots. (Full disclosure and fun fact: air spading is my very favorite type of tree care to perform!)
Root Collar Excavation
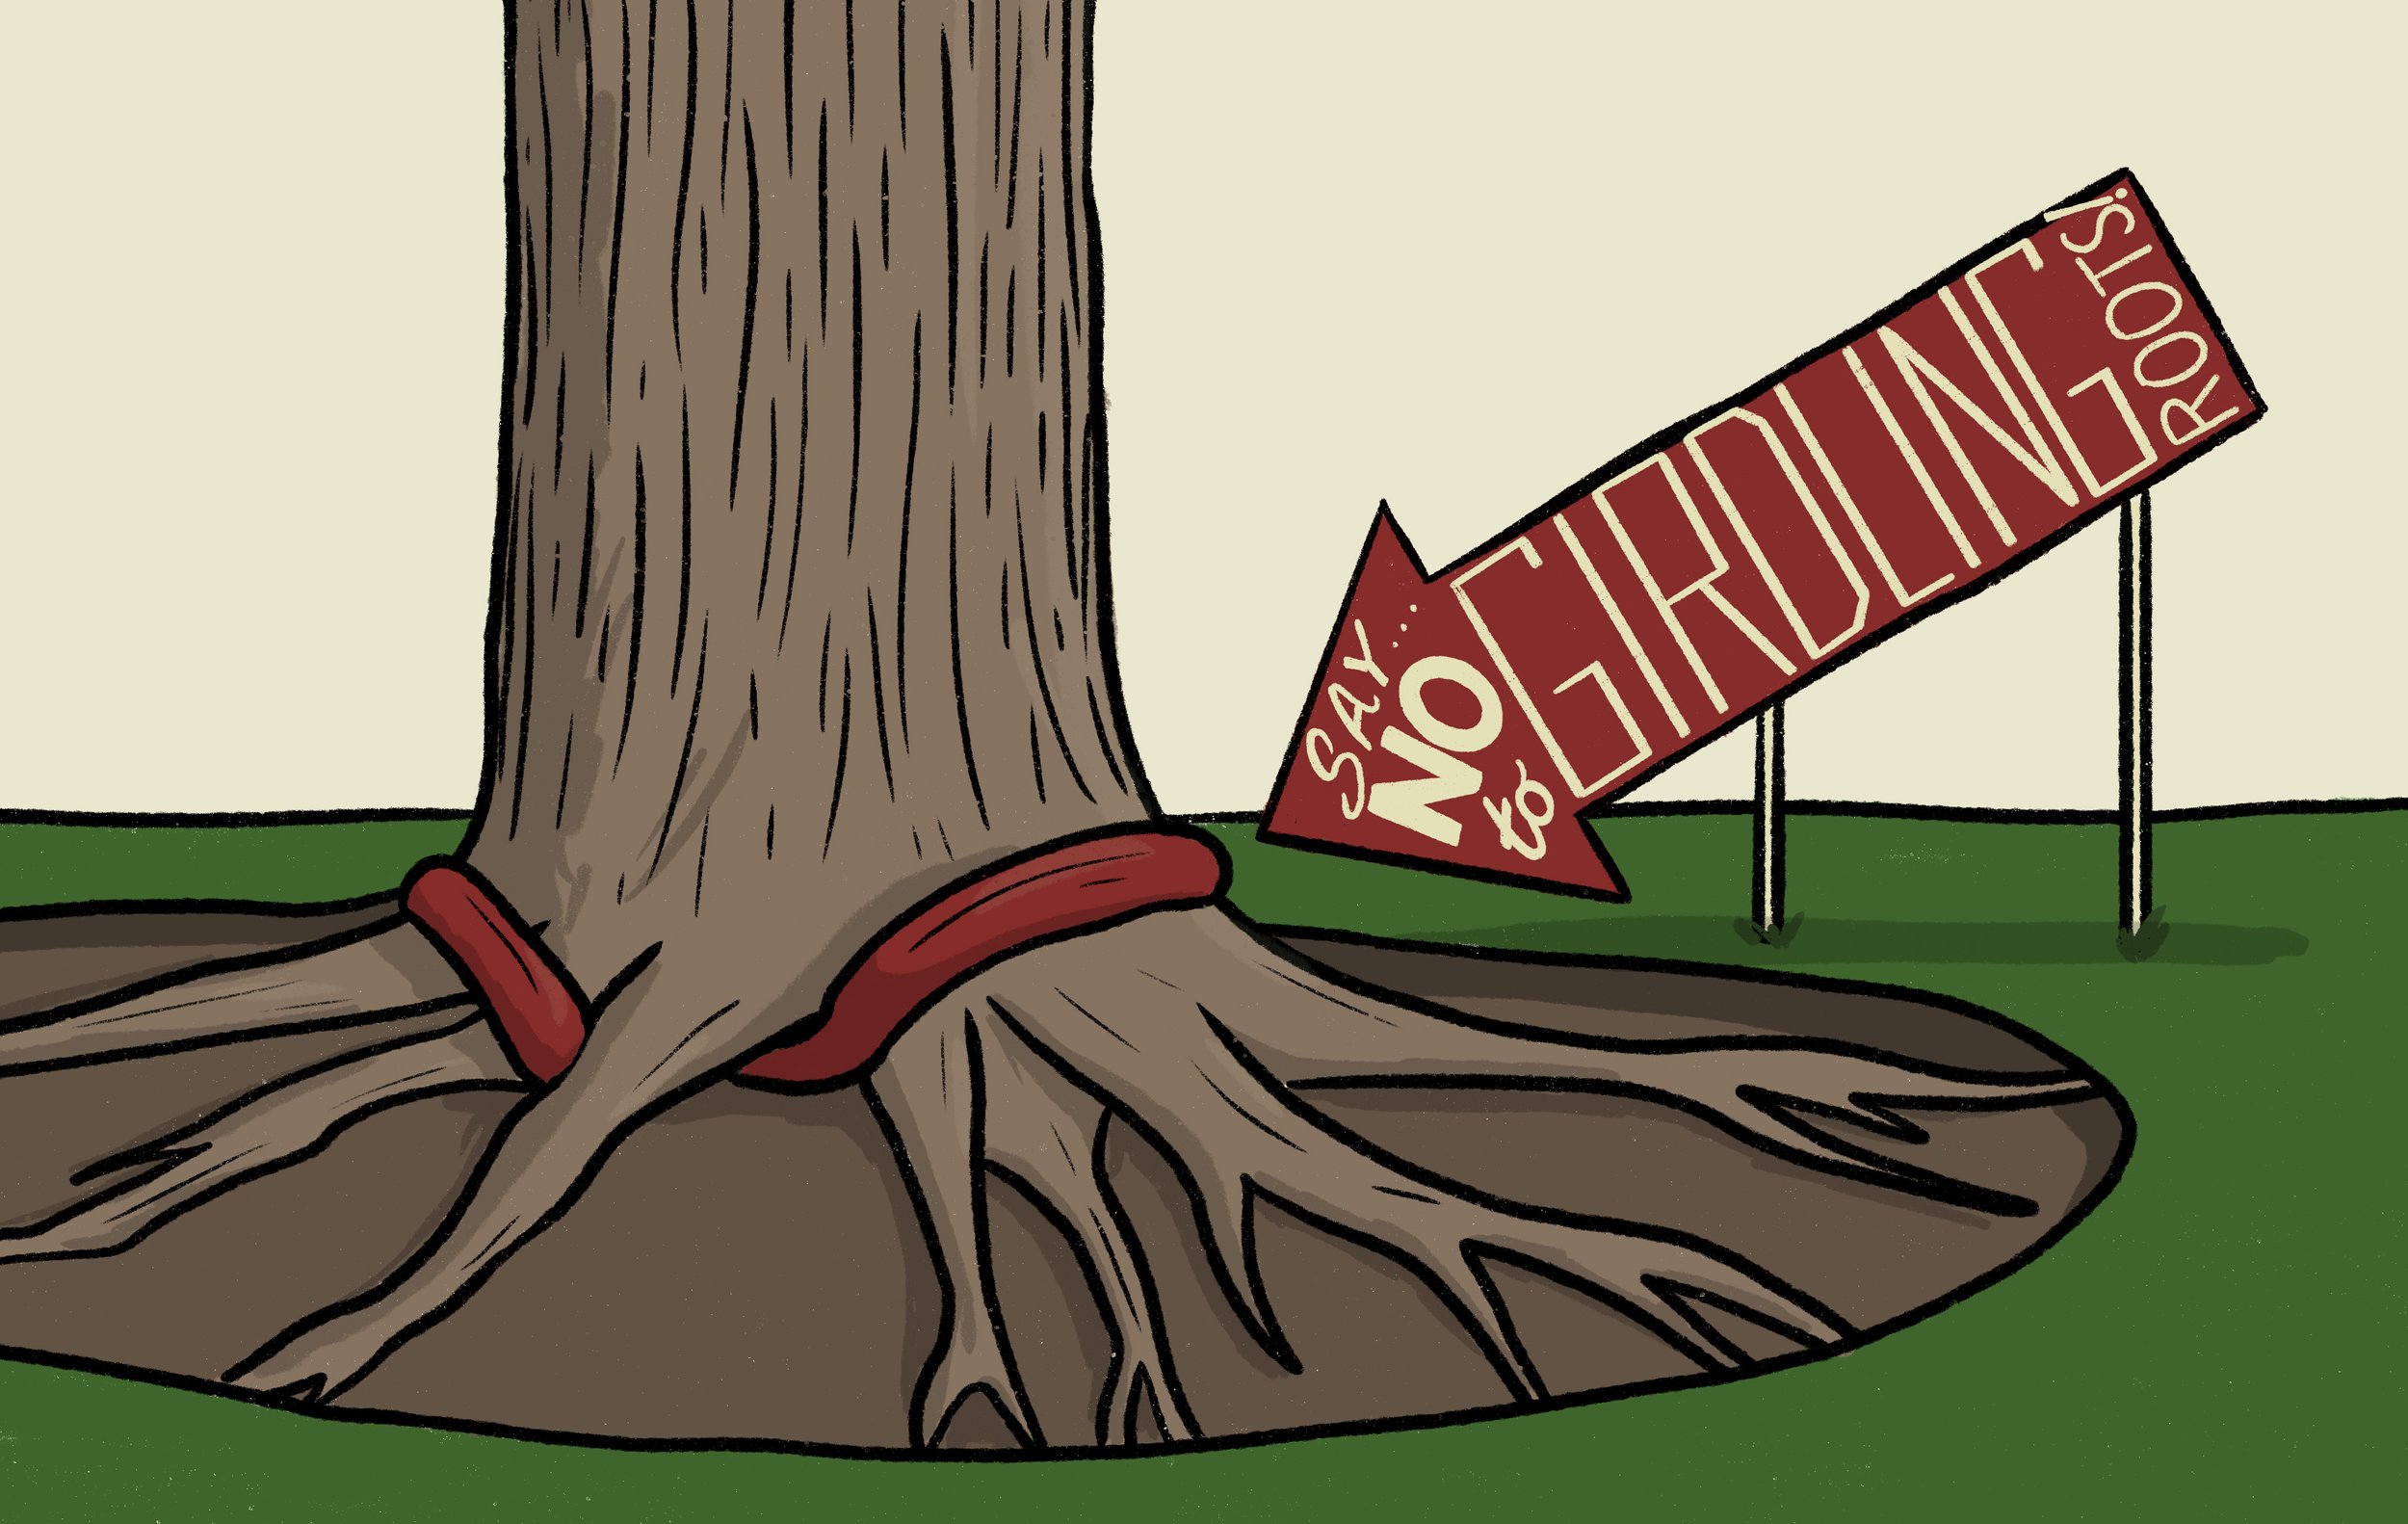
“Say NO to Girdling Roots!”
The most common root-health service is root collar excavation. In this procedure, our technician begins at the tree's trunk and removes soil approximately a foot outwards to reveal the root system closest to the tree. From here, roots that are squeezing the trunk or each other can be selectively removed, thus improving the passage of water and nutrients from the roots to the leaves. Once the soil near the trunk is removed, additional improvements can be made such as removing twine, burlap, or other nursery products left during planting, or correcting the soil depth of trees planted too deep. In my experience, this is the single most beneficial process to long-term tree health. Maples and sweetgums are especially prone to girdling roots. Stem girdling roots are no good because they inhibit the flow of water and nutrients for a tree. Signs of trunk girdling in other trees include lack of flare at the base (which indicates the tree is planted too deep), flat spots in the otherwise round trunk, early fall color and leaf drop, and excessive stress during summer drought. Root collar excavations should be performed in winter when trees are dormant, but when the ground is not frozen.
In limited quantities, roots can also be exposed and pruned to prevent damage to patios, driveways, or underground utilities. This method of root removal is far less damaging to tree health than traditional shovel/backhoe techniques. An ISA Certified Arborist® should always be consulted before this type of work is performed because excessive root removal can cause instability and rapid tree death. Air spade trenching and root removal can be performed year-round except in the case of some trees that may be highly stressed or experiencing severe drought conditions.
Even when a tree is planted at the proper depth, has plenty of soil space, and with no girdling, the trunk can still benefit from root-health services. We offer three related, but progressively more intensive options to treat the entire root zone and not just the area around the trunk.
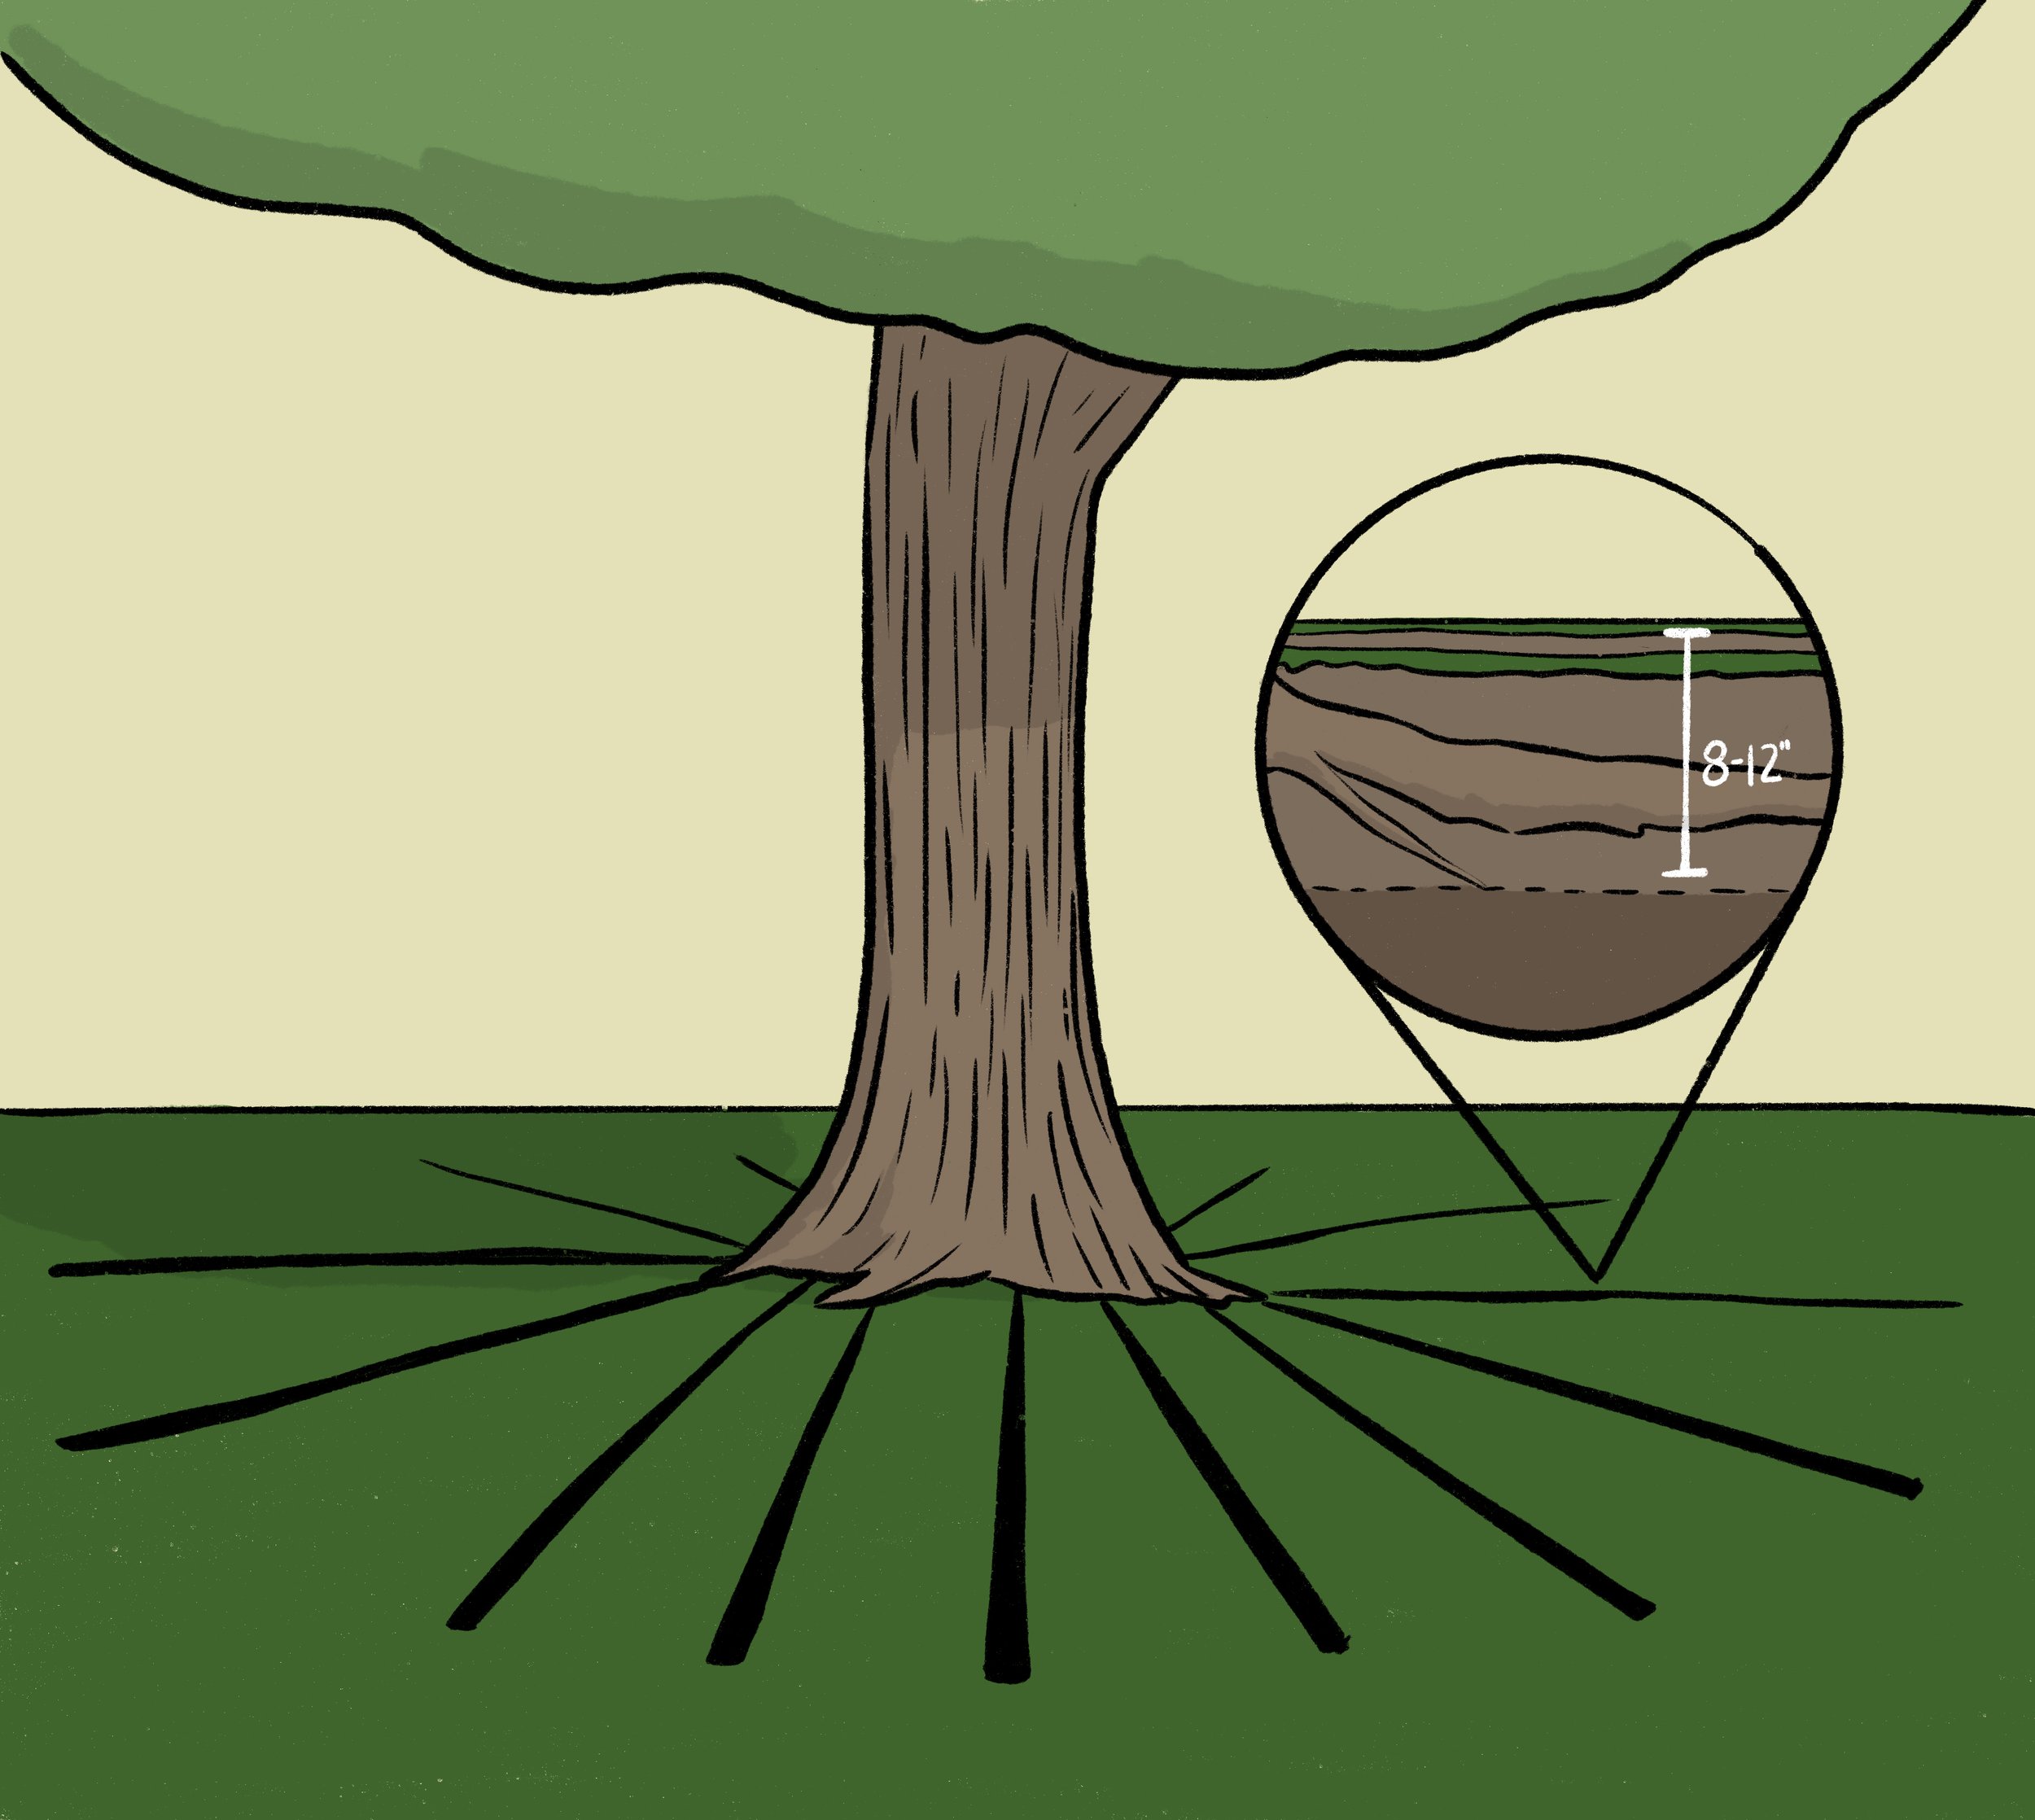
Vertical Mulching

Vertical Mulching
The first is vertical mulching, in which the technician removes soil in small bursts radiating outward from the trunk and extending the entire drip-line of the tree. The small but 8-12 inch deep cavities are then replaced with a porous and nutrient-rich compost blend. The result is a looser, more aerated soil structure for new roots and beneficial microorganisms to expand into. This service can be provided almost year-round (frozen ground/drought excluded) and is my go-to for mature trees on undisturbed sites that are beginning to lack vigor.
Radial Trenching
Radial Trenching
One step up, radial trenching is a similar procedure, but instead of small bursts, the soil is removed in continuous lines radiating outward the length of the canopy. I prefer this technique for new builds and areas with recent compaction, urban sites, and situations where old trees are beginning to decline. This is another almost year-round service.
Root zone Invigoration
The most extensive of entire root zone services we offer is root zone invigoration. In this technique, we use the air spade to remove all the grass, soil, or competing plants sitting on top of the tree's root system. We then correct any girdling and planting depth problems. Finally, we replace the entire space with our compost blend. This is a big, messy, expensive procedure but often the best solution when a valued small to medium-sized tree is being damaged by mowers, vandalism, or when there is an especially dense or aggressive plant growing above the root zone. I prefer this service to occur during winter dormancy, but in extreme cases, it can be performed any time roots are too restricted to function properly.
It’s easy to forget about your trees while they're sitting leafless in winter - but late fall and winter can be an incredibly opportune time to give them attention. Caring for your tree's roots is often more beneficial than pruning, spraying fungicides, or almost any other plant health care service. For a free tree work quote from one of our 25+ ISA Certified Arborists®, visit RussellTreeExperts.com/Quote or call us at (614) 895-7000!
Please note: This article was originally published on 1/29/2024 and was revised on 10/30/2025.
ADDITIONAL ARBOR ED™ ARTICLES!


Mitch Lippencott I Regional Manager, Russell Tree Experts
Mitchell Lippencott joined Russell Tree Experts in 2020 and has been in the green industry for over 20+ years with a diverse background ranging from working for a landscape design company, a retail garden center, and two municipalities! Mitch is an alum from The Ohio State University, a licensed pesticide applicator, a qualified tree risk assessor, and an ISA Certified Arborist®. Outside of work, he enjoys traveling, cooking, and gardening.
10 Boxwood Alternatives
Dear Reader,
My introduction into the horticultural world was working at a small retail nursery in the early 2000s. Back then, when a customer would ask for an easy to grow, low maintenance, no brainer plant, boxwood is what we would often recommend. Fast forward twenty years and today boxwood have to contend with boxwood leaf miner, boxwood psyllid, spider mites, volutella stem canker, winterburn, boxwood blight and most recently, a new disease known as boxwood dieback. Historically, Boxwood have been appreciated in the landscape because they are evergreen, deer proof, compact, easy to manipulate and respond well to pruning/shearing. But they are no longer the maintenance free, easy to grow plants they once were. 2023 was a particularly bad year for boxwood in central Ohio and every arborist, landscaper and plant person I know was overwhelmed with calls from desperate clients willing to try anything to restore their boxwood to how they once looked. Many of the boxwood installations I observed this year are beyond preservation. Others will likely recover over the next two to three growing seasons but may look a little rough along the way. Much of the damage that occurred to boxwood this year is a result of the cold weather event we had just before the holiday season of 2022, where temperatures changed from 40 degrees Fahrenheit into the negatives in less than 12 hours. There is no topical spray or any professional service that can be offered to combat this sort of environmental event. And many of the boxwood that were able to survive the initial cold temperatures succumbed later to disease spreading pathogens seeking a stressed and vulnerable host. Even under normal weather conditions, most boxwood require regular applications of insecticides and dormant oils to protect them from insect pests that have taken advantage of their abundance. The best management strategy for the prevention of disease and insect pests on our plants is to use plants that do not get those diseases and insect pests. So as you are wrapping up your Fall landscape plantings or making plans for next Spring, consider something new for your hedges, accent plants and foundation plantings. Here are 10 suggestions for plants to consider with similar characteristics to boxwood.
1. Blue Holly
Blue holly (Ilex x meserveae) is a hybrid between the cold hardy Asian prostrate holly (Ilex rugosa) and English holly (Ilex aquifolium). It is one of my personal favorite evergreen shrubs and has lustrous dark green/blue leaves and dark red berries on female plants that ultimately feed the robins and mockingbirds around late winter to early spring. Individual plants form a shrubby upright to pyramidal habit and can grow 8 to 12 feet in height by 6 to 8 feet in width. Blue holly (Ilex x meserveae) can easily be pruned into hedges and can be kept at any height or width with minimal, annual pruning. They are cold hardy to -20 degrees Fahrenheit and adaptable to both full sun or partial shade. Several cultivated varieties of this hybrid exist with my personal favorites being Blue Princess and Blue Prince.
NOTE: Holly plants require a male pollinator to achieve fruit. Make sure to include at least one male plant (like Blue Prince), and possibly more depending on the size of your Holly plantings to improve fruiting.
Negatives: Blue holly (Ilex x meserveae) can have significant leaf burn when temperatures drop below -10 degrees Fahrenheit (although established plants recover quickly in the Spring). They are susceptible to phytophthora (root rot) in poorly drained sites and deer browsing during the winter when snow persists for days at a time.

2. Privet
Privet (Ligustrum spp.) is a densely branched shrub with dark green to yellowish green leaves that can easily be manipulated into rounded plants and hedges. Privet (Ligustrum spp.) is fast growing and adaptable to a wide range of soils and growing conditions; I’ve observed many well kept privet hedges that would give boxwood a run for its money during the spring or summer. The foliage persists late into the fall often turning purple but is not evergreen. There are no serious disease or insect problems and oftentimes plants seem to thrive with neglect. Several different species and many different cultivars exist for a range of size, texture and leaf color.
Negatives: Privet (Ligustrum spp.) is not native to central Ohio and can easily spread by seed into native areas and out compete native species. They are also not evergreen.

3. Wintercreeper euonymus
Until recently I have always considered this species of euonymus to be best used as a ground cover or climber on a tree or trellis. More and more though, I’m seeing it in the landscape pruned into a very small and cute hedge or sculpted into 1 to 2 feet tall and wide mounds looking very similar to boxwood. Euonymus in general is fast growing and adaptable from full sun, to full shade, and to just about any landscape situation that isn’t a swamp. Leaves are evergreen most winters (leaf drop can occur when temps drop below -20 F) and there are dozens of cultivated varieties for leaf size and color. I’m partial to the green and white variegated cultivar ‘Emerald Gaiety.’
Negatives: Wintercreeper euonymus (Euonymus fortunei) is not native and can easily naturalize and take over unmanaged native areas. They can be susceptible to euonymus scale and difficult to treat successfully once a population is established.

4. Spirea
There are several species and dozens of different cultivars of spirea that mimic the compact and rounded habit of boxwood. They can be grown as separate plants, planted in masses or managed as a hedge. Spirea can grow in most landscape situations and will perform well in any soil that is not excessively wet. Spirea are easy to grow, have little insect or disease problems, respond well to pruning and shearing, and are cold hardy and adaptable to full sun and partial shade. Spirea are deciduous but even without leaves, the stems and twigs are so dense that the structure of the plant still provides texture and interest in the winter landscape.
Negatives: Spirea are not evergreen. They can get powdery mildew but it has little impact on the overall health of the plant. Spirea may also be somewhat overused in the landscape but for good reason - it is almost impossible to kill.
5. Japanese HollY
Japanese holly (Ilex crenata) is another compact evergreen shrub with a rounded habit and dark green foliage through the growing season and through the winter. They can grow 3 to 5 feet in height and width, although I have observed larger plants in arboreta. Japanese holly (Ilex crenata) is cold hardy to - 20 degrees Fahrenheit and adaptable to both full sun or partial shade. They respond well to pruning/shearing and can be used in hedges, foundation plantings, or in masses. Several different cultivars are available for different sizes, colors, and superior cold hardiness.
Negatives: Japanese holly (Ilex crenata) is slow growing and not tolerant of high pH soils. They are a preferred host to spider mites during extended periods of drought. Japanese holly (Ilex crenata) is not well known in Ohio and could be difficult to source. I would avoid using the upright cultivar ‘Sky pencil’ unless in a warmer protected spot with exceptionally well drained soil.

6. Globe arborvitae
Globe arborvitae (Thuja occidentalis ‘Globosa’ or ‘Little Gem’) is a compact and rounded form of our native eastern arborvitae. Its leaves are bright green in the spring and summer but turn more bronze or yellowish green during the winter months. Globosa arborvitae is a dwarf form and matures to only 5 to 6 feet tall and wide. They are very adaptable to different soil types and respond well to pruning and shearing. Globosa arborvitae can be used as a specimen plant or accent plant as well as in hedges or foundation plantings. Little gem arborvitae has essentially the same habit as globosa arborvitae but are smaller, maturing to a height of about only 3 feet tall. Either cultivar will perform well from full sun to partial shade (but they should have at least a half day of sunlight).
Negatives: Deer will eat arborvitae to bare wood when hungry. They are also a preferred host to bagworm and spider mites.

7. Yew
Yew (Taxus spp.) is a hardy and easy to grow evergreen shrub. I use them primarily for screening in the parts of my garden that receive less sun, but they can be easily manipulated and sculpted into tight hedges, mazes, and formal shapes in the same fashion that we often treat boxwood. Yew are very adaptable and urban tolerant and can withstand almost any amount of pruning. They will grow well in sun and shade and have few disease or pest problems. If they are used as an alternative to boxwood, I recommend the cultivars ‘Runyan’ or ‘Densiformis’.
Negatives: Yew are susceptible to deer browsing

8. Japanese Plum Yew
Japanese plum yew (Cephalotaxus harringtonia) is similar to yew, but with longer and glossier needles. I have planted this in more than one rural location and my experience so far is that deer will not touch them. Japanese plum yew (Cephalotaxus harringtonia) should be considered by anyone that likes yew but has given up because of continual deer damage. There are several different cultivars selected for a range of different sizes and habits but ‘Duke Gardens’ is the cultivar I recommend for central Ohio gardens and for anyone wishing to experiment with using Japanese plum yew (Cephalotaxus harringtonia) to replace boxwood. This cultivar matures to approximately 2 to 3 feet in height, approximately 3 to 4 feet in width and is cold hardy to - 20 degree fahrenheit. There are no serious pest or disease problems.
Negatives: Straight species is not cold hardy in true zone 5 winters (winters that reach -20 F). I observed significant winterburn in the plants in my garden from the cold snap we had just before the holiday season of 2022.

9. Inkberry
This is one of the boxwood alternatives that I think has the most potential. Inkberry (Ilex glabra) is native to the east coastal plains of the US and is a compact evergreen shrub with lustrous, dark green leaves during the growing season. Foliage can bronze somewhat during the winter months. Without pruning, inkberry (Ilex glabra) can reach heights of 6 to 8 feet tall with a width of 8 to 10 feet wide. Female plants can produce a small, pea-sized black berry (hence the name inkberry) that is edible to birds. Inkberry (Ilex glabra) performs well from full sun to full shade (foliage density is better with at least 5 to 6 hours of sunlight) and is cold hardy to - 20 degrees fahrenheit; although I have observed winterburn in exposed plants during winters with temperatures that have dropped below zero for extended periods of time. Inkberry (Ilex glabra) responds quite well to heavy pruning or shearing and has strong regenerative growth in established plants. They can easily be used as individual specimen plants or in hedges. I recommend using the cultivars ‘Cape Cod’ or ‘Compacta’ if available. These selections maintain a more rounded and compact habit with less pruning.
Negatives: Inkberry (Ilex glabra) is not tolerant of excessively high pH soils and plants can lose lower leaves and become quite leggy if not well managed. I have observed significant deer browsing during periods of extended snow cover in landscapes with a high deer population.

10. Canadian Hemlock
Canadian hemlock (Tsuga canadensis) is one of my favorite evergreen trees. It is a native and graceful evergreen tree with glossy dark green needles that also responds well to aggressive pruning. When my wife and I moved into our current home in 2008, we planted 36 Canadian hemlock (Tsuga canadensis) on 5 foot centers around the perimeter of our front and side yards. We keep these plants sculpted into a tight 6 feet tall by 3 feet wide pyramidal shaped hedge which we prune once a year in the late spring, approximately a month after new growth has pushed out. This could make an excellent replacement for a tall boxwood hedge.
Negatives: Canadian hemlock (Tsuga canadensis) is susceptible to deer browsing during the winter months with extended periods of snow. They are a preferred host to spruce spider mites when under stress. Canadian hemlock (Tsuga canadensis) also have poor tolerance to drought.
These 10 plants are just the beginning of the conversation regarding boxwood alternatives. There are dozens of other cultivated varieties of chamaecyparis, juniper, spruce, pine, fir, leucothoe, etc that could fulfill the same niche in many of our gardens. I believe there is a perfect substitute out there for every plant. The perfect substitute for your needs will depend on your individual situation and landscape.
Sincerely,

TJ Nagel I Scheduling Production Manager, Russell Tree Experts
TJ loves trees. He is an avid gardener and plant collector. TJ graduated from The Ohio State University with a B.S. in Agriculture with a major in Landscape Horticulture and minor in Entomology. TJ is an ISA Board Certified Master Arborist and well versed in Plant Pathology. TJ joined Russell Tree Experts in 2012.
Illustrations by Kenny Greer, Russell Tree Experts
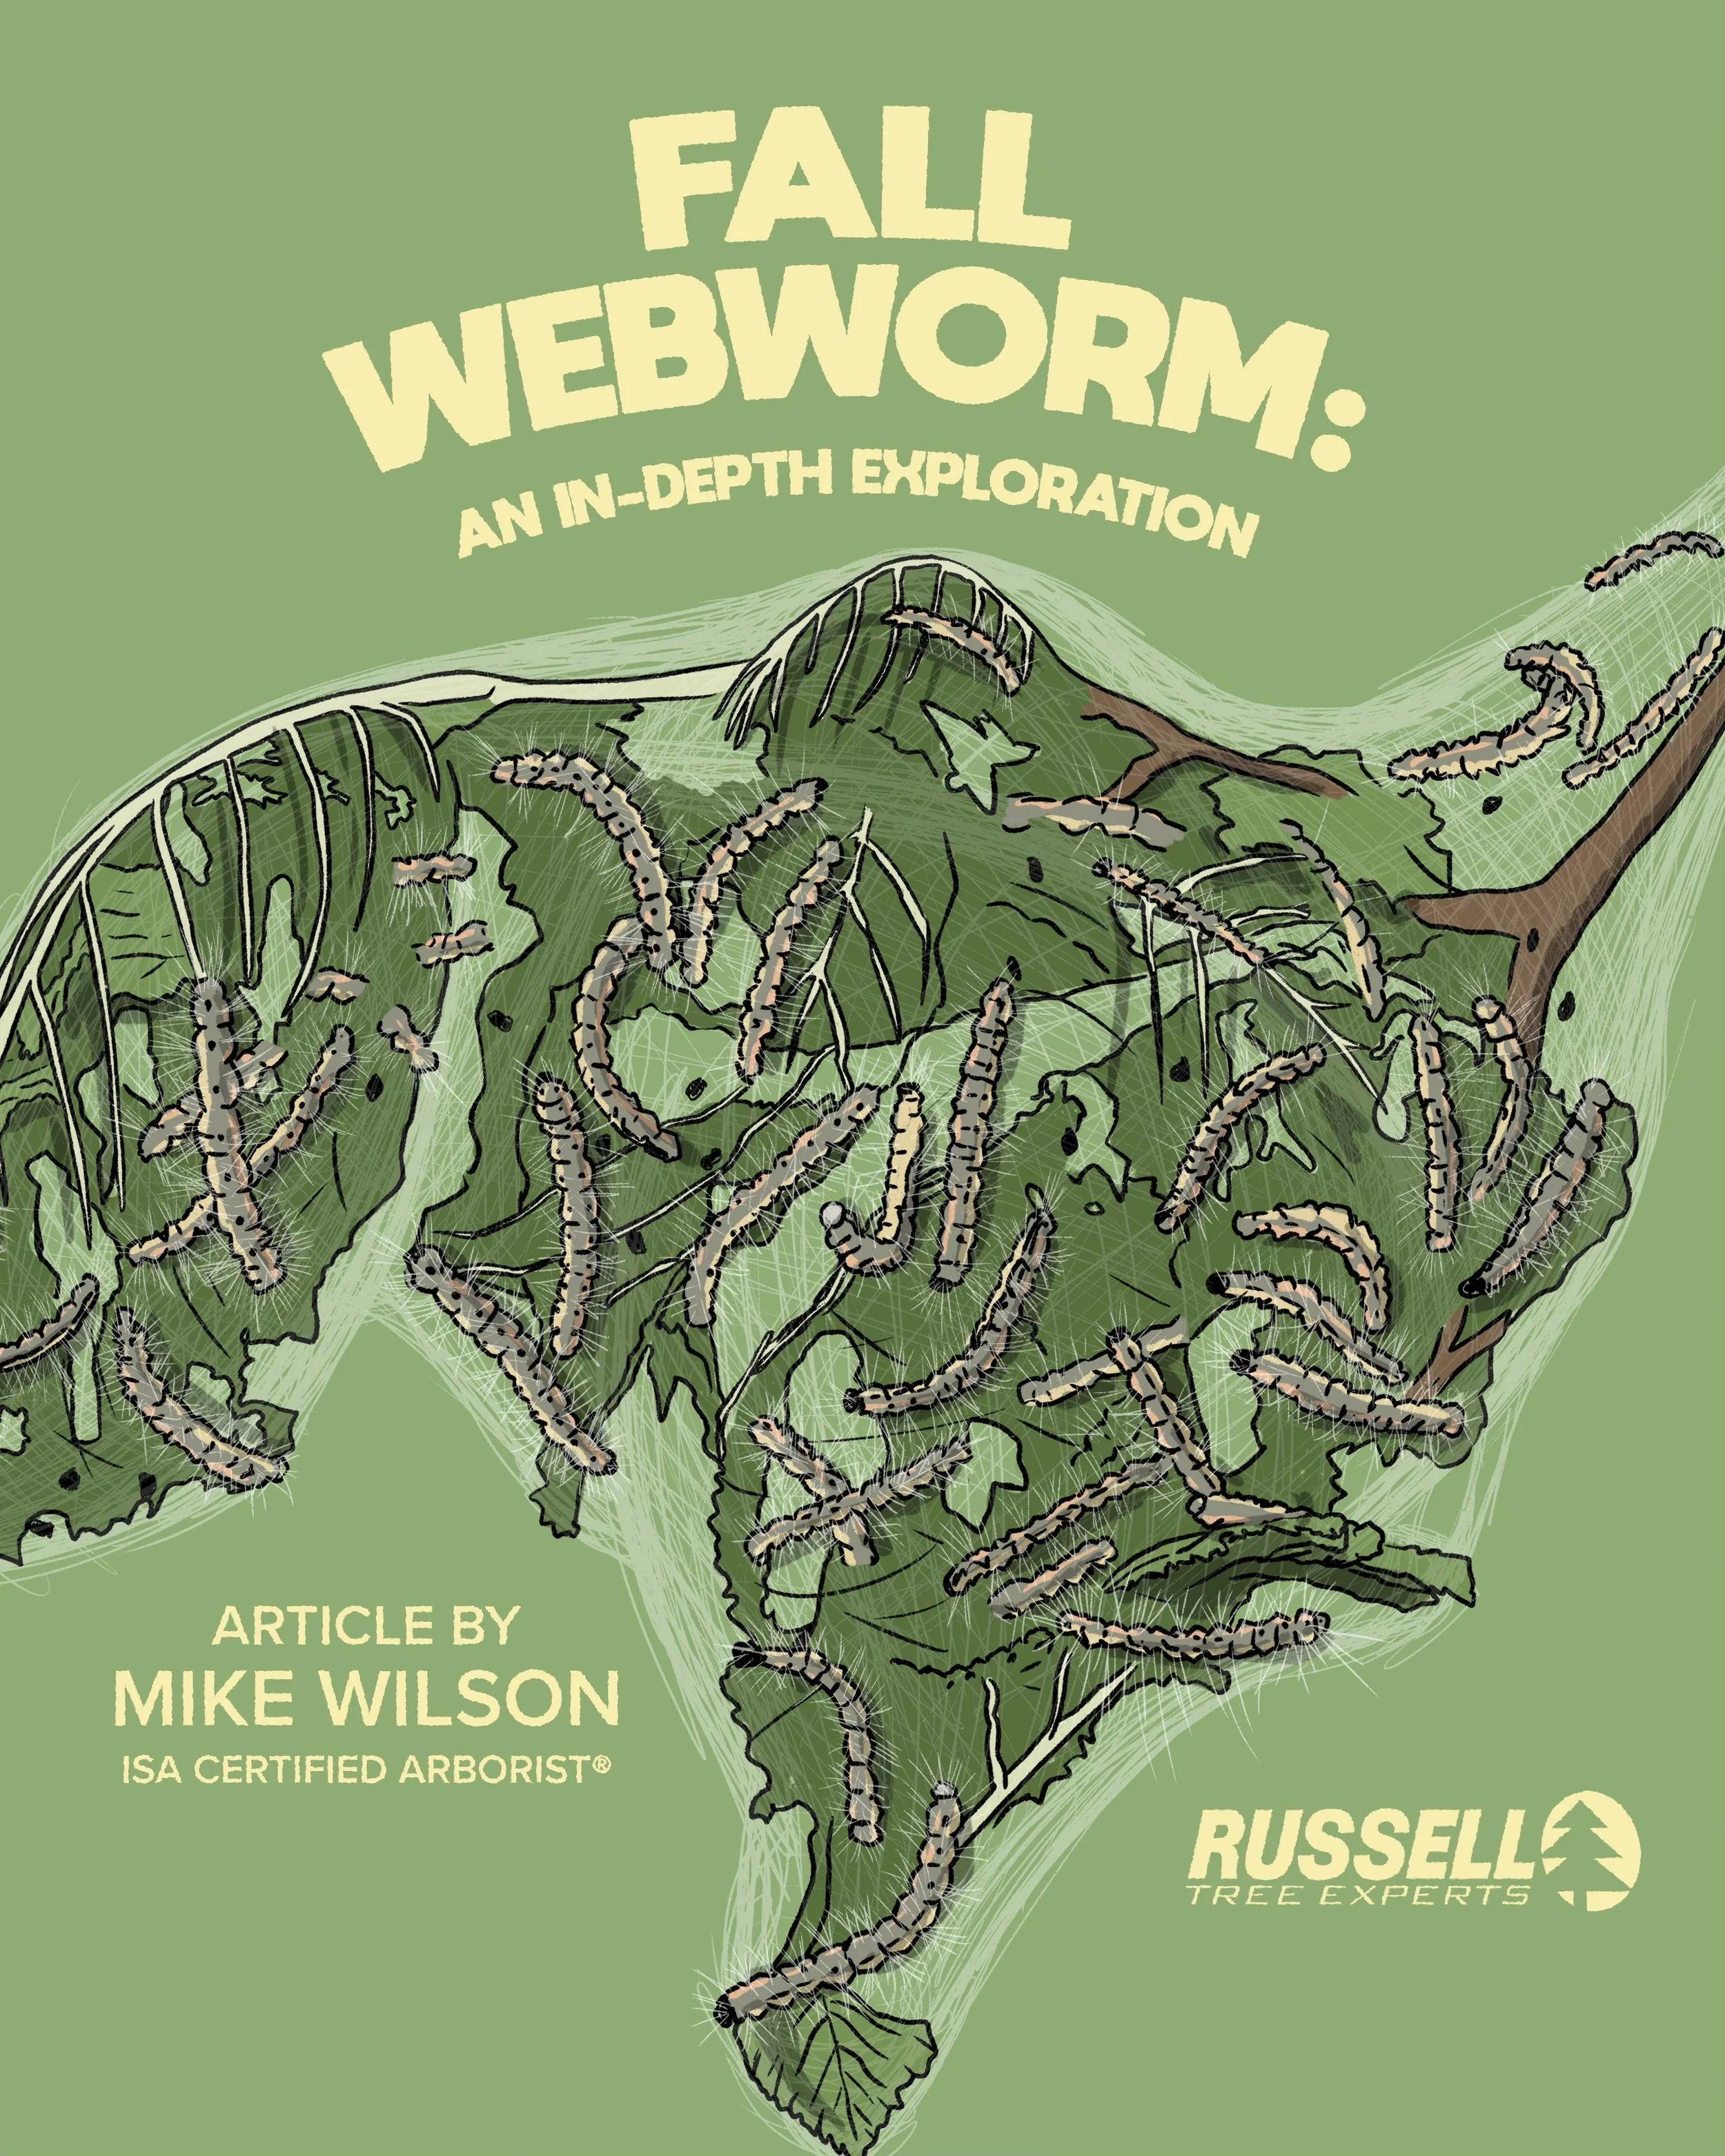
Why Are We "Buckeyes?"

By Mike Wilson
ISA Certified Arborist® OH-6806A
August 28, 2025
College football is back! The Ohio State Buckeyes vs the Texas Longhorns face off this Saturday for Week 1. One day, I sat in my family room making buckeye necklaces for friends and family for an upcoming OSU football game and that’s when my curiosity struck. I began to wonder why anyone would call themselves a buckeye. I like to think a team prefers to have a name that intimidates or even scares an opponent, but not us. Many throughout central Ohio consider themselves buckeyes even if they didn’t attend The Ohio State University. However, what does it mean to be a buckeye and why is the identity of Columbus based around this unique nut from a tree? Well, there is actually quite a bit of history surrounding the Ohio buckeye tree (Aesculus glabra) in our beautiful state of Ohio and the story of how it was adopted by our university may not be well known.
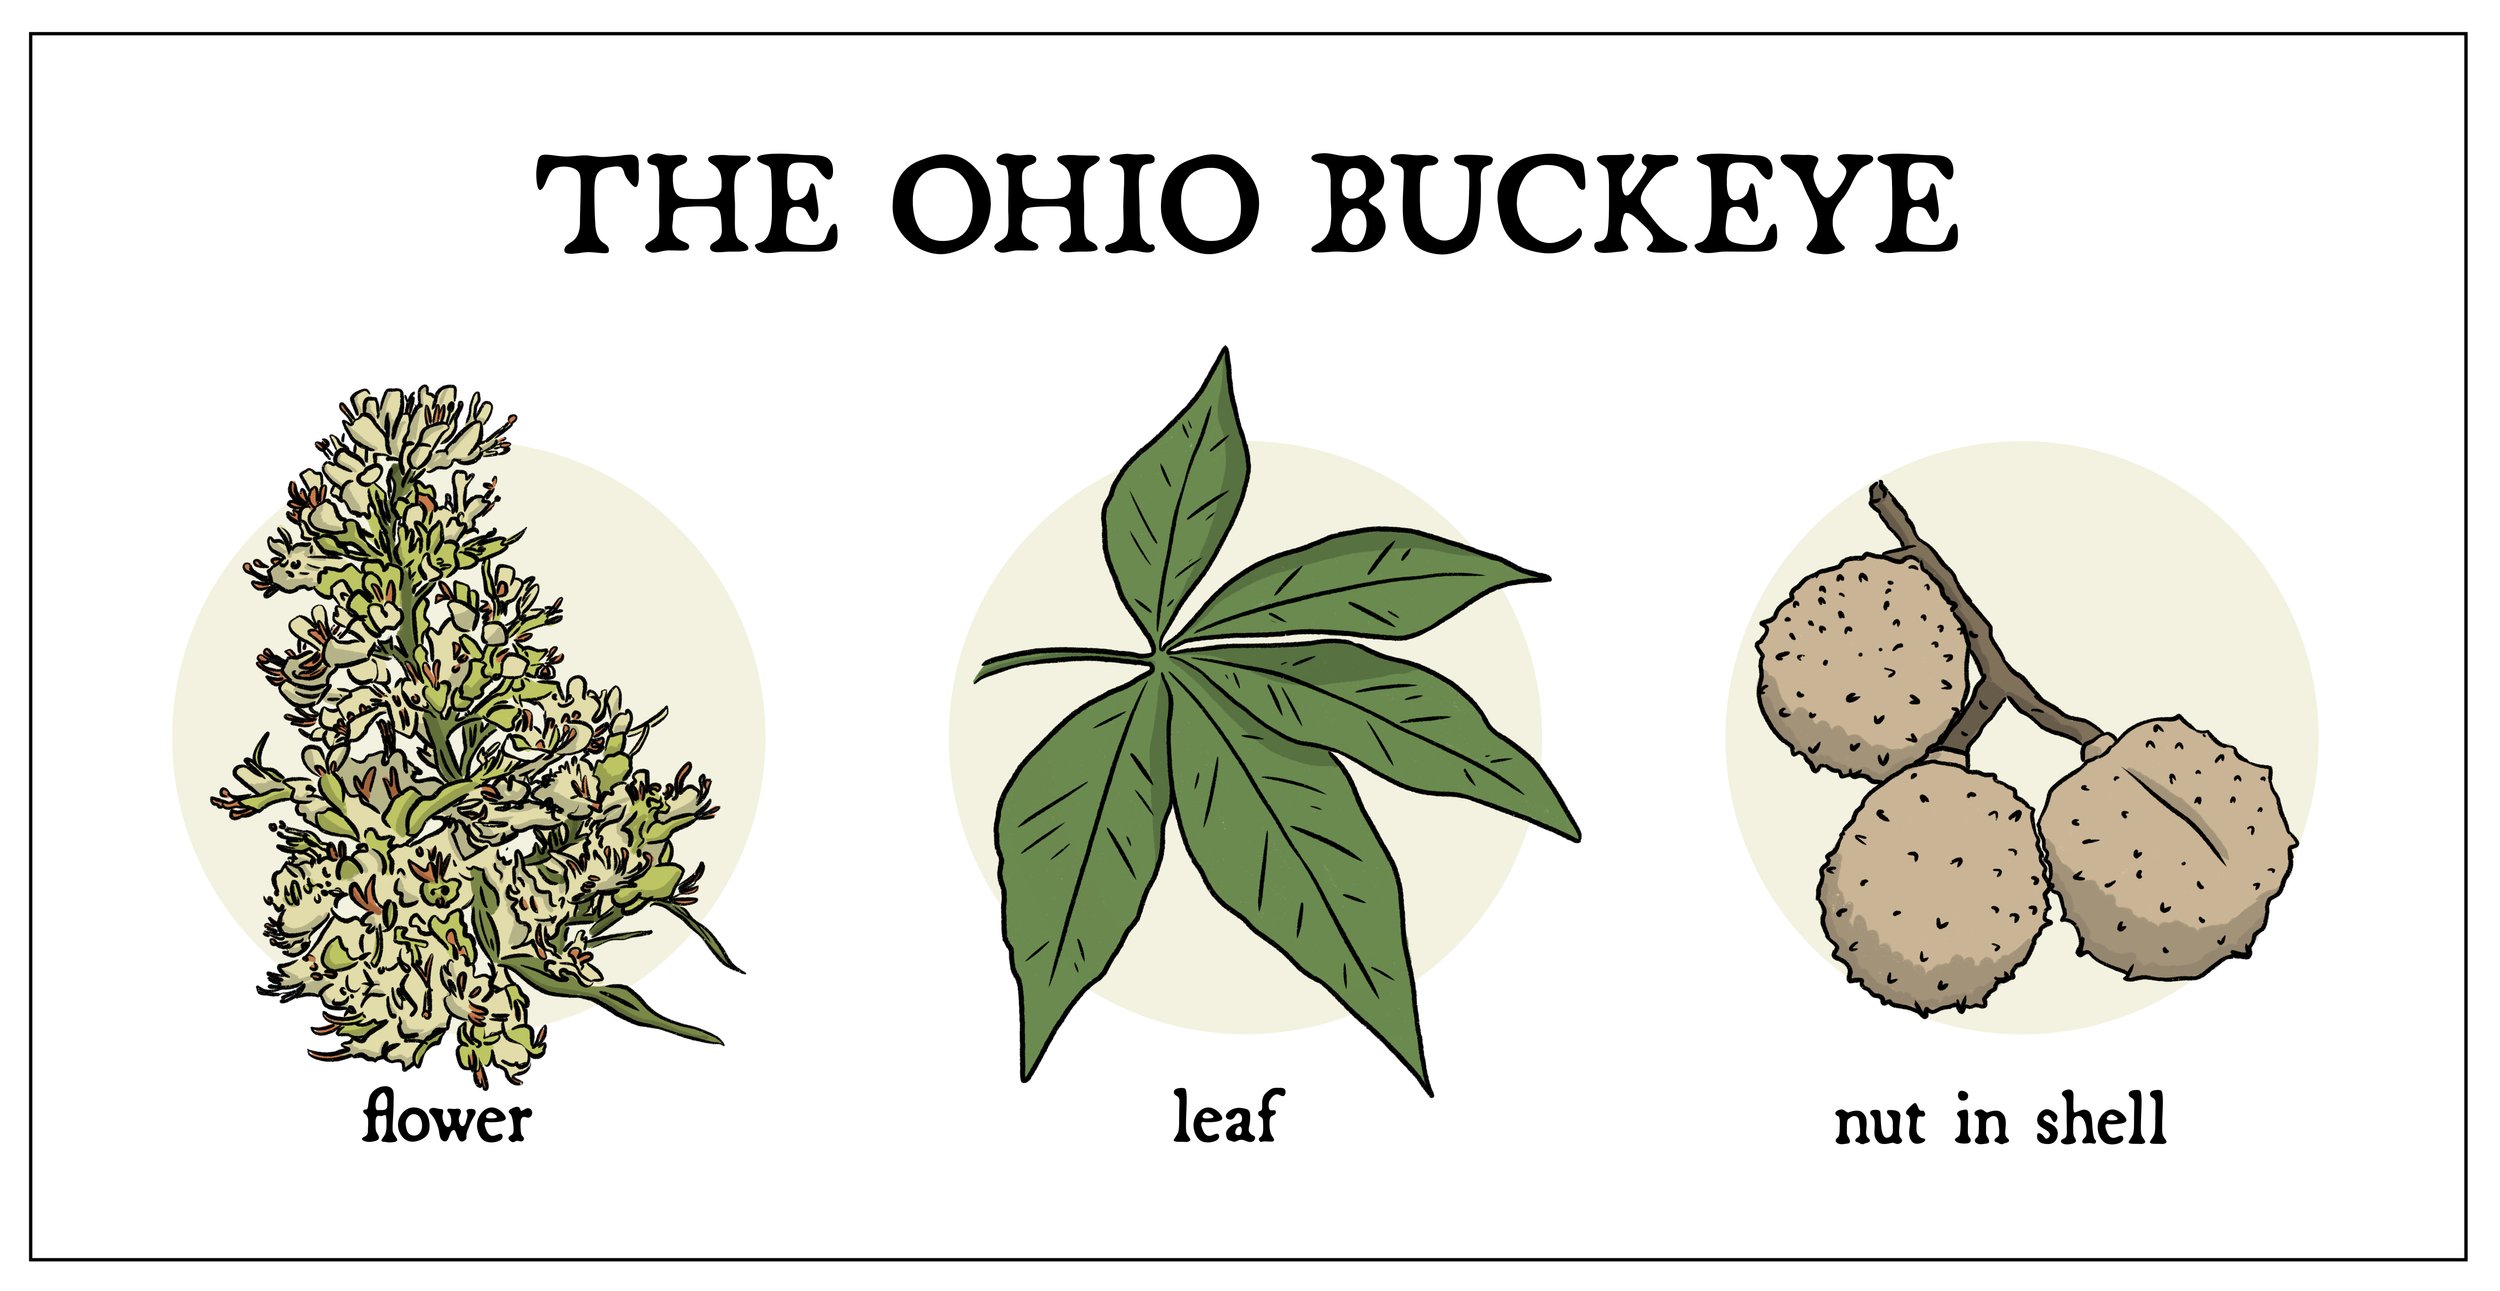
[Illustration by Kenny Greer, Russell Tree Experts]
The Ohio buckeye tree has palmately compound leaves, usually comprising of five (occasionally seven) leaflets. The leaves are bright green in the spring and summer, turning to yellow and gold in the fall, creating a stunning display of autumn colors. In the spring, the Ohio buckeye tree produces clusters of small, tubular, greenish-yellow flowers. These flowers are a valuable nectar source for pollinators, including bees and butterflies. The most iconic feature of this tree is the nut, the name of which is thought to be derived from its resemblance to the eye of a deer or a buck’s eye. These nuts are encased in a spiky, leathery husk that splits open in the fall to reveal the glossy, dark brown nut. While they might resemble true chestnuts, it's important to note that buckeye nuts are not edible and can be toxic if ingested.

[Illustration by Kenny Greer, Russell Tree Experts]
Early settlers used these nuts to craft buttons and the trees themselves became valuable for their wood and ornamental qualities. It didn't take long for the buckeye tree to become an integral part of American culture. The first recorded use of the term Buckeye was in 1788 to refer to a settler. Colonel Ebenezer Sproat, who happened to be large in both size and character, was aptly named Hetuck (the Indian word for buckeye) by local natives. He proudly carried the Buckeye nickname for the rest of his life and the label gradually spread to his companions and other local settlers. By the 1830s, writers were commonly referring to locals as “Buckeyes.” The Buckeye nickname became even more commonplace during the 1840 presidential campaign when Ohioan William Henry Harrison was running for president. His supporters wore buckeye-shaped wooden tokens as a sign of their allegiance, and the nickname stuck. Some even believed that carrying a buckeye nut could bring good luck similar to a rabbit’s foot or a four-leaf clover. The buckeye continued to resonate with Ohioans and became the state tree in 1953.
The Buckeye & The Ohio State University

Learn more about the history of Brutus Buckeye
[Illustration by Kenny Greer, Russell Tree Experts]
In the early 1950s, The Ohio State University held a contest to select a new mascot. A student named Dick Doan, who was a cartoonist for the university's student newspaper, suggested the buckeye as a potential symbol because of its significance to Ohio. Prior to this, The Ohio State University hadn’t solidified any formal name. In 1950, The Ohio State officially adopted the name "Buckeyes" and became associated with the university's athletic teams and more. It wasn’t until 1965 that two students, Ray Bourhis and Sally Huber, formalized this tree nut as the official mascot that has been an iconic figure for Ohio State ever since. During this period, schools were known to bring live animal mascots to stadiums and the idea of corralling a live buck didn’t seem like the brightest idea. Instead, they delved back into our state’s historical roots and opted for the simple buckeye nut. An unnamed papier-mâché mascot inspired by the buckeye nut entered Ohio Stadium on October 30th, 1965 during a football game against Minnesota. Shortly afterwards, OSU held a contest to pick a name for the mascot which ultimately led to who we know today as Brutus Buckeye, responsible for the daunting task of rallying fans and encouraging our athletics teams!


Buckeye Grove (pictured above) at The Ohio State University, located just south of Ohio Stadium, is filled with various buckeye trees! Photos ©Russell Tree Experts
Today, the buckeye is a well-known symbol of The Ohio State University and the buckeye leaf logo is recognized across the country, particularly in the realm of college sports. The buckeye tree and the nuts it produces are closely associated with the state of Ohio and have become a source of pride for OSU and its fans. So next time you’re cheering on our Buckeyes, feel free to quiz those around you to see who really knows why our beloved university chose a toxic nut as a lasting symbol. And as always, go bucks!
[Please note: This article was revised and republished on 8/28/25 from its original publish date of 11/13/23]
ADDITIONAL ARBOR ED™ ARTICLES!


Mike Wilson I Regional Manager, Russell Tree Experts
Mike joined Russell Tree Experts in 2013 and has been in the green industry for 15+ years! He is an ISA Certified Arborist® and a graduate of Oregon State University. Mike is an outdoor enthusiast and a US Army Medic Veteran!
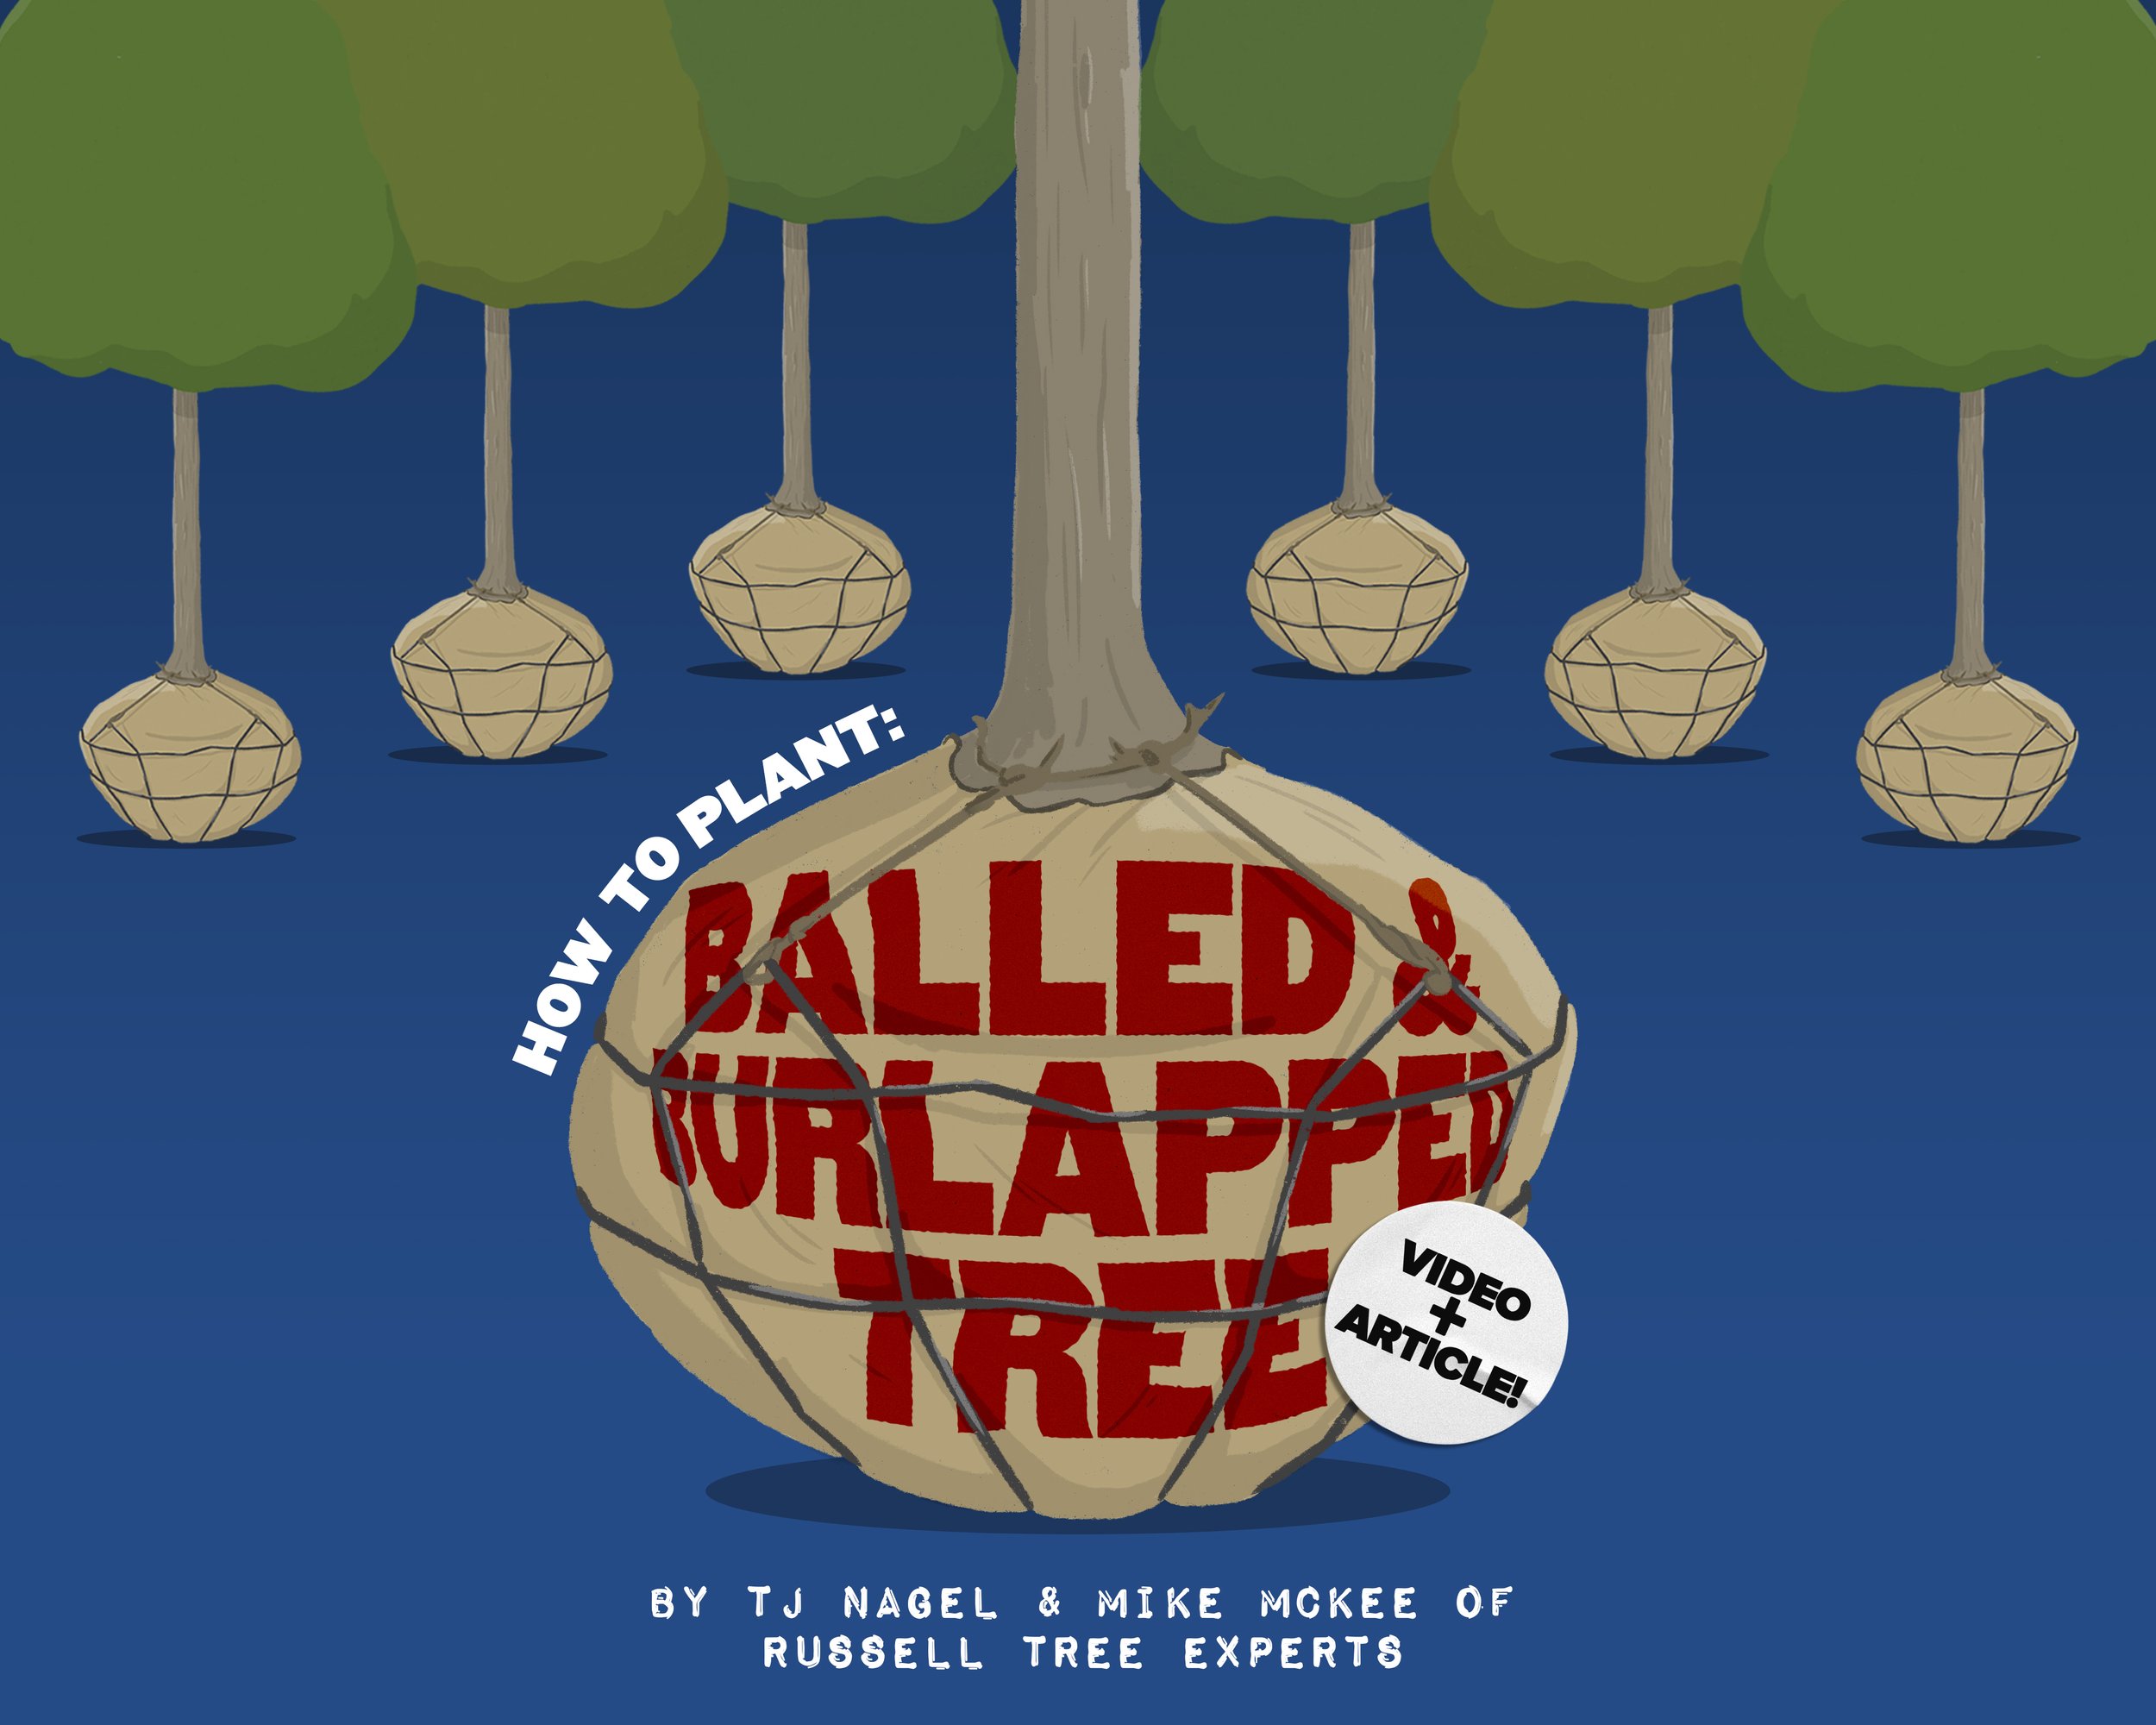
How to Plant a Balled-and-Burlapped Tree!
Dear Reader,

TJ Nagel and Mike McKee standing in front of a newly planted ginkgo tree.
My friend and colleague Mike McKee (an ISA certified arborist at Russell Tree Experts) and I were discussing recently how rarely we see a properly planted landscape tree. Every day we are out and about talking with folks who have stressed trees that are planted too deep, or that are being girdled by landscape materials or trees that are simply planted in the wrong location. Much of the tree preservation and tree removal work that we perform is a result of trees that were improperly planted.
Russell Tree Experts does not offer tree planting services but Mike and I decided it would be valuable to write this article and make a how-to video on what we believe is the best way to plant a balled-and-burlapped tree (although much of the video can apply to trees growing in containers as well). The goal of this article and video is to empower everyone to be able to plant a tree correctly and to be able to recognize what a properly planted tree is supposed to look like.
The following is a checklist of essential steps that should be followed when installing (or having installed by a contractor) a new balled-and-burlapped tree.
1. Plant the Right Tree
There is a tree out there for every landscape situation. It is important that you choose wisely when you are selecting a tree for your situation. If planting in a low site that regularly experiences flooding or standing water you might consider a bald cypress, willow or sycamore, something that is water loving/tolerant. If planting in an excessively dry area you may consider a ginkgo or some type of elm. If you are planting under overhead utilities, planting a smaller statured tree such as a redbud, will likely help to avoid conflict between the lines and tree in the future. Planting the right tree in the right location is the most important step. You may follow the rest of this checklist flawlessly but if you select the wrong tree, it was all in vain. If you are uncertain of what the right tree is for your situation, it’s worth hiring an arborist for a consultation and I know a few good ones.
2. Plant at the Right Time
Fall is for planting. Early Spring is pretty good too. Planting a new tree during either of these times while the tree is in or approaching a dormant state will improve survivability by avoiding a lot of the initial stresses trees experience during the growing season like heat and drought.
3. Tree Pruning
If a tree could only be pruned once in its life, pruning at planting is the time to do so. The overall goal of pruning at planting is to improve the structure of the canopy, to remove crossing and broken limbs, or to reduce/remove upright limbs that might be competing to be the central dominant leader. Note: It is equally important not to over prune a newly planted tree, as having the appropriate amount of leaf area in the canopy next season is essential to maintaining good health and vigor.
4. Locate the Tree’s Trunk Flare/Buttress Roots
The trunk flare will be found low on the main stem and should be the portion of the tree that gets wider just before ground level. Locating the trunk flare is essential for determining the depth of the hole you are about to dig for the tree.
5. Begin Digging!
Dig a hole that is 1.5 - 2 times the diameter of your root ball to allow loose soil to be backfilled around the rootball, which will be easy for new roots to penetrate. Do not dig the hole any deeper than the distance between the bottom of the root ball and the trunk flare. It is important that the trunk flare is at or slightly above grade once it has been placed in the planting hole. If the trunk flare is below grade, the tree will be planted too deep and will be more prone to stem girdling roots, reduced vigor, and will become more vulnerable to pests and disease. Important Note: Many balled-and-burlapped trees are already too deep within their own root ball. Do not assume that the top of the root ball is the trunk flare. My experience is that more often than not, I have to remove a few inches of soil from above the trunk flare at the time of planting. This can be seen in the video as well. Linked down below is my fellow coworker Chris Gill’s Arbor Ed article on stem girdling roots.
6. Stabilize the root balL
Stabilize the root ball in the hole. After the tree is standing upright in the hole, verify that it is positioned correctly (centered and upright) and add soil around the bottom six to eight inches of the root ball. Tamp the newly added soil to stabilize the root ball and tree while adjustments to the root ball are made.
7. Remove the twine, Top 1/3 of Burlap, and Top 1/3 of Wire Cage
Remove the twine around the trunk, remove the top third of the burlap and remove the top third (approximately) of the wire cage. The purpose of removing these materials is to prevent damage to the trunk and buttress roots as they grow over time. Removing the twine, burlap and wire cage is the subject of much debate amongst landscape contractors, tree producers, and arborists. In an effort to be brief, our recommendation to remove the top third of the wire cage, the exposed burlap (approximately the top third), and the twine is a balance between ensuring root ball stability/new tree survivability and planning for the long term health of the tree over the next hundred years. There may be some instances, like planting new evergreen trees in exposed/windy sites where it may be acceptable to leave the entire wire cage, burlap and twine intact for one full growing season before returning to remove it later.
8. Verify Tree’s PositioninG AND BEGIN BACKFILLING
Verify again that the tree is still positioned correctly. Mix a small amount of compost into the existing soil and begin backfilling the remaining portions of the hole with this mix. Lightly tamp the soil to remove air pockets but be careful not to overly compact soil as pore space is needed for water and oxygen.
Adding compost or a soil amendment to the existing soil is one way to attempt to improve soil structure and nutrient availability. Not every newly planted tree requires soil amendment. If you are planting in a native area where the soils have not been disturbed previously, you likely can backfill with just the existing soil that came from the planting site.
9. Mulch around the tree

Apply a 1-to-2 inch tall mulch ring around the trunk of the tree that extends out to the canopy drip line.
Mulch correctly around the tree. Once the tree has been planted with the trunk flare just above ground level, it is time to add one to two inches of mulch. It is important that mulch is not over applied or mounded around the main stem. It should be applied evenly around the main stem with a small berm on the outside edge that directs water toward the tree. I generally recommend pine bark or hardwood mulch although I’ve started using pine needle mulch around trees and shrubs that like a more acidic soil. Mulch does a great job of retaining moisture around newly planted trees in addition to reducing competition from weeds, regulating soil temperatures, reducing soil compaction and adding nutrients to the soil. Linked below is my fellow coworker Lindsey Rice’s Arbor Ed article on how to mulch around a tree.
10. Water YOUR TREE
Watering a newly planted tree correctly is as important as selecting the right tree. Watering is the single most important maintenance factor in the establishment and success of planting a new tree. The best way to water a tree is slowly and deeply so that water is trickling down into the root ball of the tree and not washing away into the lawn. A newly planted balled-and-burlapped tree should be watered at the time of planting and then once a week until temperatures are consistently below freezing. Watering in this same fashion should resume when the tree breaks dormancy and leafs out the following Spring. It generally takes 2 - 3 growing seasons before a balled-and-burlapped tree is established and can fend for its own water. Establishment could take longer with larger trees. For more information on watering, see my previous Arbor Ed article and video on how to water a tree linked down below.
11. Protect YOUR TRee!

Ginkgo biloba with deer protection. ©Russell Tree Experts
Protect your tree from mechanical damage. This step may not be necessary for every newly planted tree. If you live in an urban area without deer and have large generous planting beds free of turf, you can likely skip this step. When planting in rural areas, I often recommend using some sort of deer protection to protect the trunk of trees until they have surpassed eight to ten inches in diameter. I like to use a 4 foot tall wire fencing cut into a 7 - 8 foot length and then wrapped around the tree. In addition to protecting the trunk, the fencing also makes it more difficult for deer to feed on lower limbs. Trunk guards or corrugated drain pipe can also work to protect tree trunks, but they must be removed before the heat and humidity of the summer. I also recommend trunk protection for folks that have trees in areas where turf is tightly managed with large and fast moving mowers and string trimmers.
12. ENJOY!
Your new tree is now planted! Enjoy it! If there are any tags on the tree, you can remove them now if you have not done so already. I hope you enjoyed this article and the video below. Please reach out if you have any questions, happy planting!
Check Out These Related Arbor Ed Articles!


Sincerely,

TJ Nagel I Scheduling Production Manager, Russell Tree Experts
TJ loves trees. He is an avid gardener and plant collector. TJ graduated from The Ohio State University with a B.S. in Agriculture with a major in Landscape Horticulture and minor in Entomology. TJ is an ISA Board Certified Master Arborist and well versed in Plant Pathology. TJ joined Russell Tree Experts in 2012.
The Year of the Ugly Boxwood

Dear Reader, My good friend and arborist colleague Cat Baumgartner wrote the below article for the Inniswood Garden Society’s quarterly member newsletter (known as The Image). As soon as I read it, I knew that I wanted to share it with all our readers. Cat does a thorough job of describing the most serious problems we have had with boxwood this year and she explains them well and in simple terms. She has generously agreed to let us republish it. Photos within the body of Cat’s article are courtesy of Joe Boggs, OSU extension educator for Hamilton County.- TJ Nagel, Russell Tree ExpertsThe Year of The
Ugly Boxwood
by cat Baumgartner, Oakland Nursery
I don’t have a simple answer. Or there are multiple answers, and your boxwood might have one, or several of the problems at once.
I’ll go over the likely suspects for this year- including winter damage, or ‘winter burn’, Boxwood Leafminer, Volutella Blight, and THE Boxwood Blight.
I’ll start with winter burn. Boxwood store a lot of their energy in their leaves through the winter. When we get extreme cold and wind in the winter, the leaves will lose more moisture. If the ground is frozen or dry (or worse, both), the leaves lose moisture faster than the roots can replace it, and we get the ‘burn’, where they turn a straw color and die, staying attached to the stem. It wasn’t noticeable until early spring, because evergreens have a delayed reaction to stress. It’s why we can cut down trees for Christmas and they don’t immediately turn brown, often lasting months. We did have greater than normal rainfall last year, but the three months leading up to late December were on the dry side. So, the ground was dry leading up to the extreme cold event that hit in late December creating a Double Whammy. There was a lot more winter burn this spring than I’ve seen in decades. It looks like straw-colored sections in the shrubs, often in a random pattern.
Next, there are different blights out there that can affect boxwood. ‘Blight’ is a general term for a plant disease, typically caused by a type of fungus. Most of them are less common and less damaging than the blight striking fear in the hearts of gardeners that is Calonectria pseudonaviculata, called simply “Boxwood Blight”. There have been some isolated cases in the Greater Columbus area. The main symptom though is defoliation. You’ll have green leaves, then they’ll start looking funny, and rapidly progress and fall off the stem. In a matter of weeks, you can go from a healthy-looking plant to one with sections with completely naked stems. Definitive identification requires lab testing. Other blights can show similar symptoms, but since some are more treatable, confirming which type of blight your boxwood might have is recommended before removing plants. If you do have “Boxwood Blight,” replanting with more boxwood is not recommended, so confirmation of what kind of blight you have will also tell you what you can plant in that spot. Most of the damage we’ve been seeing is NOT “Boxwood Blight.”
Volutella Blight or Pseudonectria Canker (Pseudonectria buxi) can be damaging but is not necessarily a death sentence often just affecting individual stems and not whole portions of the plant. Symptoms can be seen if the stem is sliced into, showing dark brown streaking just under the bark. Most twigs infected with Volutella blight will turn straw colored and die. In most cases dead stems from Volutella canker can be easily pruned out and the remaining portions of the boxwood will fill in slowly over time.
This year we also had frost damage in May. If leaf buds are still tight, frost is not a problem. If the new leaves have emerged, but have ‘hardened off’, it is also not a problem. But if the new growth is timed so that it is new, fresh and tender, and then we have a late freeze, the new growth is damaged, turns that sad straw color, and is aesthetically at least, a problem. A healthy shrub can put out another round of growth, and it is not a long-term problem. Trimming off the burnt new growth is all that needs doing.
Boxwood Leafminer, an insect pest, is an ongoing problem. The damage from leaf miner is more generalized, an ‘all-over’ bad look rather than the chunky sections dying back. The adults lay eggs in the new growth in mid-spring, and as the larval stage hatches and begins to feed on the interior tissues, the leaves start looking bad, often having a blistered or bubbled effect, usually easier to see from the bottom of the leaf.
Preventative sprays can thwart adult leafminers from laying eggs in the new growth, but need to be applied as you see the new growth. Systemics applied in the Fall or Spring can also provide control but know that boxwoods are insect pollinated.
If you don’t have Boxwood blight, you have two options. Cut out the dead branches and let the plants regrow which may take three years or more to totally restore, in good condition, or replace the plants.
A Final Note…
Since Cat wrote her article, we have had several boxwood shrubs test positive for yet another disease, Colletotrichum theobromicola (also referred to as boxwood dieback). This is a new disease for central Ohio and symptoms look similar to other blight diseases with the random dieback of twigs and straw-colored foliage. However, in addition to twig dieback, the pathogen also causes leaf spots that appear white in the center surrounded by dark brown margins as well as a bright black discoloration just beneath the bark along the twigs. The jury is still out on the best way to attempt to manage this disease but for now, good cultural practices such as removing symptomatic plants and sterilizing pruning tools between pruning different plants are the best-known strategies. Fungicides might also be helpful, but efficacy has not been determined. Laboratory testing should be used to confirm boxwood dieback because it can easily be misdiagnosed as other blight diseases.
As we continue to have more problems in the landscape with boxwood, it may be time to consider alternative plants that can achieve a similar function. Stay tuned for my boxwood replacement article later this Fall.
Sincerely,

TJ Nagel I Scheduling Production Manager, Russell Tree Experts
TJ loves trees. He is an avid gardener and plant collector. TJ graduated from The Ohio State University with a B.S. in Agriculture with a major in Landscape Horticulture and minor in Entomology. TJ is an ISA Board Certified Master Arborist and well versed in Plant Pathology. TJ joined Russell Tree Experts in 2012.
The Oak Wilt Defense
The fall season is approaching, and cooler weather is hopefully just right around the corner. With changing temperatures, all our trees are going to be going through a change as well. As we enter the dormant season, we will be gifted with…

By Lindsey Rice
ISA Certified Arborist® OH-6739A
November 6, 2025
Fall and cooler weather is here! With changing temperatures, all our trees are going to be going through a change as well. As we enter the dormant season, we will be gifted with vibrant leaf colors on all our deciduous trees. The dormant season doesn’t just refer to leaf senescence and the weather getting colder; disease-carrying insects also enter the stage in their lifecycle where they do not pose as big of a threat to our landscape. In recent studies it has been found that from October 15th to March 31st, the Nitidulid beetles that spread Oak Wilt disease will not be actively feeding in the Midwest, thus reducing the risk of infection with the fungal disease. Nitidulid beetles are insects that feed on the sap of trees. When a beetle feeds on the sap of an infected tree, it can move to a new susceptible oak tree and spread the disease. These beetles are most attracted to fresh open wounds, such as a new pruning cut.
All oak species are susceptible to the disease, but oak wilt is most damaging to the red oak group. The fungal infection causes xylem vessels to clog, leading the host of the disease to wilt and then die as quickly as within one growing season. Thus far, we have been unable to treat any infected oak tree with any success. We have treated some healthy trees in the area with a preventative fungal application, especially those close to a confirmed case of the disease.
Unfortunately, these beetles are not the only way that this disease is spread. It is also spread via root grafts of neighboring infected trees. Root grafts can connect oak trees underground and transmit the disease from more than 50 feet away. When there is a known infected tree in the vicinity of other oak trees, root disruption may be recommended, even after the infected tree and stump have been removed.
What can you do if you have Oak trees on your property? Be sure to have them pruned during the appropriate time of year between October 15th and March 31st. If you must prune an Oak tree outside of this window, ensure the wounds are sealed with latex paint to limit the beetles' ability to transmit the disease. If you suspect any of your trees have this disease, please call us, and we can advise you on the next step to confirm a diagnosis. Note that this is the same pruning window for Elm trees as well, so we may help limit the spread of Dutch Elm Disease.

Recently, we had ISA Board Certified Master Arborist® José Fernández, an oak wilt expert and a former RTE employee, visit our office and give a presentation on oak wilt disease to our arborists. Check it out down below!
Enjoy the colorful autumn season! For a free tree work quote by one of our 25+ ISA Certified Arborists®, visit RussellTreeExperts.com/Quote or call our friendly, local office staff at (614) 895-7000!
Please note: This article was updated on 11/6/2025, but originally published on 9/28/2023.
ADDITIONAL ARBOR ED ARTICLES!


Lindsey Rice | Operations Manager, Russell Tree Experts
Lindsey joined Russell Tree Experts in 2015 with a B.S. in Agribusiness and a minor in Horticulture from The Ohio State University. Growing up in northwest Ohio, she participated in various sports, band, and FFA which ultimately inspired her love for the tree industry. In her free time she loves to spend it outdoors with her husband and daughters.
———
Additional Resources & Sources for this Article:
“New Disease Control Measures for Oak & Elm Trees” Article (2021)
“Oak Wilt in Franklin County” Article (2017)
Anatomical Upgrades for Your Trees!

When you think of anatomy, what comes to mind? I think of humans specifically, and learning about the wonderful bone and organ systems in our body in middle school science class. You may think about the anatomy of various animals and how there is an abundance of variety depending on where you are in the world, but how often do we consider the anatomy of trees?

Surely trees are just trees, right? They grow without us even considering how or why they may grow in the ways that they do. We may be blissfully unaware of their anatomy or structure until we are confronted by the reality of a winter ice storm or a summer thunderstorm. Oftentimes, we may find trees with less-than-desirable structure having taken damage after these events, or worse, having caused property damage along with their own demise!
You may be asking yourself, what does poor tree anatomy look like? The answer to that question deserves its own article, however a majority of tree structural problems can be narrowed down to codominance, and that is what I want to address in this article. Codominance is when a tree has two or more similarly-sized trunks emerging from the same location and forming a distinct “V” shaped union. There are varying reasons as to why a tree may be codominant, and some species have natural habits that lend themselves to becoming codominant.

Visual representation of codominance by Jacob Nau
To give you a visual representation of codominance, bring your elbows together in front of your chest, with your palms facing you. Now, spread your wrists apart, keeping your elbows together to form a distinctive V shape. Opening up your fingers you can picture the crown of a tree. Seems like an awkward, weak position to be in, right? Now, imagine adding the weight of tree branches, leaves, rain and 15-50 mph wind gusts, etc. (trees can go through a lot!), while you strain to keep your elbows together, and you can begin to imagine why a codominant union (V-shaped union) in a tree is not anatomically advantageous.
So what can be done to fix, or even prevent, codominant structure in a tree? The answer to this question largely depends on the age of the tree. If your tree is young and generally under the age of approximately 20 years, then a structural pruning plan can be performed to help guide the tree out of its codominance over the next 5-10 years.
However, if your tree is large and mature, there are a number of services that can be used to help support your tree's anatomy. Those services include:
End-Weight Reductions
Reduce the length of long, lateral branches in the tree’s crown to reduce the weight and levering effect on the codominant union below. Typically performed before or with a cabling support system.

Jacob Nau performing an end-weight reduction on a tree. © Russell Tree Experts
Cabling Support System
Install a single, or multiple, static steel cable(s), or dynamic rope cable(s) in the tree’s crown to support the codominant union below.
A static cabling system in a Hackberry tree in Clintonville, Ohio. © Russell Tree Experts
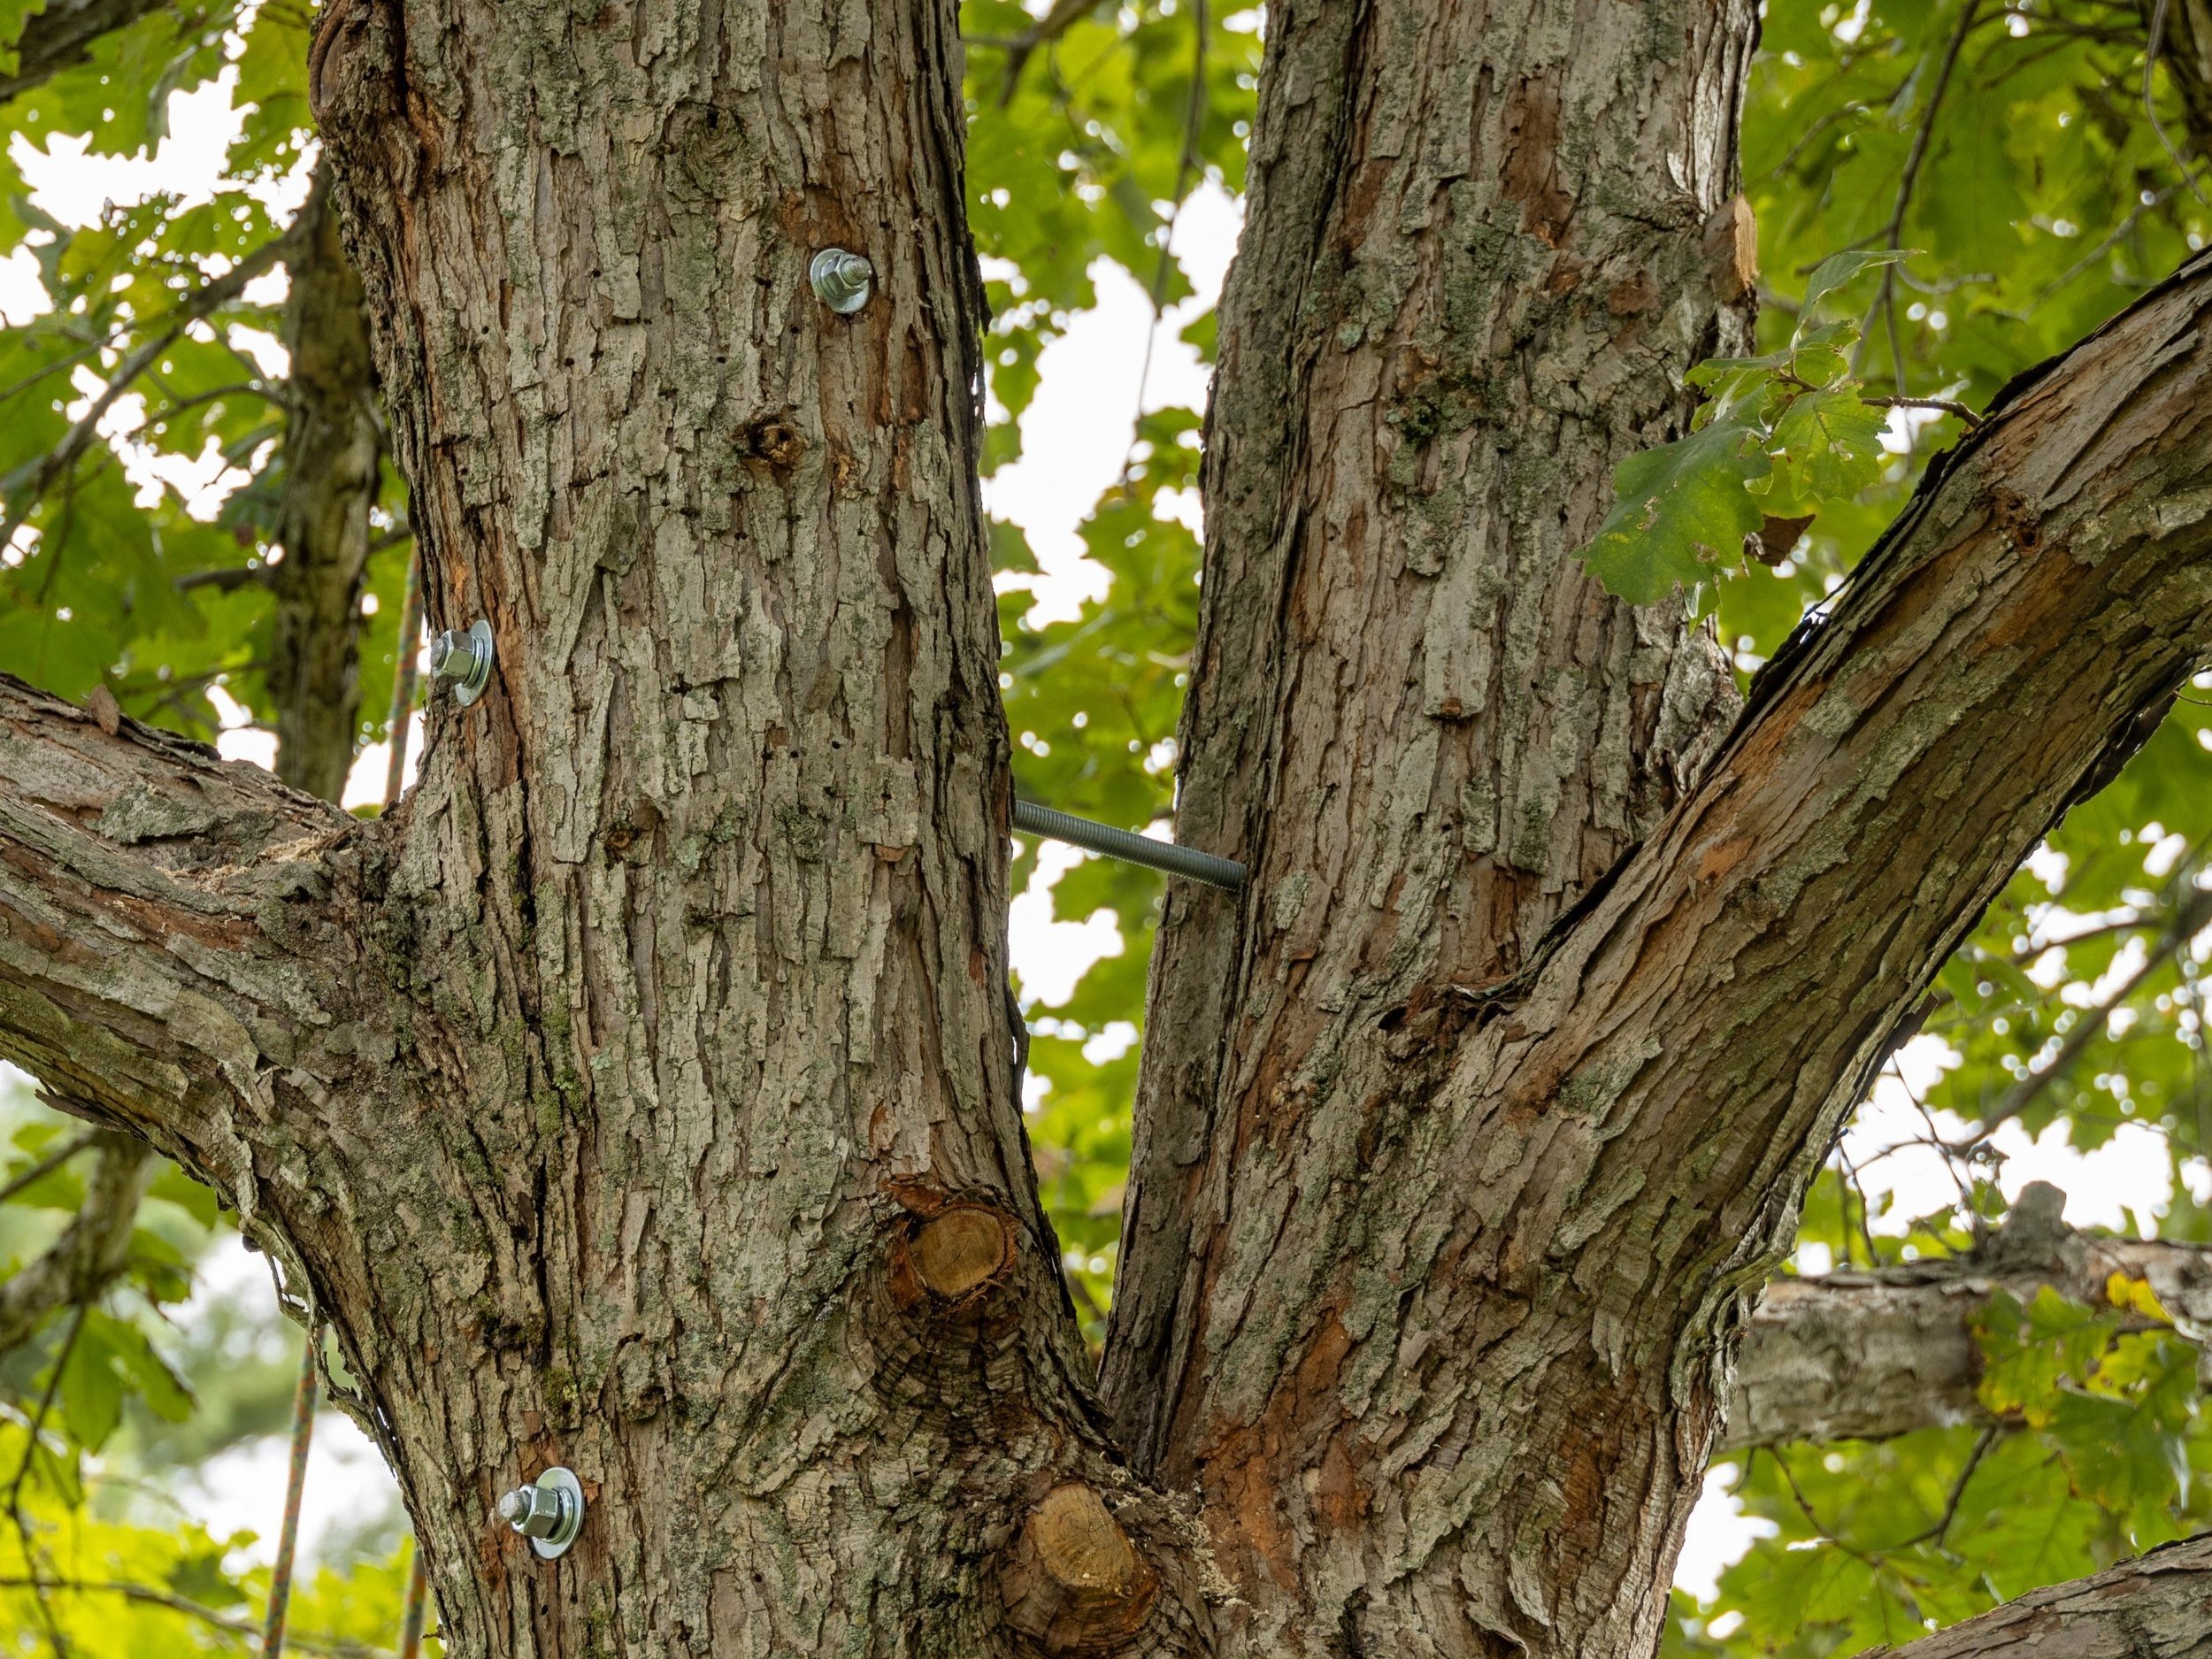
Through-Brace Support System
Install a system of steel threaded rods into the codominant union to strengthen that area of the trunk. This is usually performed in-tandem with a cabling support system.

Top Left: Final result of a brace rod installation. Top Right: Close-up of a singular, installed brace rod. Bottom Left: Side profile of two installed brace rods. Bottom Right: A brace rod about to be inserted. © Russell Tree Experts
Propping Support System
Install a single, or multiple, semi-permanent wood prop(s) to support a lower, large lateral limb to ease the strain on a codominant union. This is a more unique way to support the tree's anatomy, specifically for low, long, and lateral limbs that are difficult to support with a cabling system.

A tree prop supporting a limb from the Angel Oak tree in South Carolina. © Russell Tree Experts
All of the services listed above, including the young-tree structural pruning, are services we perform at Russell Tree Experts. I highly encourage you to look out your window and consider your tree's anatomy! Can they be supported? Is it time for an anatomical upgrade? If so, give our local office a call at (614) 895-7000 and we will happily connect you with one of our Regional Managers to assist you in determining the best course of action for your trees!
Sincerely,

Jacob Nau I Training and Development Manager, Russell Tree Experts
Jacob is an ISA certified arborist and joined RTE in 2018. He has been involved in tree care for over 10 years. He enjoys climbing trees both recreationally and professionally and in his free time, he loves spending time with his family.
Magnolia Scale: They're Back!
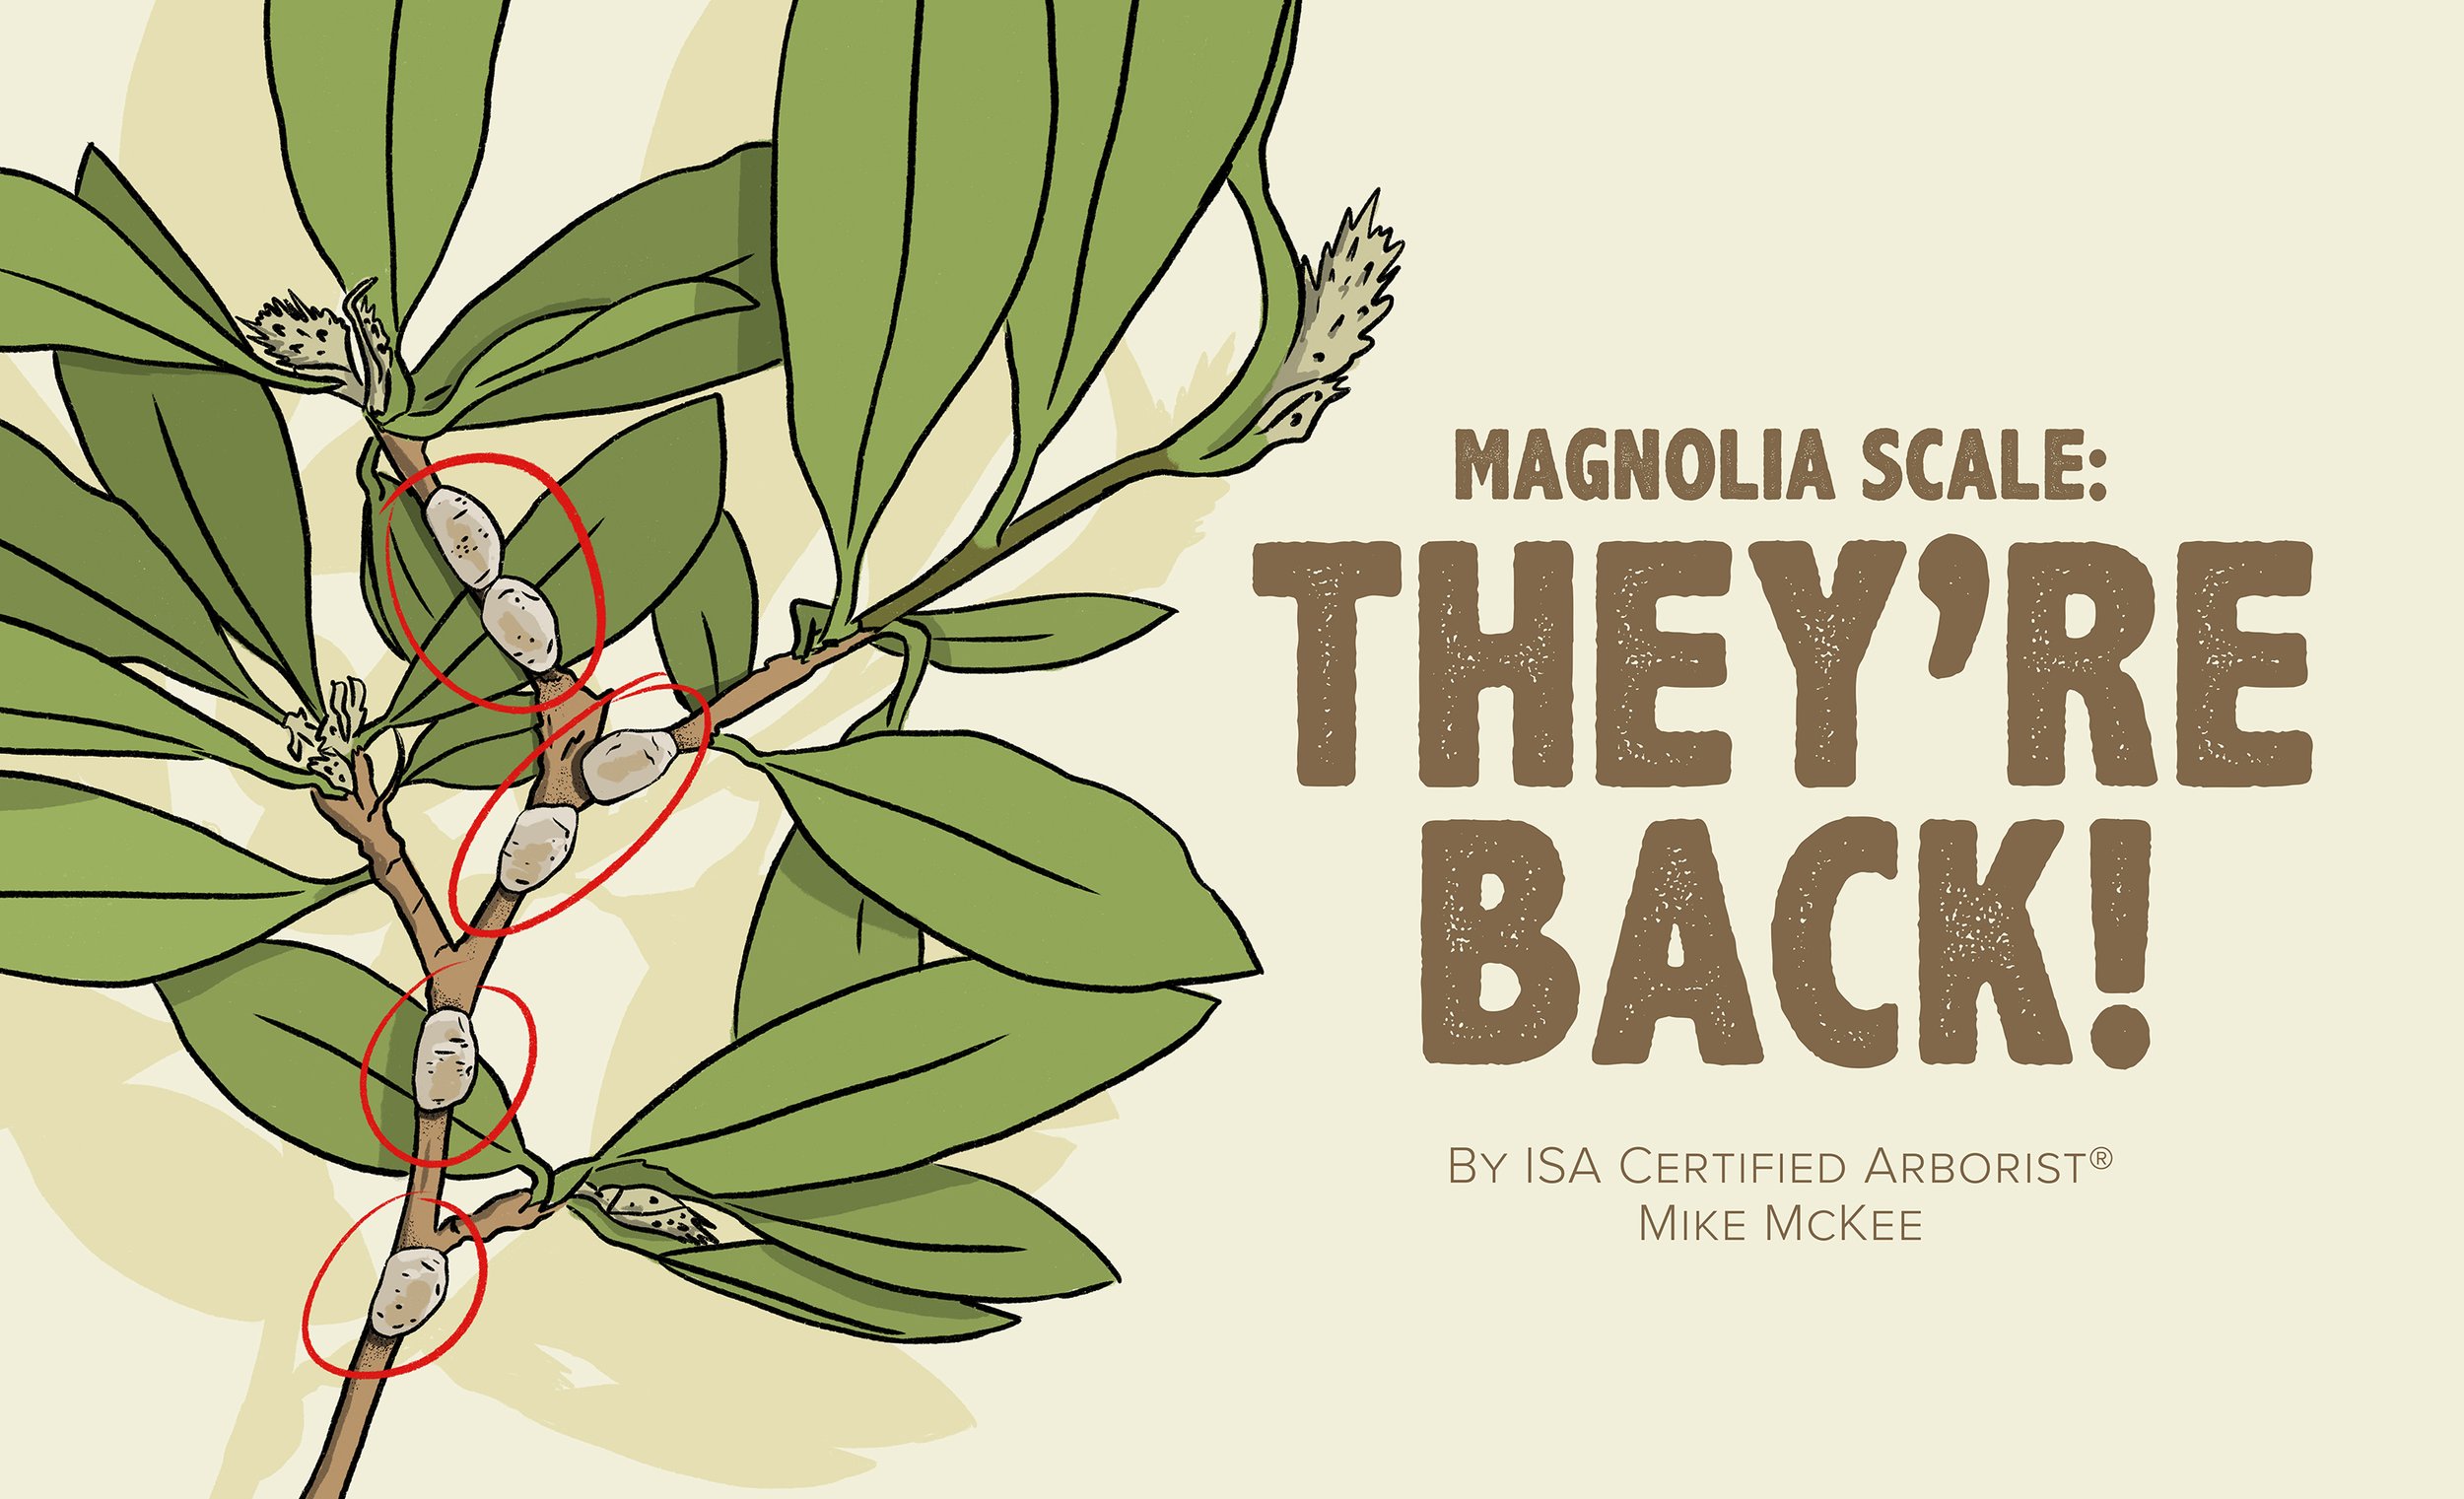
By Mike McKee
ISA Certified Arborist®
August 7, 2025
Is your magnolia tree turning black? Is it attracting ants, flies, bees and wasps? Is there a sticky substance covering the leaves and everything under the plant? If you look closely, you will also see white blotches on the twigs throughout the tree.
Over the last few years, this recent invasion of magnolia scale in central Ohio has been intense and unlike what I have observed back in the 2010s. They happen to thrive in warm summers with abundant moisture. The population is building and is very apparent this year.

© Russell Tree Experts
The insect overwinters on twigs and is inconspicuous to the untrained eye until it starts feeding and producing honeydew. Honeydew is the very sweet, sticky substance secreted by the insect that in turn coats the leaves and anything under the plant. This is what attracts other insects to the plant. Eventually the insect covers itself with a waxy coating that protects it while feeding. These are the white blotches we are now seeing on the plants starting early summer through August.
Nymphs emerging from a recently plucked adult Magnolia Scale. © Russell Tree Experts
The juvenile stage of magnolia scale emerges from these waxy coatings (the adults) in mid to late August through September as crawlers. This is when scale are most vulnerable to insecticides and we attempt to control their population. We typically recommend 2 to 3 topical insecticide sprays during this period spaced a couple weeks apart for the best control of the insect due to the extended emergence. During seasons with larger infestations, it is unlikely that insecticide sprays will completely eliminate this insect. The overall goal of plant healthcare is to keep the population at a threshold that minimizes damage and maintains aesthetics of the host tree.
If the tree’s owner is concerned about the population of magnolia scale before the appropriate window for insecticide applications is open, there are a few DIY options that can be done. First, the insects can be scrubbed off from branches and leaves in June and July. This is when the adults are visible before the hatch begins. You could also prune out heavily infested Interior branches to help reduce numbers. Be sure to completely dispose of any pruned branches as the insect will still hatch. Spraying the trees with a medium pressure garden hose can also eliminate some insects as well as reduce the honeydew on the plants.
The insects feed by sucking sap out of the tree. If left untreated the scale population can grow to levels that will cause decline and eventual death in your tree.
Another issue with magnolia scale is the occurrence of sooty mold which is a byproduct of the honeydew produced by the scale. It is a black fungal growth which is what most people notice first. Although this generally does not harm the tree, it is very unsightly.
In closing, if you suspect your magnolia tree has magnolia scale, give us a call at (614) 895-7000 or visit RussellTreeExperts.com/Quote and one of our 25+ ISA Certified Arborists® will visit your property to come out and complete an inspection! From there, we can recommend the best management strategy for your magnolia tree. Timing is everything.
Please note: This article was originally published on 8/9/2023 and was revised and republished on 8/7/2025.
ADDITIONAL ARBOR ED™ ARTICLES!


Mike McKee | Regional Manager, Russell Tree Experts
Mike graduated from Hocking College in 1983 with a degree in Natural Resources specializing in urban tree care. He has been an ISA Certified Arborist® since 1991. Mike started his career in the private industry in 1985 before becoming a municipal arborist in 1989. He retired after serving thirty years before joining us at Russell Tree Experts in Sept. of 2018. His love of trees has never waned since trying to climb up the ridges of the massive Cottonwood tree in front of his childhood home.
Why is Tree Pruning Important?

By Enrique Arayata
ISA Certified Arborist® OH-7252A
June 26, 2025
Tree care comes in many forms: insect and disease management, fertilization, cabling, lightning protection, removal, and last but not least, pruning! Today, let’s talk about the importance of tree pruning and the various reasons why a tree may need pruned.
ISA Certified Arborist Andy Bartram making a tree pruning cut! ©Russell Tree Experts
Tree pruning is the selective removal of branches from a tree with the general goal of improving the overall quality of the tree, whether it be for safety, health, structure, fruit and flower production, aesthetic appearance, and more. Some may view pruning as unnecessary as there are hundreds of thousands of beautiful, healthy, and unpruned trees out in the world that have grown successfully without human intervention. Although this is true, there are also many trees out in nature that are dead, dying, or unpleasant to look at. A native volunteer tree out in nature grew naturally from one of hundreds of seeds and competed with all the surrounding trees for resources. They are tough and independent and do not need any human assistance. However, the same cannot be said for a single tree or sapling planted by a human in a site where that tree might not have ever grown there naturally. These human planted trees often need extra care like watering, mulching, and fertilization in order for them to be vigorous, healthy, or aesthetically appealing.
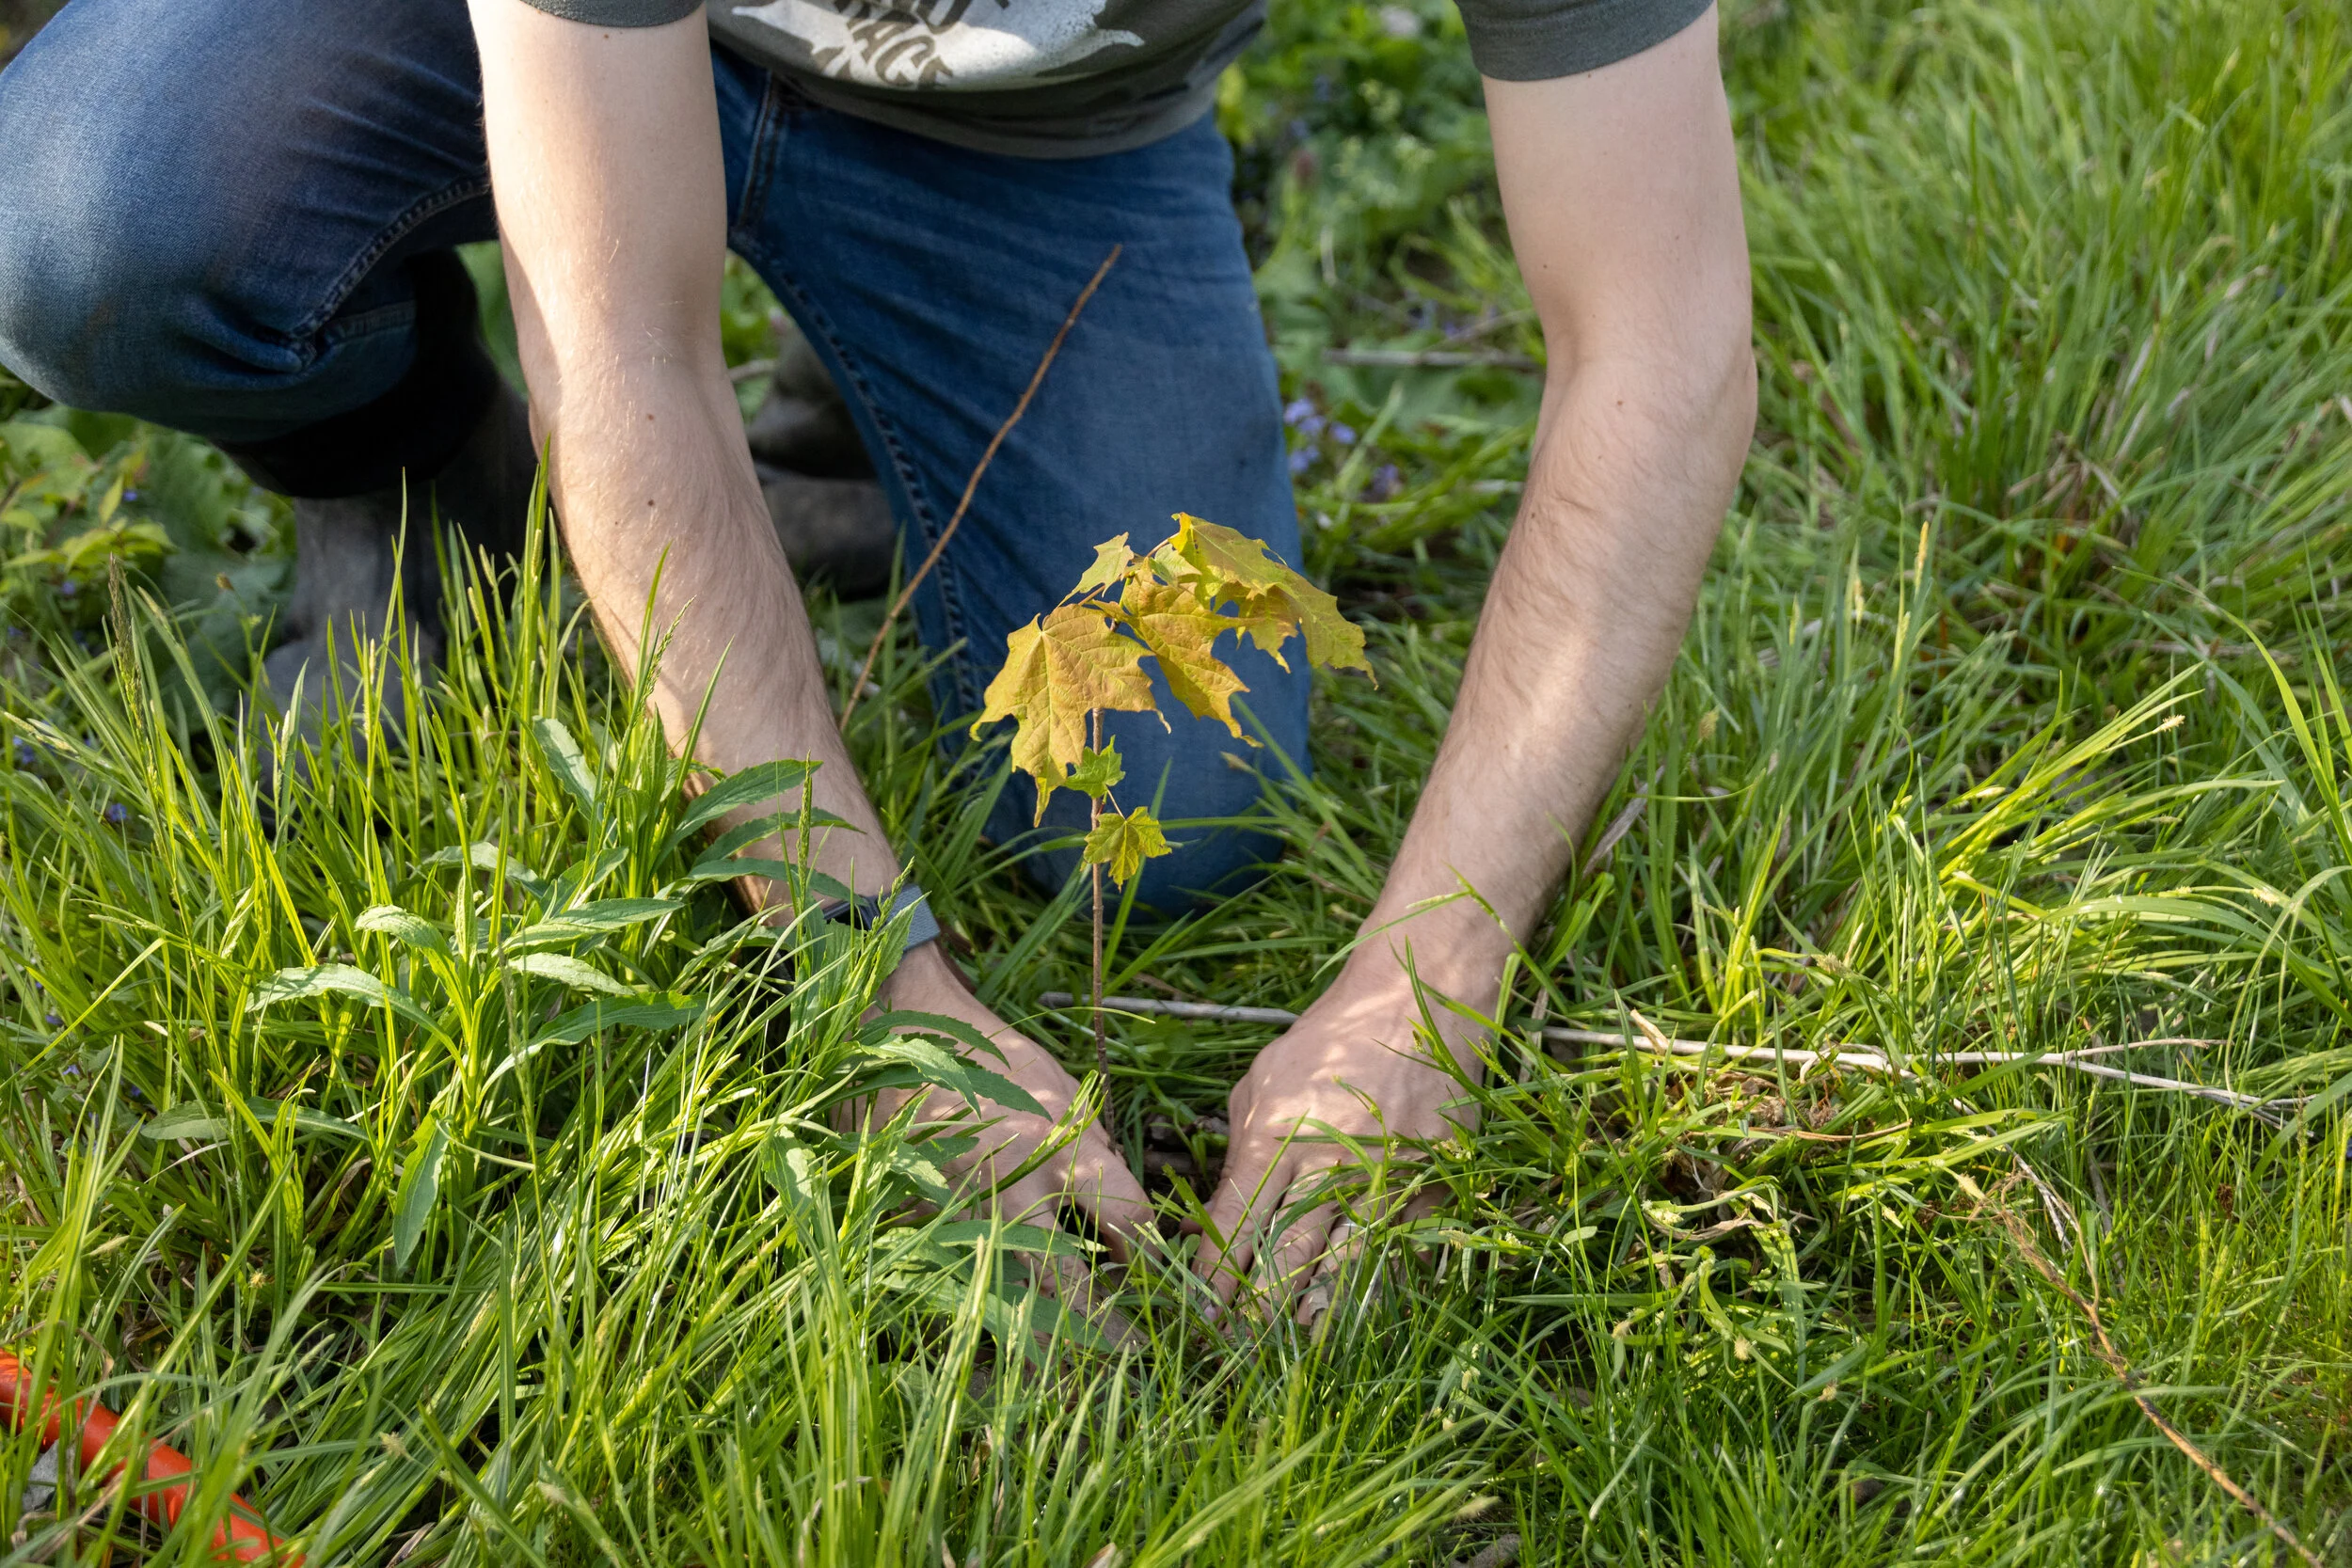
A tree sapling planted during one of our TREE FOR A TREE® tree planting community events! ©Russell Tree Experts
“Pruning” differs from “trimming” as pruning prioritizes a tree’s health and structure. Only the necessary limbs are removed and aesthetic appearance is a byproduct. With “trimming”, plants, shrubs, hedges, and trees are trimmed with the goal of improving their appearance. Depending on the individual trimmer, health and structure may be sacrificed in order to attain a certain look. Trimming can also cause problems as limbs might not be cut back to a spot conducive for compartmentalization and may invite pests or diseases to invade the tree.

Our team member Andrew making a tree pruning cut! ©Russell Tree Experts
A tree may need to be immediately pruned if it poses a safety concern, such as in the event of storm damage. If there’s a large or dead limb overhanging something significant such as a house, car, sidewalk, or valuable lawn ornament, that limb may need to be preemptively removed as it could be hazardous during a storm. Additionally, codominant stems, two stems with a tight V-shaped attachment at the union, are an example of limbs with safety concerns as this can lead to included bark, lead to uneven growth in a tree, and also be a structurally weak point in a tree that may fail in high wind, snow, or ice events.
An example of a mature codominant limb. Instead of pruning it at this stage of the tree’s life, the owner decided to have brace rods installed to add additional support to this union. ©Russell Tree Experts
Our team member Mac pruning a dead limb overhanging a busy road.
©Russell Tree Experts
If there are any limbs with clearance issues, it may also need to be removed. This applies to limbs that are touching any house siding or utility lines or any low hanging limbs that impede lawn activities or pulling into a driveway.
Another important aspect of tree pruning is for health and structural reasons. A tree’s overall health and structure will increase by removing any dead, dying, damaged, disease-infected, codominant, or crossing limbs. Removal of these limbs promotes new growth and increased flower and fruit production. When a tree is pruned, nearby trees, shrubs, plants, and grass can also benefit by receiving more resources like sun, water, and air. These additional resources can improve aesthetic appearance and promote new growth. If the pruned tree was also close to a window you may even have a better view from inside your house or more sunlight coming in during the day!
As mentioned earlier, tree pruning can improve aesthetic appearance. Pruning does not focus on looks but removing dead, dying, broken, weak in structure, or clearance-issue limbs generally makes trees look neater, cleaner, and overall better. The pruned tree may not have a specific shape desired by an individual, but it will be healthier and safer. Another factor to consider is property value. An unmaintained tree can look unpleasant, unruly, and unsafe which can hurt the curb appeal and value of a property. When it comes time to sell, having a beautiful, healthy, and pruned tree can potentially increase property value, making it an easy worthwhile investment!
So now that you have read about the various reasons for tree pruning, you may be wondering when a tree should be pruned, how often should a tree be pruned, or how much of a tree should be pruned? The short answer is… it depends! Some trees are best pruned during a specific season and some may have no preference. For example, oak trees are not recommended for pruning from roughly April to October due to the risk of oak wilt. A sugar maple can generally be pruned any time of the year, but it is recommended to prune a sugar maple tree during the summer rather than winter to avoid sap leakage from pruning wounds, which does not pose any significant problem to the tree’s health.
Multiple water sprouts shooting straight up from a larger branch due to stress.
©Russell Tree Experts
In terms of frequency, younger trees may need to be pruned every two to three years while more mature trees may need to be pruned every three to five years. The specific timing can fluctuate and vary based on planting site, climate conditions, potential insect and disease issues, and more. In terms of how much to prune, there should be no specific goal. Only remove the necessary branches. However, a general guideline is that no more than 25% of a canopy should be removed at one time as the tree may “go into shock” and grow watersprouts in an attempt to replace the stored energy lost from the removed branches.
If you decide to have your tree pruned, two common, incorrect methods of pruning that Russell Tree Experts strongly advise against and do not perform are tree topping and lion’s tailing. Tree topping is pruning to create a rounded canopy that often requires cutting through a stem at an improper location. Lion’s tailing is the removal of many, if not all, secondary or tertiary branches from the interior of the crown, leaving most of the foliage at the edge or top of a canopy. Although the look of both of these tree pruning methods may be desired by a specific individual, they do not improve the overall health or quality of a tree and can actually shorten its lifespan and promote decay.
Tree pruning is a very large and vast subject with much to cover. Someone could write a novel about tree pruning and still not cover every single detail. The goal of this article was to discuss the many reasons for tree pruning, not necessarily to teach someone how to become a tree pruning expert. However, we do have an article and a video on the 3 cut method that will be linked down below for anyone interested in learning how to safely and effectively remove a limb! Additionally, more tree pruning-related articles are also down below including 6 harmful tree pruning methods! (You already know 2 of them from reading this article!) As always, if you’re interested in a free tree work quote by one of our 20+ ISA Certified Arborists®, visit RussellTreeExperts.com/Quote or speak to our friendly, local office at (614) 895-7000!
Please note: This article was originally published on 1/12/2023 and was revised on 6/26/2025.
Interested in Pruning Your Own Tree?
ADDITIONAL ARBOR ED™ ARTICLES!


Enrique Arayata I Media Production Manager, Russell Tree Experts
Enrique is an ISA Certified Arborist® and FAA Certified Remote Pilot. In his free time, he enjoys working out, hanging out with his family and girlfriend, video production, photography, cars, technology, and cooking. Enrique has a BA in moving image production with a double minor in film studies and studio art specializing in photography from The Ohio State University, and an AA in web graphic design from DeVry University. His favorite tree is the Kwanzan cherry tree.
I Speak for the Trees
“I am the Lorax, I speak for the trees. I speak for the trees for the trees have no tongues.” As a representative of a tree company based out of Central Ohio, I feel that I have the responsibility to speak for the trees. Much like my friend the Lorax, written into this world by Dr. Seuss…

“I am the Lorax, I speak for the trees. I speak for the trees, for the trees have no tongues.”
As a representative of a tree company based out of Central Ohio, I feel that I have the responsibility to speak for the trees. Much like my friend The Lorax, written into this world by Dr. Seuss, someone needs to “speak for the trees, for the trees have no tongues.” What is our environmental responsibility as humans? To protect the environment we live in for future generations to be able to enjoy and thrive. One way to do this is to promote plant diversity which ensures we do not experience the devastation of wiping out all plant material with one fell swoop of a disease or pest. We have already seen things come through such as Dutch elm disease and the Emerald Ash Borer which wiped out thousands of elm trees and ash trees across the area. Amazingly, from these events, we saw an emergence of resistant species which is such a great example of how Mother Nature perseveres!

Illustration & text by Russell Tree Experts (Inspired by Dr. Seuss, of course!)
Humans have an Earthly responsibility to help Mother Nature — we are just a guest in her house and we need to treat it as such. By cultivating a variety of plant species, in both urban and rural settings, we can aid Mother Nature in replenishing her home with beautiful foliage and ensure that it isn’t all wiped out with one disease or pest. If we as a society decided to only plant trees in one family, a pest or disease could come along that affects only that species and suddenly, all of our landscapes are devastated. By planting more trees, and a variety of them, we can ensure their length of life is optimized while simultaneously aid in combating the toxins released by daily human activity. Each day we make several choices to either help or turn a blind eye. We live in a world where it is easy to forget the environmental impact of our actions because we do not see and perhaps will never see the consequences of our actions.

Illustration & text by Russell Tree Experts (Inspired by Dr. Seuss, of course!)
In January of 2020, my family and I made a 1-month commitment to removing all animal products from our diet for both health and environmental reasons. My cholesterol was through the roof, particularly when I was pregnant with my second daughter, and I had recently learned that the animal agriculture industry is responsible for about half of all worldwide greenhouse gas emissions. Also, producing 1 pound of meat requires approximately 50 times more water than producing a pound of plant-based nutrients in the way of fruits, vegetables, and grains. During that one-month commitment, I felt so much better; my energy levels, my mood, and I just felt generally healthier. I decided to keep my commitment going and my cholesterol numbers came down to within a normal range. Beyond that, I also felt like I was doing more for the environment and doing my part to be a good house guest to Mother Nature. It felt good making these health changes that impacted both me and my surroundings.
Human intervention is infamously detrimental to the world we live in; pollution, carbon emissions, urban monocultures, and the list goes on. Everyone should be conscious of their impacts and we should do our best to lessen the strain on Mother Nature and promote a more symbiotic relationship. One way Russell Tree Experts works to help the environment is with our TREE FOR A TREE® program; for every residential tree we remove, we plant another in its place at a local park or nominated location. We focus on a diverse selection of trees that are native to the area such as Bur Oak, Sycamore, and Red Bud.
Like my friend The Lorax, I speak for the trees, and more specifically, my environment. At Russell Tree Experts, we do our best to do what we can for Mother Nature to ensure she will be around for years to come.

Lindsey Rice | Office Manager, Russell Tree Experts
Lindsey joined Russell Tree Experts in 2015 with a B.S. in Agribusiness and a minor in Horticulture from The Ohio State University. Growing up in Northwest Ohio, she participated in various sports, band, and FFA which ultimately inspired her love for the tree industry. She loves to spend her free time outdoors with her husband and daughters.
The 3 Cut Method
There are times when the professionals at Russell Tree Experts should be utilized, although I realize there may be situations when removing a single branch is something very achievable by you, the homeowner.

By Mike Wilson
ISA Certified Arborist® OH-6806A
February 13, 2025
[Please note: This article was revised and republished on 2/13/25 from its original publish date of 6/30/21]
There are times when the professionals at Russell Tree Experts should be utilized, although I realize there may be situations when removing a single branch is something very achievable by you, the homeowner. I feel it's safe to assume if you're reading this article, you have a bit of a green thumb and you like to get your hands dirty by maintaining as much of your landscape as possible. This article isn't to dive deep into the various pruning techniques or strategies we use in the field, rather, it's to help homeowners make proper pruning cuts on trees throughout their property. Keep in mind, even though you may have seen us swinging about your trees like monkeys, we're trained to do so in the safest manner possible and I discourage you from putting yourself in harm’s way pruning your tree(s).
The reasons for pruning a branch or limb from a tree are vast. Whether it's removing a pesky branch that keeps slapping you in the face during weekly lawn maintenance to getting rid of that one dead branch that you see every time you look out your window, I'm here to help you make a cut that will ultimately compartmentalize naturally.
Trees have a natural response known as CODIT (Compartmentalization of Decay in Trees) which allows them to wall-off or seal wounds to help prevent decay or entry of harmful diseases. Cuts that are too flush with the parent stem (or left too long) are unlikely to seal properly and could potentially degrade the health of your tree.
key branch landmarks

So, now, let's get into the nitty-gritty of proper pruning cuts. It's critical to be able to identify key branch landmarks that help guide where your final cut will be: the 'Branch Bark Ridge' and the 'Branch Collar'. The branch bark ridge can be seen as the raised strip of bark on top of the branch where it joins with the main parent stem or trunk of the tree. The branch collar is the slightly raised or swollen portion around the sides and bottom of the branch, this portion may or may not be distinguishable. The imaginary line connecting these two landmarks determines where the final cut should be made.
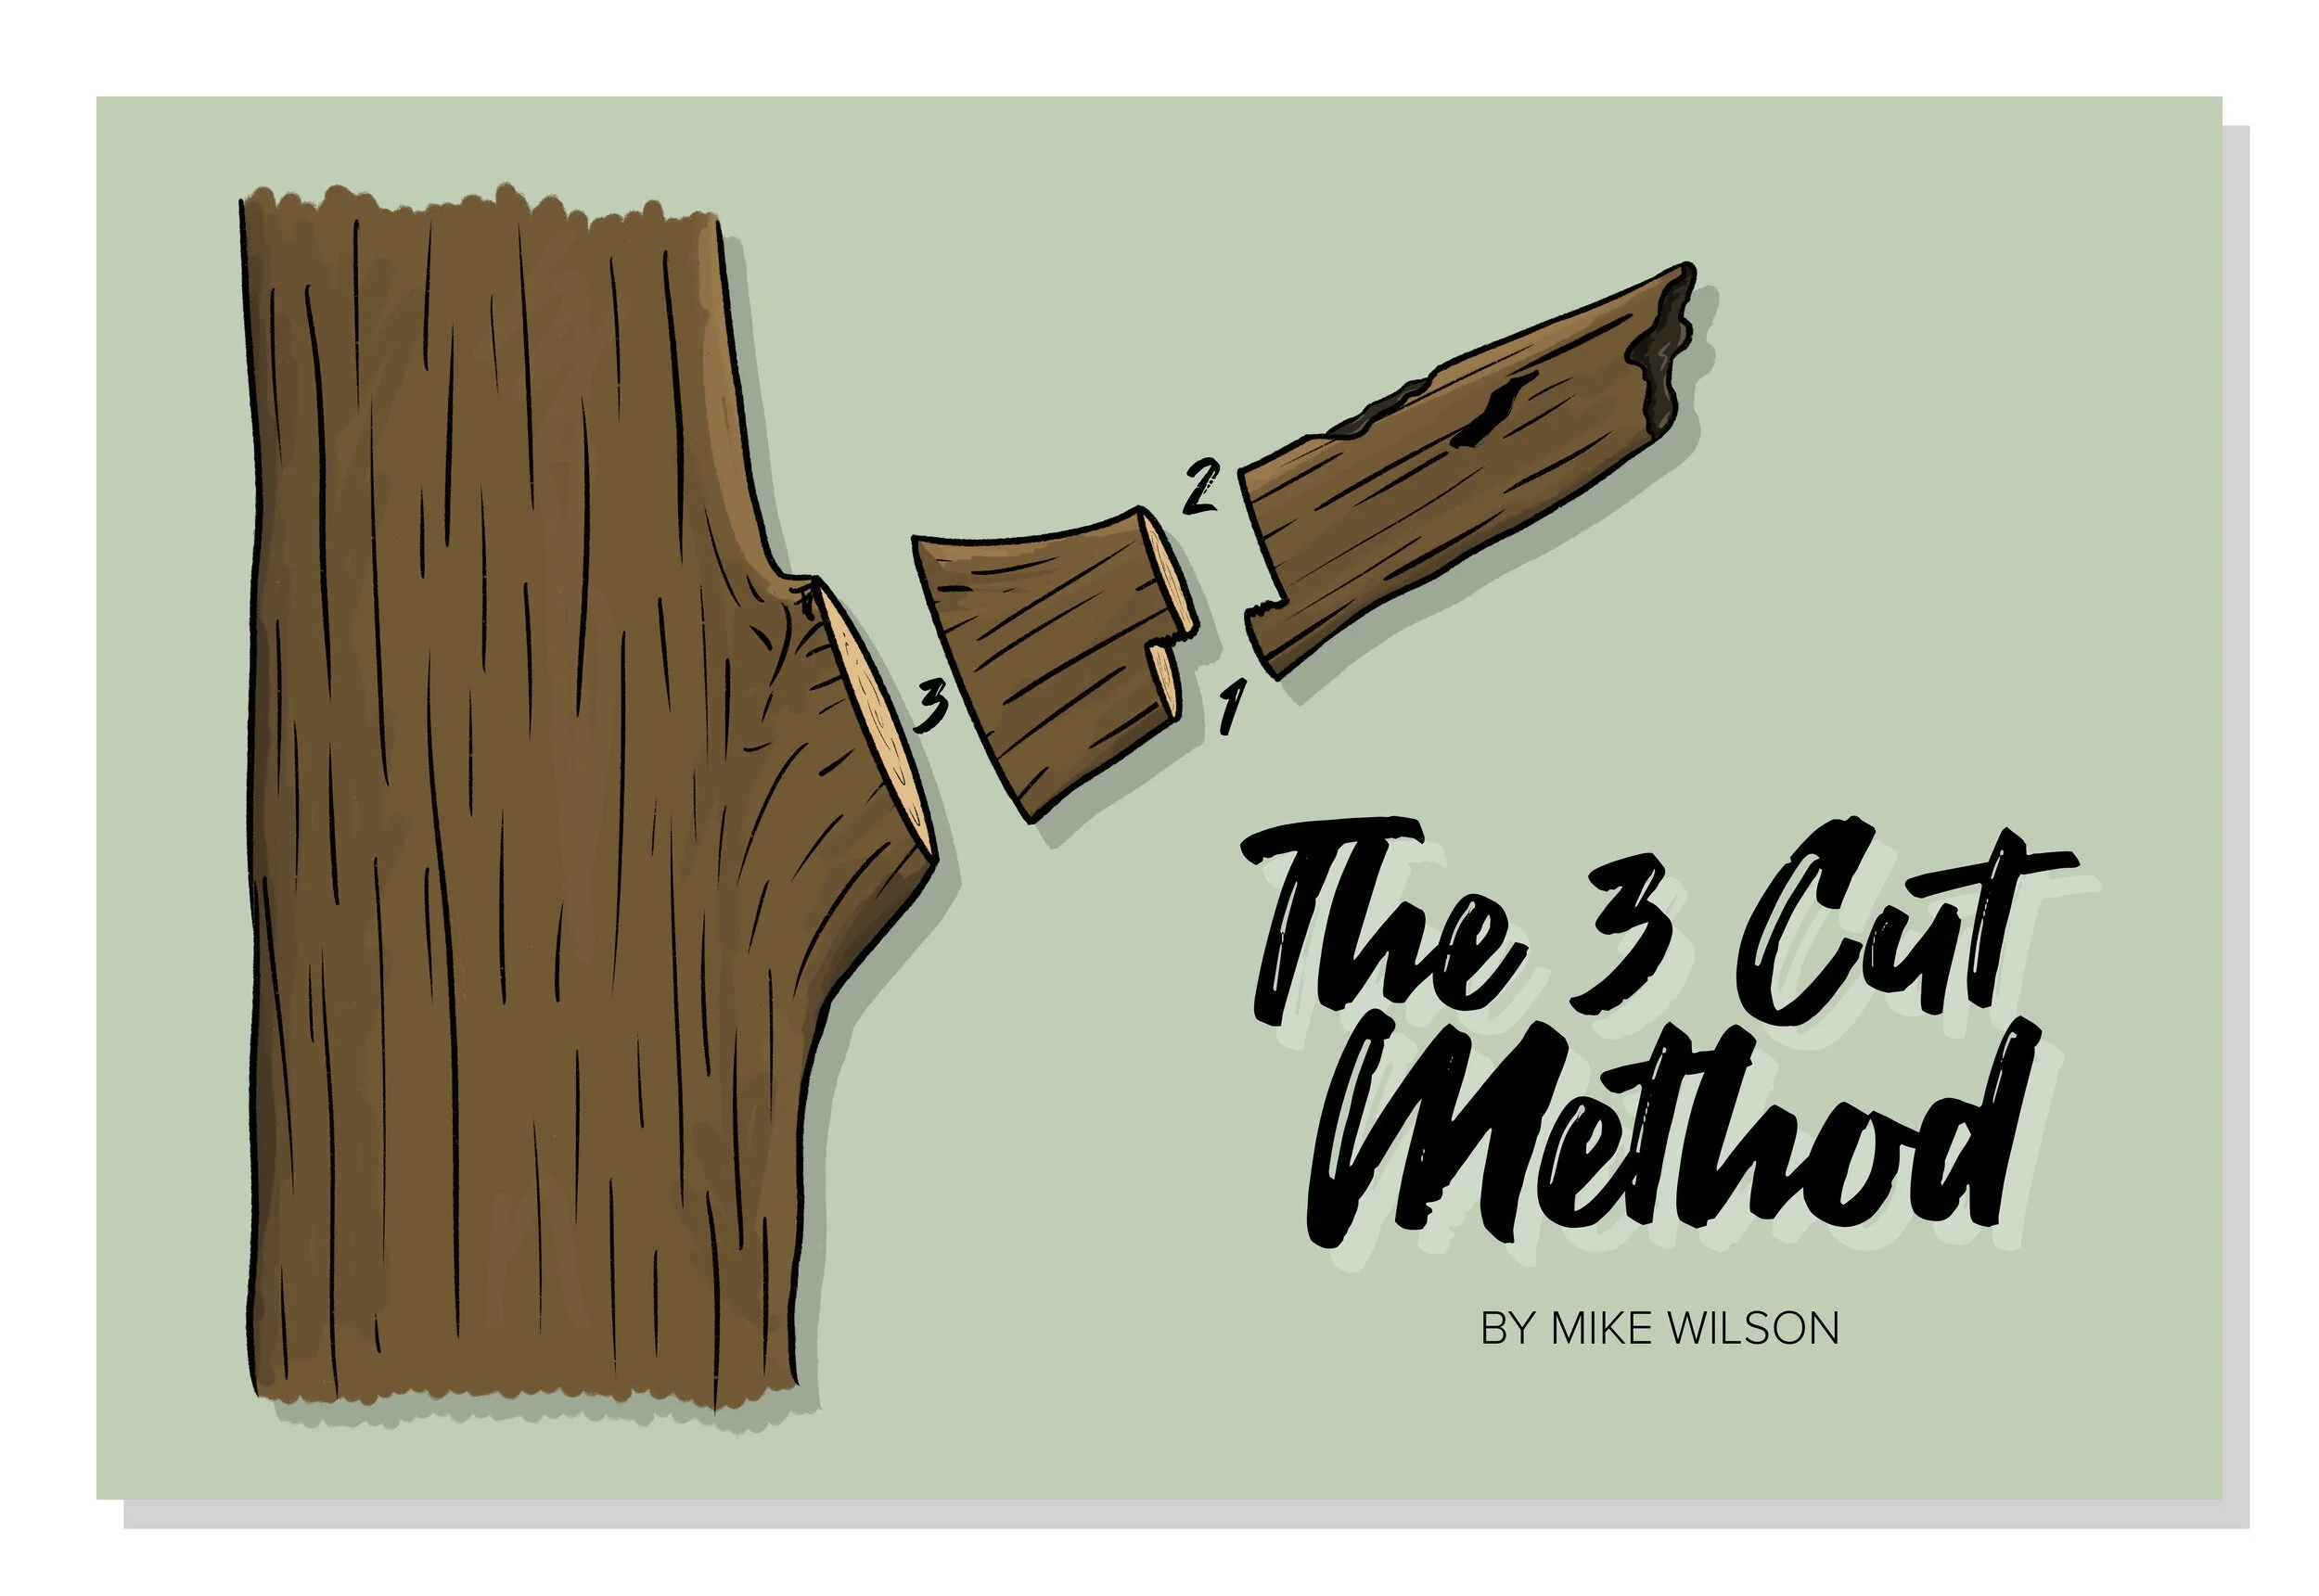
Step by step: The 3 Cut Method
To begin, whether using a handsaw/polesaw/chainsaw, I'll teach you how to remove a branch using the 3 cut method:

1st Cut / Bottom cut
Create a cut on the underside (undercut) of the branch roughly 1/3 of the way through. This is a crucial step in the branch removal process as it eliminates the risk of the branch peeling down and further harming the tree.

2nd Cut / Top Cut
Next is a second distal cut on top of the limb (further from the trunk) to remove the limb (topcut).

3rd Cut / Final cut
Now, with only a stub remaining, is when you should identify that imaginary line I described above. This will be the site for your final cut that will eventually seal properly as long as the tree is healthy and capable.
How-to Video: The 3 Cut Method
I’m not the biggest fan of being on camera so I’ve asked Kenny Greer (Our marketing guy at Russell Tree Experts) to demonstrate the 3 Cut Method in the below video! Check it out!
proper pruning results
A proper final cut will become a minor blemish guarding your tree against decay and harmful organisms. Here are some beautiful examples:


Please Note — In the past, it was believed that paint would help seal fresh wounds, although this has since been proven to only slow down the natural CODIT process. Can any of you guess when we would apply this "wound paint?" If you'd like to find out, I encourage you to read Lindsey Rice’s ARBOR ED™ article on oak wilt and dutch elm disease, my fellow coworker and ISA Certified Arborist®!
Questions? Comments? Leave them below and we will get back to you as soon as possible! Thanks for reading and watching! As always, if you’re interested in a free tree work quote from one of our 20+ ISA Certified Arborists®, give us a call at (614) 895-7000 or visit RussellTreeExperts.com/Quote!
ADDITIONAL ARBOR ED ARTICLES!


Mike Wilson | Regional Manager, Russell Tree Experts
Mike joined RTE in 2013 and has been in the green industry for over 12 years! He is an ISA Certified Arborist® and a graduate of Oregon State University. Mike is an outdoor enthusiast and a US Army Medic Veteran!
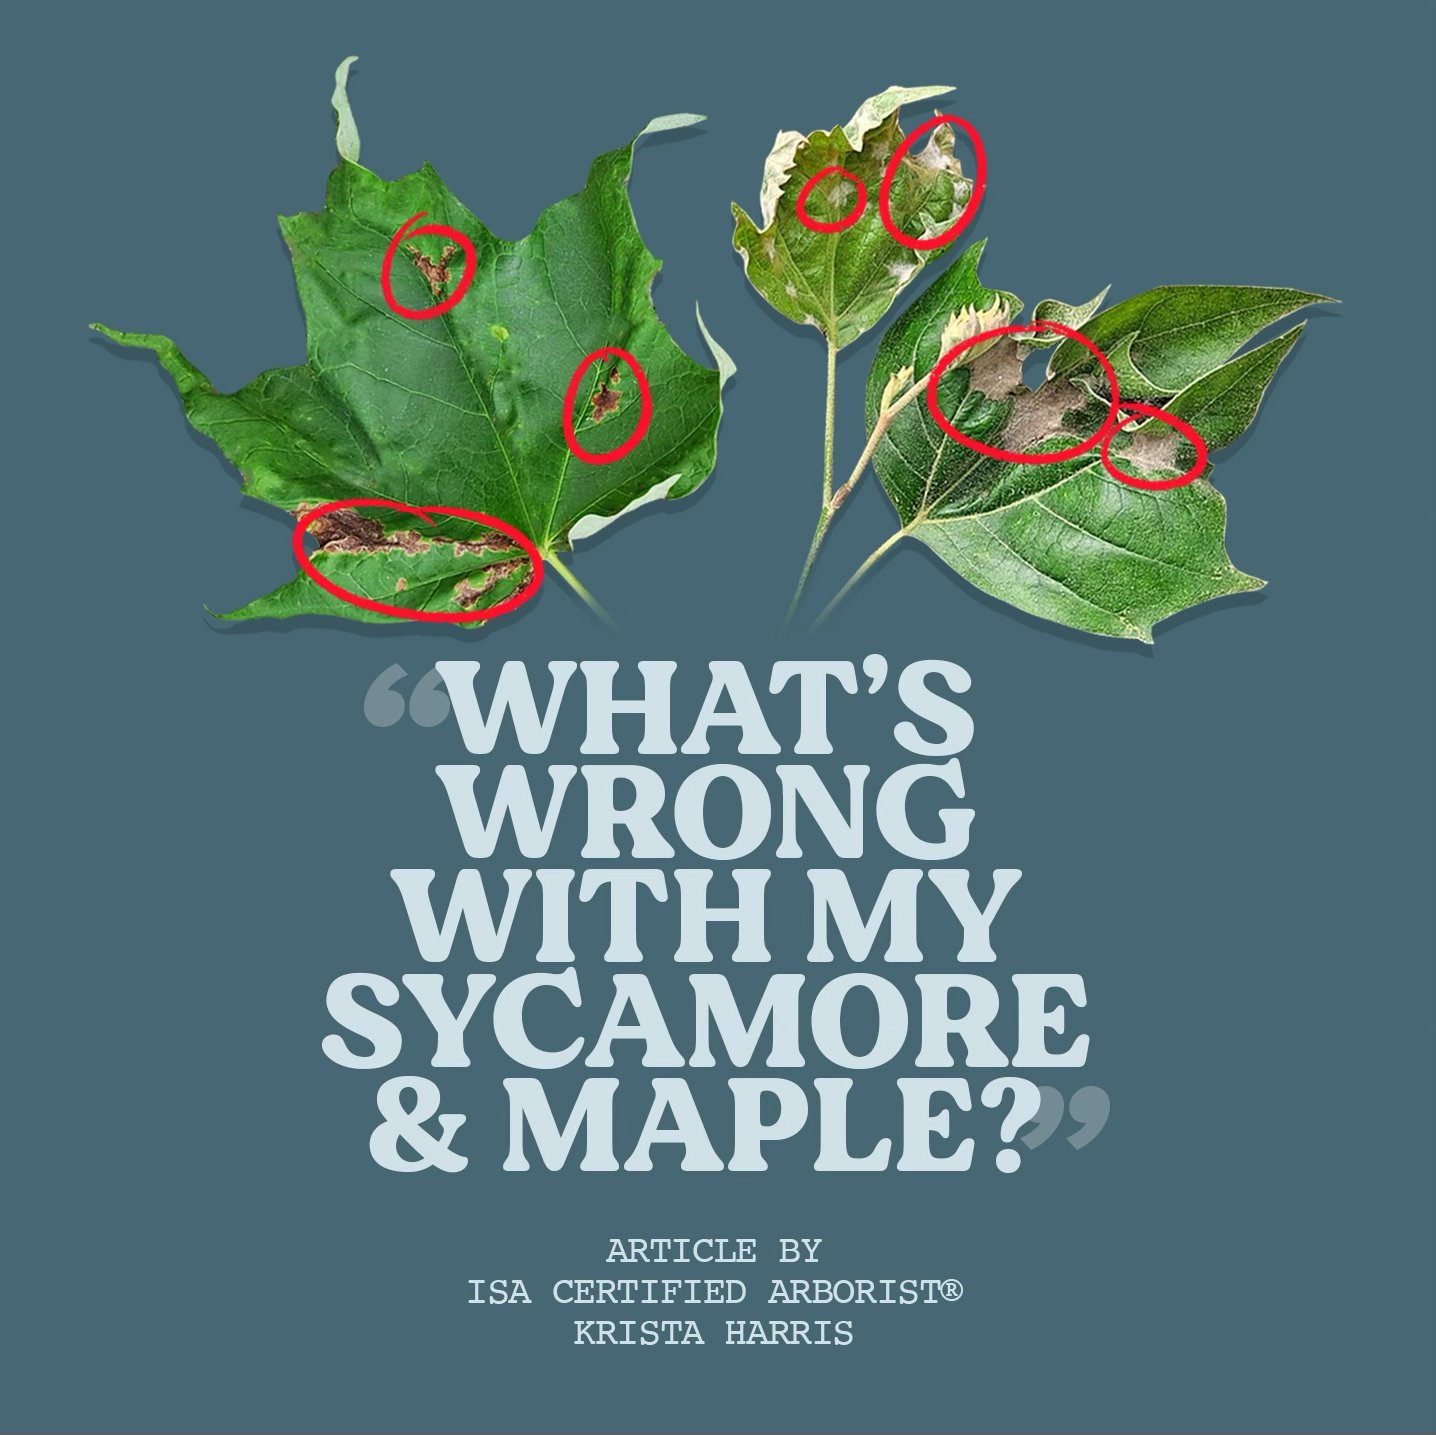
What's Wrong with my Sycamore & Maple?
"Why does my beautiful maple have ugly black spots on its leaves?" "Why is my American sycamore bare this year” …To answer these questions, we need to go back to a chilly, wet evening 5 weeks ago. On May 5th, the temperature dropped overnight to 41 degrees just after an early morning shower that day. We continued this cool, wet trend for 10 lousy days, and…
©Russell Tree Experts
"Why does my beautiful maple have ugly black spots on its leaves?""Why is my American sycamore bare this year?"By Krista Harris
ISA Certified Arborist® OH-6699A
May 22, 2025
Anthracnose fungus attacks newly emerging leaves in the spring when the weather is just right for disease development. The symptoms vary from host to host, but typically infected leaves will have irregular dark spots along veins. Eventually, the leaf will curl, die, and fall. In the case of the sycamore, often the leaf buds are killed before they have even had a chance to emerge.
[Sugar Maple leaf before and after anthracnose fungus]
©Russell Tree Experts
Anthracnose fungus affects many deciduous trees and seems to be most noticeable this year on sycamore and maple in our area. I have had at least 10 customers per week concerned that their beloved trees were dying due to this fungus. I have also been driving by my favorite American sycamores around my home, only to find them very sparsely leafed and struggling. This includes Upper Arlington's oldest tree, an amazing 3 stemmed beauty that our team pruned a few months ago.

©Russell Tree Experts
[American Sycamore leaves with anthracnose fungus]Thankfully, I have wonderful news for the stewards of these afflicted trees. Anthracnose is a cosmetic disease for the majority of trees! If the tree is otherwise healthy and well established, it will be just fine. It will replace those lost leaves in July when conditions no longer favor anthracnose development.
How can you help trees with this seasonal infection?
Water your trees during our hot, dry summers! Concentrate the water at the ground level only, do not splash the leaves. All trees will appreciate the extra water, but those that have lost their leaves and are attempting to replace them will relish it! ARTICLE: HOW TO WATER YOUR TREES
Prune your trees for better air circulation and light penetration. This will help the leaves dry faster and it will be harder for the fungus to spread.
Dispose of affected leaves so that the spores are not hanging around next year to re-infect your tree.
Consider fertilizing your trees in the spring so that they have the needed nutrients to stay healthy (and possibly put on 2 sets of leaves if it is another good year for anthracnose infection).
Above all, do not panic! We cannot control the weather or the fungus. Just concentrate on overall tree health and by mid-summer, the trees will have recovered and this disease will be just a bad memory. For a free tree quote by one of our 20+ ISA Certified Arborists®, visit RussellTreeExperts.com/Quote or speaker to our friendly, local office staff at (614) 895-7000!
Please note: This article was originally published on 6/14/2021 and was revised on 5/22/2025.
ADDITIONAL ARBOR ED™ ARTICLES!


Krista Harris | Journeyperson, Russell Tree Experts
Krista grew up in the central Ohio area and became an ISA Certified Arborist® in 2017. She graduated from The Ohio State University with a Bachelor of Science in Crop Science and a minor in Plant Pathology in 2000 and has been in the green industry ever since. Her favorite trees are the American sycamore, American beech, and giant sequoia. [BS in Horticulture Crop Science, The Ohio State University / ISA Certified Arborist® OH-6699A / ODA Comm. Pesticide Lic. #148078]
Brood X Cicada: Facts & Tips
Our arborists first saw the Brood X cicadas emerge on May 21st, 2021. They are expected to be present within our environment for the next 6-8 weeks (maybe even longer)!


EMERGENCE
Our arborists first saw the Brood X cicadas emerge on May 21st, 2021. They are expected to be present within our environment for the next 6-8 weeks (maybe even longer)!

SIZE
The Brood X cicadas are 1.25-1.5" long with red eyes. When they first emerge from their exoskeletons their bodies are a yellowish color but they soon darken to black/dark brown.

HARMLESS TO HUMANS
They won't/can't bite people but they are clumsy flyers so they will fly into things!

A Natural Process
The brood X cicadas have emerged every 17 years for centuries (!!!) and they are a natural part of our ecosystem. Many of the trees you see throughout the area have likely survived a few brood X "invasions" already!

Medium/Large Trees:
LOW RISK
For medium and large trees, they are harmless. The cicadas will likely feed and lay eggs on the trees but they will not cause any long-term damage. You may see some dead leaves and twigs but the tree will be just fine in the long term.

Smaller/Recently Planted Trees:
MEDIUM RISK
Smaller and recently planted trees may be more susceptible to long-term health issues from cicadas. You may consider wrapping these trees to prevent the possibility of damage. Check out the below video on how to properly wrap your tree!
How to Video:
Protecting a Tree from Cicada Damage
17
Seventeen years ago near this season I was starting my second year as an arborist in training. A few months more into the year and I would be applying to the ISA to sit for the Certified Arborist examination, which thankfully I would pass. At this point in my career, I was fortunate to be working under a foreman who was (and is) passionate about trees, so as I learned primarily about climbing and pruning, I was also being taught about CODIT, tree identification, and common tree pests and diseases.

Seventeen years ago near this season I was starting my second year as an arborist in training. A few months more into the year and I would be applying to the ISA to sit for the Certified Arborist examination, which thankfully I would pass. At this point in my career, I was fortunate to be working under a foreman who was (and is) passionate about trees, so as I learned primarily about climbing and pruning, I was also being taught about CODIT, tree identification, and common tree pests and diseases.
For those who mark time by political events, George W. Bush was president at the time, serving the first of what would be two consecutive terms.
Technologically, the first iPhone was still not to be available for another 3 years, so we were truly living in a different world. I think it was around this time that I purchased my first mobile telephone after stubbornly holding out for several years.
Ecologically, 2004 was the first year I directly experienced the effects of the 17-year cicada. Since then the world has turned and changed until the different cogs and wheels have aligned once more to allow the offspring of that very brood to emerge. As I sit and write this, the final instar (development stage) of those eggs that were laid 17 years ago are undergoing the last steps of maturation, soon to emerge as adults. I imagine them crawling up out of the ground, squinting at the sunlight (as they would if they had eyelids), crawling up a tree, a fence post, and going to sleep one last time. The sleep of pupation ends with an awakening into a new form. For 17 years these nymphs have been slowly growing, feeding on roots underground, changing mostly only in size. Now, something shifts inside and they decide to crawl into that great world above and go to sleep in the sun. And lo and behold, this time they awake as something very different. Who could have guessed that winged creatures would emerge from these slow, crawling, subsurface dwellers? They cast off the old husk of what they were and take to the sky, flying from tree to tree. The world aboveground has changed into something very different from what it was when these eggs were first laid. The changes that humans experience at times so tumultuously may have been experienced by these nymphs as distant rumblings or far off vibrations, or not at all.
What to expect
I have had several clients already ask me about the 17-year cicada, and what should be expected this season. Here is what I recall from my second year as an arborist:
1.
For the squeamish, these insects are a challenge. They are harmless, but they are large and very imposing. As less than graceful fliers, they can be startling when several of them fly into you if you walk past an infested tree. They make a buzzing sound as they fly, clumsily careening off of branches, arms, and faces.
2.
Also for the squeamish, despite the fact that they are harmless, they do not look so. I remember an insect with large clear wings, blackish body, and large, beady, red eyes.
3.
The 17-year cicada makes up for the fact that it is hardly ever around by emerging in large numbers. The noise made by the males as they sing for the females can be quite deafening and is mostly constant. One thinks that the females must be attracted not by the quality of the song, but by the male who can keep shrieking the longest. (And the “singing” is not really that – I imagine the sound is produced by rubbing body parts together similar to a cricket).
4.
The females use an ovipositor to cut slits into the outer twigs of trees, usually choosing twig growth from the previous year. Looking closely at these slits, the eggs are visible as whitish, elongated structures carefully lined up in the slit.
5.
This ovipositing can weaken the stem, causing it to break and hang off the tree. The leaves on the stem die, making the tree appear to have brown flags all over the canopy.
6.
Many times the twigs do not break off, but the wounding on the stem allows an opening for pathogens to enter the tree. I have seen sugar maples with cankers formed on each and every twig that had cicada oviposition, creating a very spectacular appearance in the tree.
I have also noted mature pear trees going into decline in the years following a cicada infestation – the declining growth can be traced back to the year the eggs were laid on the stem.
Regarding that last point – I always wondered if the decline was associated with some unknown pathogen vectored by the cicadas. Then I recently listened to a lecture by Dr. Klooster at OSU. She explained that in the final year prior to cicada adult emergence the nymphs were at their largest size, and fed most heavily on tree roots prior to emerging for their pupation into adults. Given the decline in trees that I had traced back to the year of oviposition, in my mind I correlated this heavy root feeding with an additional taxing of tree resources which could cause a temporary decline in the tree. This taxing of resources coupled with potential pathogen entry into the tree at the canopy and root level could definitely cause decline.
As tree owners, what do we do?
The trees I have noticed going into decline following a cicada infestation are thankfully few and far between. For the most part, mature trees deal with the issue quite well. Newly planted trees are another story. A tree that has been recently transplanted is already going through transplant stress. The added stress of twig damage and possible foliage loss from the ovipositing female can harm smaller trees. Given their size, these trees can be wrapped with netting to keep the cicadas from accessing the outer canopy. My wife was able to find a sale of material called tulle – it is a light netting that I hope to be able to use to wrap my younger trees to avoid most of the damage. If I am successful, this means that I will also avoid the first hatchling nymphs dropping into the soil below my trees and feeding on the tree roots for the next 17 years. My advice is to wait until the new leaves have hardened off and then use a light netting small enough to keep the cicadas out. Cover the tree canopy and monitor to make sure no adults are getting in. Once the cicadas are gone the netting can be removed. From what I recall it seemed like the cicadas emerged sometime in June and persisted for several weeks into the summer. I can state with confidence that if this brood is going to be a damaging presence in your landscape you will not be unaware of it.
In closing
In closing, I think of all the changes that have taken place since 2004. We are on our fifth presidential term since President Bush’s first term 17 years ago. Most of us now possess a smartphone of some kind, and spend a lot of time staring at it. In 2004 I never dreamed I would live through a pandemic! My hair has gone gray, and I have a lot less of it. A friend introduced me to an amazing woman who later agreed to become my wife. More than half of the time I have been part of the team at Russell Tree Experts.
Take stock for a moment. This is an interesting milestone. The 17-year cicadas may be an inconvenience, but the regularity of this brood (and there are several other broods that emerge at different time intervals) is actually quite fascinating. Why 17 years? And how 17 years? Who is counting for the insect? Theories abound, and other stories, but the rebellious part of me enjoys knowing that we don’t really know. In the meantime, I will sign off, wondering for a moment where I will be 17 years from now. Just think, it will be 2038. We will have gone through three or four more presidents after President Biden. Who knows what technology will be in our pockets? If I am not retired yet, I will be looking at retirement right in the face.
Go out and plant a tree this fall. In 17 years it will be big enough that you won’t have to worry about wrapping it with netting.
Nothing like a bit of perspective to balance your day. When the next 17-year cicada brood emerges, most of our current struggles will be almost all forgotten. I hope that serves to keep us from getting too worked up about some things we are going through today.
Your friendly neighborhood arborist, wishing you all the best,

José Fernández | Regional Manager, Russell Tree Experts
José became an ISA Certified Arborist® in 2004, and a Board-Certified Master Arborist® in 2015. Currently he is enrolled at The Ohio State University pursuing a Master’s Degree in Plant Health Management. José likes working around trees because he is still filled with wonder every time he walks in the woods. José has worked at Russell Tree Experts since 2012.
How to Mulch Around a Tree
By Enrique Arayata
ISA Certified Arborist® OH-7252A
April 7, 2021
Mulching is an important aspect of tree maintenance that is both functional and decorative, adding to your tree’s lifespan and helping it look its best. The main benefits of tree mulching are that it deters weeds, improves soil quality, protects trees from lawnmower damage, insulates soil from extreme temperatures, and retains moisture during hot weather. Today, I would like to talk about some tips and tricks on how to properly mulch a tree. At the top of this article is an instructional video hosted by ISA Certified Arborist Lindsey Rice that can be used to follow along while mulching your own tree!

Example of a properly mulched tree
To mulch a tree, you will need organic wood chip mulch, a shovel, a rake, and personal protective equipment such as safety glasses, gloves, and boots. A wheelbarrow or air spade may potentially be needed depending on the situation. The best time to mulch a tree is in the fall or spring. Many trees are incorrectly mulched when the mulch is too high or when it covers the root collar of the tree, which is where the trunk and roots meet. The mulch only needs to be 1 to 2 inches deep and the root collar should be completely exposed in order to properly receive oxygen. This will help prevent girdling roots, which are roots that wrap around the trunk in search of oxygen. This can suffocate a tree and add unnecessary stress. If your tree has girdling roots or a mulch volcano, you will need to resolve these issues prior to mulching.
If there are no girdling roots, the first step is to pull out any weeds surrounding the base of the tree. Then, you may begin applying mulch in a wide and evenly spread area. For younger trees, it is ideal to mulch all the way out to the canopy drip line, which is where the majority of a tree’s roots extend, but you may have to compromise depending on your landscape.

Example of a canopy drip line
For older trees, this is not as important. You should still see similar results when bringing the mulch out about 3 to 5 feet from the base. You can use a rake, shovel, or your hands to evenly distribute the mulch. The mulch only has to be about 1 to 2 inches deep at most, so make sure you avoid mounding, Leave about 2 to 3 inches of space between the mulch and the root collar in order for the tree to properly receive oxygen and to prevent girdling roots. This will also help prevent any moisture issues, which can lead to disease and rotting. Afterwards, you are all set!
For maintenance, water your mulch whenever it looks dry. Ohio can have inconsistent weather, so there is no need to water it on a scheduled basis. Also, only add mulch whenever it is looking sparse and below that 1 to 2 inch needed depth. Make sure you break up, turn over, and mix in the old mulch to prolong the mulch’s lifespan, prevent any clumping, and to allow maximum movement of oxygen and water. If there are any questions, please feel free to leave them in the comments section below and be sure to watch ISA Certified Arborist Lindsey Rice’s video for a visual guide on this topic! Good luck on your next mulching project!
Additional Reads!
Below are two excellent articles written by our ISA Certified Arborists related to mulch volcanoes and girdling roots.
”Mulch Mounds! Oh My!”
by ISA Board Certified Master Arborist José Fernández
“Are Your Trees Being Suffocated By Their Own Roots?”
by ISA Certified Arborist Chris Gill

Enrique Arayata I Media Production Manager, Russell Tree Experts
Enrique is an ISA Certified Arborist® and FAA Certified Remote Pilot. In his free time, he enjoys working out, hanging out with his family and girlfriend, video production, photography, cars, technology, and cooking. Enrique has a BA in moving image production with a double minor in film studies and studio art specializing in photography from The Ohio State University, and an AA in web graphic design from DeVry University. His favorite tree is the Kwanzan cherry tree.
Lecanium Scale (Part Two)
Recently one of my clients in Dublin ended up with three crabapple trees that had a heavy infestation of lecanium scale. We tried some treatments but the trees had declined and the client made the wise decision to remove and replace them.

[Note: For an introduction to this insect pest and as background for this article, please read Part One here, if you have not already done so.]
What I Found, and What I Predict
I started working with Russell Tree Experts in April of 2012. Soon after that my colleagues and I became aware of a major epidemic of lecanium scale in communities on the east side of Columbus. Entire streets had trees that were covered in scale, noticeable to the eyes of discerning arborists because of how black the trees looked as we drove by. We watched in chagrin as the epidemic worked its way west. As the scale populations increased in my areas (central and western communities), I could no longer jokingly rib my colleagues about how they were not taking care of the trees in their areas. We were doing what we could, but many of the infested trees were larger ornamental pear, crabapple, and cherry trees that are not the best candidates for cover sprays. Recently one of my clients in Dublin ended up with three crabapple trees that had a heavy infestation of lecanium scale. We tried some treatments but the trees had declined and the client made the wise decision to remove and replace them.
Last year during a regular fertilization visit to this property, Andy, one of our Tree Wellness arborists, made a note that another tree had scale, this time in the back yard. I stopped out soon after to take a look. Here is what I found:

Second-instar nymphs that overwintered on the tree stems. Note white waxy covering beginning to form. Scales are in their final fixed position, actively feeding and growing. Note droplets of honeydew here and there.
Each of these nymphs will mature into adult females that will be about 10 times their current size by the time they lay their clutch of 100 or more eggs.
This is a new infestation. An old infestation would also have the dead female bodies of last year’s adults alongside the current generation. They would be dark brown and about the size of BBs used for air gun ammunition.
© Russell Tree Experts
I made some notes for treatment recommendations and discussed options with the client. He decided not to pursue treatment. This was on April 23rd.
Nearly 6 weeks later in early June, I went back to this property for a different reason. While I was here I inspected the small crabapple. Much to my surprise, the second-instar nymphs had not grown. By this time they should have been at or near adult size, and they would be soft and slimy when crushed. I brushed some of the scales with my fingers and they rubbed off the tree stem like gray ash. They were dead. I checked the tree all over – no adults, all scales were dead. This tree had been treated with something very effective. You will recall from the first article that the insect stage most vulnerable to treatment is the first-instar nymph stage, which hatches from eggs laid by the adults that these second-instar nymphs would have become.
I knocked on the door.
During the ensuing conversation I found out that indeed, the tree had been sprayed with an unknown solution recommended somewhere on the internet. I encouraged my client, feeling very proud that they had taken matters into their own hands. “You killed every single scale!” I told him.
I shared the story with TJ back at the office and asked TJ to ask the client for the recipe when he talked to him to confirm our next visit to the property.
A week or two later, another client appeared on my calendar. Her problem was dieback on a crabapple, and Oakland nursery had recommended that she call us. As I walked around the front corner of the house I noticed lecanium scale on a shrub in the front bed. “Hmmm…” I thought. So I was not surprised when I saw the crabapple, a nice one, also had a heavy infestation of lecanium scale. There were the adults as expected.
Then I looked more closely. By this time of year there should have only been dying and dead adults on the tree, with possibly some first-instar nymphs feeding on the leaves. But here were dead adults alongside second-instar nymphs on the twigs. Not a single first-instar nymph to be found under a single leaf. I rubbed my finger across a few of the nymphs… Sure enough, they rubbed off easily, like ash.
Now my thoughts went back to the first client who had sprayed his tree with a home-cooked remedy. I carefully interviewed the current client and she was positive that no treatment of any kind had been made on her tree. I started to wonder.
This became a trend for the next few weeks, such that when I encountered lecanium scale several more times I was no longer surprised to see the same thing. This made me realize that the problem for the scale, and the blessing for the infested trees, had to be environmental.
Late winter of 2020 we had a two-week period of what I called “false spring”, when temperatures were far too warm for the season and I silently directed my thoughts to my trees, asking them not to believe that winter was over. Of course they ignored me and began to leaf out and flower. Then winter raged back in and the new growth was burnt, flower buds died, and spring looked less vibrant when it actually came on its normal schedule weeks later.
After that false spring, we had no less than 4 nights during two separate weeks when temperatures dropped well below freezing. I disguised my Japanese maples as ghosts using bedsheets to protect them from freezing after they had budded out. It was to no avail - all the new growth got burnt off. The same thing happened to many of you as well, since the cold snaps were widespread.
I propose the hypothesis that the second-instar nymphs of lecanium scale also believed in the false spring, and emerged along with their host plants. When the temperatures plunged below freezing four times during a prolonged cold spring all those nymphs were killed. Just like that, entire populations of this scale were dead. How many of you recall that we had snow on Mother’s Day last year? Well, if my hypothesis is correct, I present you with a blessing disguised as a late snow: For many of my clients the problem of a large population of a serious insect pest had been solved without applying a single drop of insecticide. That greatly helped me bear the disappointment of my disfigured Japanese maples!
Based on this hypothesis I close this article by making the prediction that this 2021 season my colleagues and I will continue to confirm a crash in the general population of lecanium scale. Those large trees that were not good candidates for topical sprays? No need to spray them after all. Though lecanium scales have their place within their ecosystem, when their population reaches damaging levels it is gratifying to see widespread control that has taken place with no human intervention. My only hope is that beneficial insects did not suffer in the same way.
As I close I have mixed feelings about how plants and insects are very much at the mercy of the environment. But I hope I have achieved my goal in sharing all this with you. By writing this I hoped you could see a little of what it is like when arborists try to decipher the clues they find from client to client, from tree to tree, from insect to insect. And I am still relieved to know that the lecanium epidemic may very well have been stopped in its tracks, at least for a time.
May you all be well, and may this coming season be full of “long days and pleasant nights.”
Your friendly neighborhood arborist,

José Fernández | Regional Manager, Russell Tree Experts
José became an ISA Certified Arborist® in 2004, and a Board-Certified Master Arborist® in 2015. Currently he is enrolled at The Ohio State University pursuing a Master’s Degree in Plant Health Management. José likes working around trees because he is still filled with wonder every time he walks in the woods. José has worked at Russell Tree Experts since 2012.
Where’s the Fruit?
As an arborist, I often feel like I need to double as a detective. Trees, obviously, cannot tell us verbally how they are "feeling" or why they are behaving in a certain way. We have to look for clues as to what is possibly going on with them. When I am asked why a tree is performing poorly, oftentimes I need to swap out my helmet for a Sherlock Holmes cap and start digging around, asking questions of the tree's caretaker and standing back to observe the environment in which the tree exists.

As an arborist, I often feel like I need to double as a detective. Trees, obviously, cannot tell us verbally how they are "feeling" or why they are behaving in a certain way. We have to look for clues as to what is possibly going on with them. When I am asked why a tree is performing poorly, oftentimes I need to swap out my helmet for a Sherlock Holmes cap and start digging around, asking questions of the tree's caretaker and standing back to observe the environment in which the tree exists.
One of the questions I am asked often, especially this past year, is "why didn't (or doesn't) my fruit tree produce fruit?" The answer to this can be complicated and can have many explanations. The fruit trees we typically grow here in Ohio are apples, pears, peaches, nectarines, cherries, and plums. These trees are all in the same rather challenging plant family, the rose family or Rosaceae. This family of trees (and shrubs) is susceptible to many pests, diseases, and seasonal issues. The biggest culprit last year was a late spring freeze near Mother's day [See Fig. 1]. This polar vortex sent Ohio orchard owners scrambling to save their precious buds, flowers, and very young fruit. There was also a freeze in mid-April that killed a lot of the very early blooming flowers of peaches especially.
![[Fig. 1] Temperatures dipped below and to freezing on May 9th and 12th in 2020.](https://images.squarespace-cdn.com/content/v1/59dfb3df46c3c41919eac60a/1612277614052-4CG70N1EYV41EC77KFXP/temp-graph.gif)
[Fig. 1] Temperatures dipped below and to freezing on May 9th and 12th in 2020.
Cold is a component that is very important to fruit production. Fruit trees need a certain amount of "chill hours" below a given temperature to recognize that winter has occurred and that it is time to wake up and flower. Typically, here in Ohio, we get plenty of chill hours. Our issue is either extreme and prolonged cold or a very cold dip in temperature after a warm, late winter spell. Very cold winters can kill dormant flower buds and even entire trees. This may be the case if your tree does not flower as expected in the spring. In the case of warm periods before a freeze, the tree may flower beautifully, but the flowers are damaged and cannot create that yummy crop you had been dreaming of.
Apples and pears are the most cold-hardy of the rose family fruit trees and produce fruit most reliably in our climate.
Windy, rainy, and chilly weather in spring also presents an obstacle for some of our tiniest workers, the pollinators. Native bees, honey bees, and bumblebees need to be present if any fruit is to develop on your tree at all. However, these gals are reluctant to venture out in search of pollen if the weather is wet and gusty and the temperature is below 55 degrees Fahrenheit. Thank goodness each flower is viable for 3-4 days and flowers do not open all at once. If the sun comes out for even one nice afternoon, you should have some pollination even in the worst weathered spring. Attracting bees to your yard with bee-friendly perennials and reducing the use of insecticides while bees are active should also help your future yields.
Along with pollinators, many fruit trees need a pollinizer as well. Peaches, tart cherries, nectarines, and some plums are self-fertile and will produce a crop without the help of another tree. However, apples, pears, and sweet cherries need a second tree of the same species, but a different variety, to cross-pollinate with. The trees should have overlapping bloom times and be within 300 feet of each other to be the most successful. It is interesting to note that crabapples are the exact same species as apples and will pollinate apple trees as long as they flower at the same time (and the crabapple is not a sterile variety). It is also interesting to note that cross-pollination between different varieties does not change the nature of the fruit. A Red Delicious apple tree will always produce Red Delicious apples even when pollinated by a Snowdrift crabapple [See Fig. 2], but if the seeds from the cross-pollination are planted, an entirely different and surprising fruit may be produced.
![[Fig. 2] A Red Delicious tree pollinated by a Snowdrift Crabapple will still produce a Red Delicious apple.](https://images.squarespace-cdn.com/content/v1/59dfb3df46c3c41919eac60a/1612213753269-LHLE5MF4TGKN6AIG9Q79/pollination-red-delicious-v2.gif)
[Fig. 2] A Red Delicious tree pollinated by a Snowdrift Crabapple will still produce a Red Delicious apple.
So, if you had good fruit-producing weather during winter and spring, saw many bees working your full bloom flowers, and are sure you have a pollinizer nearby, we will have to look for more clues.
![[Fig. 3] The dripline of a tree](https://images.squarespace-cdn.com/content/v1/59dfb3df46c3c41919eac60a/1612214024166-UE172M6OUJBIAMCKVDIF/200901-drip-line.png)
[Fig. 3] The dripline of a tree
Is your tree getting enough sun?
Fruit trees have the best yields with at least 8 hours of sun a day.How old is your tree?
Most fruit trees need to be between 3-5 years old before they flower and set fruit.Is your tree starved for nutrients or has it been fertilized too much?
Producing flowers and fruit takes a lot out of a tree. Fruit trees definitely benefit from a spring application of slow-release organic fertilizer to give them a boost of energy. You can also spread cow manure or compost within the dripline [See Fig. 3] to improve the soil and nourish your tree. On the other hand, over-fertilization with quick-release synthetic fertilizers high in nitrogen will cause your tree to grow too much. This vigorous green growth is at the expense of flower and fruit production and will make your tree more susceptible to fungal and bacterial attack and look delectable to deer and insects.Has your tree been pruned lately?
Pruning fruit trees during the dormant season each year can improve fruit production. It is recommended to remove 25% of the tree’s canopy (depending on age), concentrating on limbs that are broken, dead, crossing, growing into the tree, or growing vertically (water sprouts). Pruning to maintain good air circulation and sun penetration within the tree by making the correct thinning cuts will assist in keeping leaves dry and less susceptible to disease. It is important to note that fruit production is better on more horizontal limbs than limbs that grow more vertically.Is your tree getting enough water during our very hot, dry summers?
Without the proper hydration, fruit will suffer so that the tree itself can survive. Removing turf and weeds within the dripline of your tree and applying a thin 2” layer of organic mulch can help retain moisture and reduce competition. Apply supplemental water slowly and deeply during times of drought.Do you suspect your tree may be infested with insects or infected with a disease?
There are many insects, mites, fungi, and bacteria that love to feast on and infect fruit trees. Dormant oil sprays in late winter and fruit-friendly fungicide sprays during the spring may be needed to produce edible fruit.
If you have a fruit tree that needs pruned, fertilized, or inspected and treated for disease and insects, call Russell Tree Experts and entrust their proper care to our team of certified arborists. We would love to care for your trees and help you get to the bottom of “the mystery of the missing fruit”.
May you have a fruitful year ahead!

Krista Harris | Regional Manager, Russell Tree Experts
Krista grew up in the central Ohio area and became an ISA certified arborist in 2017. She graduated from The Ohio State University with a Bachelor of Science in Crop Science and a minor in Plant Pathology in 2000 and has been in the green industry ever since. Her favorite trees are the American sycamore, American beech, and giant sequoia.
BS in Horticulture Crop Science, The Ohio State University
ISA Certified Arborist® OH-6699A
ODA Comm. Pesticide Lic. #148078
CPR & First Aid
What's Going on with My Oak? Part 2
Earlier this year, we shared an article that highlighted two issues that were tied to recent weather patterns and had many homeowners concerned about their oak trees - one was an insect (Oak Shothole Leafminer) and another was a fungal pathogen (Oak Anthracnose). Combined, they made for unsightly leaves that were riddled with holes and brown patches. Fortunately, both issues were more of an aesthetic concern than anything else, and neither of them required treatment or had any lasting effects on the overall health of the trees. In fact, they are both likely to occur each year to some degree and should not be reason for concern.

© Russell Tree Experts
As we move through one of the hotter Ohio summers in recent memory, some oaks are dealing with yet another issue that is blemishing their leaves and even causing significant early defoliation. This time the culprit is a different foliar fungal issue called Tubakia Leaf Spot (pronounced “tu-bock-ee-ah”). This disease is much like the issues that we saw earlier this year in that it’s not something we need to treat and should be thought of as mostly an aesthetic issue. However, unlike the issues we saw in the spring, this one may indicate some underlying concerns that can be addressed.

Additional examples of Tubakia Leaf Spot
© Russell Tree Experts
Heat and Drought Stress
With the heat of summer comes potential heat and drought stress for trees. If an oak exhibits signs of significant spotting and leaf drop from Tubakia, being proactive the following year and providing supplemental irrigation may help to reduce the effects of the disease. It may also be worth considering deep root fertilization as a way to help the tree regain its vigor and better handle the disease the following season.
Chlorosis

Chlorosis in an oak tree in Bexley, Ohio
© Russell Tree Experts
Another common issue that many oaks struggle with is chlorosis. Chlorosis is a yellowing of the tree’s leaves that is often associated with high soil pH levels and can result in micronutrient deficiencies that affect the tree’s overall health and ability to withstand secondary stressors like insects, drought, and fungal diseases. It is a slowly progressing issue that causes a tree to decline over decades, and therefore often goes unnoticed by homeowners who just assumed their oak was supposed to be a little “yellow” looking. We’ve shared previous articles that go into greater depth regarding chlorosis, but it’s mentioned here because if your oak is chlorotic, the defoliation that can occur from Tubakia will likely be much more pronounced. Combined with the heat of summer, many oaks that are chlorotic and have Tubakia can start to defoliate at an alarming rate by mid-August. If this describes your oak tree, consider it a message that your tree is asking for a little TLC. Addressing the issue of chlorosis will help improve the health of your oak and improve its ability to deal with other stressors.
It’s worth mentioning that the issues discussed here can produce symptoms that an untrained eye may misinterpret as Oak Wilt. Oak Wilt is a serious systemic fungal disease that can, and typically does, lead to the decline and death of otherwise healthy oaks once infected. If you’re concerned about your oak tree, take a few photos of the leaves and send them to us. We may be able to determine what’s happening and put your mind at ease. If we’re not sure, we’ll schedule a visit to further inspect the tree. Even for trained arborists, Oak Wilt can only be 100% confirmed through diagnostic testing in a lab. If we suspect Oak Wilt, we will recommend this testing be done right away. Be careful with online searches as an attempt to “self-diagnose”. This often leads us down a very incorrect path when we do it regarding our own health concerns, and it’s typically no more accurate when we apply it to other living things. Ask the experts, it’s what we’re here for.

Walter Reins | Regional Manager, Russell Tree Experts
Walter has been an ISA Certified Arborist since 2003. He graduated from Montgomery College in Maryland with a degree in Landscape Horticulture, and has called Columbus, OH his home for nearly 20 years. Walter appreciates trees for their majesty and the critical role they play in our world.
Best Practices for Watering Your Trees
Last Fall I planted a Nikko maple (Acer maximowiczianum) for one of my neighbors. Somewhat uncommon, Nikko maple is a small statured, 20 - 30’ at maturity, trifoliate, hardy tree with nice fall color. It has good urban tolerance and was a good fit for its location with overhead utilities. I have been watering this tree somewhat regularly with a large watering can that I can easily carry across the street and have been pleased with the healthy appearance and good amount of new growth that has emerged this year. As far as I could tell the tree looked great so you can imagine my surprise when I came home recently from a long weekend getaway and discovered that the top half of the tree’s canopy had turned brown.

Please note: This article was originally published on 8/13/2020 and was republished on 8/1/2023.
Last Fall I planted a Nikko maple (Acer maximowiczianum) for one of my neighbors. Somewhat uncommon, Nikko maple is a small statured, 20 - 30’ at maturity, trifoliate, hardy tree with nice fall color. It has good urban tolerance and was a good fit for its location with overhead utilities. I have been watering this tree somewhat regularly with a large watering can that I can easily carry across the street and have been pleased with the healthy appearance and good amount of new growth that has emerged this year. As far as I could tell the tree looked great so you can imagine my surprise when I came home recently from a long weekend getaway and discovered that the top half of the tree’s canopy had turned brown.

I approached the tree expecting to see an insect infestation, disease presence, or mechanical damage from my neighbor getting to close with his string trimmer. I could find none of these things. Upon closer inspection I noticed that the soil around the base of the tree was cracked, hard and dry and that I simply had allowed the root system to dry out. I felt like such a greenhorn. I immediately watered the tree with a slow deep soaking and will continue to do so through the end of October.

© Russell Tree Experts
An arborist is not supposed to make this mistake but I share this story to show you how it can happen to anyone and to illustrate that there is a better way to water, and that watering is the single most important maintenance factor in the care of newly planted trees.
Many of the calls that come through our office are a result of improper tree watering, both directly and indirectly. Some are regarding trees that were planted and simply never watered, others are regarding trees that have experienced significant drought stress and now have been impacted by pest and/or disease problems targeting a vulnerable host.
Drought stress develops in trees when available soil water becomes limited. Newly planted trees are at the highest risk of drought stress because they do not have an extensive root system. As the soil dries it becomes harder and more compact reducing oxygen availability. When this happens young feeder roots can be killed outright further reducing the trees ability to absorb sufficient water even after it may return to the soil.
Why is water important to trees? Trees require water for two important functions: (1) Photosynthesis: the process by which plants synthesize food and (2) Transpiration: a process where water evaporates from the leaves and is drawn up from the roots helping to move nutrients up the tree.
No water in the soil means no nutrient transfer and no photosynthesis. This generally equates to tree death.
Knowing the best way to deliver water is the single most important maintenance factor in the care of newly planted trees so here are some basic guidelines and tips to follow to make sure you are getting the most out of your watering efforts:
When to water

Newly planted trees should be watered one to two times per week during the growing season. The best time to water is early in the morning or at night. This allows trees the opportunity to replenish their moisture during these hours when they are not as stressed by hot temperatures. Watering at night allows more effective use of water and less loss to evaporation. Side note: If watering at night, a system that directs water into the ground and away from the foliage is recommended. Some foliar fungal diseases like apple scab or needle cast can thrive on foliage that remains wet through the cool nighttime hours.
How to Water

The best way to water newly planted trees is slowly, deeply and for a long time so that roots have more time to absorb moisture from the soil. A deep soaking will encourage roots to grow deeper as opposed to frequent shallow watering which can lead to a shallow root system more vulnerable to drying out (like my Nikko maple).
I like to water trees slowly two different ways. Around my house I use a garden hose with the pressure turned low so that water is coming out at a slow trickle. I place the end of the hose on the root ball a few inches away from the main stem and leave it in place 30 - 60 minutes depending on the size of the tree. This should be done at least once a week during the growing season. Verify that water is coming out slowly and seeping into the soil rather than just running off into the lawn. For trees that are outside the range of my hose, I like to use 5-gallon buckets with two small holes poked in the bottom of one side. These can be filled up quickly with the hose but will drain slowly, ideal for a slow soaking. Two 5-gallon buckets once a week should suffice for most newly planted trees, depending on the size.
Where to water

It is important to understand that for the first growing season after planting, most newly planted tree's roots are still within the original root ball. This is where watering efforts should be focused. The root ball and the surrounding soil should be kept evenly moist to encourage healthy root growth. It can take two or more growing seasons for a tree to become established and for its roots to venture into the soil beyond the original root ball.
Trees under stress from disease or insect predation and trees in restricted root zones (trees surrounded by pavement) could take longer to establish.
Other important tips
Avoid fertilizing during drought conditions - synthetic fertilizers can cause root injury when soil moisture is low. Fertilizing in the summer could also cause additional new growth requiring additional moisture to support it.
A 1 - 2” layer of organic mulch over the root zone of the tree will help to conserve water.
The goal of watering is to keep roots moist but not wet. Excessively saturated conditions can also damage tree roots.
A “good rain” or even an irrigation system is not sufficient for most new tree plantings
During extended periods of drought all trees (including established ones) benefit from supplemental watering.
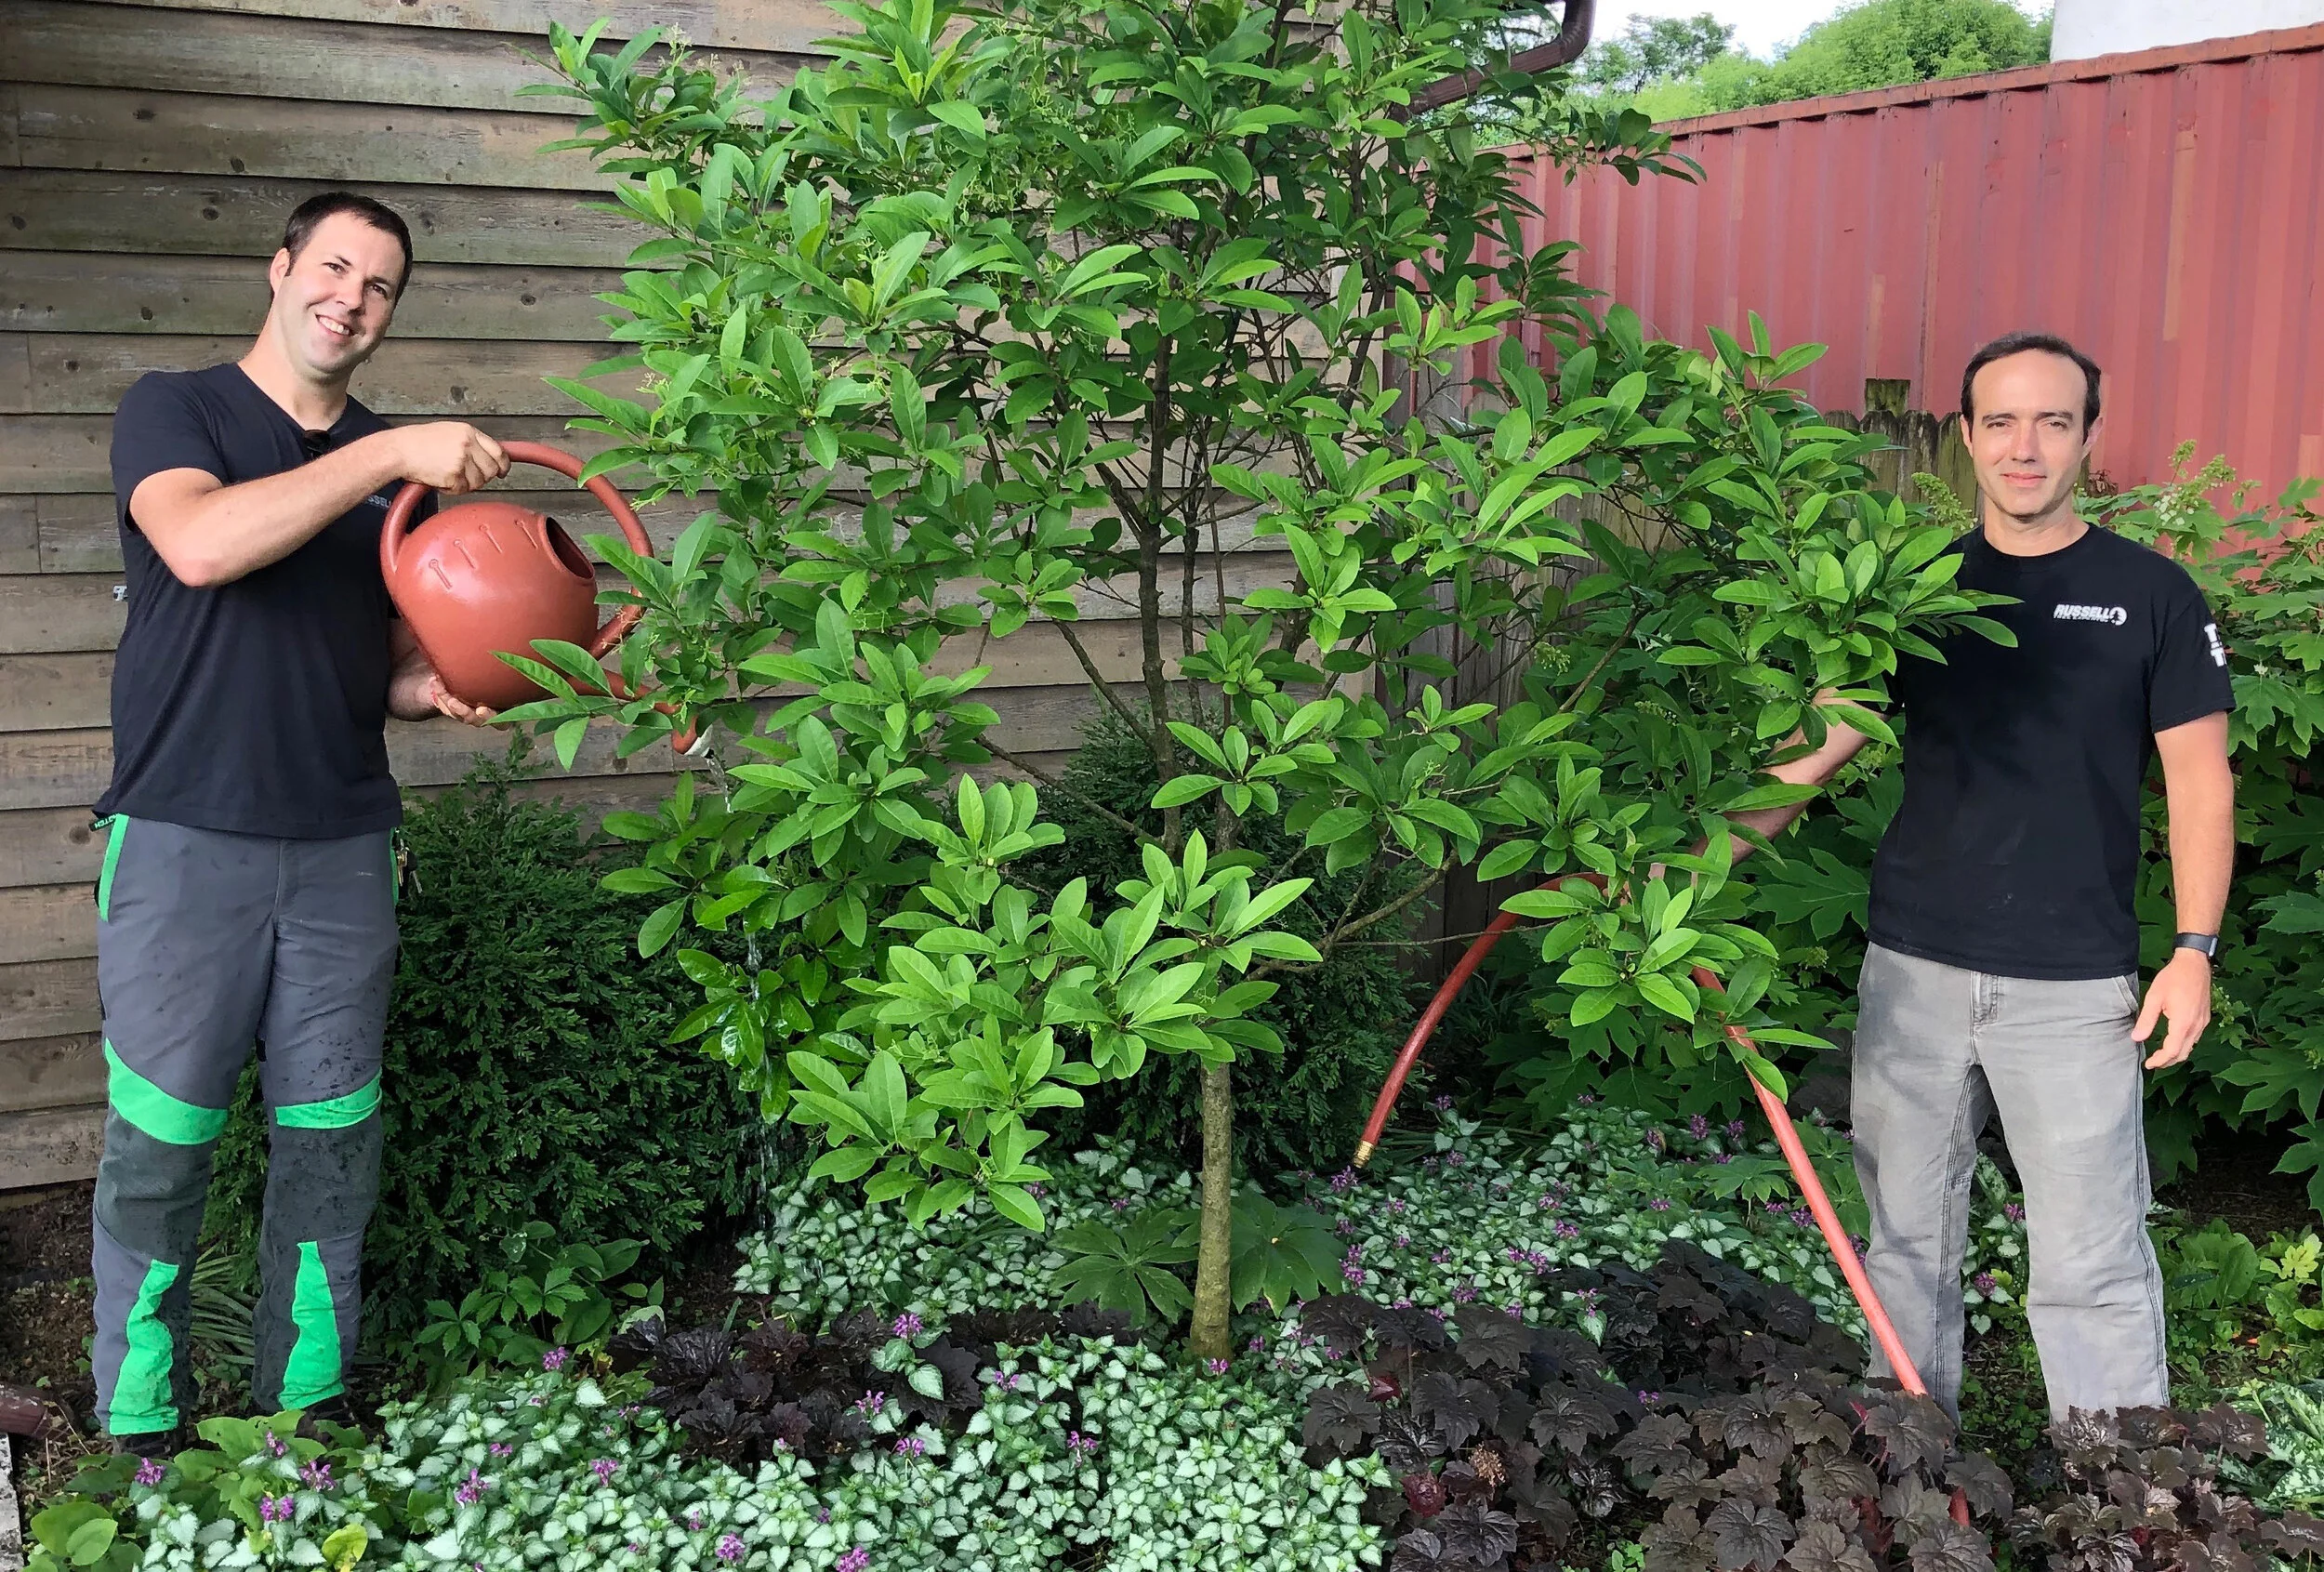
TJ Nagel & José Fernández posing for a photo for this article! Happy watering, everyone!
© Russell Tree Experts
Remember, proper watering is the single most important maintenance factor in the care of newly planted trees. I am intentionally redundant on this point because it cannot be overstated. Air temperatures, precipitation, tree health, tree size, soil texture, etc. can all influence a tree's need for water. This article is intended to be a basis for proper tree watering procedures and cannot address every tree watering scenario. Happy watering and may your rain barrels always be full.

TJ Nagel | Scheduling Production Manager, Russell Tree Experts
ISA Certified Arborist® OH-6298A // Graduated from The Ohio State University in 2012, Earned B.S. in Agriculture with a major in Landscape Horticulture and minor in Entomology // Tree Risk Assessment Qualified (TRAQ) // Russell Tree Experts Arborist Since 2010
Worms by the Bagful
Worms by the bagful. Bagworms, that is. This interesting insect is not really what we would usually call a worm, but is considered a caterpillar instead. While most caterpillars pupate into a flying adult (moth or butterfly), the female of this species never emerges from her mobile home. The male does, and he flies to the female so they can engage in activities that ensure the species does not die out.

© Russell Tree Experts
Bagworms, that is.
This interesting insect is not really what we would usually call a worm, but is considered a caterpillar instead. While most caterpillars pupate into a flying adult (moth or butterfly), the female of this species never emerges from her mobile home. The male does, and he flies to the female so they can engage in activities that ensure the species does not die out.

© Russell Tree Experts
After mating, both male and female eventually die, leaving many eggs within the female bag. These eggs hatch the following spring to cause more foliar damage as they feed on many kinds of plants, sometimes causing irreversible damage and death if left unchecked.
I focus on this pest for this article because I have been watching for its emergence this season wondering when it would finally show up. Early June is usually when we start seeing the new generation of this pest (630 growing degree days, according to the OSU OARDC calendar available here). Last season I recall bagworms emerging later than usual, and I was curious what would happen this year given the very unusual spring we have had. Yesterday I spotted my first bagworms in a client’s back yard – the smallest I have ever seen yet. The plant had been damaged in the past season by bagworm feeding, and the old adult bags were clearly visible. When I looked closely, I could just make out the very tiny, brand new bagworms moving about as they fed on the plant.
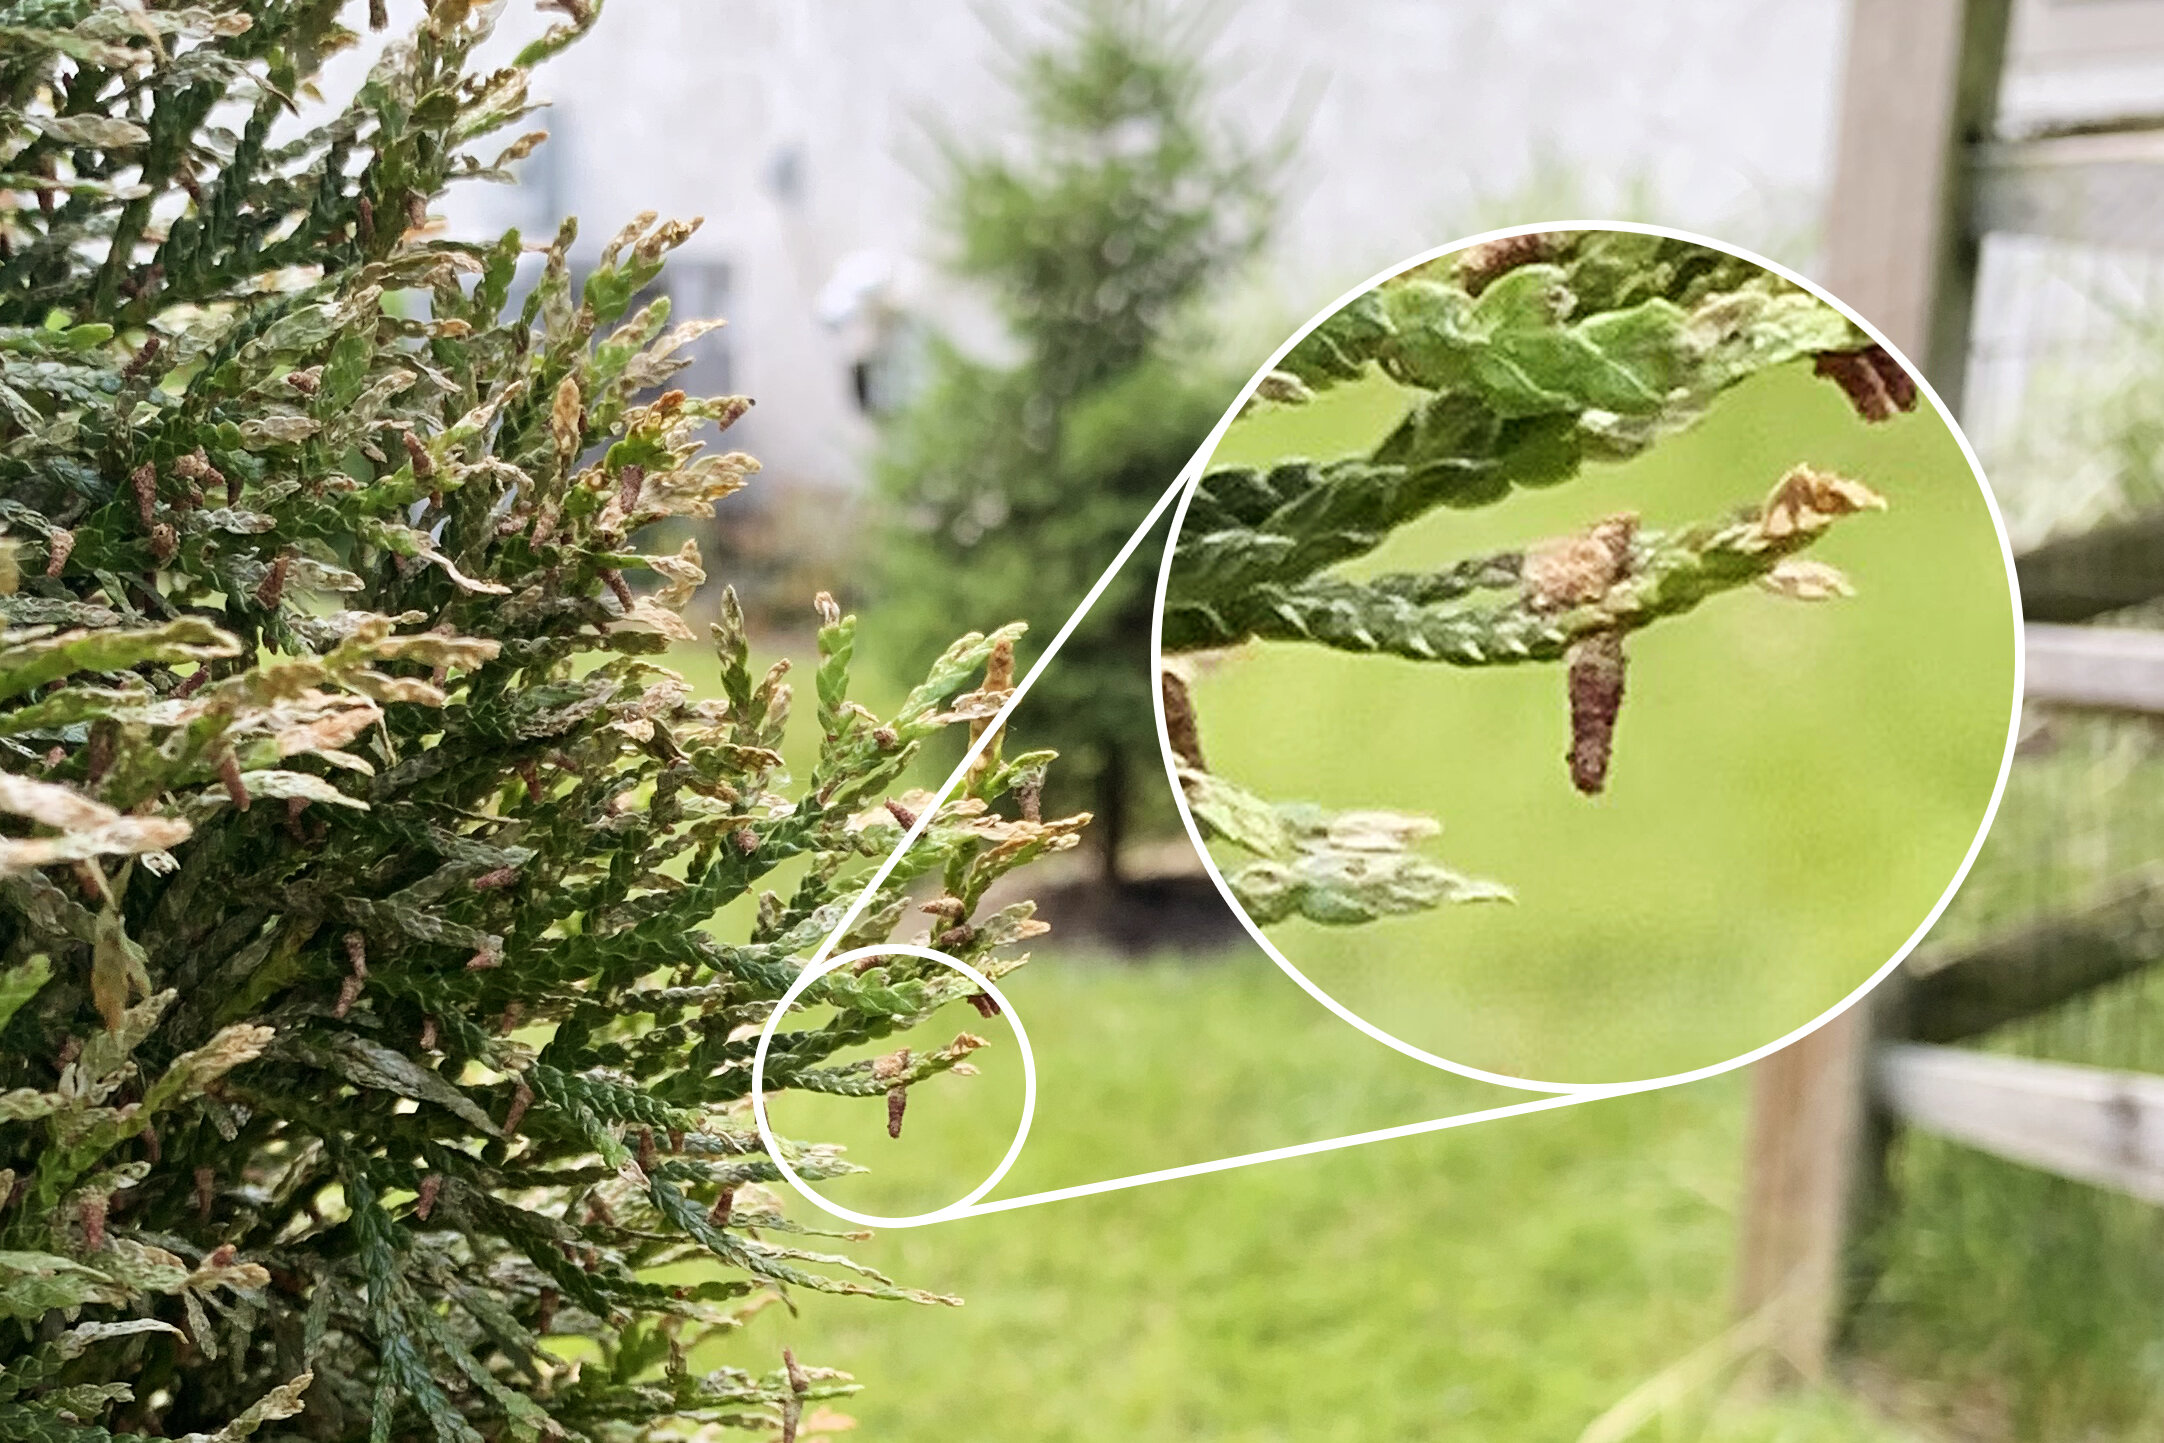
Very tiny, brand new bagworms
© Russell Tree Experts
They had also established on the neighboring, more healthy, plant.

© Russell Tree Experts
I checked the current growing degree days, and we are at 959 today for the area I was in. I can’t say when these baby bagworms were hatched, but it has not been long. I also do not know if there is a period between the hatching of the eggs and the emergence of the caterpillars from the old cocoon. As with everything in nature, there is always variation from season to season, and from place to place within the same season, so scouting is always the best way to determine when pests are present or not.

© Russell Tree Experts
Bagworms feed on a number of species, but evergreen species are the most at risk of permanent damage or death. If an evergreen is defoliated rapidly by large quantities of these mobile marauders, it will likely not have the ability to rapidly regenerate foliage to make up for that which was lost. I commonly drive past juniper, spruce, and arborvitae that have been sheared of green foliage by bagworms.
Thankfully, if caught early, this insect pest is relatively easy to control. Two treatments are sometimes recommended to make sure any late starters are caught during the second round. I routinely show clients what a bagworm looks like because they are very easy to miss within a plant. As they feed and grow they use foliage from the plant they are feeding on to build the bag that gives them their name. This means they look like part of the plant. Once identified though, they are easy to spot. If treatment is no longer an option (when the pest is settled for the winter or no longer actively feeding), removal of the bags by hand is a very good way to control this pest. This method works best on smaller plants since it is essential that every single bagworm is removed from the plant.
Thank you all for taking the time to read this article. If it is shorter and less philosophical than usual, it is because we are striving to keep up with the all the requests for service that keep coming in. I look forward to being able to take a slow breath later in the season and make some time for reflection. In the meantime, thank you very much for trusting us with your trees.
Your friendly neighborhood arborist,

José Fernández | Regional Manager, Russell Tree Experts
José became an ISA Certified Arborist® in 2004, and a Board-Certified Master Arborist® in 2015. Currently he is enrolled at The Ohio State University pursuing a Master’s Degree in Plant Health Management. José likes working around trees because he is still filled with wonder every time he walks in the woods. José has worked at Russell Tree Experts since 2012.
[Quick fact checks from https://bygl.osu.edu/node/1048 and https://www.mortonarb.org/trees-plants/tree-and-plant-advice/help-pests/bagworms.]