Tree Work

Firewood Cutting and Safety Tips!

By Mitch Lippencott
ISA Certified Arborist®
October 31, 2024

Fall is the time for football, leaf-peeping, pumpkin spice everything, and if you're like me, SO! MUCH! FIREWOOD! to process!!! In my twenty years of heating my home almost exclusively with firewood, I have learned a lot of tricks that inevitably came with learning from my mistakes. The following is a list of safety reminders and veteran advice for processing and burning wood in your own home. 

GETTING STARTED

When getting started, have a professional inspect and clean your chimney, stove, and/or fireplace annually. For heavier users like me, a second cleaning may be needed mid-winter. NEVER burn until recommended repairs are completed.

Keep fire extinguishers charged and easily accessible. Know how to operate one! Use appropriately aged hardwood species. For example, conifers should never be burned indoors. Never burn poison ivy or wood with vines you can't identify, even outdoors. Wood must be cut or split and sit long enough to allow moisture content to drop. This will typically take a minimum of 6 months. Wood with conks or mushrooms have sat too long.

Add an appropriately sized venting chimney cap to keep animals out (ask me how I know) and to protect against water damage. Water-loving tree species (ex: willow, cottonwood, and sycamore) are not dangerous to burn, but do not produce enough heat to warrant the effort.

CUTTING LOGS

Before cutting any logs, measure your stove’s opening to determine the size of your chainsaw cuts. Cuts that are too short wastes effort and time. You also don’t want to deal with the frustration of having an oversized piece of firewood that won’t fit through the door no matter how hard you try to force it or no matter how many times you rotate it. Ask me how I know… If you care about your back and chainsaw chain, you can cut your firewood on stacked logs or palettes for better work positioning. I strongly advise using a modern chainsaw with all safety features in place. Below is a video we’ve made on chainsaw maintenance and safety!

When using a chainsaw, I recommend staying safe and wearing personal protective equipment (PPE) such as ankle-high boots, chainsaw pants or chaps, hearing protection, and eye protection. If you want to complete the arborist look, you can also wear a helmet and hi-vis t-shirt too!  Cut out and discard any imperfections in the wood such as knots, bends, or flaws. These will be hard to split and may not be worth your time and energy.

SPLITTING LOGS (BY HAND) 

Splitting logs can be physically strenuous labor complete with bends, lifts, and cardiovascular stress. Be honest about your fitness and pace yourself! On the flip side, pre-cut and pre-split wood can be purchased relatively easily. It's far cheaper than a heart attack! When splitting logs, always wear ear and eye protection. Split logs on a large, flat stump or trunk section in an open space. Use a splitting maul, not an axe, and various metal splitting wedges. Again, make life easy and don't worry about waste - if a log is difficult to split, set it aside, and knock out easier pieces.

One important detail to consider about firewood once you have your split logs is to not move it! Firewood can contain insects and disease that could spread and harm another tree population. One harmful example is how emerald ash borer was first detected in the US around 2002 and wiped out, with no exaggeration, millions of ash trees across North America. The general accepted theory as to how emerald ash borer ended up in the US was through wood in a shipping crate that arrived from China. All of this to say, the exact distance varies based on county, state, and country, but the general recommendation is to burn wood within 10 miles of where it was purchased or from where the wood was split. For more information, DontMoveFirewood.org is a good resource! (not sponsored, just want to spread the message!)


STACKING

Stacking can surprisingly be another physically strenuous task, especially if you rush or try to stack too many logs at a time. Please pace yourself accordingly! When choosing a location, select a space elevated from the bare ground that can also be protected from rain and other weather. Leave a gap large enough to walk through between your woodpile and structures to make logs more accessible. More importantly, this will provide a buffer zone for insects, rodents, and wood decaying organisms between the stack and your house, shed, etc.

When stacking, place the flat side down. Round sides can roll, making the entire stack unstable. Build up corners and outside edges first - gaps in the middle can be filled as needed with less precision. Orient wedge-shaped logs inwards. Shifts or slides will fall harmlessly to the center instead of the whole stack toppling over.


BURNING

Before burning, have an evacuation plan ready that includes calling 9-1-1 in the event of an emergency. When it comes time to burn your firewood,  build up heat little by little. You can first ignite paper and work your way up to cardboard, then kindling, and eventually small logs. Cardboard doesn't burn hot enough to ignite full-sized logs. Burn as hot as possible to avoid buildup in the chimney. Remove ashes to a metal container daily. Wood ashes can increase a soil’s pH, so I would not recommend adding them to a mulch or compost bed unless you know that the pH level is below its optimal range for the trees or plants. Regularly inspect the interior and exterior of the room containing the chimney/stove.

Whether you're a veteran or a newbie, cutting and burning firewood is a physically demanding process with life and property threatening consequences. While the process should be respected with the proper safety procedures, it does not need to be intimidating. For those curious, Russell Tree Experts does not produce or sell firewood, but we do offer local, log delivery for you to process yourself! Safe and happy splitting my friends, those blisters will callus soon enough!


ADDITIONAL ARBOR ED ARTICLES

Sincerely,

Mitch Lippencott I Regional Manager, Russell Tree Experts

Mitchell Lippencott joined Russell Tree Experts in 2020 and has been in the green industry for over 20+ years with a diverse background ranging from working for a landscape design company, a retail garden center, and two municipalities! Mitch is an alum from The Ohio State University, a licensed pesticide applicator, a qualified tree risk assessor, and an ISA certified arborist. Outside of work, he enjoys traveling, cooking, and gardening.

When Do I Call an Arborist?

By Mike McKee
ISA Certified Arborist®
October 3, 2024​

Russell Tree Experts has 20+ ISA Certified Arborists® and 3 ISA Board Certified Master Arborists®!

First of all, what is an arborist? An arborist is a professional that has studied and practices the proper care of urban trees and shrubs. They use a combination of science and skills learned both in the classroom and in the field to perform their daily tasks. Arborists have learned to identify many trees and shrubs along with their preferred growing sites and conditions. They are trained to identify and treat many pests and diseases as well. An arborist can take their commitment to the next level by earning the International Society of Arboriculture (ISA) Certified Arborist® credential, accredited by the ANSI National Accreditation Board (ANAB) for meeting ISA’s standards of training and knowledge in arboriculture.

With this being said, why call an arborist? Unfortunately, many of our calls come when it’s too late for the tree after it has already succumbed to some type of insect, disease, construction damage, and more. Some trees were also planted in the wrong place to begin with, or simply not planted correctly. The following are some examples of the best instances to call an arborist.

A mature tree being protected with fencing for an upcoming home renovation project.

The best time to call an arborist is before starting your project. Whether you are clearing a lot to build a new house, planting a new landscape around your house, or simply planting a tree anywhere, it is always beneficial to have a plan. One such plan may include how to save trees from damage that you want to maintain on your new lot. This requires a lot of planning before, during, and after this process. Planting the wrong tree in the wrong spot is often a problem we deal with in many situations. Many people don't account for the mature size of that river birch they planted just off the corner of the house. Structural pruning at an early age can help trees adapt to the site, even if they were planted in the wrong place. They may not realize that the red maple they planted does not like central Ohio soils. Many trees we deal with are not suited for our soils and require additional plant healthcare just to maintain their health. This can be avoided with proper planning and choices. The list goes on and on. Sometimes just a simple discussion or email can avoid a lot of issues down the road.

Sometimes a visit to a client’s property can be discouraging when arriving on site and seeing the results of preventable construction damage or improper planning that could have been avoided with a properly timed consultation. I once had a contractor tell me that he had never killed a tree. That contractor had apparently never visited a site he worked at 4 to 5 years later to see the results from the construction and damage. Some construction damage can be apparent within the first year, but oftentimes it may take 4 to 5 years before the total impact is realized.

A tree with chlorotic leaves, indicating a potential pH problem or nutrient deficiency that could slowly lead to the decline and death of the tree if left untreated.

When I arrive on a property with trees planted too closely together, planted in the wrong site conditions, and/or planted incorrectly, these inadequate conditions sadden me for the health of the trees. As an arborist, we are trained to see the future impact of plant selections, as well as how they will fit into their site at maturity. Trees planted too close together can often result in stunted growth due to resource competition such as water, sunlight, and space. Unideal site conditions for a tree can lead to numerous, future problems such as leaf scorch and chlorosis just to name a few. An improperly planted tree can result in stem-girdling roots and root rot. A simple consultation in the beginning can avoid a lot of issues down the road. 

My third, most challenging visit is to a recently purchased property. One of the best times to consult with an arborist is prior to purchasing an existing property with mature trees. We often find major problems that could be taken care of before the purchase by the seller or used in the negotiation of the purchase price. Most home inspectors are not trained to identify tree issues. A simple consultation could save you a lot of money on your new home purchase. A recent example is with our Media Production Coordinator (Enrique) who had a pre-purchase inspection by one of our Regional Managers (Mitch) who caught lecanium scale on a crabapple tree and boxwood leafminer on numerous boxwood shrubs that were missed by the home inspector. He was able to bring this to the attention of the previous homeowner who offered to take care of the plant healthcare services prior to closing. In the end, he saved a few hundred dollars by attaining a pre-purchase inspection instead of paying for plant healthcare services.

ISA Certified Arborist® Mike McKee and ISA Board Certified Master Arborist® TJ Nagel planting a ginkgo tree!

Another trend that I have noticed lately is insurance companies telling homeowners that they must eliminate all overhang of their structure or their insurance policy will be dropped. Some insurance agents are using Google Earth images to make many of these decisions and not visiting the property in-person to more accurately assess the tree’s risk. This practice could lead to pruning practices that could severely degrade the health of your trees. A property owner that is proactively caring for their trees should not be subjected to this practice. If this trend continues, it will be our job as arborists to help convince insurance companies not to require this practice, especially when it is not appropriate. If you receive such a request from your insurance company, this would be another opportune time to call an arborist.

In closing, the goal of this article is to help people to understand the best time to call an ISA Certified Arborist®. The scenarios mentioned in the article are from recent visits to our client’s properties and are a recurring problem. As an arborist, we are disappointed when we have to tell people to remove a tree that could have been preserved if the proper steps had been taken at the beginning of a project. Tree removal is a part of our business, but preserving trees for future generations is our passion! I hope this helps. Below are other beneficial Arbor Ed article related to tree planting and tree preservation. To request a free tree quote by one of our 20+ ISA Certified Arborists®, request a quote at RussellTreeExperts.com/Quote or call us at (614) 895-7000!

ADDITIONAL ARBOR ED ARTICLES!

Sincerely,

Mike McKee | Regional Manager, Russell Tree Experts

Mike graduated from Hocking College in 1983 with a degree in Natural Resources specializing in urban tree care. He has been a certified arborist since 1991. Mike started his career in the private industry in 1985 before becoming a municipal arborist in 1989. He retired after serving thirty years before joining us at Russell Tree Experts in Sept. of 2018. His love of trees has never waned since trying to climb up the ridges of the massive Cottonwood tree in front of his childhood home.

Day in the Life of a Tree Wellness Technician!

By Alex Miller
ISA Certified Arborist®
September 26, 2024​

Green spaces are known to have an endless list of positive effects on mental and physical health, including but not limited to reducing stress, reducing blood pressure, strengthening memory retention, increasing productivity, increasing concentration, increasing creativity, and lowering the symptoms of dementia. This makes being a plant healthcare technician a rewarding profession centered around the essential task of maintaining and enhancing the health of trees and shrubs in the urban landscape! However, it is not without its challenges. Each day is a blend of technical skills, environmental awareness, and client interaction which makes everyday both unique and fulfilling.

One of our plant healthcare trucks!

My day typically begins early, often before sunrise, as I prepare for a day of diverse tasks. The morning routine involves reviewing the day’s schedule, which might include site visits to commercial properties, residential gardens, or public parks. Each location has its own set of plant health issues, so preparation is key. I check for any special instructions or updates related to the plants I will be treating, ensuring that all necessary equipment and supplies are loaded into the truck. Often, I am aware of the issues I am treating, but not always. If I can, upon arriving at the site I try to meet with the client, if for nothing else, to let them know who’s walking around their property. Then my role will shift into diagnostic mode or straight into treatment. If I am doing an inspection, this involves carefully inspecting plants for signs of distress, looking for telltale signs of pests, diseases, or nutrient deficiencies. Detailed observations are crucial. For example, yellowing leaves might indicate a nutrient imbalance, while holes in leaves could suggest an insect infestation. I take lots of notes on these observations and sometimes collect samples for further analysis.

Treating a crabapple tree for apple scab via fungicide spray!

A significant part of my day involves applying treatments. This could mean spraying pesticides, administering fertilizers, or implementing soil amendments. Each treatment requires precision to ensure that it targets the problem effectively while minimizing impact on the surrounding environment. I follow a lot of safety protocols, wearing protective gear and adhering to regulations regarding chemical use. Often, I will simply report my findings and allow the regional manager who is more familiar with the property to engage in consultations with clients. This involves explaining findings, recommending best practices for plant care, and discussing potential improvements to enhance plant health in the future. As my workday progresses, I am constantly logging data; documenting treatments I’ve applied, the observations I’ve made, and the outcomes I’ve observed. This helps track the progress of each plant and plan future interventions.

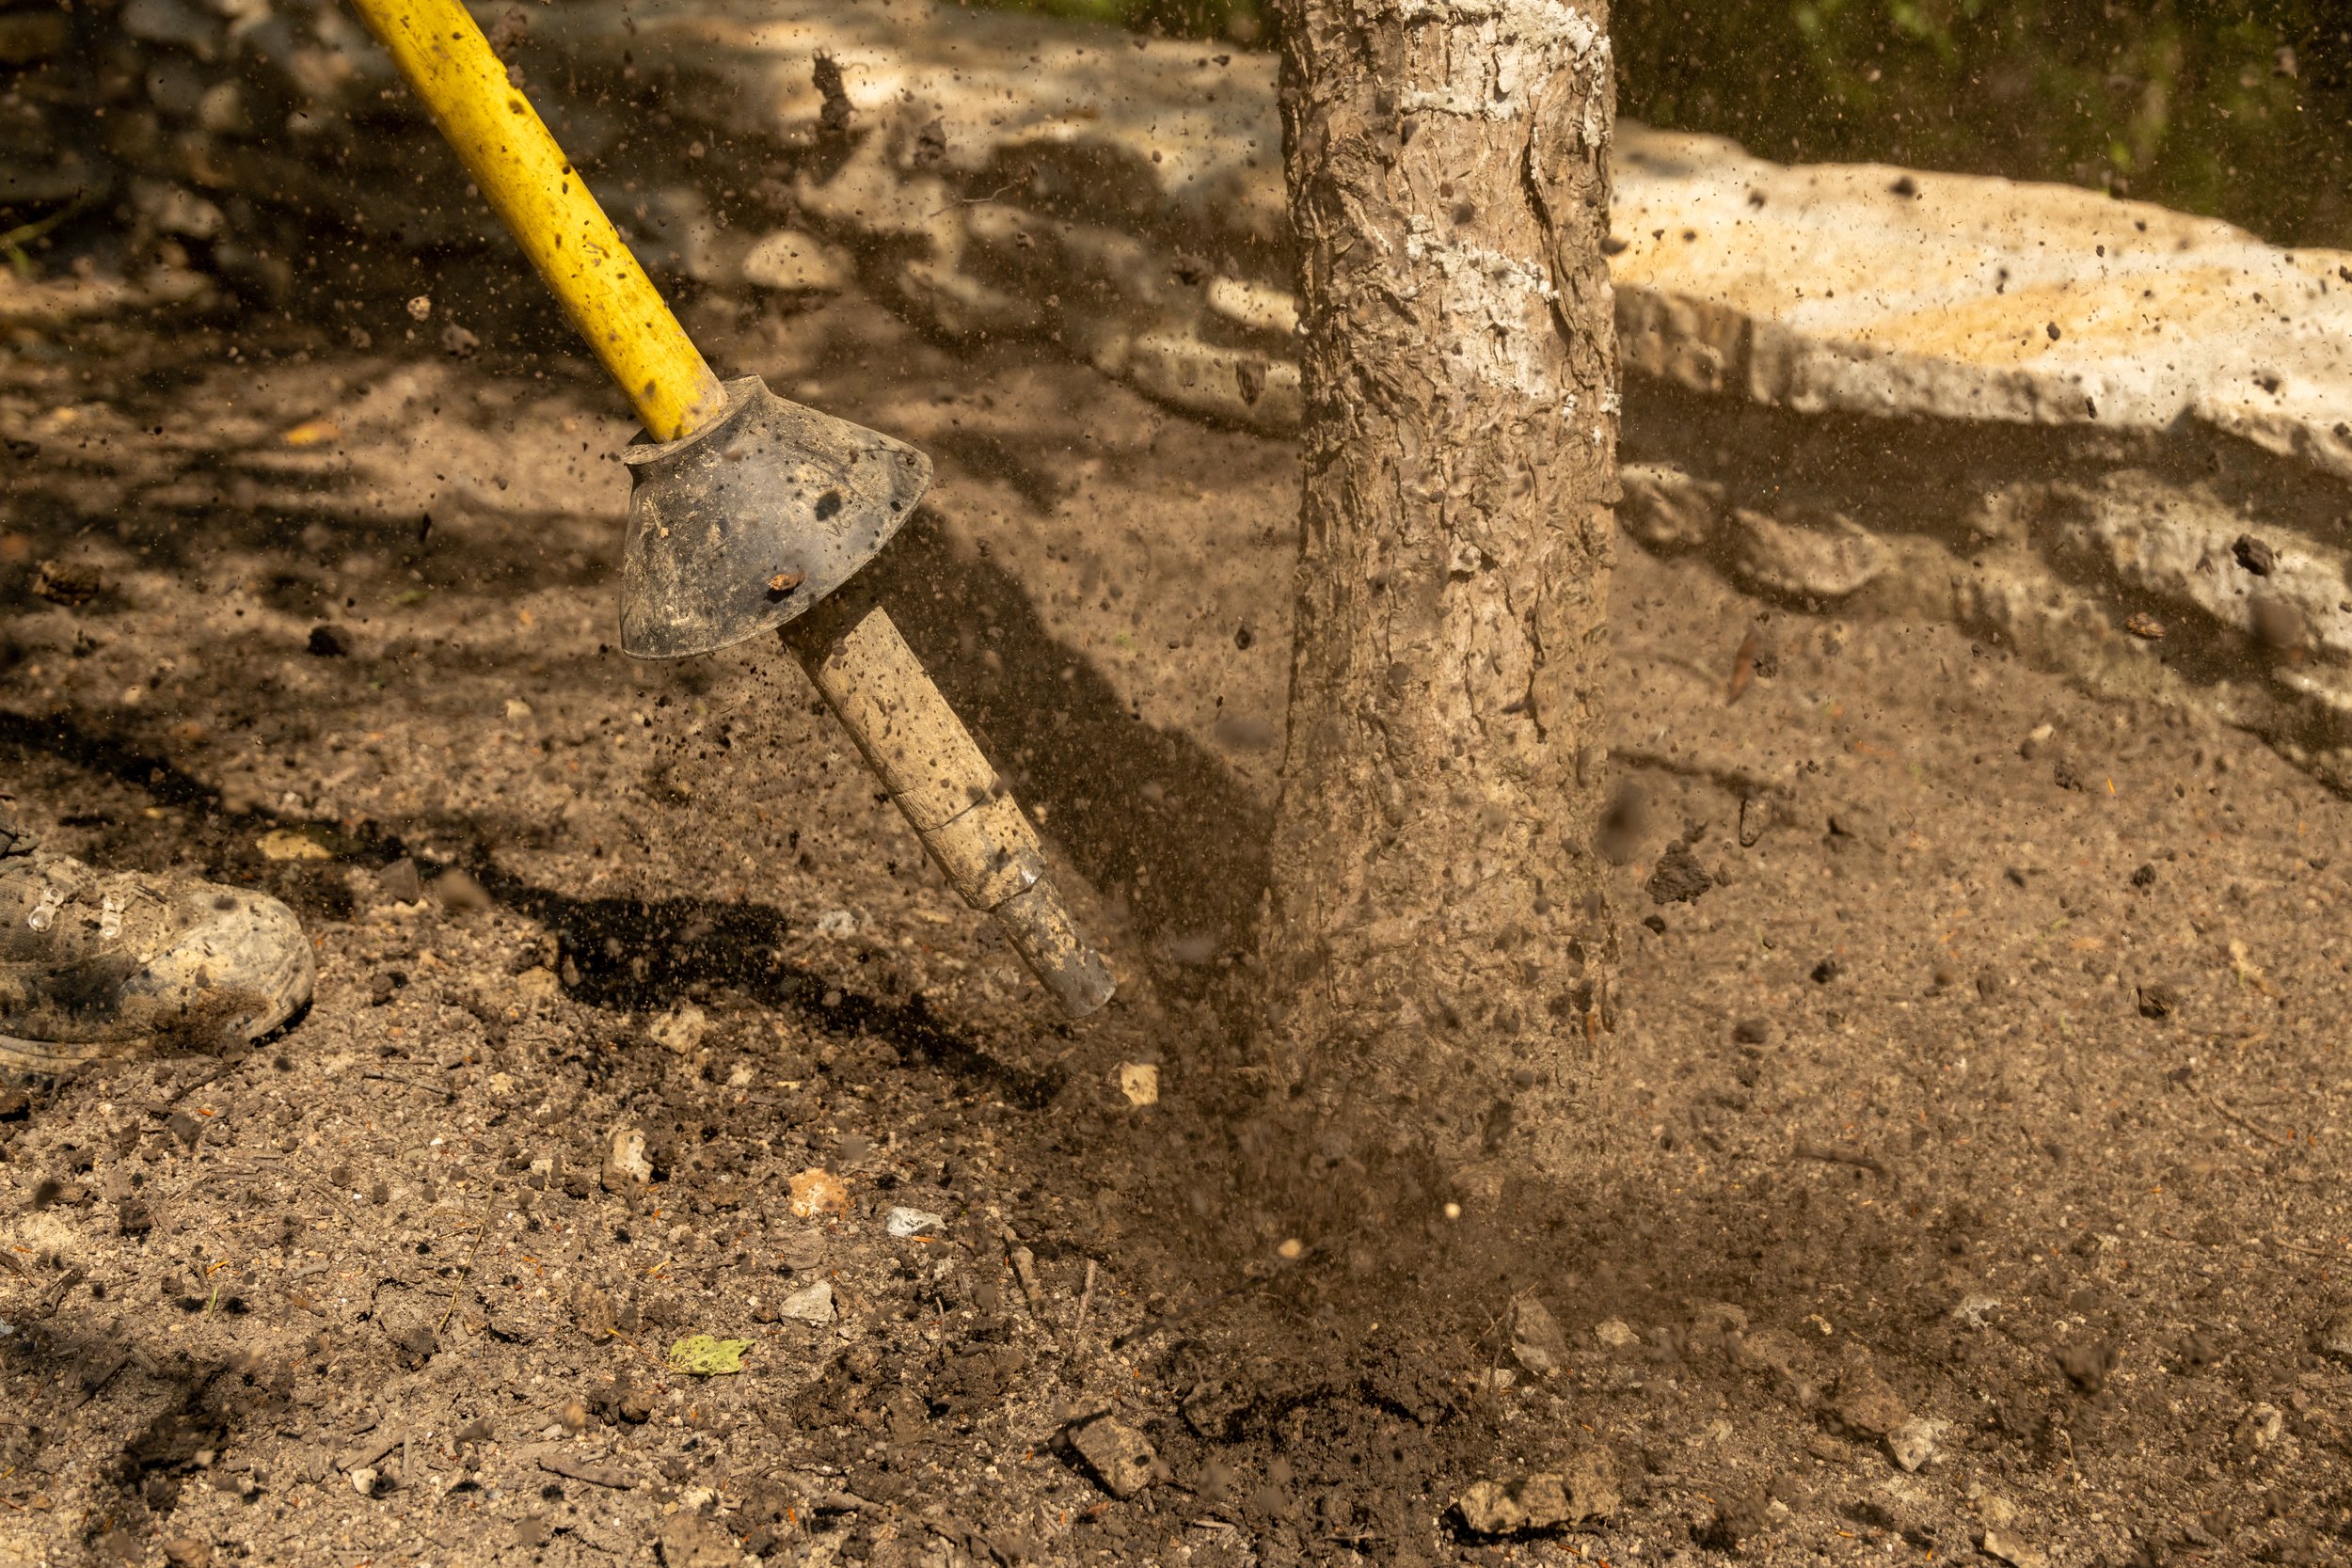
Root zone invigoration using an air excavation device!

An often-overlooked aspect of working in various outdoor settings is dealing with the occasional mess left behind by others. For instance, it is quite a relief when I encounter a site where pet waste, such as dog poop, has already been picked up. It not only improves my working conditions, but also ensures that I can focus on plant health without any distractions. This small but significant detail can make a substantial difference in my day’s workflow as dragging a hose through a backyard without hitting any landmines can sometimes be a challenging task. It is a simple pleasure that certainly enhances the overall experience of the job. In addition, it is incredibly helpful when clients are able to prepare for my arrival by moving bird feeders, yard art, or furniture out of the work zone. This thoughtful preparation allows me to focus on the task at hand and leads to a smoother and more efficient workflow.

Vertical mulching a tree suffering from soil compaction!

My day typically ends with a review of the completed tasks and preparation for the following day. I may plan out my next set of site visits and ensure all necessary tools and supplies are working and ready. There’s also a period of reflection on the day’s work, assessing what went well, and what could be improved. However, not every day is perfect, and there are challenges such as inclement weather or unexpected complications with plant health issues that may lead to delays. This can of course be frustrating for clients because some interventions may have a very narrow window of effectivity and may have to take priority of certain tasks that have a much wider range of time to be effective. Communication here is the key to ensuring tasks are getting done in their appropriate time frame and clients are satisfied with the work they are receiving. One of the more gratifying aspects of my job is the opportunity to visit sites year-to-year, or sometimes even a few times a year, and witness the positive outcomes of my interventions. There is something deeply rewarding about seeing a plant bounce back from the brink of disease or pest damage and seeing it full of life and vigor; especially after you have put in the effort to nurse it back to health.

In summary, a day in the life of a plant healthcare technician is a dynamic blend of technical expertise, hands-on problem solving, and client interaction. It involves diagnosing and treating plant health issues, applying treatments, and offering valuable advice. Amidst the challenges, small comforts, like avoiding the unpleasantness of dog poop, enhance the work experience, making the role both manageable and uplifting by ensuring that plants thrive and contribute positively to humans and to their environments. If tree preservation services are of interest for your property, Russell Tree Experts provides free tree work quotes from one of our 20+ ISA Certified Arborists® at RussellTreeExperts.com/Quote or (614) 895-7000!

CHECK OUT THESE VIDEOS!

Sincerely,

Alex Miller I Crew Leader, Russell Tree Experts

Alex joined Russell Tree Experts in 2021 and has been in the green industry since 2020. He is an ISA Certified Arborist®, EHAT certified, CPR and first aid certified, OSHA 10 certified, and holds an ODA commercial pesticide license. Alex’s favorite tree is a magnolia tree! When not at RTE, he enjoys rock climbing and his favorite movie series: The Lord of the Rings!

How to Prepare Your Trees for Severe Storms

By Chris Gill
ISA Certified Arborist®
September 19, 2024​

The word “storm” can take on many different meanings: Thunderstorms, blizzards, ice storms, tornadoes, hurricanes, or one of our crew leaders Storm Wellman! Jokes aside, all types of storm events can wreak havoc on properties, causing significant damage to homes, landscapes, and personal property. Preventing storm damage is crucial for safeguarding your property and minimizing costly repairs. By taking proactive steps you can reduce the impact of severe weather. Regular maintenance and preparation are key to ensuring that your property remains protected when storms occur. In this article, we will explore practical tips to help protect your property against the destructive forces of nature.

WHAT IS "STORM DAMAGE"?

General Crew Leader Harry Carter removing a tree off of a house that failed during a thunderstorm.

Storm damage occurs when a tree or limbs from a tree fall and damage valued property. This can range from a tree limb falling on your gutter to a large tree falling onto your home. Storm damage results in millions of dollars in property loss every year. 


IS IT POSSIBLE TO PREVENT STORM DAMAGE?

While it is not always possible to eliminate storm damage, steps can be taken to reduce its impact. However, extreme storms may still cause damage despite preventive efforts. See below for useful tips to help you identify at-risk trees and limbs as well commonly employed interventions to mitigate these risks for the future. 


HOW TO IDENTIFY STORM DAMAGE RISKS 

The key to reducing potential storm damage is identifying the hazards. The following are a few simple ways to try and identify potential hazards.

1.    Look for hazardous dead limbs close to your house or other valued property

Dead limbs near a house.

2.    Try to identify declining trees on your property by looking for the following:

    • A large number of dead limbs in the canopy of the tree

    • The existence of conks or mushrooms which are the fruiting bodies of decay on the trunk of the tree

    • In general, a tree that appears unhealthy (missing leaves, loose bark, etc.)

An example of co-dominant stems with multiple brace rods installed.

3.    Locate high risk co-dominant stems

    • These are tight “V” type unions 

    • May appear as multiple stems originating from one point in the trunk.

HOW TO MITIGATE HAZARDS

Mitigating the hazards within your trees can be done in many ways. At Russell Tree Experts, we can identify general and more noticeable hazards on your property during a tree inspection such as our free anytime quote or optional firm time quote by one of our 20+ ISA Certified Arborists®. Another option to consider is a tree risk assessment containing a thoroughly written report on a suspected hazardous tree. In this scenario, an ISA Certified Arborist® with a TRAQ (Tree Risk Assessment Qualification) will employ various tools and tests from head-to-toe of your tree to assess the overall risk rating of your tree. Once hazards are identified either though a property inspection or tree risk assessment, a full mitigation plan can be put together. This plan may include, but is not limited to, tree pruningtree removal, brace rod installation, cabling, and lightning protection to make your property safer and more resilient to storms. 

IN SUMMARY

Don’t be scared - be prepared. A well-maintained tree with regular pruning and care will be stronger and more storm-resistant. Proactively identifying hazards and putting together a mitigation plan can help save money as well as reduce headaches when storm events occur.

CHECK OUT THESE VIDEOS!

Additional Arbor Ed Articles!

Chris Gill I Regional Manager, Russell Tree Experts

Chris joined Russell Tree Experts in 2015 and has been in the green industry for over 15 years. When not at RTE, he enjoys spending time with wife & son, wakeboarding, and hunting. His favorite trees are the white oak & sugar maple for their beauty and uses beyond the landscape. Chris is an ISA certified arborist, EHAT certified, CPR and first aid certified, holds an ODA commercial pesticide license, and holds a tree risk assessment qualification (TRAQ).

Fall Webworm: An In-Depth Exploration

By Mike Wilson
ISA Certified Arborist®
September 12, 2024​

As a regional manager, I have been hearing many concerns from homeowners about fall webworm over the last few weeks and have seen even more in landscapes throughout central Ohio. Fall webworm (Hyphantria cunea) is a species of moth known for its distinctive and conspicuous webs, which are commonly found on a wide variety of trees across North America. While not considered a major threat, fall webworm can cause significant defoliation in late summer and early fall, leading to reduced vigor and unsightly trees.


Life Cycle of the Fall Webworm

The life cycle of fall webworm is a fascinating process that begins with the emergence of adult moths in late spring or early summer. The adult moths, characterized by their white wings often dotted with black spots, are nocturnal and are seldom seen during the day. After mating, the female moth lays her eggs on the underside of leaves. These eggs are small, white, and laid in clusters, often numbering several hundred.

Within a week or two, the eggs hatch into larvae, which are the most destructive stage of the fall webworm life cycle. The caterpillars are initially light green or yellow with two rows of black spots along their bodies. As they mature, they develop long, silky hairs. The larvae immediately begin to feed on the leaves of the host tree, creating a communal web that serves as both a shelter and a feeding ground. As the larvae grow, the web expands to cover more of the tree's branches. This feeding occurs from late spring to mid-summer. By late August, they typically stop feeding.

The larvae go through several instars (or developmental stages) over the course of four to six weeks. Once they reach maturity, they leave the webbing to pupate in the soil or under loose bark, where they remain until the following spring.


Habitat and Distribution

Young fall webworm insects are highly adaptable caterpillars that feed on a wide variety of plants, including more than 100 species of deciduous trees. Some of their preferred hosts include hickory, walnut, cherry, and persimmon trees.

The webs of the fall webworm are commonly found in late summer and early fall, which is how the species earned its name. These webs can cover entire branches and, in severe infestations, can even envelop small trees entirely.


Ecological Impact

While fall webworm is a pest and nuisance, its overall impact on the urban forest is generally minimal. Most healthy trees can withstand the defoliation caused by these caterpillars, and the damage is typically more cosmetic than lethal. The webs themselves, though unsightly, do not cause direct harm to the tree. The unsightly webs can diminish the aesthetic value of ornamental trees, leading to concerns among tree managers.


Management and Control

Controlling populations of fall webworm can be challenging due to the species' high reproductive rate and wide host range. However, several management strategies can help reduce their impact.

  1. Mechanical Control: One of the simplest methods is physically removing the webs from affected trees. This can be done by pruning infested branches or tearing open the webs to expose the caterpillars to predators.

  2. Biological Control: Natural predators and parasitoids can help keep fall webworm populations in check. Birds, spiders, and wasps are all natural enemies of fall webworm. In some cases, introducing or encouraging these predators can be an effective control measure.

  3. Chemical Control: In severe infestations, insecticides may be used to reduce fall webworm populations. We generally only recommend this if the infestation is extreme or if the tree is of high aesthetic value.

  4. Cultural Control: Maintaining healthy trees through proper watering, fertilization, and pruning can help them better withstand defoliation. Additionally, removing fallen leaves and other debris from around the base of trees can reduce overwintering sites for pupae.


Conclusion

In conclusion, although the presence of fall webworm can be unsightly and concerning, they are generally not a serious threat to the overall health of trees. We generally do not recommend treatment of this pest unless populations are excessive, or if a young tree is infested to the point where serious defoliation is a concern. Should chemical or physical treatment be warranted, one of our 20+ ISA Certified Arborists® can provide a free tree quote and determine the best care for your trees at RussellTreeExperts.com/Quote or at (614) 895-7000!


CHECK OUT THESE ARBOR ED ARTICLES!

Sincerely,

Mike Wilson I Regional Manager, Russell Tree Experts
Mike joined RTE in 2013 and has been in the green industry for over 14 years! He is an ISA Certified Arborist® and a graduate of Oregon State University. Mike is an outdoor enthusiast and a US Army Medic Veteran!

How to Mulch a Tree Ring with CRISP Edges!

By Enrique Arayata
August 8, 2024

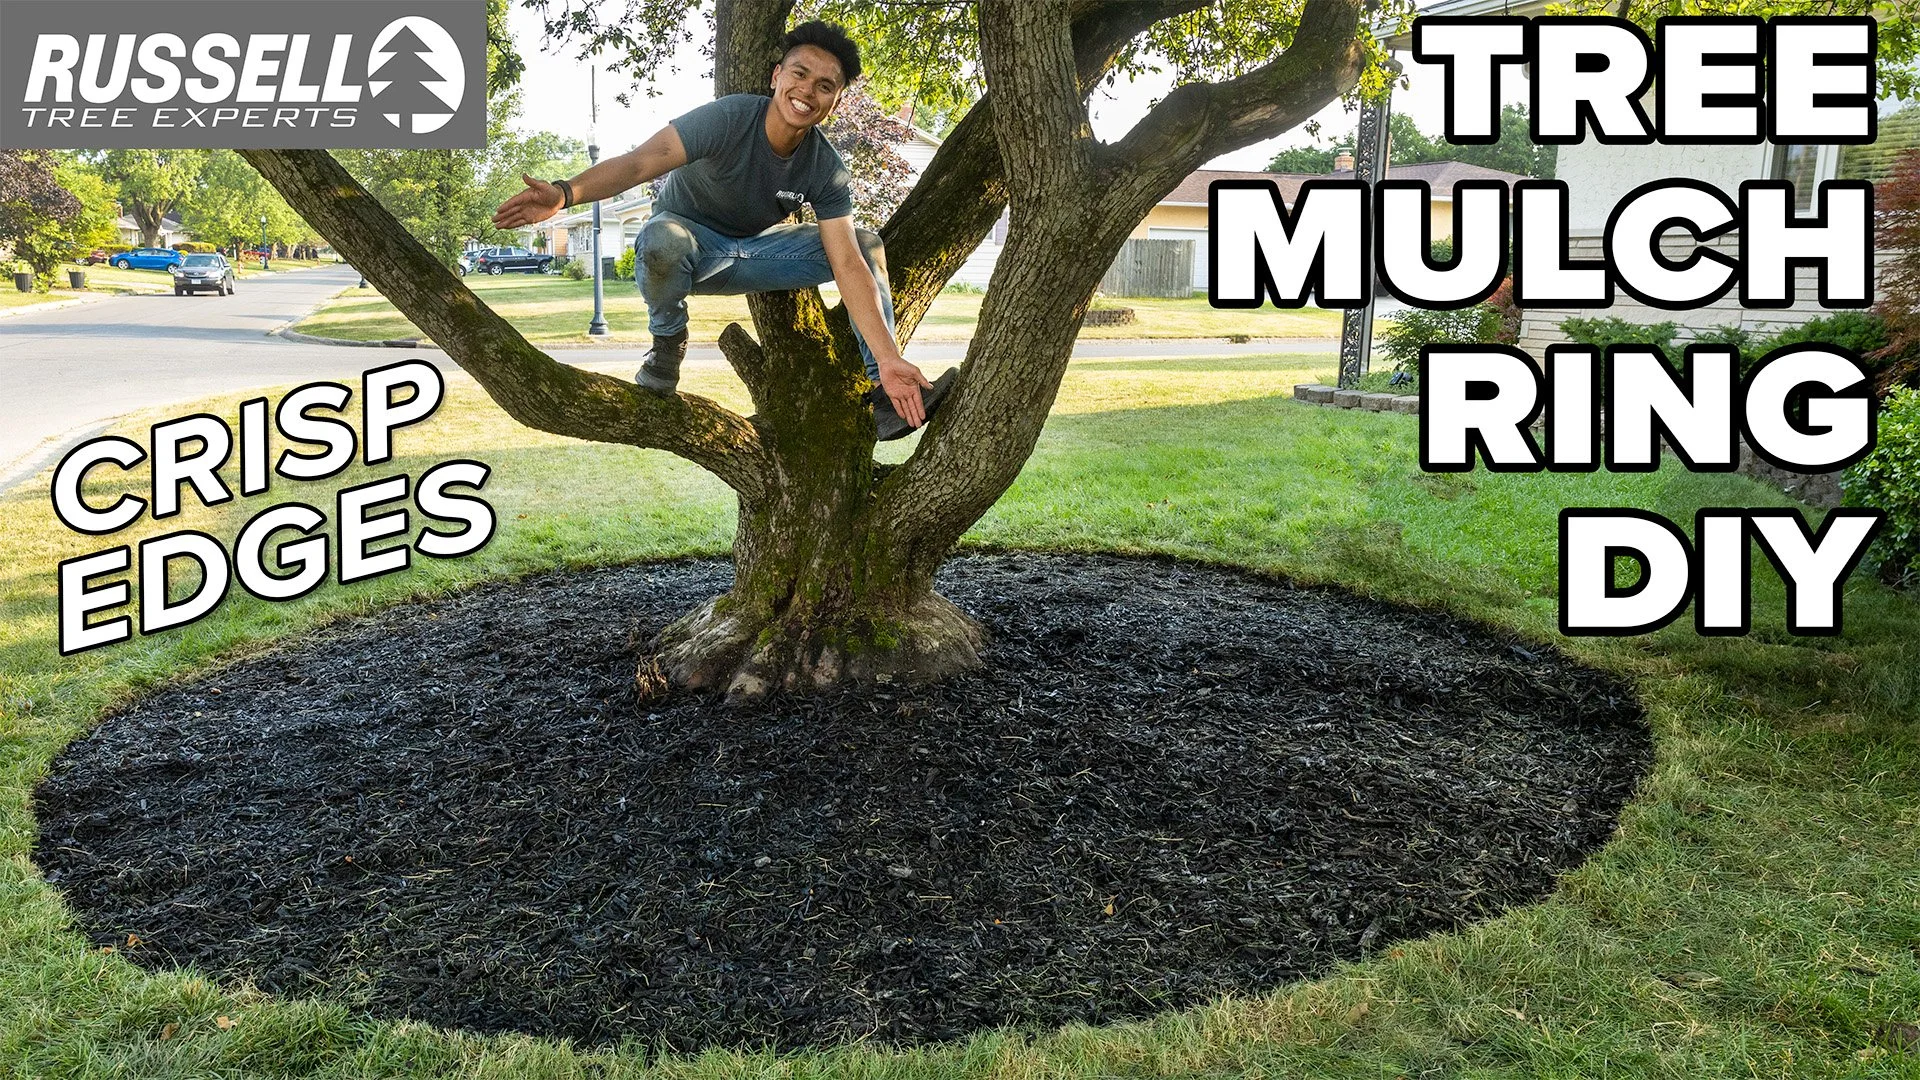
In this article (and video below), we will be going over how to make a tree mulch ring with crisp edges! First, what is a tree mulch ring? In general, it is a circular area of organic mulch around the trunk of your tree. Sometimes the perimeter will be outlined with stone or plastic landscape edging. The benefits of creating a tree mulch ring is that if done properly, it will aid in maintaining the health of your tree and promote increased growth and vigor. We will also be going over common mistakes to be cautious of.

VIDEOS: HOW TO CREATE A TREE MULCH RING

Full-length video

Shortened video

Benefits of a Tree Mulch Ring

More Nutrients: Organic mulch contains a lot of essential nutrients like nitrogen, phosphorus, and potassium that will slowly break down and decompose for the tree to absorb. Examples of organic mulch are mulches made from wood chips, compost, or leaves. Examples of inorganic mulches that would not provide the benefit of increased nutrients are anything made of stones or synthetic materials like plastic or fabric.

Water Retention: Mulch is a natural insulator that will keep the soil warmer in the winter and cooler in the summer compared to the surrounding, ambient temperature. Mulch also retains water more effectively than grass or topsoil. Evaporation is slowed down and more water is available for the tree. This also means that less tree watering may be needed depending on the weather and season. Instead of watering every 1 to 2 days, a deep soaking once or twice per week could be completed with similar or improved results. Erosion is also minimized as mulch will lessen the impact of water droplets hitting the ground and washing away the soil.

Outcompeting Other Plants: Mulch will reduce competition of nutrients, water, and oxygen for the tree from grass, weeds, invasive plants, and more. This results in the tree having more resources to absorb to keep it growing as healthy as possible!

Minimizing Trunk Damage: A mulch ring will minimize or even eliminate any risk for trunk damage from lawn mowers or string trimmers. Someone may not be intentionally trying to damage a tree’s roots or trunk, but accidents happen when trying to mow or trim those last, stubborn blades of grass. If there’s mulch instead of grass near the trunk, then there will be no reason to bring a lawn mower or string trimmer within a close enough distance for accidental damage to occur. 

Soil Decompaction: Soil compaction is bad for a tree because it minimizes gas exchange and water infiltration. A tree benefits from soil decompaction and root zone invigoration if the soil is compacted when digging up the topsoil and is replaced with porous mulch. Peo de ple are also less likely to step on mulch compared to grass which will aid in minimizing soil compaction and keeping it porous for adequate gas exchange and water infiltration. 

Final product of a properly mulched tree ring!

Reduced Maintenance: Although there is an upfront time commitment with installing a tree mulch ring as well as some annual maintenance with re-edging the lines and adding mulch, less tree maintenance will be needed in the future. A tree mulch ring means less grass to mow and less weeds popping up. Revisiting the benefit of increased water retention, this means that less tree watering will be required with certain exceptions like newly planted trees and drought-like weather conditions. A properly installed tree mulch ring and a consistent watering schedule can also minimize the risk of stem girdling roots, soil compaction, drought stress, and some nutrient deficiencies. This makes for a healthier tree and lessened chance for problems that would require tree work services like fertilization, root collar excavation, root zone invigoration, or worse, tree removal.

Aesthetics: Subjectively speaking, tree mulch rings are aesthetically pleasing and can boost curb appeal! It conveys to passersby that you care about your trees and property. You can even make your neighbor Jim from three doors down envious of your lawn! If you start to notice other neighbors creating a mulch ring around their tree after creating yours, you can take pride and credit for being a trendsetter.

Stem girdling roots circling around the trunk of a tree. This is a common symptom a tree mulched or planted too deeply.

Correcting an Improperly Planted Tree: This doesn’t apply to every tree. However, if you are wanting to mulch a tree that just so happens to be planted improperly, this is a great double positive to fix the imperfection while also gaining the aforementioned benefits of tree mulching. Signs of an improperly planted tree are stem girdling roots, mulch volcanoes, and the lack of a visible root flare.

Now let’s move on with how to create a tree mulch ring and avoid some common mistakes!

How to Create a Tree Mulch Ring 

The ISA Arborists’ Certification Study Guide recommends a mulching depth of 2 to 4 inches and a radius of anywhere from 3 feet up to the canopy drip line of a tree.

1. Determine the size of your mulch ring! In general, aim for a mulch ring with a diameter anywhere between 6 feet wide or up to the canopy drip line for a medium-to-large sized tree. The latter is not always achievable however due to obstacles like nearby trees, plants, concrete, and more. As long as the mulch ring is at least 6 feet in diameter, it should suffice! In terms of mulch depth, 2 to 4 inches is recommended, but I like sticking closer to 2 inches deep.

2. Outline your circle and make sure the tree is centered. There are multiple, effective methods of outlining the mulch ring circle. Below are a few popular ways. One might be more effective than the other depending on your tree, such as if there’s a central leader or any low hanging limbs.

  1. Method 1 requires a tool like a shovel or edger and some type of long, ovular, band like a piece of rope, tie down strap, belt, or exercise band. Place the tree trunk inside one end of the band and the edging tool on the other end of the band. Set the distance of the band to the desired radius of the mulch ring. Go around the tree in a circle and make a 2 to 4 inch deep cut into the ground until you have a fully outlined circle.

  2. Method 2 requires string and a can of spray paint. Cut the string to the desired radius of your mulch ring. Leave some margin on the string so you can tie the tree trunk and spray paint can together and maintain the desired radius. On one end, tie the string gently and securely to the tree trunk and on the other end, tie the string to the spray paint can. An easy knot I recommend would be the bowline knot! Walk around the tree while applying a visible layer of spray paint to create a circular, painted outline. 

  3. Method 3 requires a long garden hose and measuring device. Lay down the garden hose in a circle around the tree to create an outline the size of your desired mulch ring. Use the measuring device to check if the tree is centered in the circle by checking for the same radius at various locations between the trunk and the hose.

  4. Method 4 requires a measuring device and an edging tool. Measure your desired radius from the trunk of the tree to the edge of the mulch ring and mark the spot by digging 2 to 4 inches into the soil with your edging tool. Move your shovel away from the mark and repeat this process along the circumference of the tree until your circle is fully outlined. 

3. Dig up the top 2 to 4 inches of topsoil within the circular outline! Be careful of any fine, fibrous tree roots. If any are present, consider using an air blower or your hands to gently remove the soil near it. If there’s any grass or weeds remaining after the top 2 to 4 inches of topsoil are removed, consider pulling them out to minimize the chance of weeds or grass growing out above the mulch. Check for a level surface and a well-defined edge and make touch-ups if needed.

4. Dampen the soil to a darker shade of brown and avoid pooling of any water. This could be considered optional on different guides for how to create a tree mulch ring, but I recommend this as a quick, low effort way to add moisture back into the soil. This is especially helpful if you are doing this in the middle of summer with any exposed roots. Avoid placing down landscape fabric between the soil and mulch. This is a common practice of the past that is slowly being phased out because studies have shown this to not be noticeably more effective at blocking weeds, because the openings can clog up with organic matter and minimize air exchange and drainage, and because the decomposed nutrients from the mulch will be blocked from improving your soil and making nutrients more available for your tree. If weeds are a concern, an optional step could be to apply a weed preventer like Preen before applying mulch.

An incorrect method of applying mulch commonly known as a mulch volcano.

5. Evenly apply your mulch! Depending on the specific diameter and depth of your hole, anywhere from 1 to 4 bags could be used. Be cautious of compacting the mulch. You can lightly tamp the soil with your hands to help level the surface, but keep the mulch porous to maximize gas exchange and water infiltration. Do not cover the root flare (also known as the trunk flare) of the tree. This may be a commonly seen occurrence, but that does not mean it’s the correct way to mulch a tree. This is known as a mulch volcano and is bad for the tree! They are detrimental to a tree’s health because they encourage unwanted disease and decay and because the needed oxygen-carbon dioxide exchange for healthy growth is minimized. Keep it simple by applying a level layer of mulch. If you are concerned about water runoff, a tiny, wall-like berm could be created around the perimeter of the mulch ring and formed by hand to encourage water to remain inside the mulch.

6. Touch up the circumference of the mulch ring to make that edge look nice and crisp! You can use a tool like the sharp end of a shovel, an edger, a string trimmer, or a bed redefiner. Avoid stepping on the edge or using a heavy piece of equipment as the edge could cave in and break.

Final product!

7. Water the mulch! Ideally, it is best to water the tree slowly and deeply using a watering bucket or a drip irrigation device, but you can also use a garden hose on the mist setting and apply it evenly for a couple of minutes to get the mulch damp and moist. Avoid pooling any water and do not get the trunk or leaves excessively soaked for an extended period of time because an environment for disease or decay could be created.

8. Voila, you’re finished! Time to take a step back, enjoy it, take a few pictures, show your friends and family, or whatever else you’d like to do! You might have also created a messy work zone that you may need to clean up!

~~~

In terms of future maintenance, you may annually need to redefine the edge to keep it looking crisp and you may need to add a minimal amount of mulch as it decomposes and thins out. To preserve your edge line, avoid mowing directly up to the edge and use a string trimmer to cut the grass 1-3 inches closest to the edge. You can also add stone around the perimeter to make it stand out even more, but this is not necessary in regards to your tree’s health.

I hope this article was insightful and useful! The videos near the beginning are a visual guide for how to create a tree mulch ring! If you’re curious to learn more, I strongly encourage checking out the related articles below on topics such as proper tree watering, tree mulching, mulch volcanoes, stem girdling roots, and more. As always, if you’re in the central Ohio area looking for tree work, one of our 20+ ISA Certified Arborists® are happy to provide a free tree inspection and quote!


Additional Arbor Ed Articles!

Sincerely,

Enrique Arayata I Media Production Coordinator, Russell Tree Experts

In his free time, Enrique enjoys working out, hanging out with his girlfriend, video production and photography, cars, technology, cooking, and watching new movies and YouTube videos. He has a BA in moving image production with a double minor in film studies and studio art specializing in photography from The Ohio State University, an AA in web graphic design from DeVry University, and is an FAA Certified Remote Pilot.

Spotted Lanternfly: They Are Here!

By Lindsey Rice
ISA Certified Arborist®
August 1, 2024​


In early 2022, I sent out a message warning people to keep an eye out for the spotted lanternfly as it was on the move from our neighboring state of Pennsylvania. Now today in 2024, there are multiple confirmed populations in Franklin County, Ohio. Linked below is a map with confirmed populations:

https://cornell.app.box.com/v/slf-distribution-map-detail

As a review, the spotted lanternfly (SLF) is an invasive insect that feeds on various plant species, with its primary host being tree of heaven (Ailanthus altissima), but has been seen feeding on over 70 species of plants.

Preferred host plants for SLF depending on the time of year and stage of life cycle. (Source: PSU Extension)

Frontal view of a spotted lanternfly. Source: GH Photos Alamy Stock. PSU Extension.

SLF are not harmful to humans as they cannot bite or sting, but they are large in their adult form and look intimidating.

Spotted lanternfly insect are sap suckers and feed on the sap through a tiny, straw-like mouth part. While feeding, they excrete honeydew which has been known to resemble a light rain in forested parts of infested areas. SLF is a plant stressor that, combined with other stressors, can cause significant damage to the host plant. SLF alone may not necessarily kill a tree; it has only been known to kill grapevines, tree of heavens, and black walnut saplings directly.

We need to slow the spread of SLF by checking vehicles and any outdoor equipment for egg deposits. If they are present, they need to be destroyed and not moved across quarantine lines. Eggs are laid in the fall from September to December and will hatch in the spring from April to June. They lay their eggs on trees, decks, houses, outdoor equipment, and cars, and are protected by a mud-like covering, making the egg masses difficult to spot.

Adults begin to emerge in July and remain active until a hard freeze. 

Late spring/early summer

Spotted lanternfly nymph

When they start hatching, they will look like little black insects with white spots, and they will not turn red until about mid-summer. Watch out for the combination of honeydew/black sooty mold/wasp swarms around your trees, because it could be an indicator of an invasion.


Management options

Contact insecticides can be used by spraying either the nymphs or the adults from May through October. Be cautious of spraying actively blooming plants to minimize the risk of killing beneficial insects. Systemic insecticides can be used to control and kill SLF adults from May through September. Unfortunately, due to SLF being nimble and fast travelers, just because you treat your property or plant material once, doesn’t mean they won’t come back.

Please be diligent about stopping the spread of this invasive pest. When traveling and vacationing this summer, please be diligent in inspecting your vehicles, camping equipment, and basically anything that is exposed and stationary for more than a couple of hours, especially in known outbreak areas.

If you believe your tree might be infested with spotted lanternfly insects, one of our 20+ ISA Certified Arborists® can provide a free tree quote to determine the best care for your trees at RussellTreeExperts.com/Quote or at (614) 895-7000!

OTHER CREEPY CRAWLERS!

Sincerely,

Lindsey Rice | Special Projects Manager, Russell Tree Experts

Lindsey joined Russell Tree Experts in 2015 with a B.S. in Agribusiness and a minor in Horticulture from The Ohio State University. Growing up in Northwest Ohio, she participated in various sports, band, and FFA which ultimately inspired her love for the tree industry. In her free time she loves to spend it outdoors with her husband and daughters.

Some Mites Like It Hot... Ready or Not!

By Krista Harris
ISA Certified Arborist®
July 25, 2024​

As the average temperatures rise, hungry spider mites thrive! These tiny leaf suckers love hot and dry weather and are currently causing many of our beloved foundation shrubs to look sickly and even lose their leaves entirely.

Spider mites on a burning bush

Spider mite damage on burning bush (Euomymus alatus) and on boxwood (Buxus sp.) is common in the summer months. These typically dependably green shrubs will begin to take on a yellow or bronze cast when infested, and, upon closer inspection, a distinct stippling or scratched appearance of the leaves will become apparent. This characteristic pattern is caused by feeding of the mites on the undersides of the plant’s leaves. Many generations of this tiny sucker can occur per summer. A complete generation can take less than a week during 90°F temperatures and without significant rainfall. That’s a lot of babies at 100 eggs per female!

The twospotted spider mite is the species that afflicts the burning bush. These mites will also feed on many other species when available including viburnum, roses, edible plants, perennials and houseplants. In full sun conditions (especially near hardscape like driveways or brick walls) you may see their webbing binding the leaves and even tiny mites moving within the web. This species of mite overwinters as adults in leaf litter and in soil. It's important to clean up and bag any fallen leaves in the fall so that you can reduce the population of these pests before they wake up next spring.

The boxwood spider mite can only feed on boxwood species. This makes it a “host specific” species of spider mite and will not cause damage to any other plants in your landscape. This mite also differs from the twospotted spider mite in that it creates no webs, it feeds on the upper surface of the leaf as well as the bottom surface and it overwinters as eggs on the boxwood plant.

If you want to check your plants for these "pepper sized" pests or suspect you may have a growing spider mite issue, the best way is to firmly smack the twig over a white piece of paper. Look closely and you may see tiny mites crawling on the paper.

As a preventative measure, it is a great idea to give both your burning bushes and boxwoods a heavy spray with your hose nozzle. Do this twice a week in hot, dry weather (over 85°F). Concentrate on the undersides of the leaves especially to attempt to dislodge adults and eggs.

Keeping your plants watered during the summer also really helps to curb serious infestations. If plants are stressed for water, they will be much more likely to become overrun with spider mites and also insect pests like scale, aphids and lacebug.

If you would like one of our 20+ ISA Certified Arborists® to scout your landscape for spider mites and give you options to control these proliferous pests, please contact our office at (614) 895-7000 or request a free quote at RussellTreeExperts.com/Quote. We offer many options to get spider mites under control and we will help determine the best course of action for your specific trees and shrubs! Have a great summer and make sure to keep yourself watered as well!

Additional Arbor Ed Articles!

Sincerely,

Krista Harris | Journeyperson, Russell Tree Experts

Krista grew up in the central Ohio area and became an ISA Certified Arborist® in 2017. She graduated from The Ohio State University with a Bachelor of Science in Crop Science and a minor in Plant Pathology in 2000 and has been in the green industry ever since. Her favorite trees are the American sycamore, American beech, and giant sequoia. [BS in Horticulture Crop Science, The Ohio State University / ISA Certified Arborist® OH-6699A / ODA Comm. Pesticide Lic. #148078]

Deep Root Irrigation: Another way to water!

By TJ Nagel
ISA Board Certified Master Arborist®
July 18, 2024​

Every day over the last couple of weeks I have observed newly planted trees in parks, along streets, and in front yards dry up and lose all their leaves because they are not receiving adequate water. As the weather continues to heat up in central Ohio, this is the time of year to pay special attention to your newly planted trees (and shrubs) to ensure they do not dry out. All trees need water to healthily grow, photosynthesize, and be more resistant to pests and disease. However, newly planted trees (trees planted within the last 3 growing seasons) need extra watering help throughout this time of year because they have limited root systems and less access to moisture. Whether your new trees are deciduous, evergreen, big, small, or listed as a drought tolerant species, it must receive supplemental water this time of year.  

As a quick review, remember that watering is the single most important maintenance factor in the care of the newly planted trees. Traditionally, tree watering should be performed regularly, slowly, deeply and in the area with active feeder roots. For more detailed information on general watering practices check out my article and video on watering HERE

Today, I’d like to introduce a new tree watering service we are providing called Deep Root Irrigation (DRI).  DRI is intended to efficiently deliver water to tree roots that need special assistance getting adequate hydration. 


How Does Deep Root Irrigation Work?

With DRI, we use an irrigation lance to penetrate the surface of the soil and inject water six to eight inches deep into the root zone of the tree. Using the lance beneath the surface of the soil helps to bypass turf, groundcover, or weed roots and delivers the water directly to the root zone of the tree. 

An irrigation lance used for deep root irrigation.

Additionally, the water comes out of the lance at about 200 psi and splits into four separate streams that help to break up compacted soil and add valuable pore space into the soil profile for future root growth.

The tip of an irrigation lance spraying water at about 200 psi in 4 separate streams.

Since the water is being injected directly into the root zone of the tree with no chance of run off, the water can be applied to the tree quickly as opposed to the longer, deeper soaking that is required with traditional tree watering that starts above the soil surface. With DRI we can thoroughly apply the recommended 10 gallons of water to a new planted 2 inch dbh (diameter at breast height) balled-and-burlapped tree in 2 to 3 minutes. The amount of recommended water for a tree will vary depending on the particular tree’s size, level of establishment, and planting site.  

ISA Board Certified Master Arborist® TJ Nagel performing a deep root irrigation using an irrigation lance!

What Trees Benefit From Deep Root Irrigation?

While tree watering is essential for ALL trees, certain trees will benefit from deep root irrigation more than others such as:

  • Newly planted trees in landscapes whose owners are away during the hot or dry seasons. A 2 week gap in watering is all it takes for a tree to dry out while it’s owners are enjoying vacation

  • Newly planted trees that are not close to a watering source (park trees, street trees or trees inaccessible by hose)

  • Established trees in restricted root zones (ex: parking lots or sidewalk cut outs)

  • Trees that recently experienced soil compaction or root disturbance events

  • Established trees that have recently received a root zone invigoration

  • Trees experiencing stress from insect infestation or disease

  • Over mature trees in the beginnings of decline

  • Established trees during extreme periods of drought


How Often is Deep Root Irrigation Needed?

There is not a one size fits all answer to this question. Watering is essential to newly planted trees during most of the growing season (May through October). In general, a newly planted 2 inch dbh balled-and-burlapped tree should receive roughly 10 gallons of water once every 7 to 10 days. If you have newly planted trees that you regularly care for, but plan to be away for a short time on vacation during the growing season, DRI is likely to only be needed while you are away. If you have a large old tree that is in the beginnings of decline, a thorough DRI once a month during the summer months will go a long way to maintaining health and vigor. Every situation is different.

To request a quote, please visit RussellTreeExperts.com/quote or call us at 614-895-7000 and one of our 20+ ISA Certified Arborists® can help determine the best care for your trees!


DEEP ROOT IRRIGATION IN ACTION!

ADDITIONAL ARBOR ED ARTICLES!

Sincerely,

TJ Nagel I Scheduling Production Manager, Russell Tree Experts

TJ loves trees. He is an avid gardener and plant collector. TJ graduated from The Ohio State University with a B.S. in Agriculture with a major in Landscape Horticulture and minor in Entomology. TJ is an ISA Board Certified Master Arborist and well versed in Plant Pathology. TJ joined Russell Tree Experts in 2012.

Your Friendly Neighborhood Spider-lift

By Mitch Lippencott
ISA Certified Arborist®
June 27, 2024​

Our CMC 90HD+ Arbor Pro® tracked aerial lift, commonly referred to as a “spider lift,” is one of the most versatile, but misunderstood machines in our fleet. It is invaluable for working in tight spaces beyond the reach of more traditional equipment and can provide safer, more efficient working conditions for our arborists. 

As an ISA Certified Arborist® and regional manager at Russell Tree Experts, I want to highlight the benefits and limitations of this machine. At the end of this article is also a video showcasing our spider lift!

Specifications 

Over the last couple of years, we have used various spider lifts as part of our fleet, so the specifications can and will vary as time passes. Below are the specifications for our current CMC 90HD+ Arbor Pro®:

Our CMC 90HD+ Arbor Pro spider lift in action on a residential tree removal job in Westerville, Ohio

  • Weight: 9,025 pounds

  • Max Basket Load Capacity: 507 pounds

  • Max Working Height: 90 feet

  • Max Lateral Reach: 50 feet

  • Multiple rotation, articulation, and telescoping boom points for flexible work positioning

  • 360 degree operation

  • Length: 22 feet, 3 Inches with basket or 19 feet, 10 inches without basket

  • Extendable, non-marking, rubber tracks

  • Width: 35 inches with tracks in, 55 inches with tracks extended

    • 35 inch width is great for squeezing past fence gates

    • 55 inch width is great for increased stability, especially during towing and transport

  • Once in position, a footprint of approximately 14X20 feet is needed to extend the stabilizer legs and rotate the boom (hence the “spider” moniker)

  • 3 points of operation by the tracks, in the bucket, and with a wireless remote control

Spider Lift USE Cases

Employing rigging techniques alongside our spider lift to remove this tree due to a small drop zone

  • Drop zones too small for tree felling

  • Spaces too small, soft, sensitive, or far away to reach with larger machines like bucket trucks, cranes, telescopic handlers, etc

  • Trees too decayed, compromised, or dead (this has proven to be the most critical asset)

  • Trees with significantly larger or wide canopies and/or multiple trees able to be reached with one or minimal setups

  • Safer, quicker work positioning for less experienced or physically capable climbers


NON-IDEAL SPIDER LIFT SCENARIOS

Our team member Bodi in our spider lift!

  • Steep slopes or uneven terrain - the spider lift is a long, heavy, narrow machine that can roll over! 

  • Soft or sensitive work zones where turf impact and compaction is unacceptable. If the turf is soft due to rain, we may reschedule tree work for another, dryer day

    • Note: The spider lift will have less turf impact than a bucket truck or crane, but will leave a footprint nonetheless

  • Near electrical hazards - Our buckets at this time are uninsulated and we will need to follow minimum approach distance (MAD)

  • Small trees or large, nonintrusive work zones - getting the spider lift on and off the trailer and in to and out of its work position is a tedious process – a tree that can be climbed or felled safely in an hour or two is usually not worth the extra steps 

~~~

We at Russell Tree Experts are constantly seeking new techniques and machines to make tree work as safe and low-impact as possible. While our spider lift isn’t a perfect solution, it provides us with another option to maximize efficiency and limit damage. As always, if you’re in the central Ohio area looking for tree work, please feel free to request a free tree inspection and quote by one of our 20+ ISA Certified Arborists®! You might even get to see the spider lift working on your own property!


Spider Lift Showcase

SPIDERLIFT TREE WORK VIDEOS

Sincerely,

Mitch Lippencott I Regional Manager, Russell Tree Experts

Mitchell Lippencott joined Russell Tree Experts in 2020 and has been in the green industry for over 20+ years with a diverse background ranging from working for a landscape design company, a retail garden center, and two municipalities! Mitch is an alum from The Ohio State University, a licensed pesticide applicator, a qualified tree risk assessor, and an ISA certified arborist. Outside of work, he enjoys traveling, cooking, and gardening.


My Journey: Becoming an ISA Certified Arborist®!

By Enrique Arayata
May 9, 2024

When I started working at Russell Tree Experts as a video production intern (and now media production coordinator), I had no significant knowledge of arboriculture apart from taking courses in environmental science and world of plants in college. I graduated with an associate’s degree in web graphic design from DeVry University in 2018 and with a bachelor's degree in moving image production with a double minor in film studies and studio art with a specialization in photography from The Ohio State University in 2023 and there’s quite a stark contrast between cameras and trees. One of my notable follies is that an “acorn tree” is not a thing and that it is the genus Quercus that produces acorns. I have also been judged for the Colorado blue spruce tree being my favorite tree since it is not native to Columbus and is susceptible to rhizosphaera needle cast. Luckily, throughout my almost 5 years now of working here, I have picked up various things along the way from talking with coworkers, attending meetings and training sessions, researching for a video, and more!

However, now that I have completed school and have some additional free time outside of work, I have decided to take on my next challenge and study to become an ISA Certified Arborist®! To become an ISA Certified Arborist®, one must have at least 3 years of documentable experience in the tree industry (or a combination of formal education and practical arboriculture experience) and must pass the ISA Certified Arborist® Exam with at least a 76% or higher. To learn more about what it takes to become an ISA Certified Arborist®, check out this Arbor Ed article written by my fellow coworker (and ISA Certified Arborist®) Lindsey Rice or visit ISA’s website here.

In my personal life, I try to always be curious, open-minded, and willing to learn and improve, so attaining my ISA Certified Arborist® credential feels like a good, natural next step in my career! Throughout this journey, I hope to expand my knowledge of arboriculture which will help me produce better photos, videos, or written content like social media captions or Arbor Ed articles! I would consider earning this certification a success if I can learn more about arboriculture and be able to use my position and platform here at Russell Tree Experts to spread more knowledge to people that would inevitably lead to better and more informed care of our trees and environment. I do not have a strict target date for when I take the ISA certified arborist exam but as of the time of writing this article, I am currently on chapter 5 out of 16 in my study guide (the 4th Edition Arborists’ Certification Study Guide). So far in my 82 pages of studying, there have already been many important details and interesting facts that I have learned that can go a long way in ensuring the best long-term health for your tree. Below are just a few of many!

Leaves are Life

Leaves are important! Leaves are considered the “food factories” of a tree and have two important roles. First, leaves have cells with chloroplasts. Chloroplasts contain a great pigment known as chlorophyll which is the main leaf pigment that absorbs sunlight. Energy from the sun is collected in the chloroplasts for photosynthesis which converts the energy from sunlight into carbohydrates which is then used by the tree for growth and other processes within the tree. The second function of leaves is transpiration, which is the loss of water through a tree’s foliage in the form of water vapor, which in turn cools the leaf. Transpiration draws water up through the xylem from the roots. This is important for cooling a tree as this is essentially how evaporation occurs for a tree. Transpiration is also the driving force for water from the roots to travel up and through the tree to the shoots for growth. Transpiration is moderated by stomata, which are small openings commonly found on a leaf’s underside which controls the loss of water vapor and gas exchange by opening and closing like a door or gate. 

Root for Your Roots

Roots are also important! They play four key roles in a tree with anchorage, storage, absorption, and conduction. Anchorage is a tree’s ability to stay anchored to the ground so that they do not fall over during adverse weather conditions. Storage is a tree’s ability to store water and nutrients that can be used in the future, such as during the winter months when nutrients might be scarce. Absorption is a tree’s ability to uptake minerals and water. Conduction is a tree’s ability to distribute food and water throughout other parts of the tree like in leaves and stems.

Supportive Soil

For some trees such as maples and oaks, iron and/or manganese deficiency in higher pH soils can lead to chlorosis, the yellowing or whitening of leaves. This is a symptom of a tree not functioning properly. This is one example of why having the proper pH for a tree is important.

Soil is more complex than you may think! Soil is generally composed of 3 materials: clay, silt, and sand. The percentage content of each of these 3 particles determine a large number of factors ranging from the soil’s physical properties like pore space, texture, structure, and bulk density, chemical properties like pH, buffering capacity, and cation exchange capacity (CEC), and biological properties like water holding capacity, food web, and more. All of these different properties are important because if they are not ideal or paired correctly with a particular species of a tree, its growth may be hindered, or the tree may even fail. Two examples are: (1) unideal soil pH can cause nutrient deficiency, and (2) soil compaction can inhibit water flow and gas exchange. Soil has its own diverse ecosystem commonly referred to as a soil food web containing fungi, bacteria, small mammals, earthworms, millipedes, mites, and other insects and organisms that are directly and indirectly beneficial to trees. Collectively, they help to maintain soil structure, decompose organic matter, and aid in nutrient cycling and nutrient mineralization which, to make a long topic short, helps make nutrients available for roots and trees.

Wealth in Water

Water is arguably the most important factor when it comes to a tree’s health. Leaves need water to perform photosynthesis. Roots are important for a tree so that it can uptake water and nutrients. Soil is important so it can hold and provide water for trees. With that said, too much of a good thing can be bad. Trees have adapted to their environment and some trees near coastlines or swamps are thirstier for more water in comparison to trees that have adapted to arid regions like deserts. Drought and heat can cause leaf scorch and leaf drop, twig dieback, or even tree death. Flooding and overwatering can lead to leaf discoloration, defoliation, and crown dieback. It is important to research the tree (or trees) you are considering planting and figure out its water needs. Your local nursery or online resources from colleges, nurseries, laboratories, and more can be helpful! Tools such as bubblers, sprinklers, slow-release watering buckets, soil probes, electronic moisture sensors, and tensiometers can be beneficial in monitoring and adjusting soil moisture. There are also strategies to better manage water for a tree like xeriscaping, the designing a landscape of drought tolerant plants, minimum irrigation, the providing of the minimum amount of water to maintain and not prohibit a tree’s health, growth, and appearance, and hydrozoning, the grouping plants and trees of similar water needs and irrigating on the same schedule. One interesting fact I learned is that recycled or reclaimed water from your home’s water supply can commonly be high in salts and other chemicals which can raise a soil’s pH. Depending on what is planted, this may be a nonissue, but for trees that prefer a slightly acidic soil, this can be a big problem. Learning more about your trees and plants and performing a test on your soil and/or water can be beneficial for you and your trees’ success!

— — —

There are so many important details that I have learned (and not mentioned because I would be here all day) about trees that are essential for their long-term health and survival. Above are just a few pieces of information that I found particularly interesting or useful! I plan on continuing my studies and will provide another update or two with more important details about trees that you might be able to apply to your tree’s maintenance. In the meantime, enjoy your landscape and the upcoming spring weather!

Check out these Arbor Ed Articles!

Sincerely,

Enrique Arayata I Media Production Coordinator, Russell Tree Experts

In his free time, Enrique enjoys working out, hanging out with his girlfriend, video production and photography, cars, technology, cooking, and watching new movies and YouTube videos. He has a BA in moving image production with a double minor in film studies and studio art specializing in photography from The Ohio State University, an AA in web graphic design from DeVry University, and is an FAA Certified Remote Pilot.


Rhizosphaera Needle Cast: Causes, Symptoms, and Management

By Mike Wilson
ISA Certified Arborist®
May 2, 2024​


Rhizosphaera needle cast is a fungal disease that affects various species of coniferous trees, particularly spruces throughout central Ohio and the midwest, and has become increasingly common. This disease can cause significant damage to tree health and aesthetics if left untreated. Understanding its causes, symptoms, and management strategies is crucial for preventing its spread and minimizing its impact on host trees in your landscape. Rhizosphaera needle cast, or needle cast for short, is primarily caused by the fungus Rhizosphaera kalkhoffii. This fungus thrives in humid and wet conditions, which Ohio is seeing more and more of now. Spores of the fungus are spread through water splash, wind, and contaminated pruning tools, facilitating its transmission from infected to healthy trees. Colorado blue spruce trees (Picea pungens) is especially vulnerable due to the fact that they much prefer dry, arid environments like in Colorado and Utah.

A young Colorado blue spruce tree (Picea pungens) rapidly defoliating

Symptoms

The symptoms of needle cast typically appear on older needles first and progress upwards through the tree. Common symptoms to look out for are:

  • Needle Discoloration: Infected needles initially develop yellow or light green spots, which gradually turn brown or purple-ish brown as the disease progresses.

  • Needle Dropping: Infected needles may prematurely drop from the tree, leading to sparse foliage and an overall thinning of the canopy.

  • Black Fruiting Bodies: Under close inspection, black fruiting bodies (spores) of the fungus may be visible on the surface of infected needles, particularly during humid conditions. This shows up as very fine black peppering found on the underside of the needles.

Black fruiting bodies (spores) of the fungus fungus Rhizosphaera kalkhoffii on the surface of infected needles

Effective management strategies of Rhizosphaera needle cast involves a combination of cultural practices, chemical control, and preventive measures.  

Cultural Practices

  • Proper Tree Spacing: Ensuring adequate spacing between trees promotes good air circulation, reducing humidity levels and minimizing fungal growth.

  • Pruning: Prune infected branches to improve air circulation within the canopy and remove sources of fungal spores. Also, lightly elevating the canopy of a tree above the ground can help increase airflow.

  • Mulching: Apply a layer of organic mulch around the base of trees to retain soil moisture and reduce stress, which can help trees resist fungal infections. 

Chemical Control

Apply fungicidal sprays containing active ingredients such as chlorothalonil or copper hydroxide during the spring months as new growth is emerging. Multiple applications in 10 to 14-day intervals applied annually are most effective, however, there is no end-all cure for this fungal disease.

Preventive Measures

  • Monitoring: Regularly inspect trees for early signs of infection, especially during periods of high humidity.

  • Water Management: Avoid overhead watering and excessive irrigation, as these practices can create ideal conditions for fungal growth. Water trees in the morning to avoid foliage staying wet overnight.

  • Plant Selection: Some other options that may be suitable for your landscape include, but are not limited to: Concolor fir (if you desire the silvery blue color), Norway spruce, green giant arborvitae, and Canadian hemlock.  

Purple-ish brown needles

Rhizosphaera needle cast poses a significant threat to the health and vitality of coniferous trees, particularly Colorado blue spruce. By understanding the causes, symptoms, and management strategies associated with this fungal disease I hope that you will, as a Colorado blue spruce owner, help keep these beautiful trees healthy. Through a combination of cultural practices, chemical controls, and preventive measures, it is possible to mitigate the impact of Rhizosphaera needle cast and preserve the beauty and ecological value of our coniferous forests and landscapes. Please reach out to Russell Tree Experts if you suspect your trees are infected or need advice on proper maintenance as our ISA Certified Arborists® (myself included) are happy to take a look! Have a happy summer and we look forward to helping you with your trees!

Sincerely,

Mike Wilson I Regional Manager, Russell Tree Experts
Mike joined RTE in 2013 and has been in the green industry for over 14 years! He is an ISA Certified Arborist® and a graduate of Oregon State University. Mike is an outdoor enthusiast and a US Army Medic Veteran!


Check Out These Tree Preservation Videos!

Additional Tree Preservation Articles!

The Root of Many Plant Problems in Central Ohio: Soil pH

By Walter Reins
ISA Certified Arborist
April 25, 2024​

You’ve probably heard the term pH. You may even think “I know this one - it means something is either acidic, neutral, or alkaline”, and that wouldn’t be wrong. But what does that mean and why does it matter? What determines the pH of soil, water, or even the human body? Like the periodic table of elements, pH may be something that reminds you of high school chemistry class, something you’ve filed away under the “when am I ever going to use this?” section of your brain, long ago forgotten and collecting dust ever since it was put there. While pH is far from being an endorphin-producing topic, it does significantly influence plant growth and overall health in your landscape. Let’s discuss the role that soil pH plays in nutrient availability, soil chemistry, and even microorganism activity, and why it matters for your plants.

pH and How It’s Influenced

pH stands for “potential of hydrogen”, and is a measure of the acidity or alkalinity of a solution, ranging from 0 to 14 with 7 being neutral. A value below 7 is considered acidic while a value above 7 is considered alkaline (or basic). This scale represents the concentration of hydrogen ions present, with acidic solutions having a greater number of ions and alkaline solutions having fewer ions. In soils, that concentration of hydrogen ions is influenced by things such as the parent rock material that originally formed the soil, human activity, climate, and the presence or lack of organic matter. In turn, the resulting pH will influence the availability of nutrients essential for plant growth, microbial activity that helps with nutrient absorption, and soil chemistry that influences the breakdown of soil particles into more usable forms. Of the influencing factors mentioned above, parent rock material and the presence or lack of organic matter often go hand in hand and are the most significant influencers in our central Ohio landscapes. Central Ohio largely consists of limestone bedrock, which naturally has a higher pH than what’s preferable for most plants. So you might ask “Well, how is it then that any plants can be healthy and thrive in central Ohio?”. The answer is organic matter. In an undisturbed, natural environment like the forest, years and years of organic matter have formed on top of the infamous “Ohio clay” subsoil that we encounter in our backyards. The source of this organic matter comes from falling leaves, dead branches and trees, and dying organisms just to name a few, that collect on the forest floor year after year, decade after decade. These are all things we tend to remove from our landscapes to keep them tidy, which results in a lack of organic matter formation over time. For more on how to address this topic, check out our Arbor Ed article “Leave those Leaves!

Nutrient Availability

Chlorosis in a pin oak tree in Bexley, Ohio

pH influences the availability of essential nutrients in the soil by changing their level of solubility. This simply means that pH will determine whether or not these nutrients are in a form that can be absorbed by the tiny roots and roots hairs of plants. Most plants will prefer growing in soil with a pH range between 6-7, slightly acidic to neutral. When the pH is out of its optimal range for a particular plant (generally too high in central Ohio), the plant’s growth may slow, it may lose overall health and vigor, or conditions like chlorosis can develop because that plant isn’t getting the nutrients it needs to carry out essential functions for growth. Chlorosis, or yellowing of leaf tissue, is a very common condition in central Ohio and can be seen most often with trees like pin oak, red maple, white pine, and river birch. It’s interesting to note that these are trees that are either native to Ohio or an adjacent region. In their natural habitats where organic matter is abundant, soil pH is lower and nutrients are readily available for uptake. The parent material, derived from limestone and having higher pH levels, does not affect the trees since the absorbing roots are largely growing in the organic layer above it. In our backyards however, carpeted with lawn but cleared annually of leaves, higher pH levels can quickly cause issues even with otherwise healthy trees.

Chart showing availability of essential elements at various pH levels

Microbial Activity

pH affects the activity of microorganisms in the soil. These microorganisms are essential for plant health, helping plants to absorb certain nutrients, or aiding in the breakdown of organic matter into available forms for your plants. Certain fungi, bacteria, or insects that benefit a particular plant will naturally thrive in the same pH that is ideal for that plant. Encouraging the proper pH for your plants in turn helps to foster a healthier population of these important helpers in the soil. In the same way that our own bodies are influenced by the health of our gut bacteria, plants rely on microbial activity in the soil. Without it, they can struggle to carry out essential functions for proper growth and overall health.


Soil Chemistry

Similar to nutrient availability, pH can affect the chemistry of the soil and determine whether or not the available nutrients will be absorbed by roots. It also influences the composition of the soil, helping certain minerals to break down into smaller molecules, ultimately affecting the charge of soil particles and the ability for the soil to hold on to essential elements that could otherwise be removed from the soil. A good example of this would be a soil’s ability to retain certain nutrients by preventing them from getting washed out of the soil by irrigation or rainfall. Acidic soils tend to be better at retaining more of these charged nutrients. It's no coincidence then that most plants prefer acidic or slightly acidic soils, as the lower pH makes those soils richer in nutrients and more “user friendly” for plants.

 ~

Soil pH plays a significant role in the overall health of trees, shrubs, and other plants in our landscape. A little bit of knowledge can go a long way in helping to understand the unique issues you may have in your central Ohio landscape. Below is a list of a few things you can consider in determining what’s best for your yard.

  • Have a soil sample from your yard submitted for analysis to help determine if there is a pH issue or nutrient deficiency.

  • If you know that you have higher pH levels, consider planting trees and shrubs that are more tolerant of alkaline soils.

  • Try incorporating more organic matter into your soil by allowing leaves to decompose in landscape beds over the winter, and consider enlarging groundcover or mulch beds around trees (less lawn)

  • Have root zone invigoration work done for trees that are struggling with nutrient deficiencies and/or soil compaction.

  • Apply pH lowering products to landscape beds with particularly sensitive trees or shrubs (note that this is something that generally needs done annually, as permanently lowering the pH of soil with additives is next to impossible).  

As always, our ISA Certified Arborists are happy to help and you can contact us for any questions, issues, or inspections!

Additional Tree Preservation Articles!

Sincerely,

Walter Reins I Regional Manager, Russell Tree Experts

Walter became an ISA certified arborist in 2003 and has a degree in landscape horticulture. He has 25 years of experience in the tree and landscape industries and originally began working at Russell Tree Experts in 2011. Walter is also the owner/operator of Iwakura Japanese Gardens, a small design/build/maintenance firm specializing in Japanese-style gardens, and also offers responsible tree planting for all landscapes.

Remote Assignment: The Smokies

By Enrique Arayata
April 18, 2024

If you live in or around Great Smoky Mountains National Park or vacationed there recently over the last few months, there’s a chance that you may have seen one of our large grapple trucks or our fellow arborists doing tree work. If you did a double take because you were surprised to see us there, don't be alarmed; that was indeed us and no we didn’t move our office from Westerville, Ohio to Gatlinburg, Tennessee. We were trusted by The National Park Service to perform extensive tree work services around the park and we were honored to care for the trees in such a beautiful and breathtaking area.

This tree work project spanned across primarily eastern Tennessee and portions of North Carolina working on a variety of different tree work services. It lasted for approximately 4 months spanning from approximately December 2023 to March 2024 with our crews working 10 to 11 hours 5 to 6 days per week. This heavier work schedule was to take advantage of the little sunlight during this time period, to account for lighter days of tree work during unideal weather, to be able to go home and visit family during the holidays, and to finish a couple of weeks ahead of schedule!

The primary service of our tree work project at Great Smoky Mountains National Park was hazardous tree removal. Trees were deemed to be hazardous if they presented any significant signs of decay or risk of failure near populated areas such as roads, parking lots, and campgrounds. A good litmus test was that if a tree could fall on a person or vehicle, we pruned or removed it. If there was a potentially hazardous tree deep into the woods with little to no foot traffic or an already uprooted tree with no potential energy, they were left untouched as they do not pose a risk and can be beneficial to its local ecosystem. Next, we performed prism clearing where we pruned in a pentagonal shape along roadways to provide additional clearance for taller vehicles and large trucks and to clear additional line of sight around blind curves and corners. Lastly, we visited over two dozen different vistas across the park and removed any small brush and any pioneer or invasive species that would inhibit the view for visitors while avoiding any specimen trees. We applied herbicide onto the very small stumps to minimize the chance of resprouting.

Since this project was a little ways away from our office in Westerville, Ohio our arborists had to bring a lot of equipment to make sure we could get the job done! Two grapples truck were used so that we could load one grapple truck with excess woody material while the second one was hauling it away to a mulching site. A bucket truck was used to help prune tall limbs. For cleanup, we utilized an articulated loader to move around larger pieces of brush and backpack blowers and a stand-on blower to blow small debris like leaves and sawdust away from the road. When it came to vista clearing, climbing gear was used to help scale up and down the vistas along, a trimmer to clear small brush, a backpack pump sprayer to apply herbicide, and of course, chainsaws to get to cuttin’! 
This project was led by our offsite project manager Tyler and crew leader Storm with a rotating crew of 6 other arborists. I chatted with them to get their insight on this project and the general consensus was strongly positive! All of them had a great time and would go back to work at Great Smoky Mountains National Park again! They said it was a fun chance to travel, visit new places around Gatlinburg, Pigeon Forge, and the park itself, and build stronger relationships amongst each other. It was a refreshing change of pace from the traditional, residential tree work in central Ohio! We are honored to be given the trust to work at Great Smoky Mountains National Park and would like to thank The National Park Service for this opportunity and for helping to keep everyone safe by providing traffic operators and temporarily closing down work zones to the public when needed to minimize any risks and hazards. Below are various videos produced from this tree work project including a formal interview, a day-in-the-life, and montage of cool tree work clips!

Our fellow arborists Pedro, Storm, Brian, TJ, Tyler, Scott, and Juve! (left to right)

Videos from Great Smoky Mountains National Park

Sincerely,

Enrique Arayata I Media Production Coordinator, Russell Tree Experts

In his free time, Enrique enjoys working out, hanging out with his girlfriend, video production and photography, cars, technology, cooking, and watching new movies and YouTube videos. He has a BA in moving image production with a double minor in film studies and studio art specializing in photography from The Ohio State University, an AA in web graphic design from DeVry University, and is an FAA Certified Remote Pilot.

Right Tree, Right Place!

By Mitch Lippencott
ISA Certified Arborist
April 11, 2024


Much of the tree work our arboriculture division at Russell Trees Experts performs is a direct result of trees and shrubs being planted in inappropriate locations.

When we prune trees to clear a house, roof, or utilities, it's often because a large tree was planted too close, or a smaller tree should have been used. When we shear shrubs to stay below windows or to not encroach on walkways, a smaller, narrower shrub would not have needed maintenance. When we repeat micronutrient fertilizations or fungicides, it's usually to support a tree that doesn't belong in its environment. In short, we make wrong trees fit in wrong spaces.

The unfortunate fact is most trees and shrubs need a specific set of conditions to thrive - they can't just go anywhere. While figuratively forcing square trees in round holes is good for our business, the savvy gardener will not pick out a tree they 'like' and plant it in a spot where they think it 'will look nice'. Instead, they will study the conditions of their site, then choose the tree that best fits those conditions.

So how can you, the savvy gardener, 'study' your planting site? It's more than looking out the window once. Measuring is a good idea, but still not enough. Instead, examine your area from multiple vantage points, during multiple weather conditions, and multiple times of day.

Does rainwater pool anywhere? Where does the sun hit, and for how long?  Which direction does the wind come from? Where would privacy be preferred? These, and many more questions should be incorporated into the plan.

While this seems cumbersome, the process can be broken down into five important factors: size, water, soil, exposure, and goals.

1) Size

Yes, plants can be pruned to keep them smaller, but most don't want to be! Severe pruning and shearing can cause stress, which in turn, makes plants less capable of defending themselves against diseases and insects; especially near a house or patio. Research plant sizes and don't get greedy - if a plant gets too big for your space, it's out of contention.

2) Water

As the global climate continues to change, Ohio is experiencing warmer, wetter winters and springs. Few plants can tolerate both wet and dry conditions. So if your area is wet most of the year, only water-loving plants should remain in the candidate-pool. Forcing dry-footed plants to wet soils will likely leach away vital nutrients and cause fungal infections. Conversely, heavy drinkers in dry soils will likely need continuous watering, which is time-consuming, expensive, and environmentally careless.

3) Soil

Soils vary greatly by location, but in general, central Ohio soils have a heavy clay texture with poor drainage, and a neutral pH (neither acidic, nor alkaline). Undisturbed soils tend be more loamy and acidic. New builds and urban areas tend to be more compacted and alkaline. Plants in soils not matching their needs can suffer from fungal infections, nutrient deficiencies, and instability due to poor root growth.

4) Exposure

While sun and wind are obvious factors, deer-resistance, salt tolerance, limited root space, planned or recent construction, and known insect pests or pathogens are other common exposures in our region.      

5) Goals

I will discuss this more thoroughly in a future article because this is the most fun part - this is where all of your research and observation pay off and your plant starts to work for you! Privacy, traffic noise reduction, food production, bird watching, and a created, desired aesthetic are all examples of good planting goals. Luckily, there is a plant for every size and for every site, so be diligent and find exactly what you need. Scott Zanon's excellent guide Landscaping With Trees in the Midwest lists trees for a variety of situations, including photos, plant sizes, and recommended cultivars.

~~

Pairing the correct plant to the correct location may take time and research, but it is the best path to a long-lasting, low-maintenance garden. When planting your next tree, thoroughly observe your site before heading to the nursery, then limit your search to the trees that match those conditions. Just don't get too carried away - we still have a business to run over here! ;-)

ADDITIONAL TREE PLANTING RELATED ARTICLES!

videos on tree planting and watering!

Sincerely,

Mitch Lippencott I Regional Manager, Russell Tree Experts

Mitchell Lippencott joined Russell Tree Experts in 2020 and has been in the green industry for over 20+ years with a diverse background ranging from working for a landscape design company, a retail garden center, and two municipalities! Mitch is an alum from The Ohio State University, a licensed pesticide applicator, a qualified tree risk assessor, and an ISA certified arborist. Outside of work, he enjoys traveling, cooking, and gardening.

Spring: A Great Time to Fertilize

By Chris Gill
March 7, 2024

Dear Reader,

Spring is a great time to fertilize trees. As the soil begins to warm up, feeder roots become active and begin to look for nutrients in the soil. A general Spring fertilization provides trees with a boost of macronutrients (typically nitrogen, phosphorus, and potassium) which are essential to trees as they enter the challenges of a new growing season and require energy to develop new leaves, branches, and roots. Spring fertilization can also benefit trees recovering from the winter stresses of cold temperatures, desiccating winds, and potential exposure to de-icing products around tree roots. 

At Russell Tree Experts, we fertilize trees through a technique called deep-root fertilization. We perform deep-root fertilization by using a lance to inject liquid fertilizer under pressure deep into the feeder root system in a soluble form that is easy for the tree to take up. This is superior to a traditional surface application where a granular fertilizer is spread over the root system of a tree but still requires time for the product to break down and work itself into the soil. Deep-root fertilization allows nutrients to pass by the competitive roots of turf, weeds, and other ground covers to maximize uptake for the tree. The process of deep root fertilization also helps to loosen up compacted soil around the tree to promote better root growth while also allowing water and oxygen to more easily reach the roots. Compacted soil is a common problem in urban landscapes and can reduce a tree’s ability to access nutrients.

Trees that are showing dieback in the canopy, poor leaf color, stunted growth, or low vigor are all great candidates for fertilization. When putting together a fertilization plan, it is important to also consider tree type and location. Most trees benefit from a general fertilization, but many tree species may require more specific nutrients. Some of these nutrients can be lacking in urban and highly developed environments. For example, many woodland species that grow naturally in low-lying areas (ex: river birch, pin oak, and red maple) often require the addition of manganese to a fertilization program for long-term health and vigor when planted in a residential neighborhood. The specific nutrient for which a tree is deficient may not always be obvious, especially in a young or newly planted tree, but can be determined easily through soil and tissue testing. Russell Tree Experts can provide these testing services as needed.

Trees in native areas are less likely to require fertilization. This is due to the less disturbed nature of the soil and to the natural breakdown of leaves, sticks, and other organic matter continually providing nutrients to the soil or a “natural fertilization.” Trees in urban or highly developed areas are less likely to experience “natural fertilization” due to interference from hardscapes and through regular landscape maintenance practices including raking out yards and landscape beds. 

Soil quality is the key to good tree health and longevity and Spring fertilization is a great way to start the soil improvement process. There are various considerations that are made when selecting a fertilizer for your trees including the type of tree and the location of the tree in your landscape. Consulting with one of our certified arborists can help determine the specific nutritional needs of your trees and get the process started!

Sincerely,

Chris Gill I Regional Manager, Russell Tree Experts

Chris joined Russell Tree Experts in 2015 and has been in the green industry for over 15 years. When not at RTE, he enjoys spending time with wife & son, wakeboarding, and hunting. His favorite trees are the white oak & sugar maple for their beauty and uses beyond the landscape. Chris is an ISA certified arborist, EHAT certified, CPR and first aid certified, holds an ODA commercial pesticide license, and holds a tree risk assessment qualification (TRAQ).

More Tree Preservation Articles!

Tree Bracing 101

Dear Reader,

Trees adorn our landscapes, offering shade, beauty, and a connection to nature. However, ensuring their structural integrity and stability is vital for their longevity. Common tree preservation services that you may be familiar with are tree pruning and mulching. Other uncommon services could be cabling or trunk injections depending on the specific tree. However, throughout my 4+ years of working at Russell Tree Experts, one service that I have not heard of up until this year is tree bracing! Let's delve into the world of tree bracing to understand the process and benefits!

What is Tree Bracing?

Tree bracing? I couldn’t initially picture what this meant when first hearing it. Let’s first break down tree bracing into two words. Tree. Bracing. Tree: A woody, perennial plant typically having a single stem. I know what that is. Brace: To make (something) stronger or firmer, or to prepare for something difficult or unpleasant. So would it be a solid guess that tree bracing is the process of making a tree stronger? Yes! That’s exactly what it is!

Tree bracing is a tree preservation service to reduce the risk of two or more stems from splitting apart or to fasten a split or cracked union together, thus improving the overall structure of your tree. This is achieved through the installation of brace rods to prevent select tree unions from spreading or twisting apart or to prevent a split or cracked union from worsening.

This sounds great! Let’s start bracing every single tree to improve their overall structure! Well, not so fast. Only certain trees will stand to benefit from tree bracing. Just like fertilizing trees with manganese or iron to treat a manganese or iron deficiency, this service is only recommended for trees that need it, otherwise there would be either no noticeable effect or even a decrease in structural rigidity. Just like with pruning, which involves removing (or “wounding”) the tree’s crown of undesired parts, bracing is a semi-invasive procedure that involves installing large threaded steel rods into the trunk of the tree, so we only want to install brace rods when the net result is positive and beneficial. 

What Trees Should Be Braced?

So what trees should receive tree bracing? Well, as mentioned earlier, trees with a split or cracked union could benefit from brace rod installation. A split or cracked union should be easy to spot, especially in the winter in the case for deciduous trees as there is little to no foliage. A limb can split or crack due to various reasons like included bark (bark that is partially or fully embedded into the tree’s wood), improper pruning, disease, and storm damage from adverse weather like lightning, heavy winds, rainstorms, and thick layers of ice just to name a few. A split or cracked union can also occur from structural defects like large, long, horizontally growing limbs and codominant stems. If the limb is large and long and growing more horizontal rather than vertical, there could be a lot of weight-related stress near the union that could cause it to split if the limb is not supported properly or if end-weight reduction pruning does not occur. Codominant stems are two similarly sized stems originating from the same point of the tree and growing in the same, general direction. They can be characterized as having a tight “V” shape near the union or by both of the limbs competing to be the central leader of the whole structure. This is not ideal for a tree’s structure as they are prone to splitting during adverse weather conditions. In scenarios where removal of the branch or tree is not viable or preferred, tree bracing serves as a beneficial solution or alternative.

What Are the Benefits to Tree Bracing?

Tree bracing can be beneficial for a tree as they can minimize movement, ensuring the splits or cracks do not occur or worsen, especially during strong weather. A tree with poor structure or a split or cracked union may not want to be removed by the owner as it is a specimen tree (a tree chosen as a point of focus in a landscape) that provides aesthetics, shade, real estate value, or more. For some trees, it may also be unnecessary to remove them simply because of one or two weak, treatable unions that could even be healed over time. Tree bracing aims to improve the tree’s structure at a choice union and to give its owner more peace of mind that a union or limb has a decreased chance of failing, which would potentially end the tree’s life, or to keep it from falling onto something like a house, car, driveway, or anything else near the tree.

The Tree Bracing Process

Here at Russell Tree Experts, we use the ANSI A300 Tree Support System Best Management Practices to help guide us! With that said, before tree bracing begins, we typically prune the tree's crown to reduce weight and then install one or more cables in the crown to support the suspect union(s) from above. Once these initial steps are complete, we install a specified size and quantity of brace rods in your tree in accordance with the ANSI A300 Tree Support System Best Management Practices. The size and quantity is determined by factors such as the tree’s diameter below the union, number of limbs or unions being cared for, and whether or not there is or is not a split or crack present. To install the brace rods, holes are drilled straight through the tree near the union. The threaded brace rods are then fully inserted and will have excess rod on both ends. The brace rods are then secured with one or more washers, a lock washer, and a nut on both ends. The connections are then tightened as firmly as possible. Afterwards, the excess length of threaded rod is cut off close to the nuts and subsequently peened off to prevent any movement of the nuts. And voila! The end result is a tree with increased structural integrity and a reduced chance of failing! 

I talked with my coworker Jacob, our Training & Development Manager and an ISA certified arborist, read through the ANSI A300 Tree Support System Best Management Practices, and looked at other resources online to see if it was an acceptable practice to drill holes through a tree to install brace rods. After considering a variety of sources, the general consensus is that the overall impact is minor because almost all of the drilled wounds are filled with threaded steel rod (except a 1/32'' gap), allowing the tree to compartmentalize the wounds rapidly, and that tree bracing should be done on trees that have a bigger concern to worry about, such as two codominant stems or a split union.

Professional assessment is imperative to determine the necessity of bracing for a tree. Signs such as co-dominant stems or split or cracked unions should prompt owners to get an opinion from an ISA certified arborist. After researching, observing, recording, and photographing various trees being braced, I felt empowered and motivated to share my newfound knowledge on this not-so-commonly heard of tree preservation service! The main purpose of this Arbor Ed article is to educate and share my findings, but Russell Tree Experts does provide tree bracing services should you want or need it! Our regional managers are all ISA certified arborists and can provide a free inspection and quote! Below are some videos about tree bracing! 

Sincerely,

Enrique Arayata I Media Production Coordinator, Russell Tree Experts

In his free time, Enrique enjoys working out, hanging out with his girlfriend, video production and photography, cars, technology, cooking, and watching new movies and YouTube videos. He has a BA in moving image production with a double minor in film studies and studio art specializing in photography from The Ohio State University, an AA in web graphic design from DeVry University, and is an FAA Certified Remote Pilot.

Learn More About Tree Bracing!

Tree Work in the Winter?

Dear Reader,

Can we get this work scheduled before winter kicks in?” “Do you complete tree work during the winter?” These are questions that I am often asked as the hibernal or winter soltice has arrived. In many cases, winter is the only time we can complete certain projects. This is due to the fact that many diseases and insects are not active, wildlife regulations are not in effect, visibility is increased, and the impact on landscapes is lessened due to winter’s colder conditions. Winter can be the perfect time for tree work.

One example of projects that must be completed during the winter is anything that falls under federal bat tree regulations. This typically includes public property projects where large trees need to be removed or the removal of any tree that could be a nesting site for bats. These regulations are intended to protect the Indiana Bat and the Northern Long-eared Bat, which are both currently endangered species. The importance of bats in our ecosystem is a story in itself. Bats typically overwinter in caves but move out to their nesting sites as early as April, therefore removal of possible nesting sites is regulated from March 31 through October 1. This is the main reason that the majority of our clearing operations and trail creation projects are completed during the winter months.

Winter is also also an opportune time for tree pruning to minimize the risk of insect and disease issues. For oak trees and elm trees, oak wilt and Dutch elm disease respectively are two devastating diseases that are be transmitted by insects (and root grafts) attracted to fresh pruning cuts. (Learn more here!) These insects are typically not active during the winter months, thus making approximately October 15th to March 31st the preferred time to prune oak and elm trees. If pruning cuts are required outside of this time window due to reasons such as storm damage, we highly recommend painting the cuts to minimize the risk of attracting the insects that can spread these diseases. Other trees that can benefit from winter pruning is the Rosaceae family which includes apples, pears, plums, and other fruit-bearing trees. The pathogens that infect many of these trees with diseases such as fire blight and black knot are typically not active during the winter months. Black knot is also much easier to see and prune out when the leaves are not present on our plum trees. Sanitation between cuts and proper disposal of these branches is imperative to slow down the spread of this disease.

Another reason for performing tree work during the winter months is the minimization of turf impact. Winter typically provides an absence of perennial and annual plants that are often planted under trees. Clients also tend to store their yard art, furniture, and other items that could be damaged during pruning and removal operations. This allows for our crews to be more efficient as less time is spent preparing the drop zone and moving items to a safe location prior to beginning any tree work. Thirdly, the winter months tend to be colder which provides a harder, sturdier ground that is more resilient to damage from limbs or equipment. As always, we do place mats on the ground if turf impact is a concern regardless of the time of year. Therefore, winter pruning becomes much more productive since there are fewer items that could be damaged otherwise.

Certain job sites such as golf courses, public parks, and street tree pruning, just to name a few, are performed during the winter months as there tends to be less pedestrians, allowing for better focus, less interference, minimized risk, and overall a more efficient and safe work zone.

As you can see, there are many reasons for scheduling a visit from your ISA certified regional manager this winter. With the absence of leaves on the trees, it is much easier for the trained eye to identify structural issues. Some structural issues may require a cable or even brace rods to secure your favorite tree in your landscape. Winter is also a great time to observe decay, fungi, or other pathogens that may not be visible during the summer when leaves are abundant and present. It is also the best time to observe cavities throughout the tree that may not be noticed while leaves are present. Dead, diseased, and broken branches are also much more visible when the leaves are not present in the winter months. Our arborists are trained to be able to identify the difference between dead and live branches even during the winter months. This time also allows the arborist to make quick decisions on improving the structure of the tree while pruning in the most efficient time of the year. Every day is a good day for tree care! Check out the video below to learn more!

Sincerely,

Mike McKee | Regional Manager, Russell Tree Experts

Mike graduated from Hocking College in 1983 with a degree in Natural Resources specializing in urban tree care. He has been a certified arborist since 1991. Mike started his career in the private industry in 1985 before becoming a municipal arborist in 1989. He retired after serving thirty years before joining us at Russell Tree Experts in Sept. of 2018. His love of trees has never waned since trying to climb up the ridges of the massive Cottonwood tree in front of his childhood home.

The Year of the Ugly Boxwood

Dear Reader, 
My good friend and arborist colleague Cat Baumgartner wrote the below article for the Inniswood Garden Society’s quarterly member newsletter (known as The Image). As soon as I read it, I knew that I wanted to share it with all our readers. Cat does a thorough job of describing the most serious problems we have had with boxwood this year and she explains them well and in simple terms. She has generously agreed to let us republish it. Photos within the body of Cat’s article are courtesy of Joe Boggs, OSU extension educator for Hamilton County.
- TJ Nagel, Russell Tree Experts

The Year of The
Ugly Boxwood

by cat Baumgartner, Oakland Nursery

I don’t have a simple answer. Or there are multiple answers, and your boxwood might have one, or several of the problems at once.

I’ll go over the likely suspects for this year- including winter damage, or ‘winter burn’, Boxwood Leafminer, Volutella Blight, and THE Boxwood Blight.

I’ll start with winter burn. Boxwood store a lot of their energy in their leaves through the winter. When we get extreme cold and wind in the winter, the leaves will lose more moisture. If the ground is frozen or dry (or worse, both), the leaves lose moisture faster than the roots can replace it, and we get the ‘burn’, where they turn a straw color and die, staying attached to the stem. It wasn’t noticeable until early spring, because evergreens have a delayed reaction to stress. It’s why we can cut down trees for Christmas and they don’t immediately turn brown, often lasting months. We did have greater than normal rainfall last year, but the three months leading up to late December were on the dry side. So, the ground was dry leading up to the extreme cold event that hit in late December creating a Double Whammy. There was a lot more winter burn this spring than I’ve seen in decades. It looks like straw-colored sections in the shrubs, often in a random pattern.

Photo courtesy of Joe Boggs, OSU extension educator for Hamilton County. 

Next, there are different blights out there that can affect boxwood. ‘Blight’ is a general term for a plant disease, typically caused by a type of fungus. Most of them are less common and less damaging than the blight striking fear in the hearts of gardeners that is Calonectria pseudonaviculata, called simply “Boxwood Blight”. There have been some isolated cases in the Greater Columbus area. The main symptom though is defoliation. You’ll have green leaves, then they’ll start looking funny, and rapidly progress and fall off the stem. In a matter of weeks, you can go from a healthy-looking plant to one with sections with completely naked stems. Definitive identification requires lab testing. Other blights can show similar symptoms, but since some are more treatable, confirming which type of blight your boxwood might have is recommended before removing plants. If you do have “Boxwood Blight,” replanting with more boxwood is not recommended, so confirmation of what kind of blight you have will also tell you what you can plant in that spot. Most of the damage we’ve been seeing is NOT “Boxwood Blight.”

Photo courtesy of Joe Boggs, OSU extension educator for Hamilton County. 

Volutella Blight or Pseudonectria Canker (Pseudonectria buxi) can be damaging but is not necessarily a death sentence often just affecting individual stems and not whole portions of the plant. Symptoms can be seen if the stem is sliced into, showing dark brown streaking just under the bark. Most twigs infected with Volutella blight will turn straw colored and die. In most cases dead stems from Volutella canker can be easily pruned out and the remaining portions of the boxwood will fill in slowly over time. 

This year we also had frost damage in May. If leaf buds are still tight, frost is not a problem. If the new leaves have emerged, but have ‘hardened off’, it is also not a problem. But if the new growth is timed so that it is new, fresh and tender, and then we have a late freeze, the new growth is damaged, turns that sad straw color, and is aesthetically at least, a problem. A healthy shrub can put out another round of growth, and it is not a long-term problem. Trimming off the burnt new growth is all that needs doing.

Photo courtesy of Joe Boggs, OSU extension educator for Hamilton County. 

Boxwood Leafminer, an insect pest, is an ongoing problem. The damage from leaf miner is more generalized, an ‘all-over’ bad look rather than the chunky sections dying back. The adults lay eggs in the new growth in mid-spring, and as the larval stage hatches and begins to feed on the interior tissues, the leaves start looking bad, often having a blistered or bubbled effect, usually easier to see from the bottom of the leaf.   

Preventative sprays can thwart adult leafminers from laying eggs in the new growth, but need to be applied as you see the new growth. Systemics applied in the Fall or Spring can also provide control but know that boxwoods are insect pollinated. 

If you don’t have Boxwood blight, you have two options. Cut out the dead branches and let the plants regrow which may take three years or more to totally restore, in good condition, or replace the plants.


A Final Note…

Since Cat wrote her article, we have had several boxwood shrubs test positive for yet another disease, Colletotrichum theobromicola (also referred to as boxwood dieback). This is a new disease for central Ohio and symptoms look similar to other blight diseases with the random dieback of twigs and straw-colored foliage. However, in addition to twig dieback, the pathogen also causes leaf spots that appear white in the center surrounded by dark brown margins as well as a bright black discoloration just beneath the bark along the twigs. The jury is still out on the best way to attempt to manage this disease but for now, good cultural practices such as removing symptomatic plants and sterilizing pruning tools between pruning different plants are the best-known strategies. Fungicides might also be helpful, but efficacy has not been determined. Laboratory testing should be used to confirm boxwood dieback because it can easily be misdiagnosed as other blight diseases. 

As we continue to have more problems in the landscape with boxwood, it may be time to consider alternative plants that can achieve a similar function. Stay tuned for my boxwood replacement article later this Fall.

Sincerely,

TJ Nagel I Scheduling Production Manager, Russell Tree Experts

TJ loves trees. He is an avid gardener and plant collector. TJ graduated from The Ohio State University with a B.S. in Agriculture with a major in Landscape Horticulture and minor in Entomology. TJ is an ISA Board Certified Master Arborist and well versed in Plant Pathology. TJ joined Russell Tree Experts in 2012.