
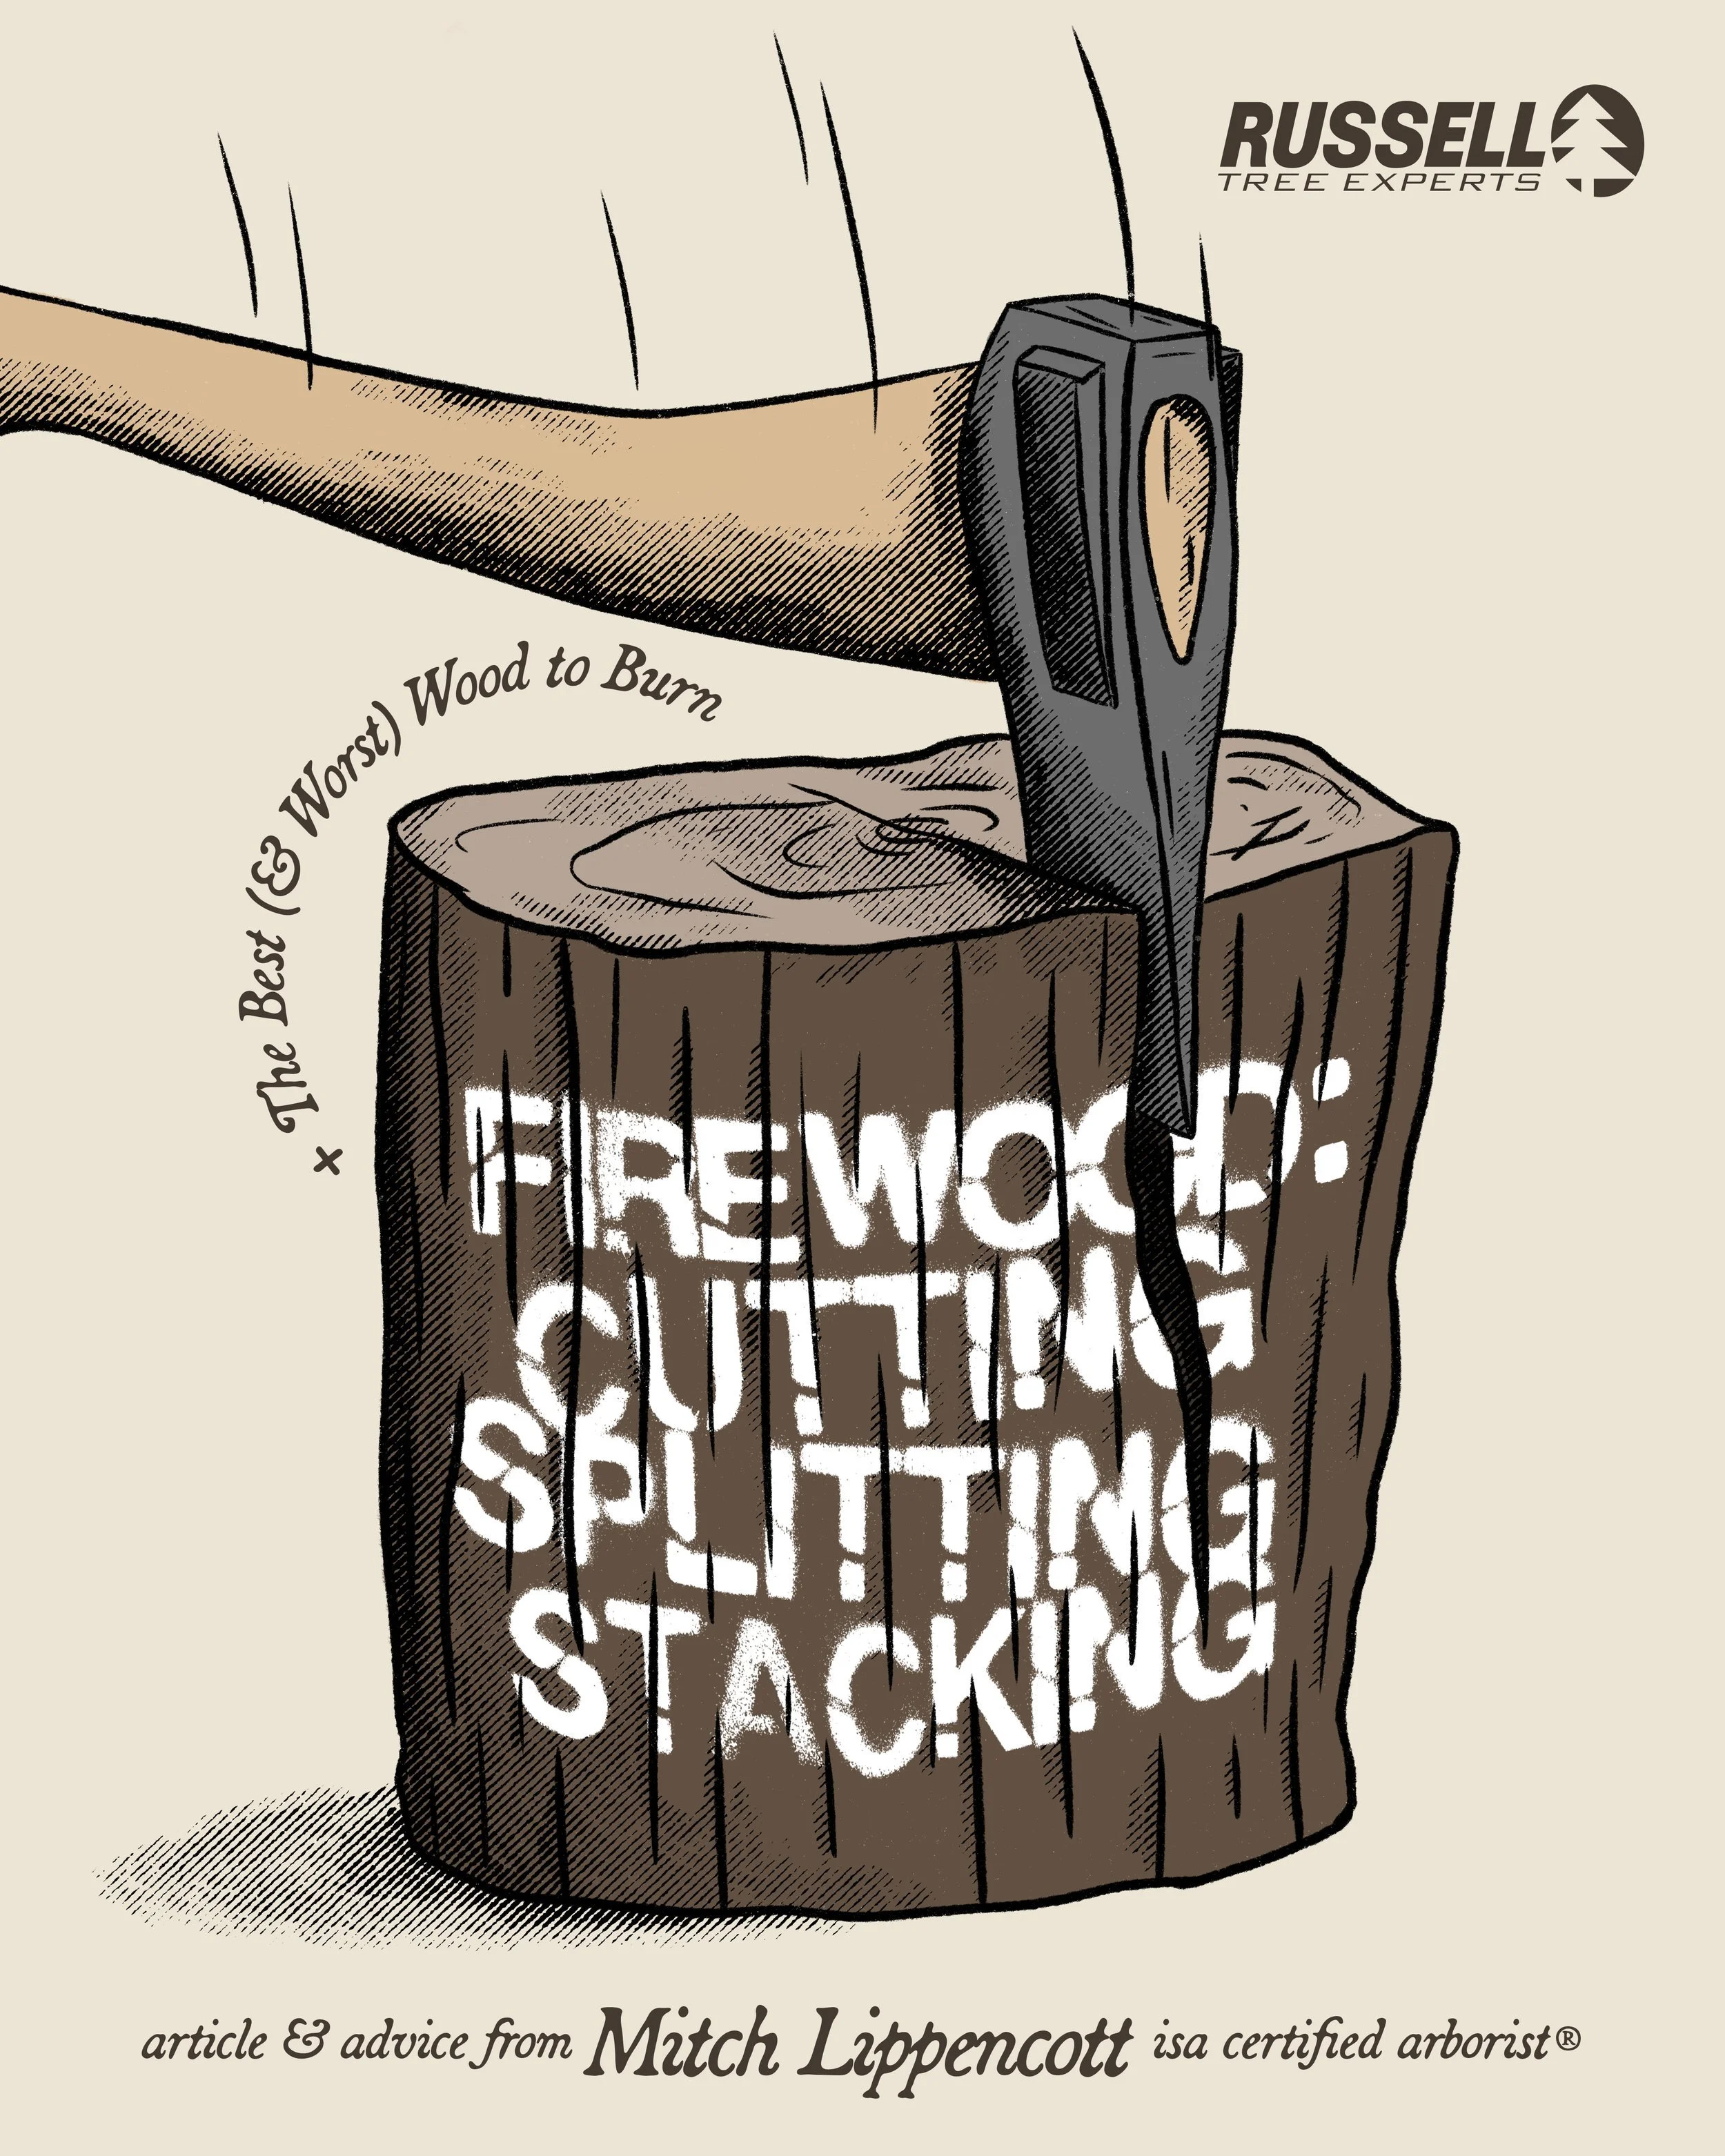
“Lichen? Moss? Why are you on my tree?”
On a winter hike at your local park or preserve you notice small green circles on the trunks of nearby trees. Upon closer inspection you notice leaf-like structures in a circular fashion. Congratulations, you have just found the…

Andrew Hendricks
ISA Certified Arborist® OH-7089A
January 15, 2026
On a winter hike at your local park or preserve you notice small green circles on the trunks of nearby trees. Upon closer inspection you notice leaf-like structures in a circular fashion. Congratulations, you have just found the Common Greenshield Lichen (Flavoparmelia caperata). A quick glance around reveals more lichen and mosses covering parts of trees all along the trail. Now you ask yourself “Are these benevolent acquaintances or are they treacherous foes trying to slowly devour our beloved trees?” Let’s break down the facts of these little suspicious growths: What are they exactly, where do they come from and do they hurt trees?
©Russell Tree Experts
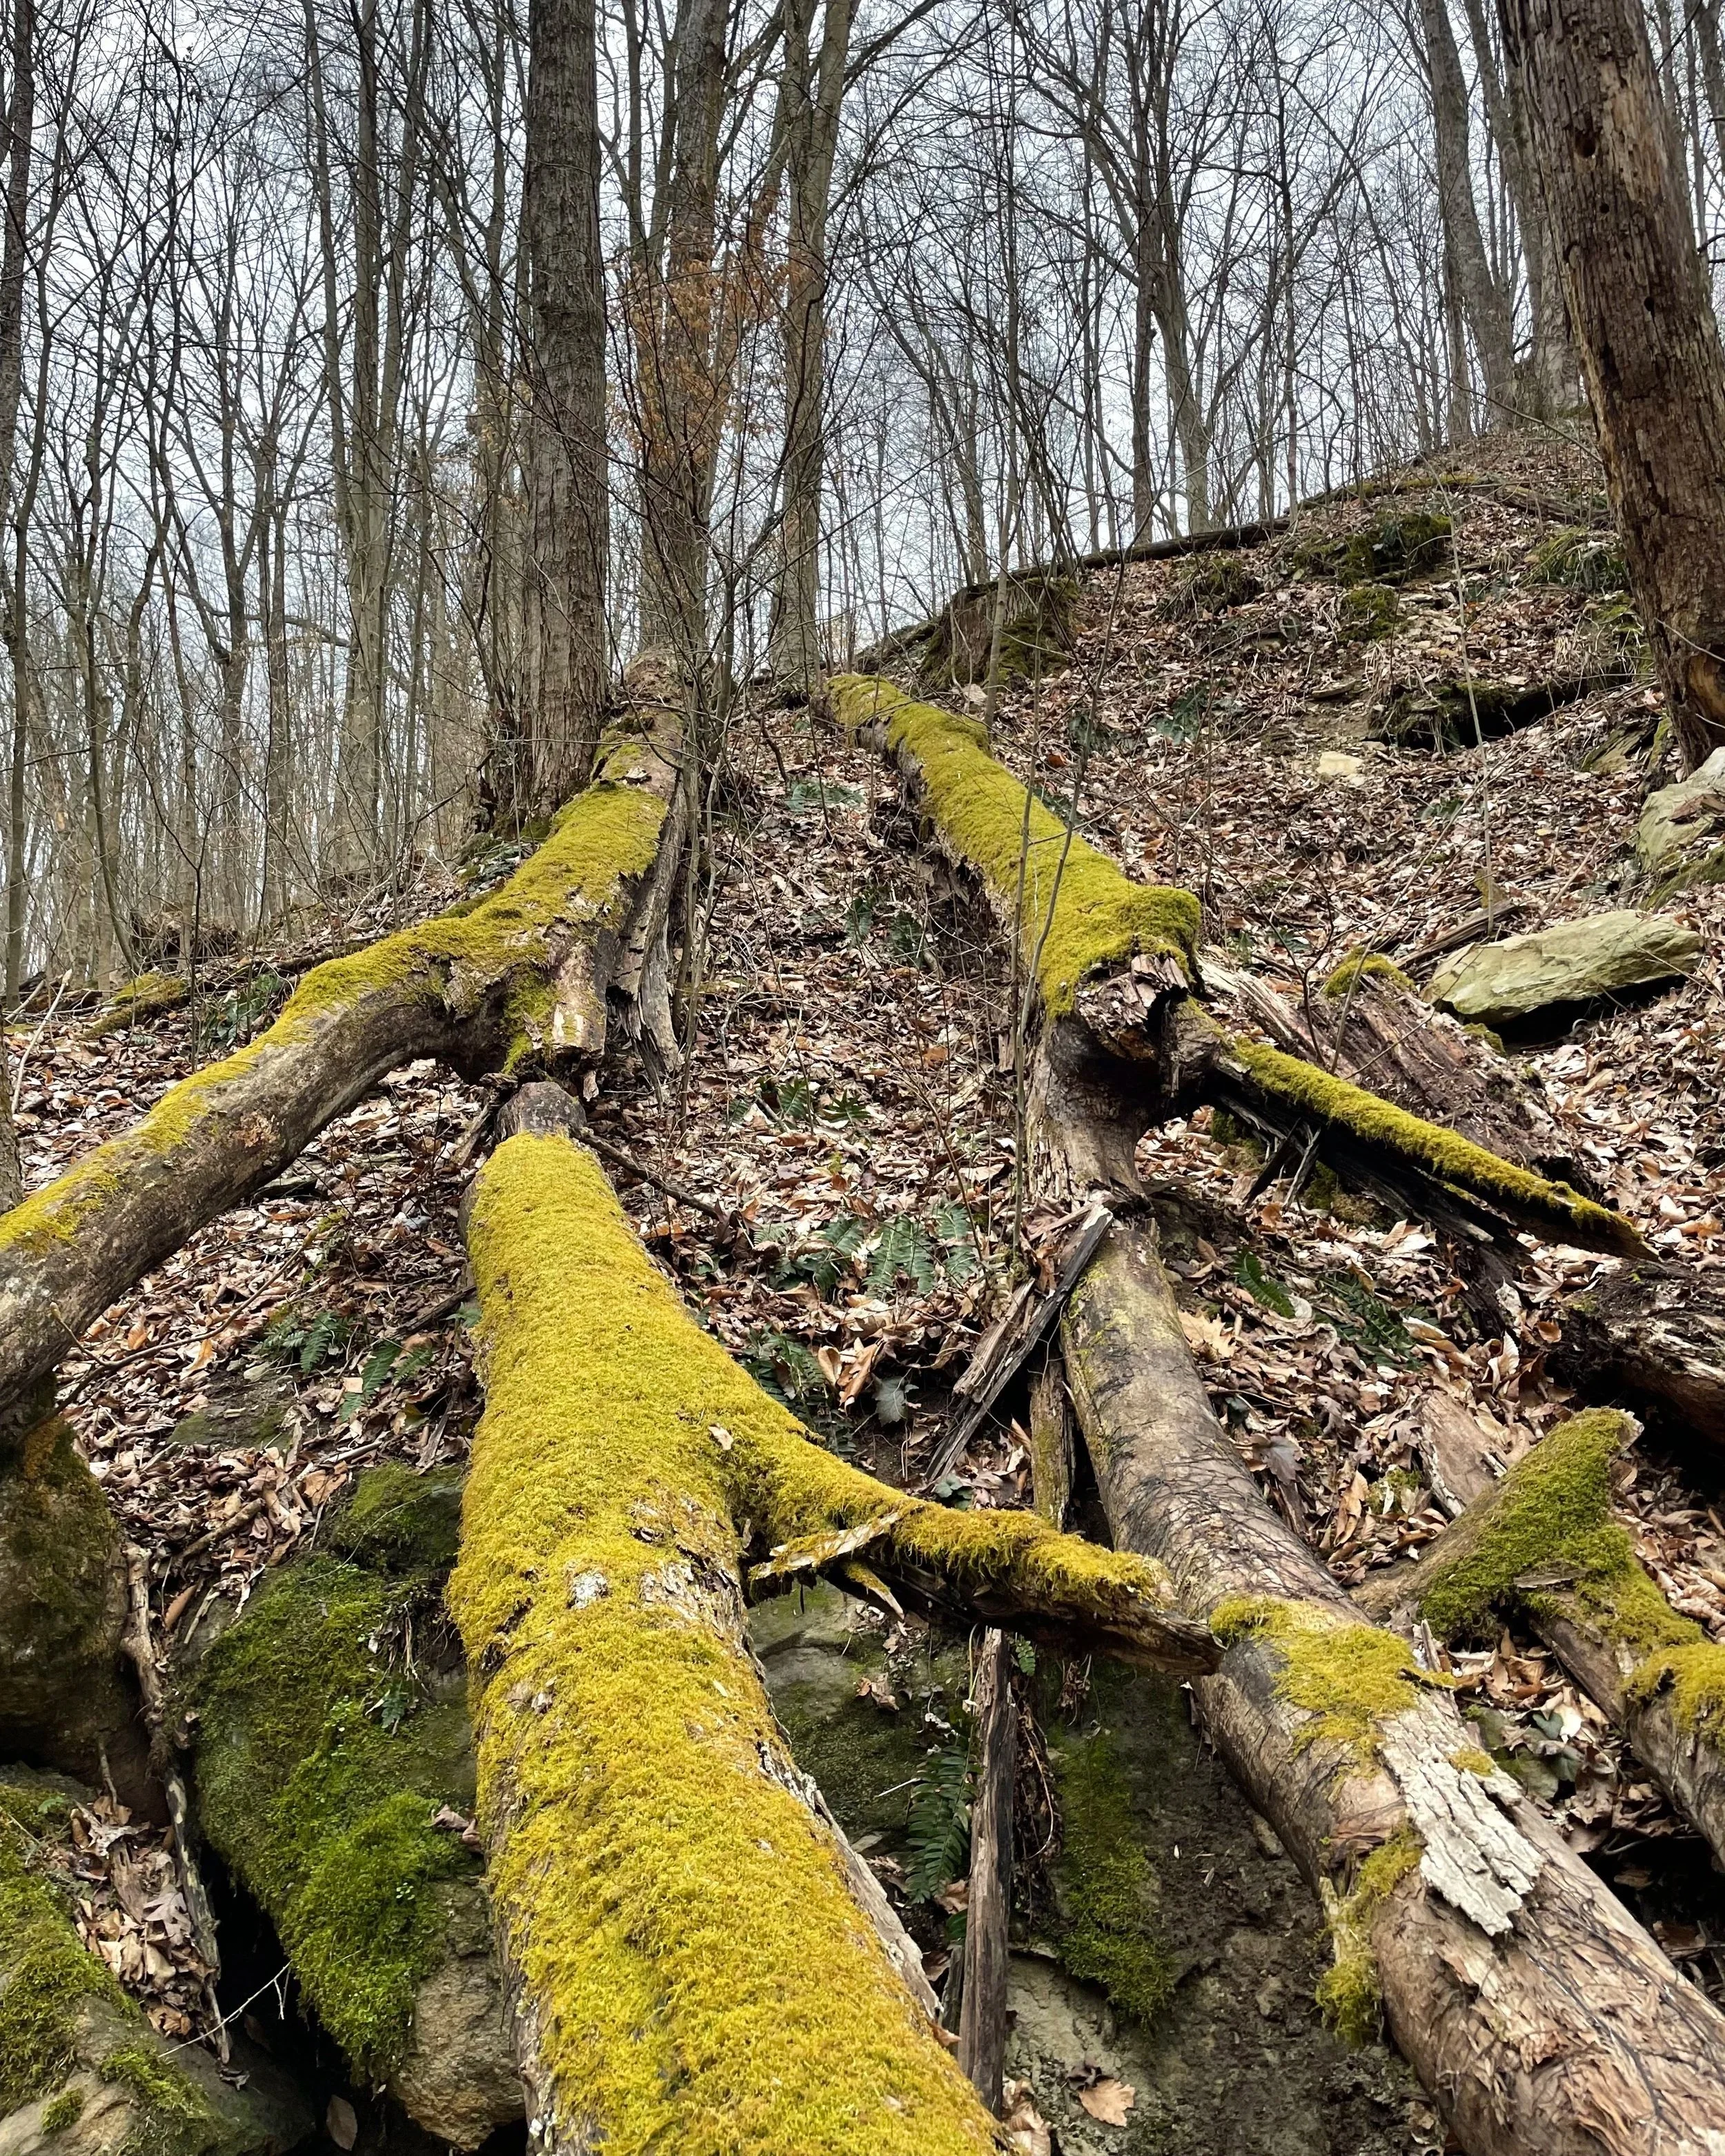
Moss growing on a tree.
Lichen are fascinating organisms not only because of their symbiotic relationship between fungi and algae, but also for the fact that there can be multiple fungi partnering with multiple algae in one specimen! Fungi give the structure of the overall organism, while algae provides sustenance for both through photosynthesis, “Lichens are a case of fungi that have discovered agriculture” -Trevor Goward, Naturalist. Lacking formal training in biology, Trevor Goward, a citizen scientist, has contributed to the scientific community through his observations in Wells Gray Provincial Park. One notable contribution was in 2016 his research led to the discovery of lichens containing a second fungal partner.
©Russell Tree Experts
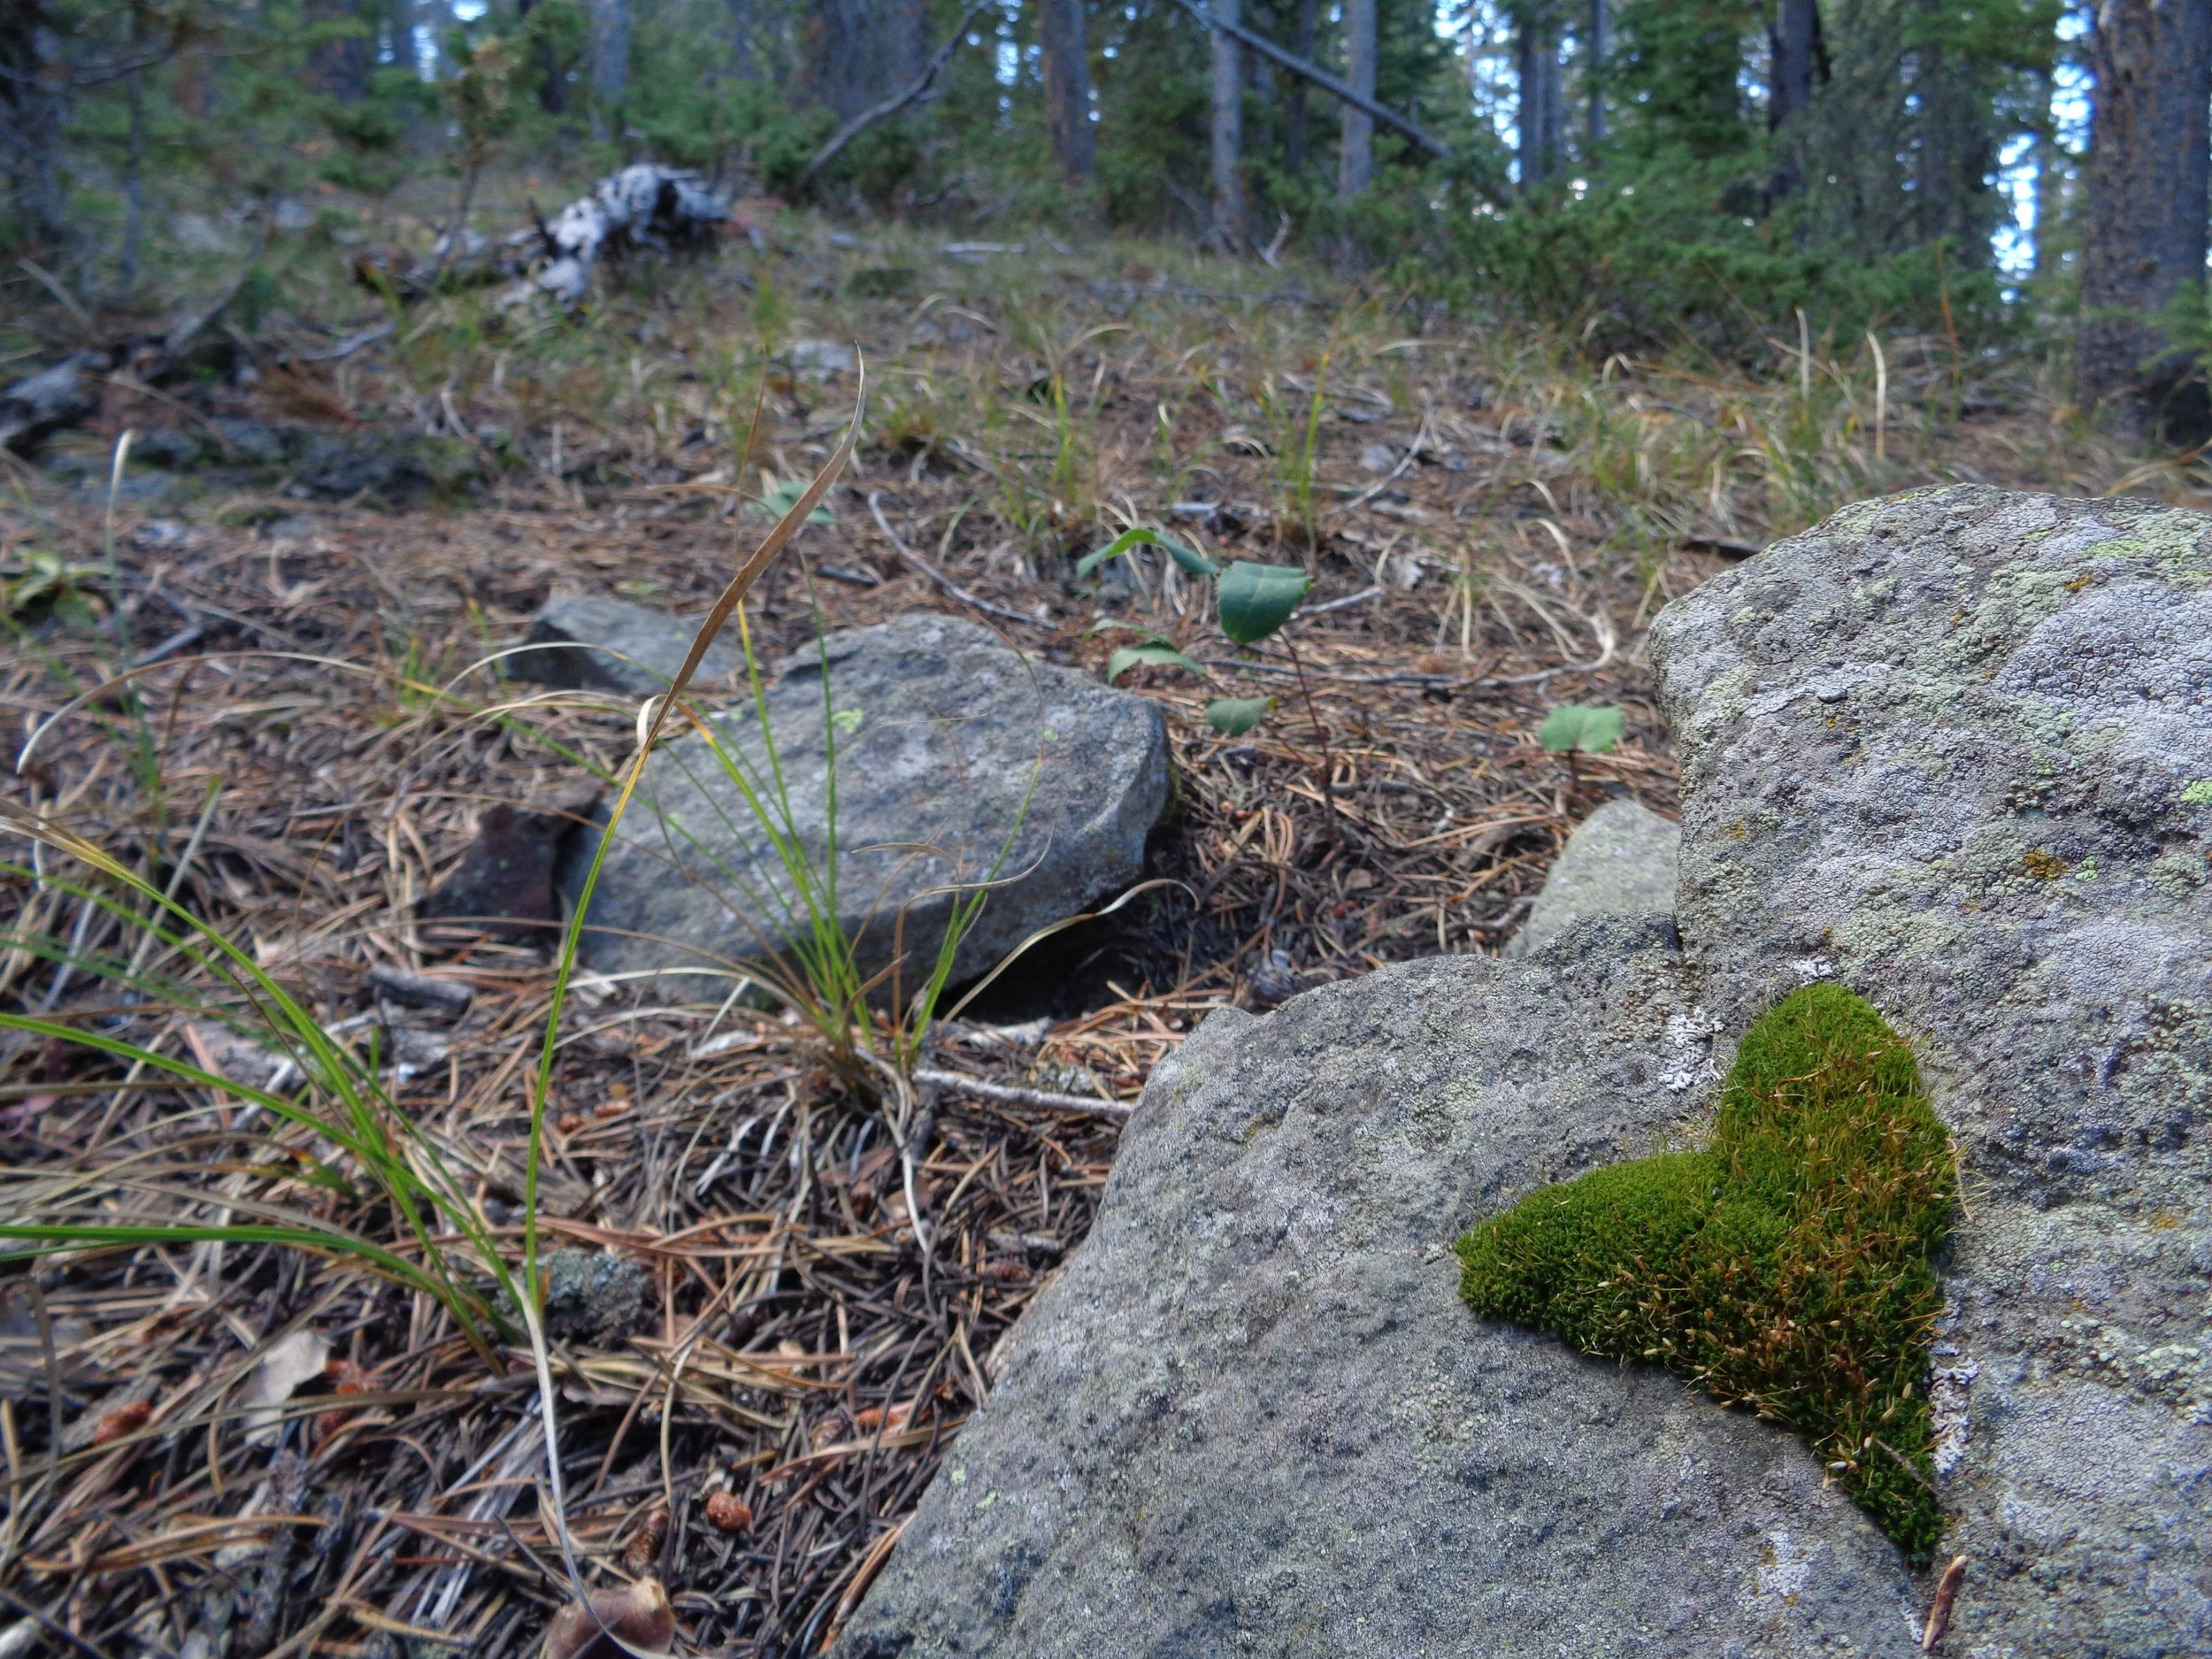
Moss growing on a rock (in the shape of a heart!)
Mosses on the other hand, are similar to trees in that they produce their own energy through photosynthesis but lack true vascular tissues. Lacking flowers is another trait of the mosses otherwise known as bryophytes to the scientific community.
Ecologically speaking, lichens are a pioneer species; meaning they’re the first organism to colonize rocks and help build soils for higher forms of life like mosses. Lichen and moss can both spread across the landscape by spores or vegetatively, where small pieces break off and start anew. Wildlife, such as birds, will utilize different lichens or mosses in building nests. For example, the water-ouzel comes to mind from reading John Muir books; these lovely little birds make their nests near the edge of creeks almost entirely of moss. “These are deftly interwoven, and felted together into a charming little hut; and so situated that many of the outer mosses continue to flourish as if they had not been plucked” notes John Muir. Closer to home and a bit smaller are the Ruby-throated Hummingbirds, they will weave lichen into their nests to camouflage from predators.
©Russell Tree Experts
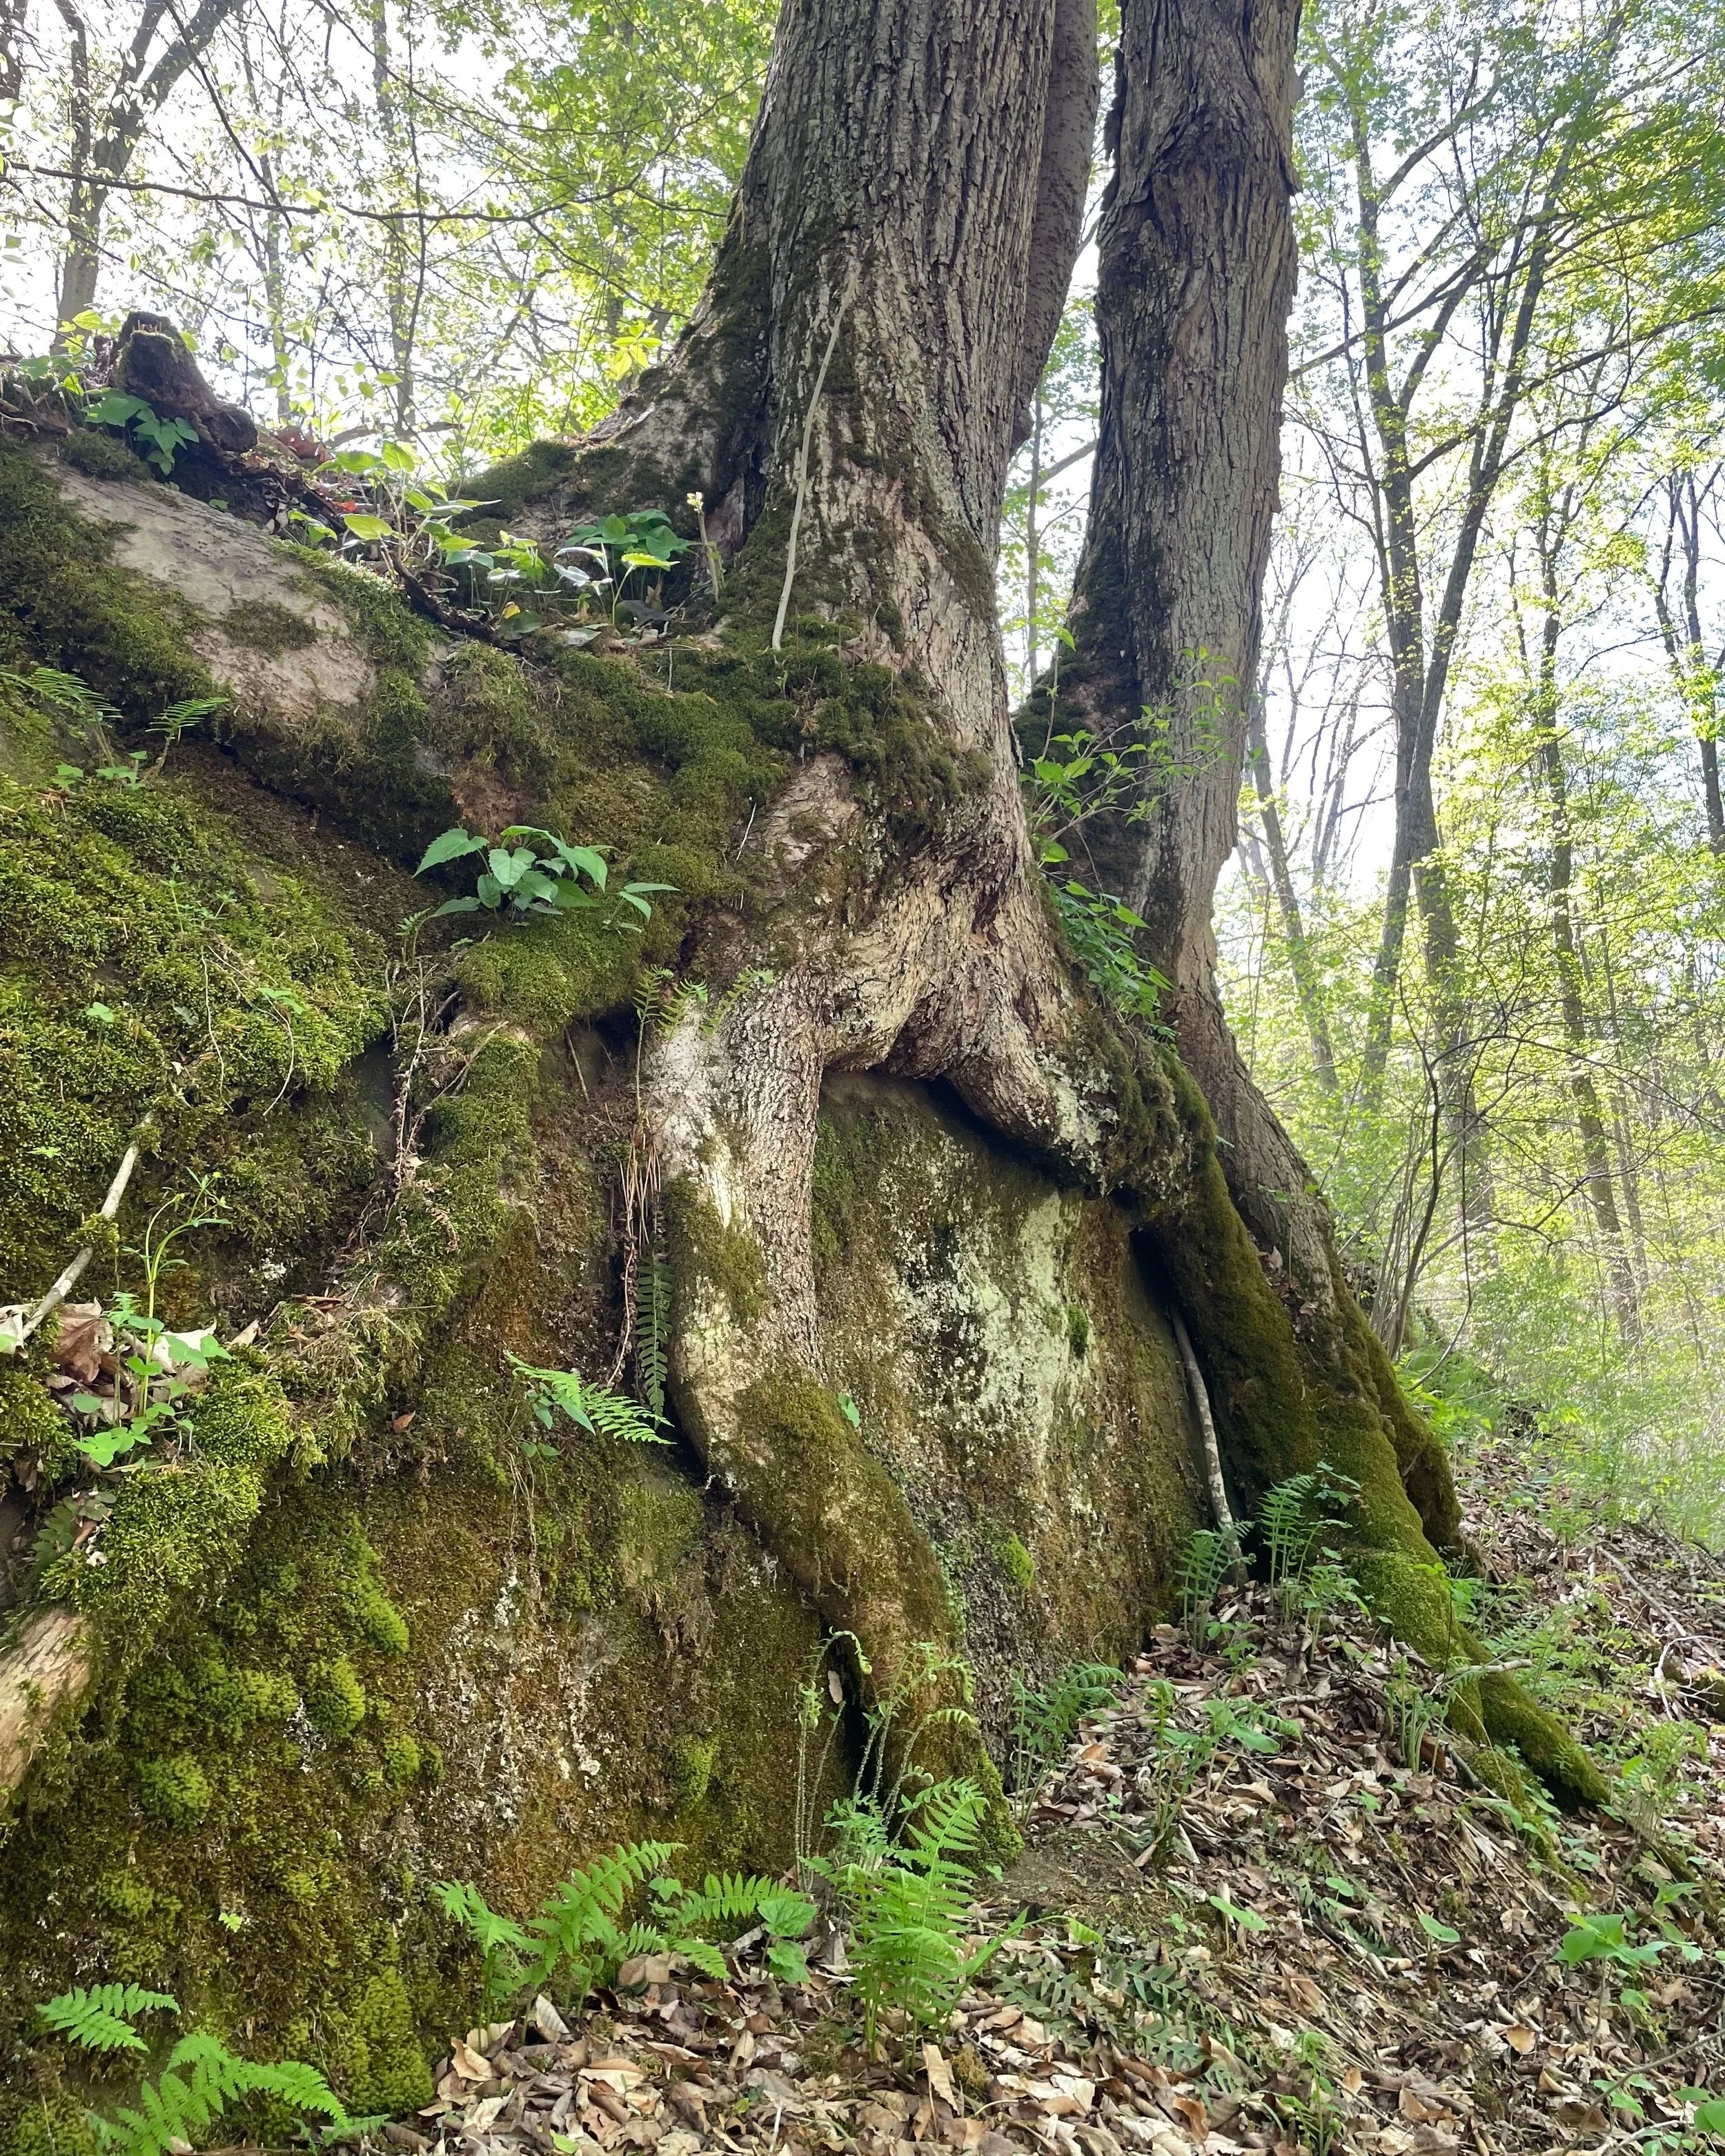
Mostly moss (green) growing on a tree with some lichen (light blue-ish gray) on the rock and tree.
Mosses and lichen are epiphytic (non-parasitic) plants using other plants as growing sites. They prefer moist locations such as swamps or high humidity areas. Looking in our yards, we can find lichen in undisturbed sites exposed to sunlight and most important of all, clean air. I can find some lichen and moss on the redbud tree in front of our house; these are of no concern. A common belief is that lichen and moss kill trees because they are the ones present when a homeowner notices a dead tree in their yard. That is similar to blaming smoke for a fire instead of the match that started it. A surplus of lichens or mosses may be signs of a stressed tree due to a thinning of canopy and not the cause of your declining tree. Signs of a declining/stressed tree include but are not limited to browning or yellowing leaves, dead branches and smaller than average leaves. Causes for this may be environmental such as drought stress, poor soil fertility or extreme temperature changes. Other causes could be due to pests or diseases; lichens and mosses however are not stressors rather they are taking advantage of an increase in light due to a thinning canopy. The best thing for your trees is to provide a healthy environment that is stress free so they can do what they do best and keep reaching for the light. The only thing lichen and mosses are killing is time. Sit back and relax while marveling at our little neighbors as they come together in partnerships, exploring new sites, challenging the way we think about them and all the while building precious soil.
©Russell Tree Experts
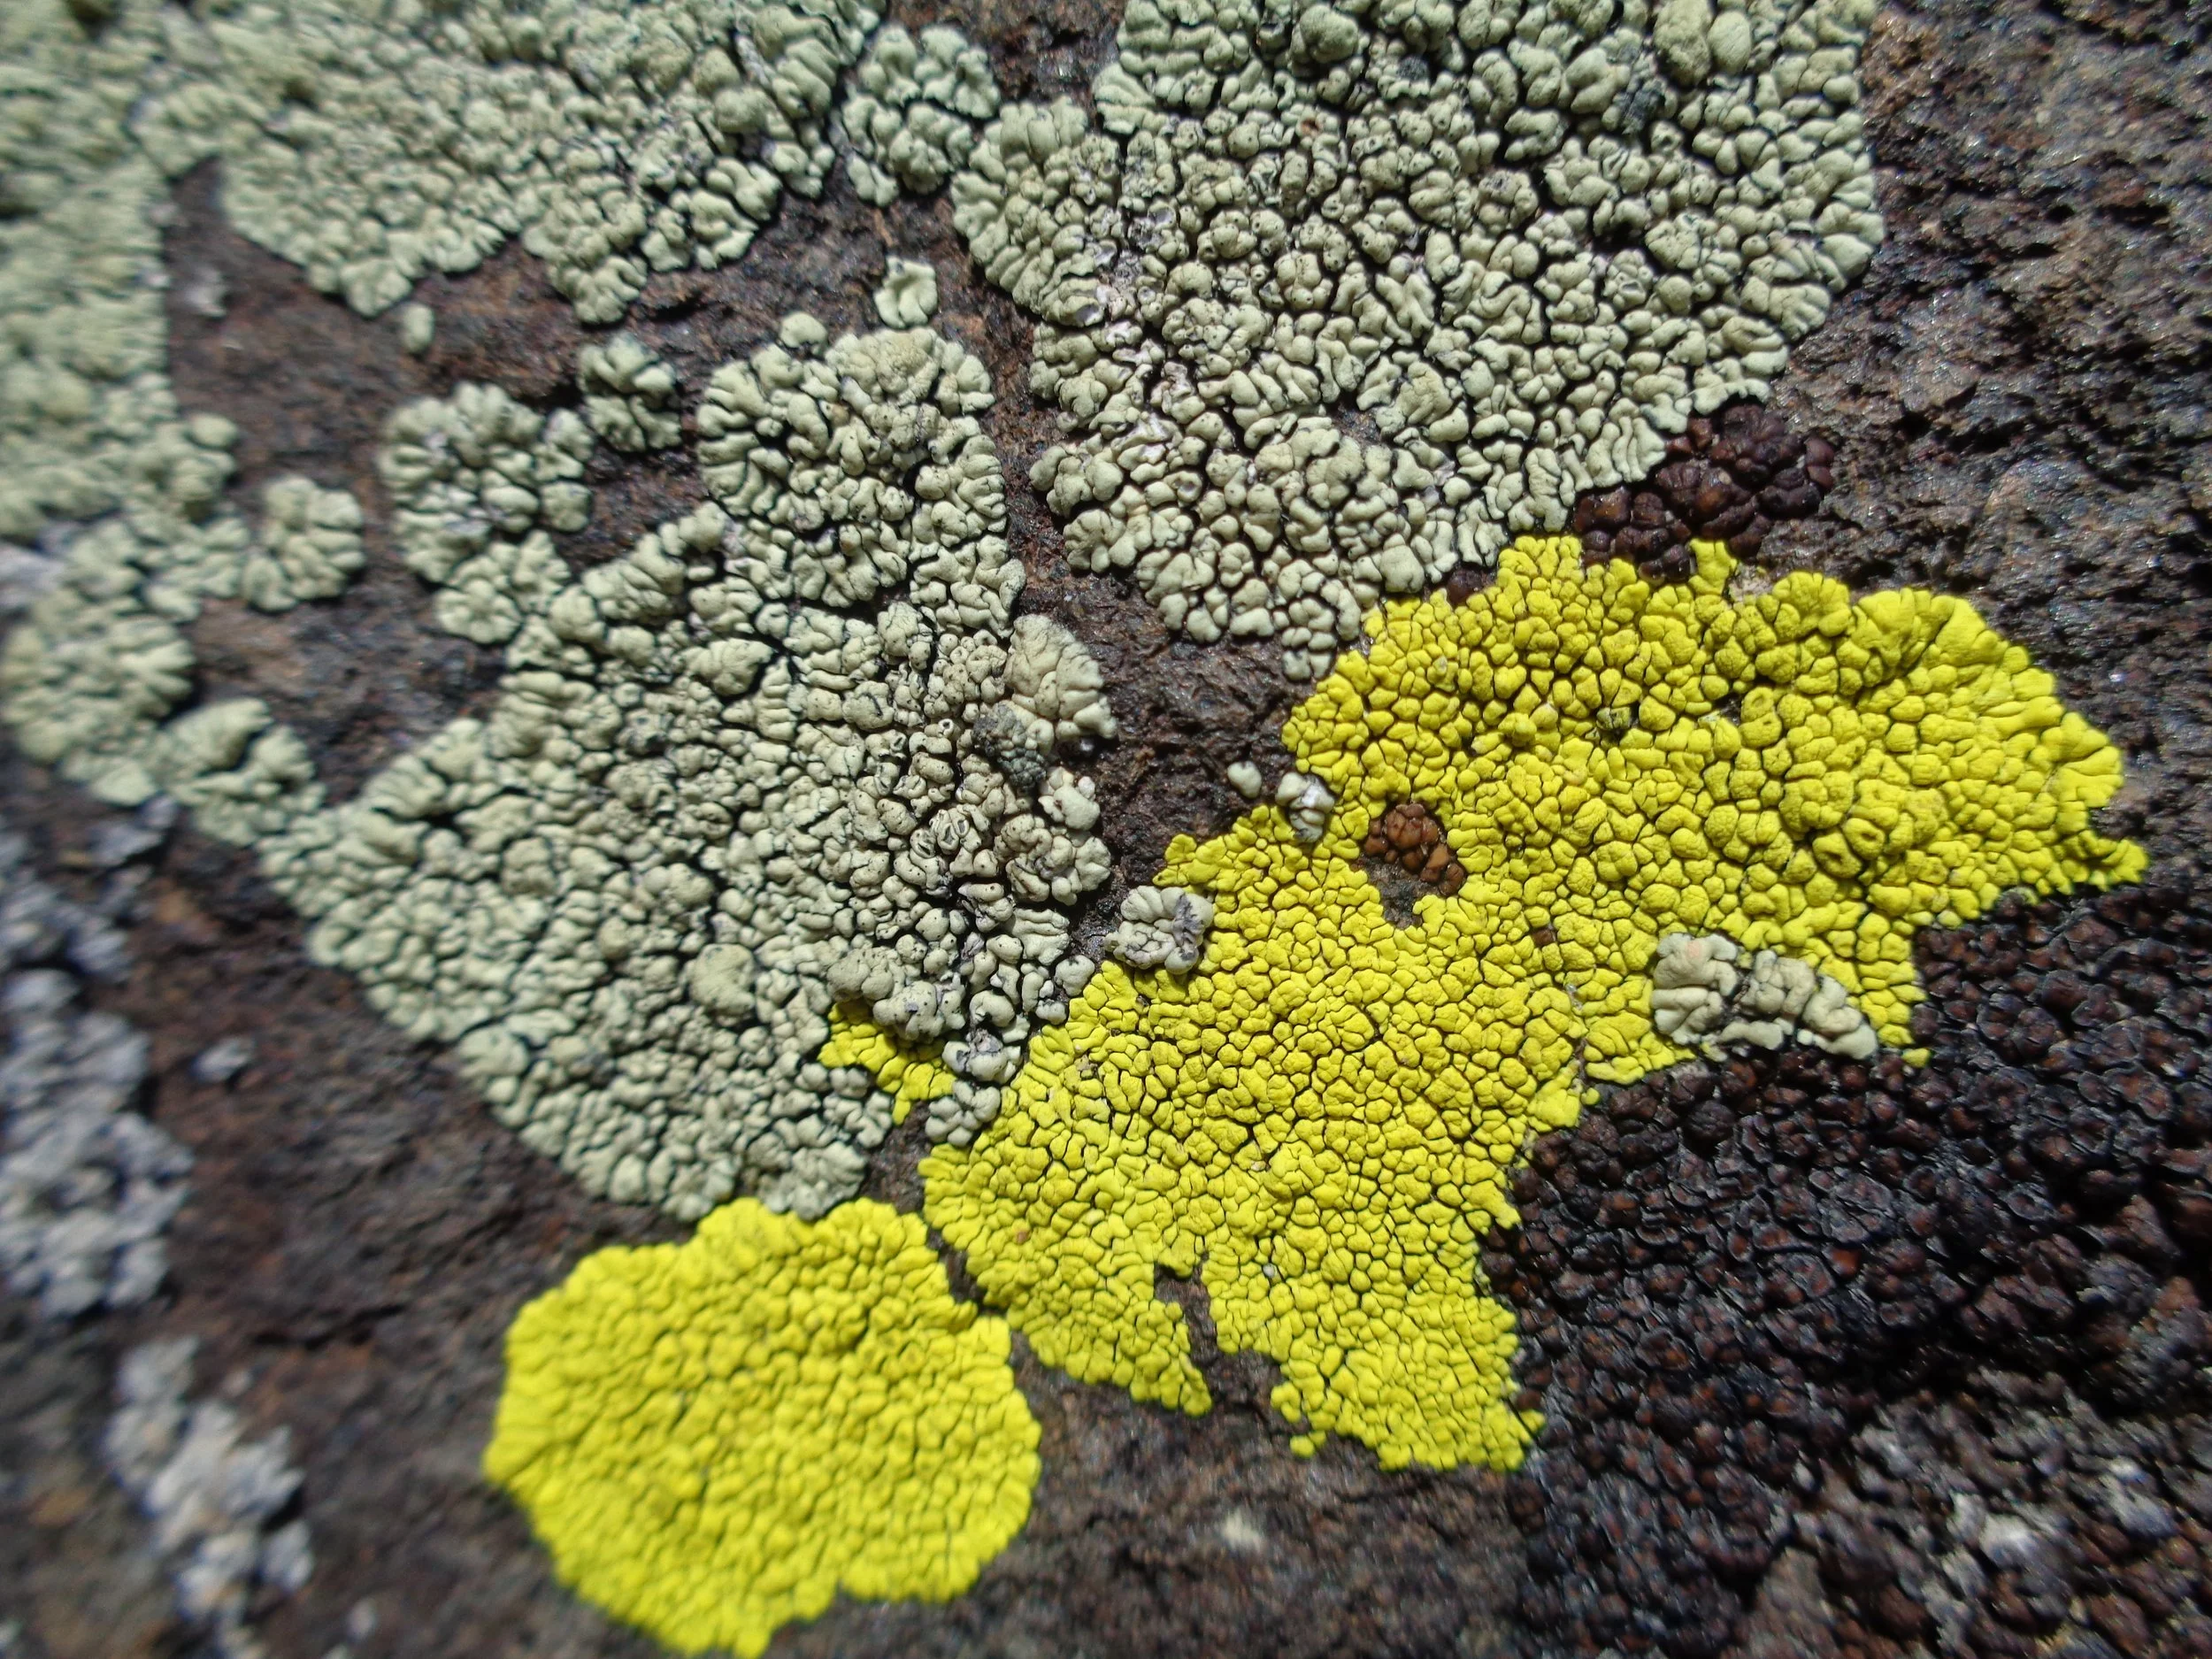
Close up of lichen
For more in-depth reading on lichens, check out chapter 3 of Entangled Life (Merlin Sheldrake, 2020) from our Winter Reading List ARBOR ED™ article by my coworker and ISA Certified Arborist®, Mitch Lippencott! For incredible up close photos, I recommend Ways of Enlichenment, a website started by Trevor Goward located in British Colombia. For something more local visit the Ohio Moss and Lichen Association website to learn more about our very own lichen and mosses of Ohio or by joining one of their forays in search of our little friends.
ADDITIONAL ARBOR ED™ ARTICLES!


Andrew Hendricks I Regional Manager, Russell Tree Experts
Andrew joined Russell Tree Experts in 2021 but has been in the tree care industry since 2018. He is certified in first aid, CPR, and RTE TREES, is an ISA Certified Arborist® and has his commercial applicator license. Andrew’s favorite tree is the eastern redbud (Cercis canadensis). In his free time, you might be able to spot him hunting or eating his favorite food: spaghetti with zucchini noodles!
Celebrating Our Customers: You!
Michelle Burden
January 8, 2026
As we begin a new year, Russell Tree Experts would like to thank you, our loyal customers, for all you do to make our business a success! Because of your trust and continued loyalty in our services and staff members, we are now celebrating over 21 years in the tree care industry! We could not have achieved this without you!
©Russell Tree Experts
Our team member Alex fertilizing an ash tree.
You love your trees and entrust us to ensure those trees last as long as possible by allowing Russell Tree Experts to provide plant healthcare services throughout the year. Many of you take advantage of our annual auto-renewal plan to ensure we provide the proper treatments at the proper time. This thoughtful commitment to your trees ensure they will last a long time.
We are also honored that you advocate for your trees by giving us the opportunity to prune, cable, and brace your trees as needed. Well-cared-for trees are happy trees and we love happy trees! Many of you once planted some of your trees in memory of a loved one or to mark a special moment. We take great pride in you trusting Russell Tree Experts to maintain these valued trees as they grow and quietly give back as only trees can.

©Russell Tree Experts
Our team member Scott pruning a weeping willow tree.
Another reason we admire you is your proactiveness prior to having your work scheduled. You often notify us in advance when you prefer to have your work done or when a time conflict occurs. You also let us know when you have a bird’s nest or squirrel’s nest needing relocated prior to your scheduled date. You contact us in advance when you have to put your work on hold until a bee’s, hornet’s, or wasp’s nest has safely been removed. These considerate gestures helps our Production Manager to schedule work in a timely manner, avoids extended wait times for you, and keeps our crews safe.
While we do our best to schedule your work in the estimated time frame given, sometimes high winds, thunder, lightning, and heavy downpours can impact these time frames. Our Production Manager admires your flexibility as he adjusts the schedule to accommodate unexpected weather conditions.
Also from time to time we get urgent calls due to a tree suddenly falling and unfortunately landing on a building, home, or other structure. We appreciate your patience as priority needs such as this sometimes causes other customers to wait a bit longer than we originally anticipated.
©Russell Tree Experts
Russell Tree Experts responding to an urgent and hazardous removal after a tree fell on the homeowner’s house during a thunderstorm in Columbus, OH.
Our crews also get called away for weeks and sometimes months at a time to assist with disaster relief like hurricanes, wildfires, ice storms, and more. The people who have suffered through these storms are so very thankful for our cleanup efforts when needed. This impacts you, our local valued customers. Your compassion and understanding as we collaborate with those affected by natural disasters throughout the country does not go unnoticed.
So many of you are very proactive upon being notified of your scheduled date. Prepping your lawn and driveway by moving vehicles, lawn furniture, and planters prior to our arrival allows our crews to complete your work efficiently and keeps your property safe. Not only that, but you are also considerate of your neighbors by informing them, when necessary, that we will be in the neighborhood.
Not only are you good neighbors and accommodate our crews by moving any items that may hinder efficient tree work, but you also often make yourselves available to be on site and even greet our crews upon arrival. Taking the time to chat with the crew upon their arrival and at the end of the job helps ensures our goal of providing the work to your complete satisfaction.
©Russell Tree Experts
A group photo of just some of our team members!
We value your efforts to make our crews feel comfortable while they are visiting your property. Tree work can be laborious at times, and being offered a cold glass of water in 90 degree temperatures goes a long way. Our crews appreciate your willingness to maintain a safe distance from the work area to maintain everyone’s safety. They also have mentioned that many of you have provided snacks, kind words, and even occasional tips. Our crews are touched by these thoughtful acts of kindness.
As busy as so many of you are with work, family, and life in general, you considerately make time to provide glowing Google reviews and to share your experiences with your friends and family. These glowing reviews and referrals ensures our continual growth, and we are sincerely grateful.
You are valued, respected members of our community and many of you feel like family. We look forward to serving you in 2026 and beyond. Please know we are here for you 24/7 with an ISA Certified Arborist® available anytime. To speak with me or my coworker Snobilee for a free tree work quote, call us at (614) 895-7000 or request a free tree work quote online at RussellTreeExperts.com/Quote.
ADDITIONAL ARBOR ED™ ARTICLES!

Michelle Burden I Office Manager, Russell Tree Experts
Michelle joined Russell Tree Experts in 2019. Fall is her favorite time of the year! When she is not working she enjoy spending time with family and friends.
Complimentary Christmas Tree Disposal!

What: Complimentary Christmas Tree Disposal Service by Russell Tree Experts
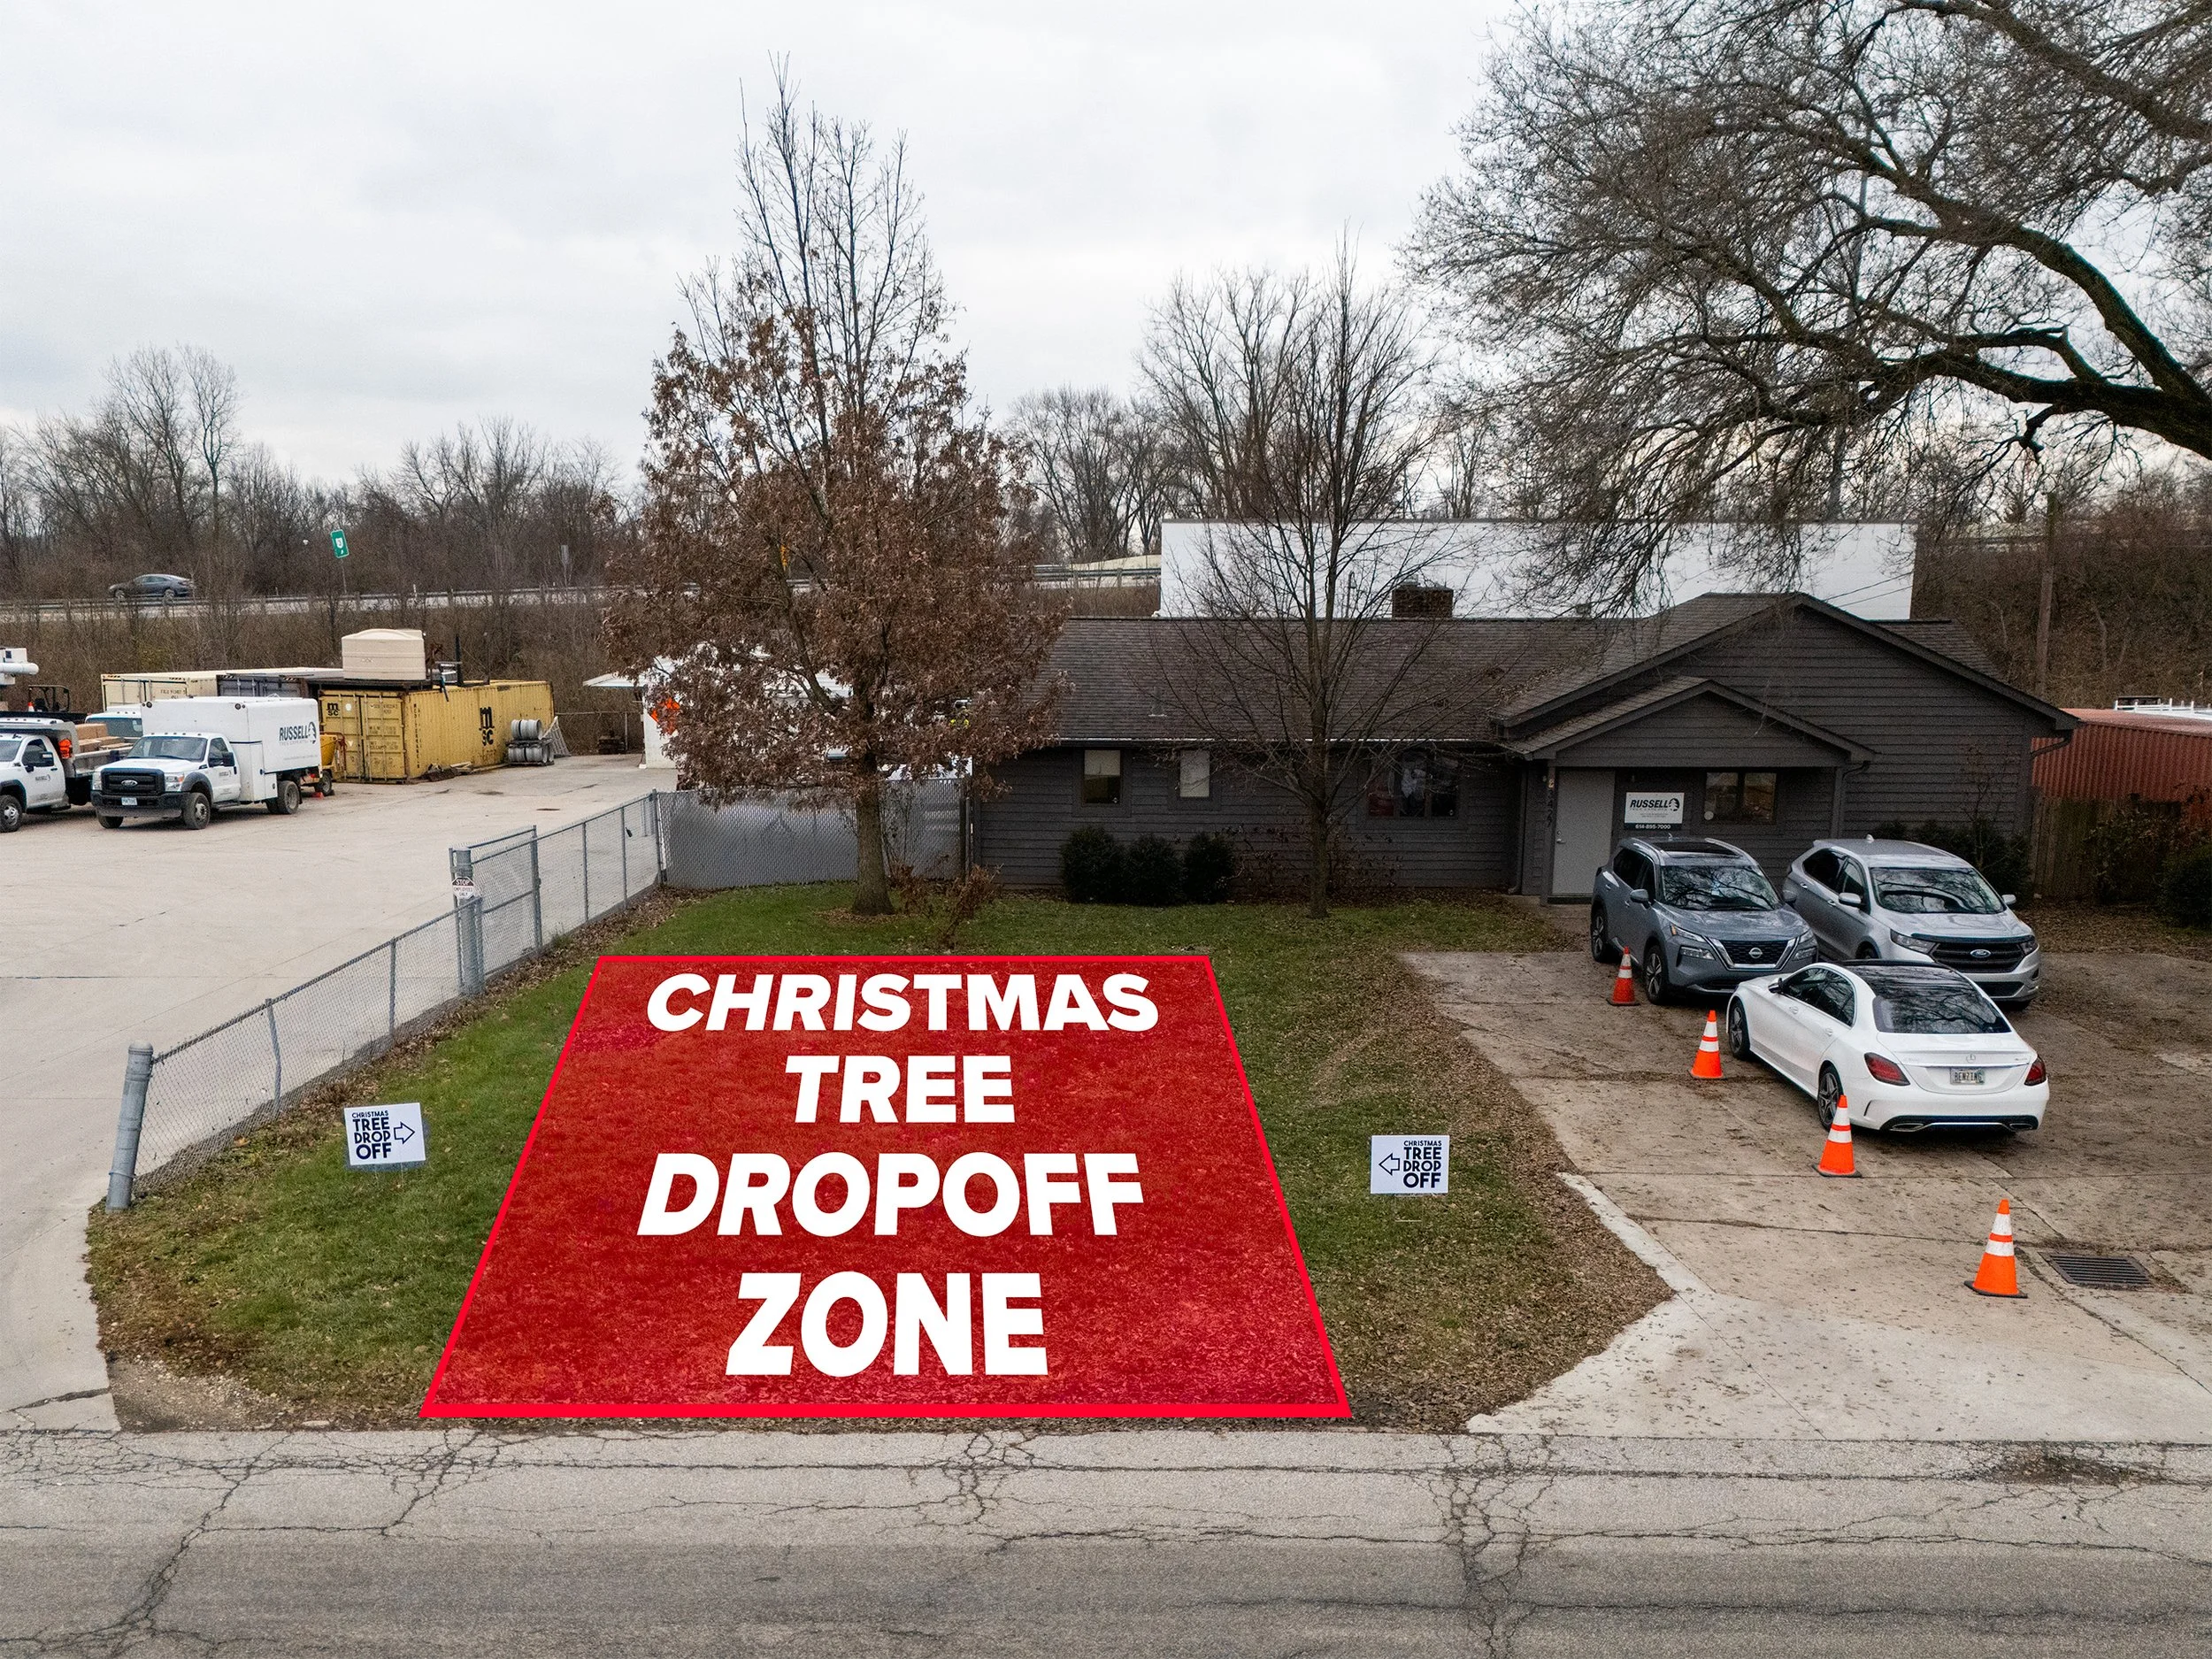
Where: 3427 E Dublin Granville Rd. Westerville, Ohio 43081
When: December 26, 2025 – Jan 9, 2026
Details:
For those who live in a home where it is difficult to dispose of your tree, you can drop off and dispose of your old Christmas tree for free anytime at Russell Tree Experts (3427 E Dublin Granville Road Westerville, OH 43081) between Friday, December 26th 2025 and Friday, January 9th 2026. The drop-off zone will be at the front yard of our office with marked cones and signage! If you need any assistance, you can knock on our front door between 8:30 AM to 4:30 PM from 1/5/26 to 1/9/26 and one of our friendly staff members will lend a hand! We’ll ensure that your Christmas tree gets reused to become mulch or compost!
Quotes:
“We are happy to offer this service again this year to anyone who doesn’t have yard waste
removal services available… and it is always fun for us to throw a couple dozen trees through
our wood chipper!” – Kenny Greer, Marketing Director
“If you want your old Christmas tree to get reused and recycled back into the Earth, we’ll make
sure it finds a new home in the form of wood chip mulch!“ – Enrique Arayata, Media Production Manager
ADDITIONAL ARBOR ED™ ARTICLES!


Comparing Conifers of Central Ohio
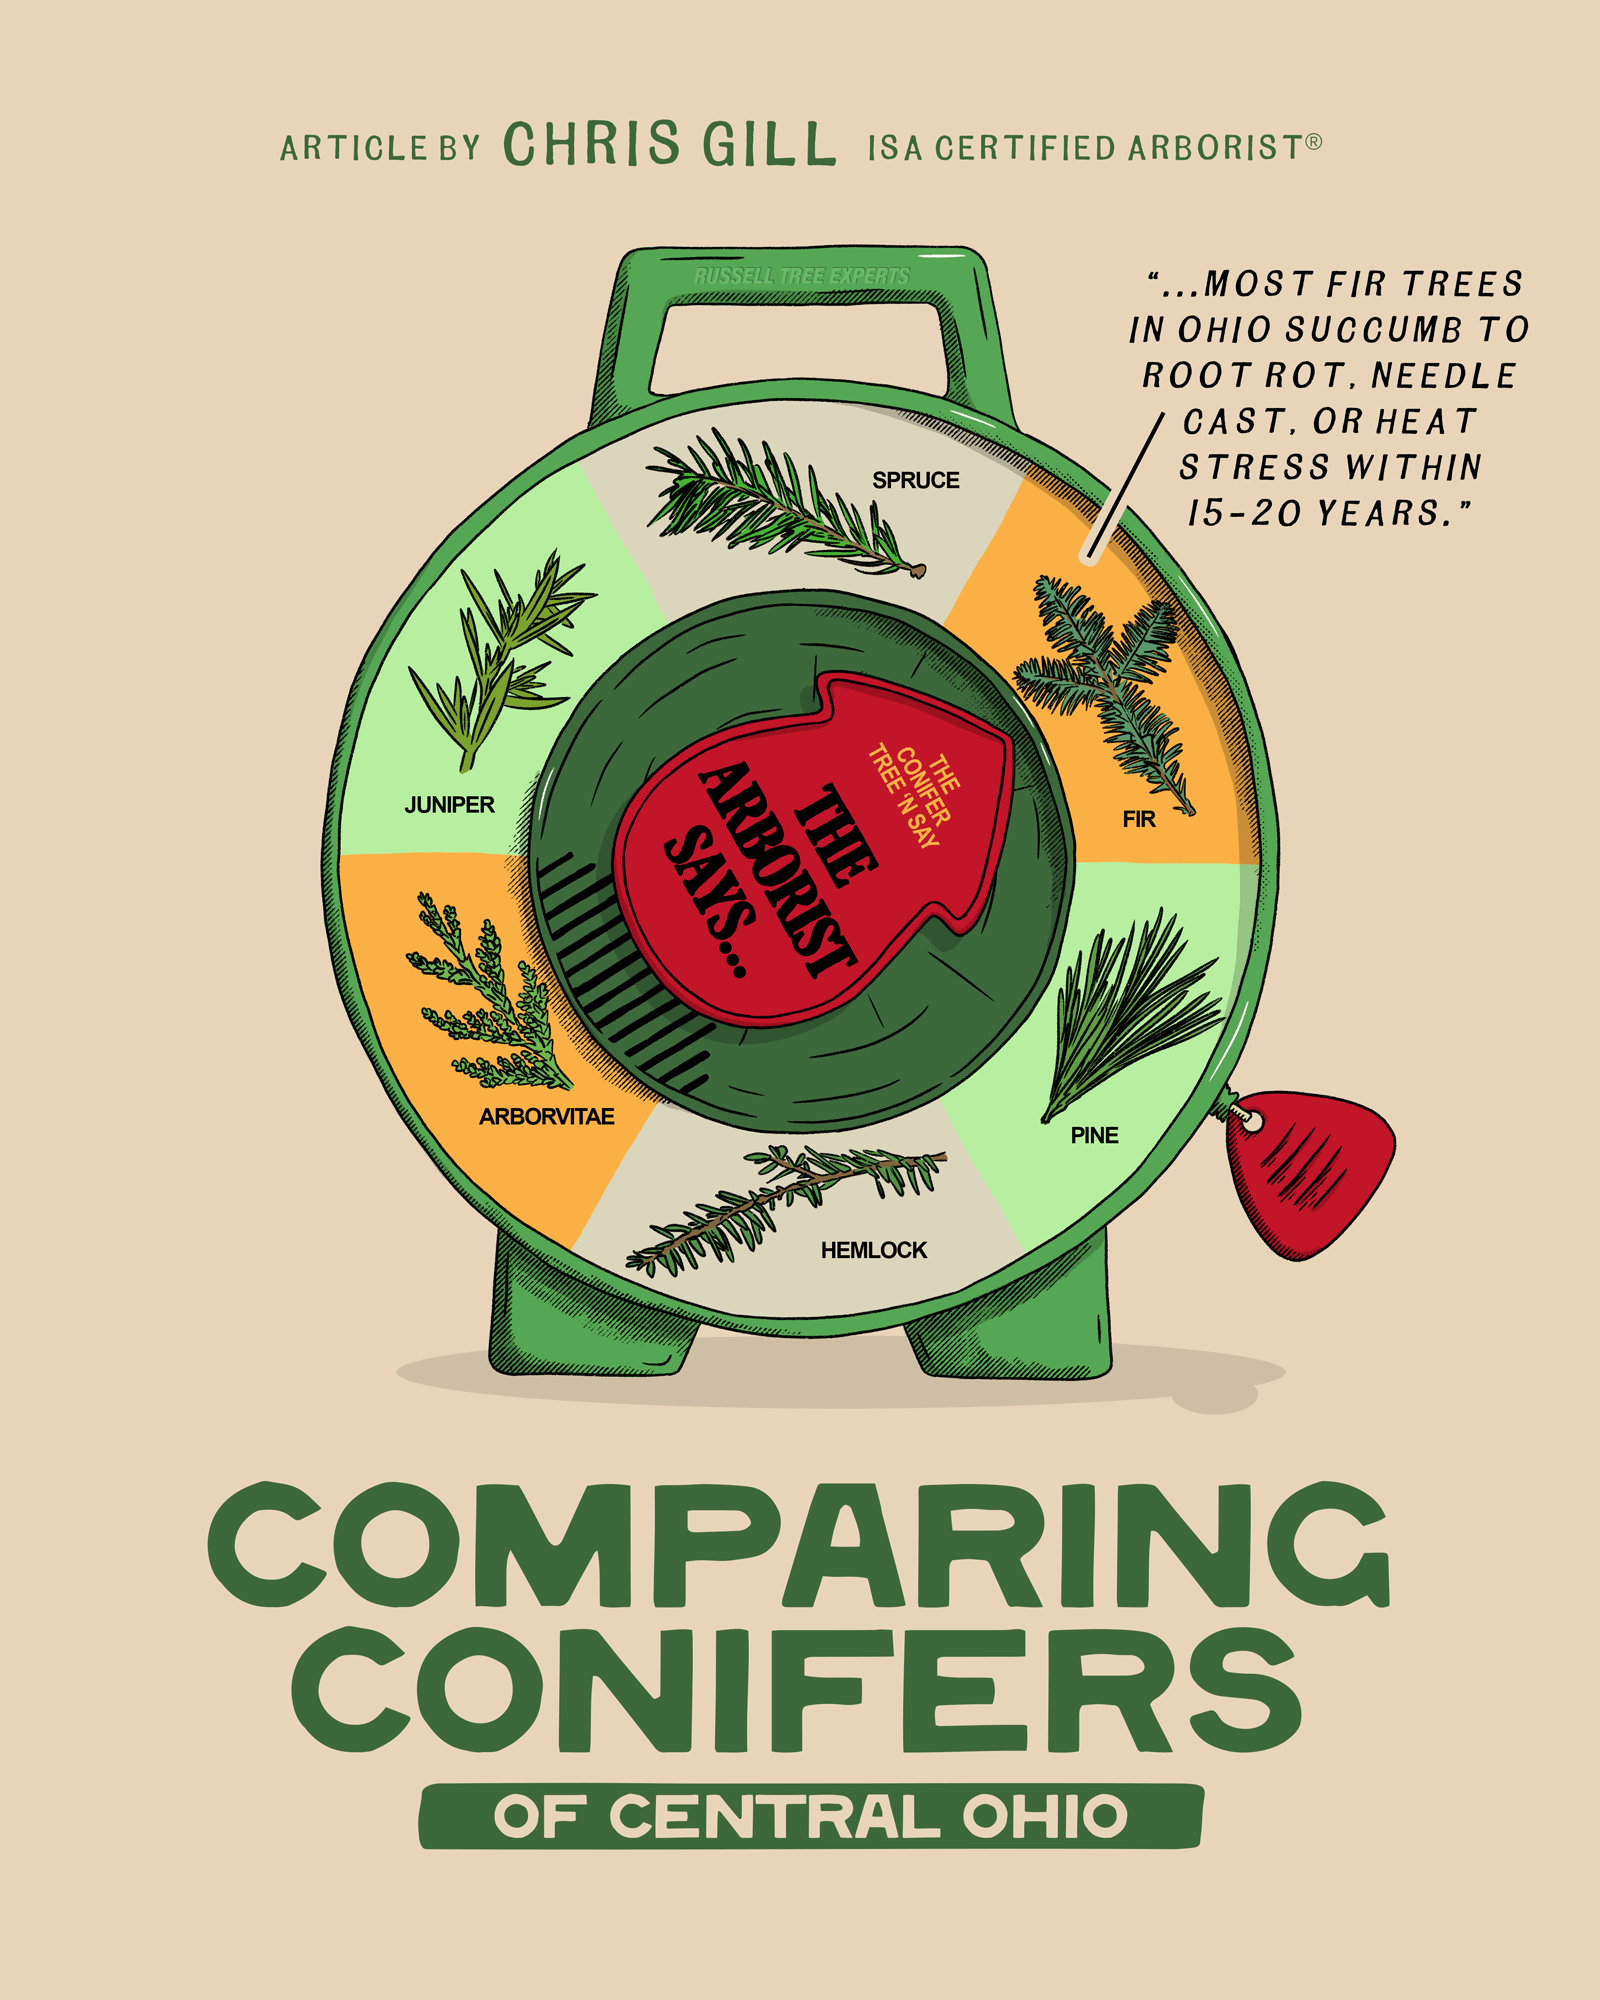
By Chris Gill
ISA Certified Arborist® OH-6416A
December 18, 2025
Every December my family bundles up and heads to our favorite local tree farm. We wander the rows of evergreens until we find the perfect tree, usually a Fraser fir (Abies fraseri) or Canaan fir (Abies balsamea var. phanerolepis) because nothing else matches that incredible citrus-pine fragrance, the soft flat needles that don’t shed the moment you look at them, and the strong limbs that will support many ornaments. The kids run ahead, my wife and I drag the sled behind us, and for that one afternoon everything smells like Christmas. Even if fir trees don’t love growing in my yard year-round, they will always be our favorite Christmas tree. There’s nothing like the smell of a real tree in the living room.
Yet, once the holidays are over and we’re thinking about evergreens that actually have to survive in Central Ohio’s hot summers, humid nights, heavy clay, and hungry deer, the choices narrow quickly. Central Ohio can be a tough transition zone for many conifers. Here’s a practical breakdown of the most commonly planted genera of evergreen trees and how they really perform in our area.
1. FIR (ABIES SPP.)
True fir trees especially Canaan fir, Fraser fir, and to a lesser extent concolor fir (Abies concolor) are the gold standard for Christmas tree farms in Ohio, and with good reason. They have soft, flat needles, excellent fragrance, and strong branches. As landscape trees however, they can be short-lived here. Most succumb to root rot, needle cast, or heat stress within 15–20 years. Canaan and concolor fir are the most adaptable and are occasionally used in yards, but even they prefer cooler, shadier microclimates.
2. Spruce (Picea SPP.)
Norway spruce (Picea abies) and Colorado blue spruce (Picea pungens) are the two most common landscape spruce trees. Norway spruce grows fast, tolerates wet clay soil well, and can make for a decent windbreak. It can eventually reach 60–80 ft tall and often outgrows small or dense residential lots. Blue spruce, despite its stunning color, does not perform well in central Ohio as our wet springs and humid summers make them prone to rhizosphaera needle cast and cytospora canker. Most specimens planted in the 1980s and ’90s are now dead or dying. Another spruce to consider is Serbian spruce (Picea omorika). Serbian spruce trees can grow tall to a mature height of 50-60 ft, but is much narrower in width, making it more appropriate for backyards with limited space.
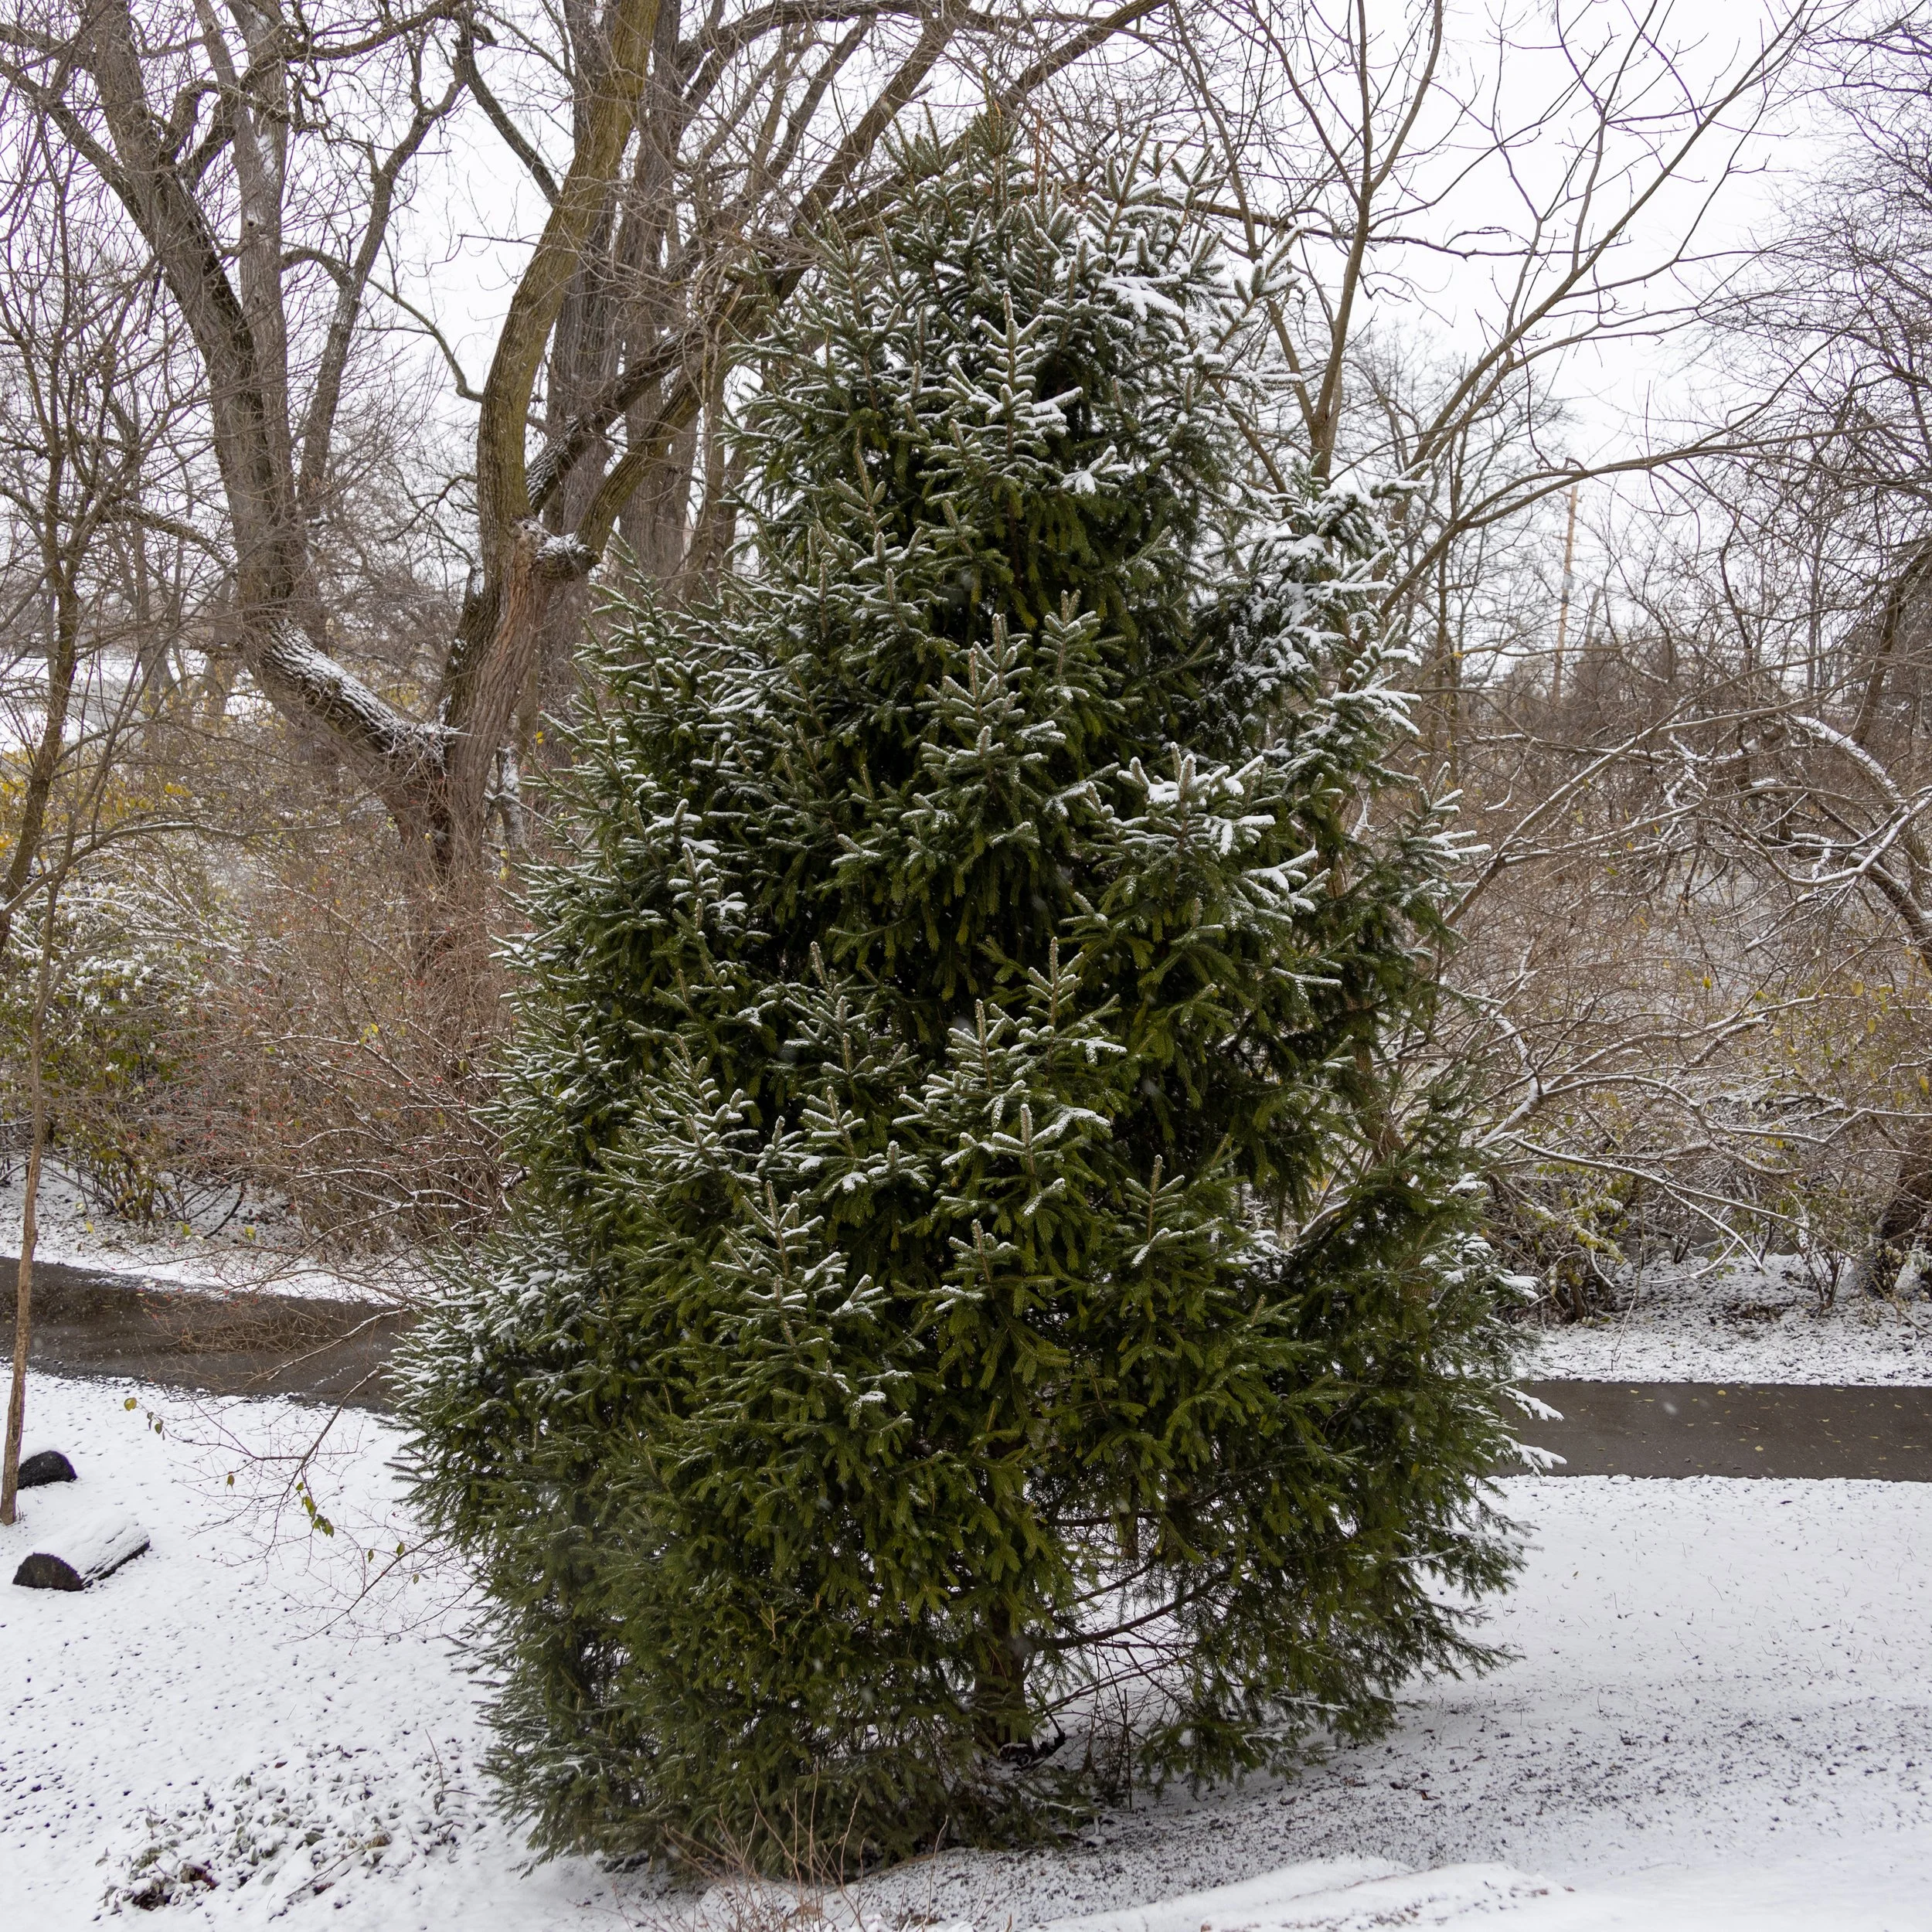
©Russell Tree Experts
Norway spruce (Picea abies)
3. Pine (Pinus SPP.)
Eastern white pine (Pinus strobus) grows quickly and has a soft, graceful look but is prone to white pine weevil and nutrition issues when planted in poor sites. Austrian pine (Pinus nigra) and Scotch pine (Pinus sylvestris) were once the default evergreen screen, but diplodia tip blight and dothistroma needle blight have wiped out entire rows along highways and in neighborhoods since the early 2000s. I recommend avoiding these two species (Austrian and Scotch pine) when selecting pine trees for central Ohio.
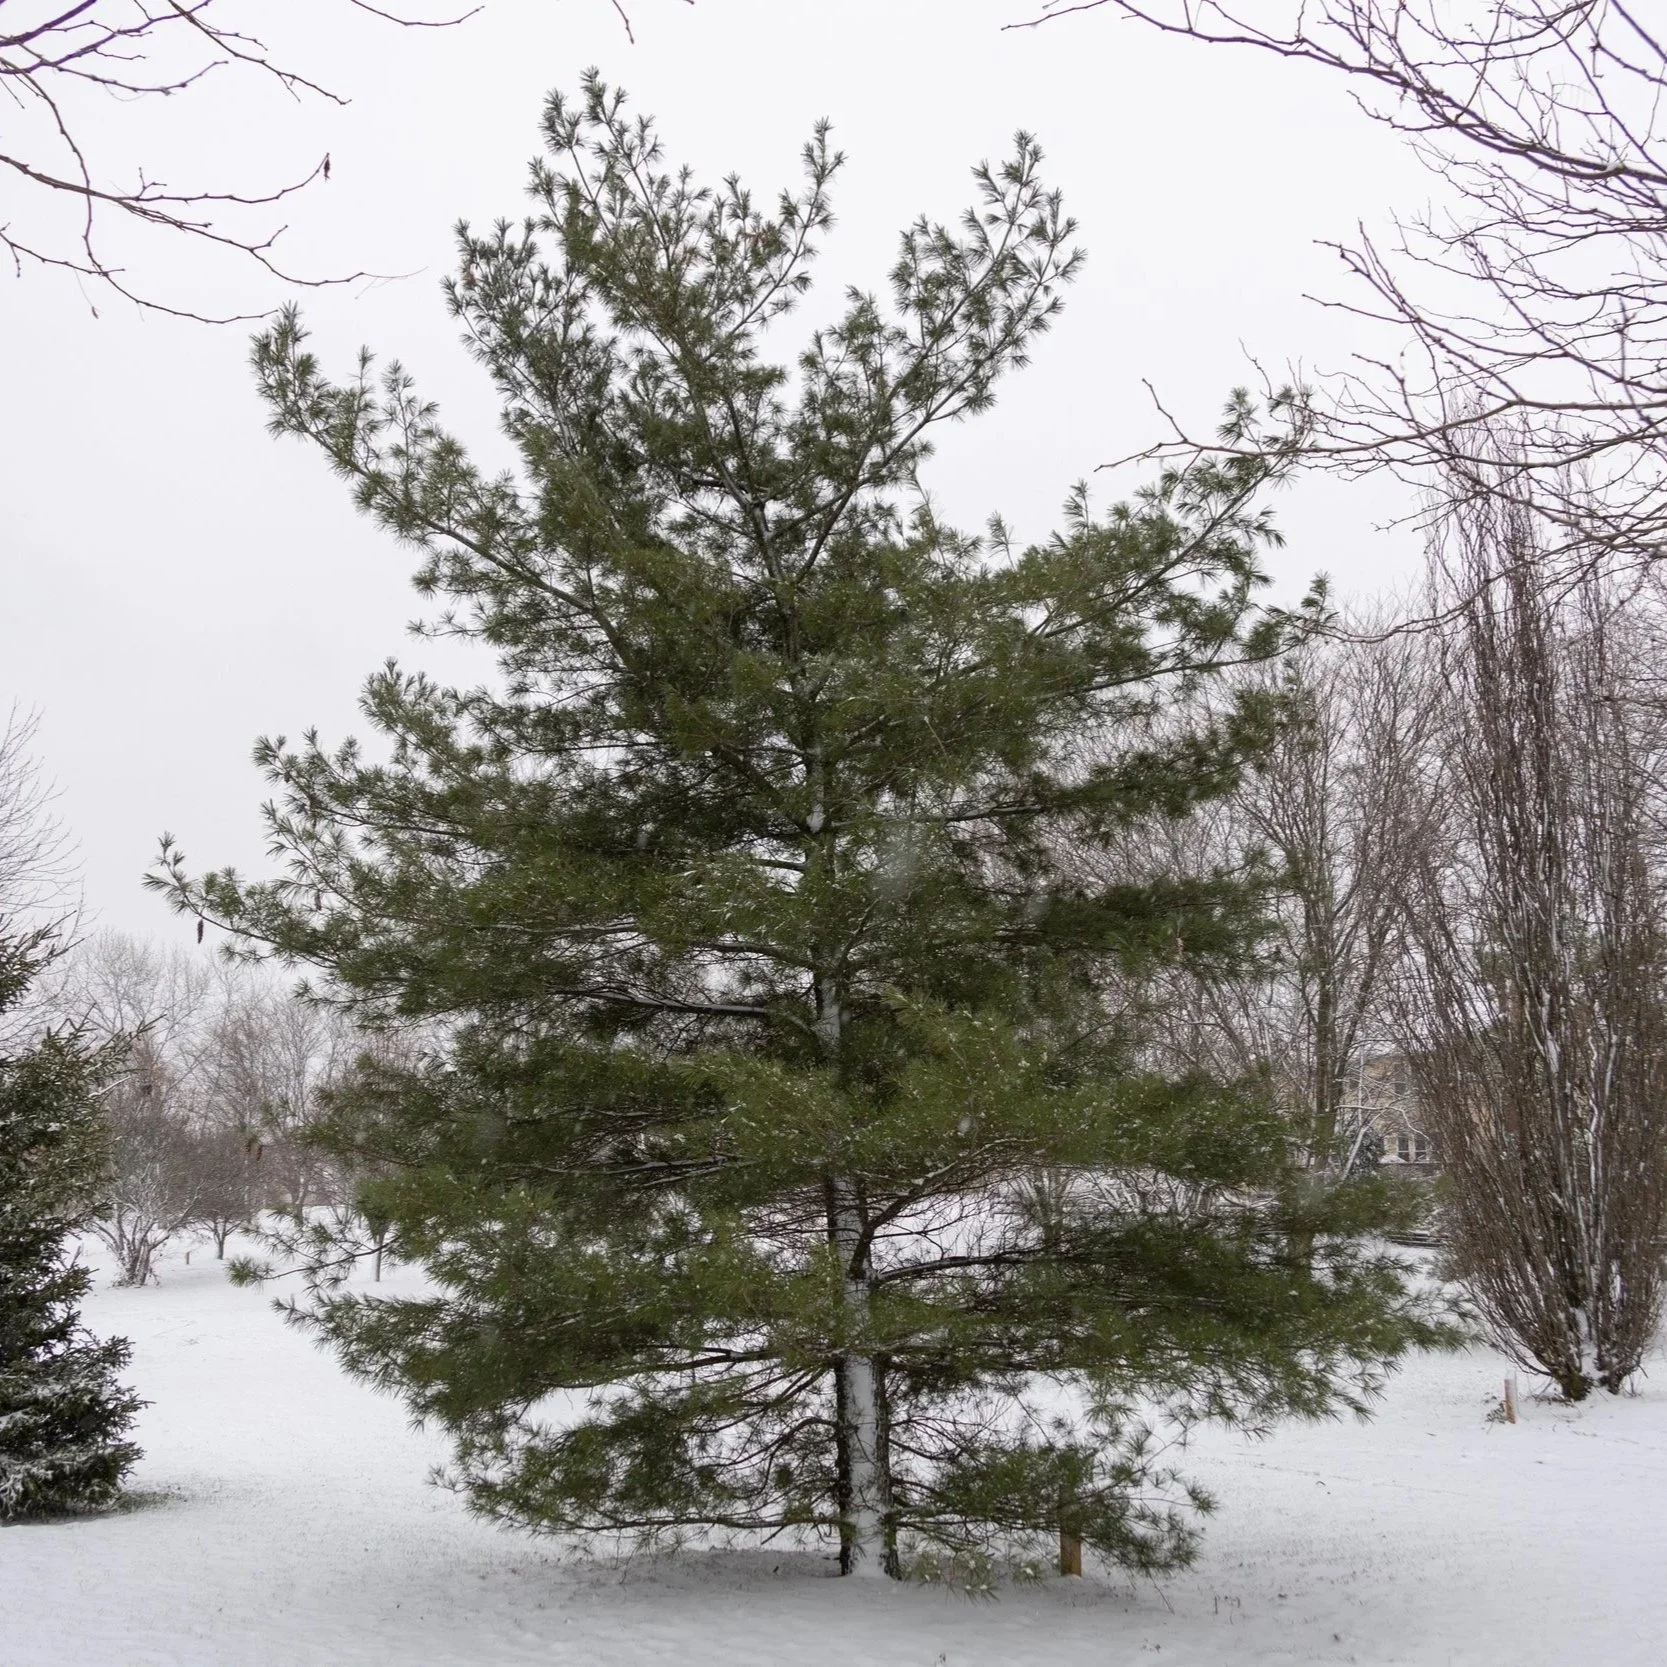
©Russell Tree Experts
Eastern white pine (Pinus strobus)
4. Hemlock (Tsuga SPP.)
Eastern hemlock (Tsuga canadensis), also known as Canadian hemlock, is a beautiful native tree with delicate needles and a graceful, drooping habit. It thrives in cool, moist ravines like Hocking Hills, but does not care for hot, open suburban lawns. Add the advancing hemlock woolly adelgid in southern Ohio, and new plantings are risky unless you’re prepared to treat them regularly.
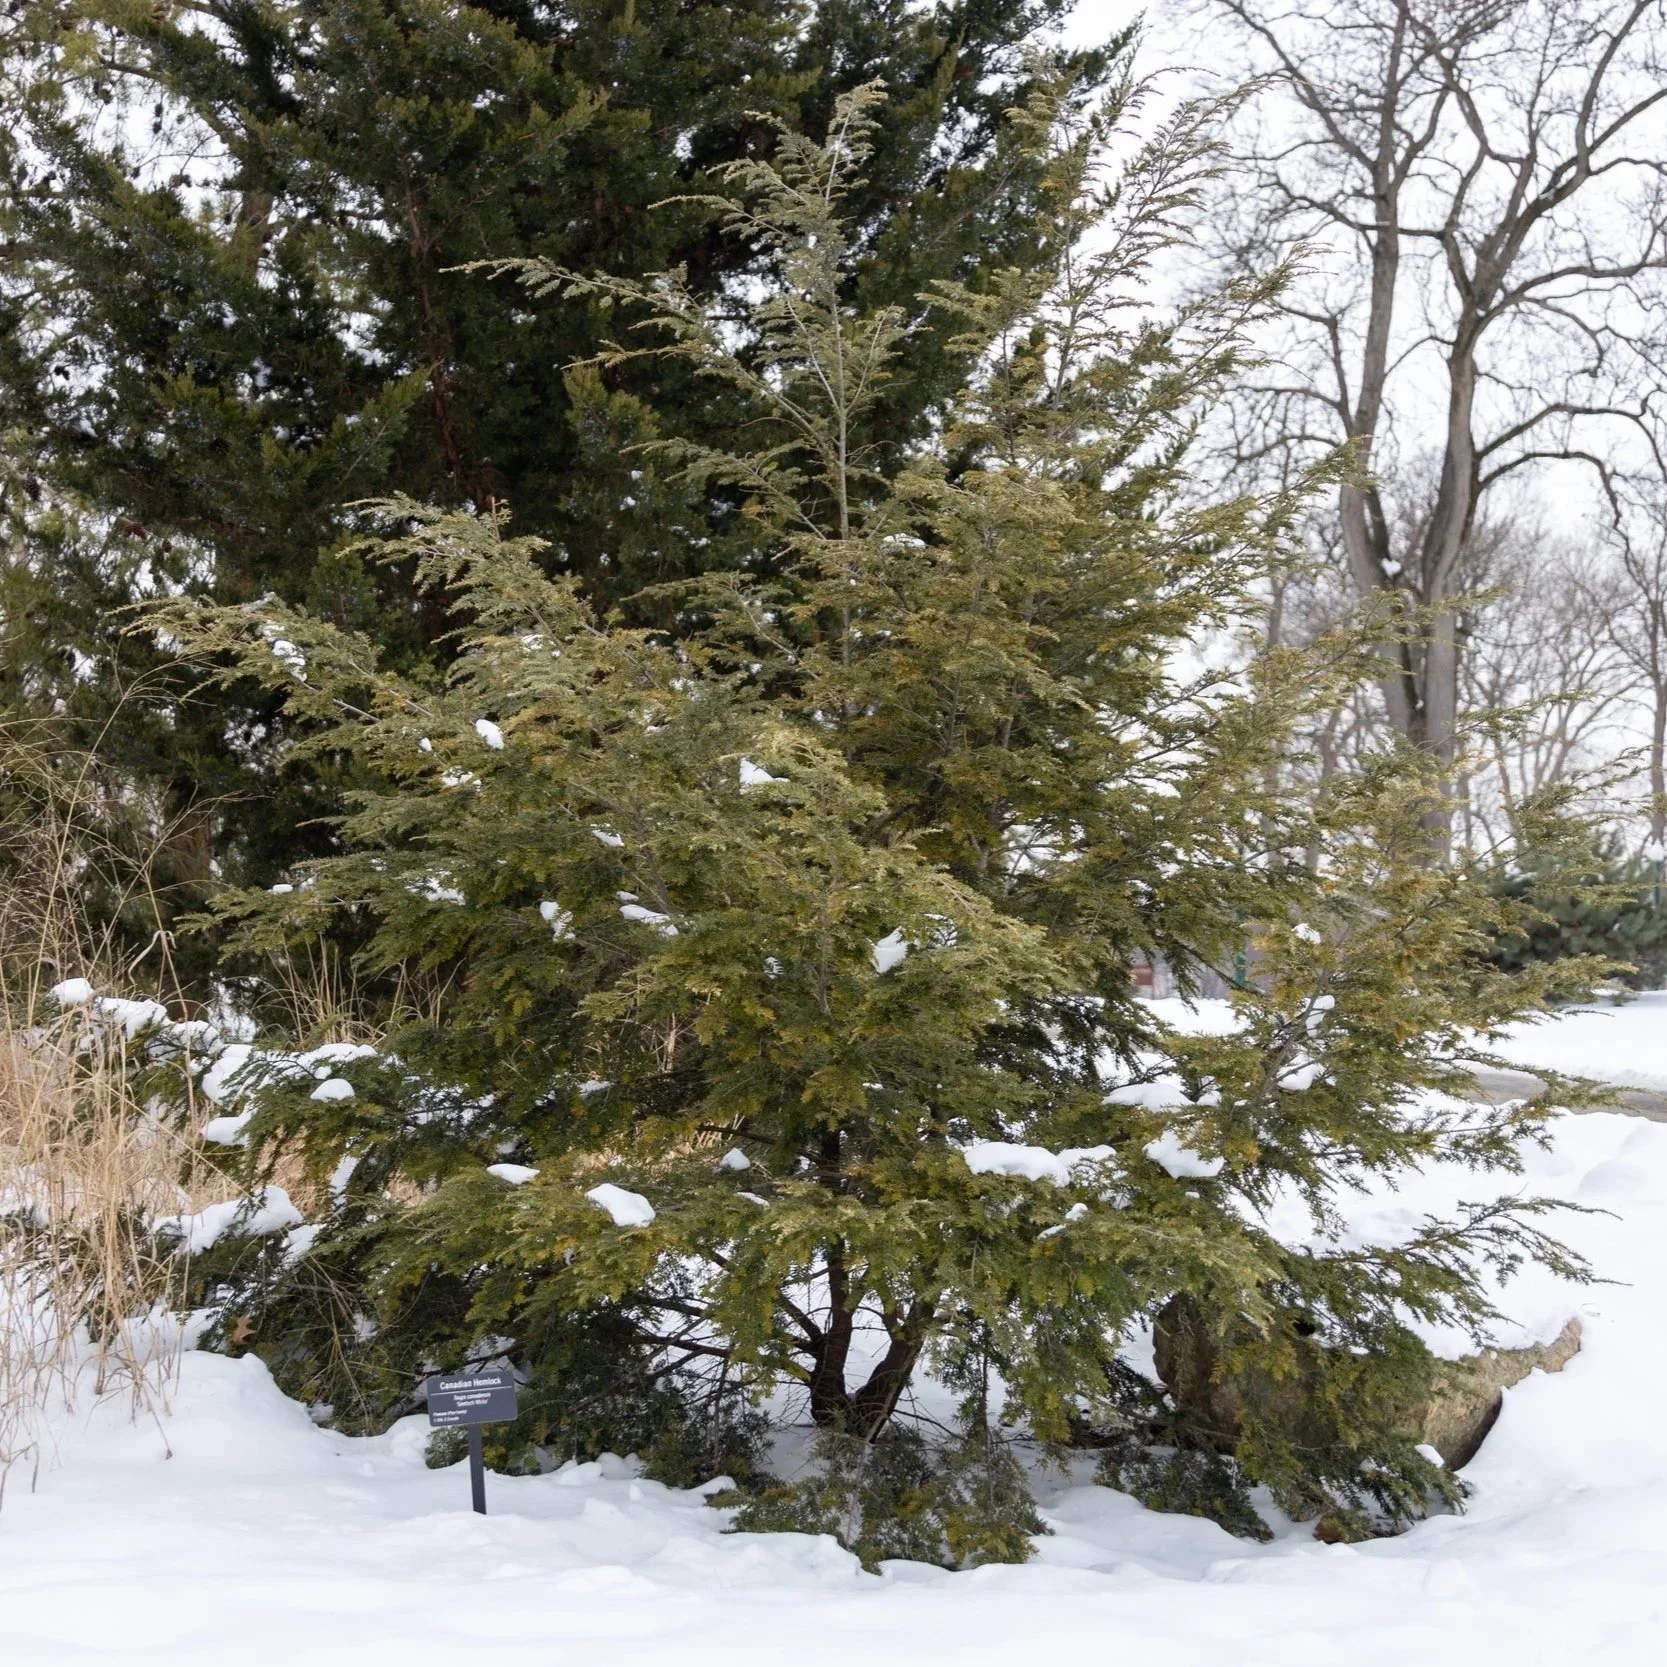
©Russell Tree Experts
Canadian hemlock (Tsuga canadensis)
5. Arborvitae (Thuja SPP.)
Arborvitae remains the workhorse for privacy screens. Emerald green arborvitae (Thuja occidentalis ‘Smaragd’) is narrow and widely available tree, but can brown badly in winter and is a favorite of whitetail deer. Green giant arborvitae (a hybrid, often listed as Thuja ‘Green Giant’ or Thuja plicata × standishii), however, is one of the true success stories: fast growing (3–5 ft per year when young), heat and drought-tolerant once established, decent clay soil tolerance, and much better deer resistance. For a tall, reliable screen in central Ohio, Green giant arborvitae is usually my top pick.
6. Juniper (Juniperus SPP.)
Older upright junipers like Hetzii juniper (Juniperus chinensis ‘Hetzii’) and Hollywood juniper (Juniperus chinensis ‘Torulosa’ or ‘Kaizuka’) have largely been killed by Phomopsis and Kabatina blights in our wet springs. Newer cultivars like Taylor juniper (Juniperus virginiana ‘Taylor’), Spartan juniper (Juniperus chinensis ‘Spartan’), and grey owl juniper (Juniperus virginiana ‘Grey Owl’) are far more resistant. Once established, junipers handle drought, poor soil, and deer pressure with ease.
Recommendation Summary for Central Ohio
• Tall screen: Green giant arborvitae or Norway spruce (with space)
• Medium screen: Taylor juniper or Serbian spruce (with caution)
• Best native landscape tree: Eastern white pine (with caution)
• Avoid entirely: Colorado blue spruce, Austrian pine, most true fir trees (except Canaan or concolor in cool spots), and hemlocks in full sun
In the end, there is no one perfect conifer in central Ohio. It is important to match a tree with a suitable planting site that will complement its growing needs. With that said, green giant arborvitae, disease-resistant junipers, and carefully sited natives like eastern white pine can provide decades of evergreen beauty with minimal headaches. Choose wisely, give them decent drainage, and take good care of them for the first few years, and you’ll have living privacy and winter structure that actually survives our midwest extremes.
PUT YOUR CONIFER TREE ID SKILLS TO THE TEST!
COMPLIMENTARY CHRISTMAS TREE DROPOFF (FOR RECYCLING!)
For those who live in a home where it is difficult to dispose of your tree, you can drop off and dispose of your old Christmas tree for free anytime at Russell Tree Experts (3427 E Dublin Granville Road Westerville, OH 43081) between Friday, December 26th 2025 and Friday, January 9th 2026. The drop-off zone will be at the front yard of our office with marked cones and signage! If you need any assistance, you can knock on our front door between 8:30 AM to 4:30 PM from 1/5/26 to 1/9/26 and one of our friendly staff members will lend a hand! We’ll ensure that your Christmas tree gets reused to become mulch or compost!

ADDITIONAL ARBOR ED™ ARTICLES!


Chris Gill I Regional Manager, Russell Tree Experts
Chris joined Russell Tree Experts in 2015 and has been in the green industry for over 15 years. When not at RTE, he enjoys spending time with wife & son, wakeboarding, and hunting. His favorite trees are the white oak & sugar maple for their beauty and uses beyond the landscape. Chris is an ISA Certified Arborist®, EHAT certified, CPR and first aid certified, holds an ODA commercial pesticide license, and holds a tree risk assessment qualification (TRAQ).
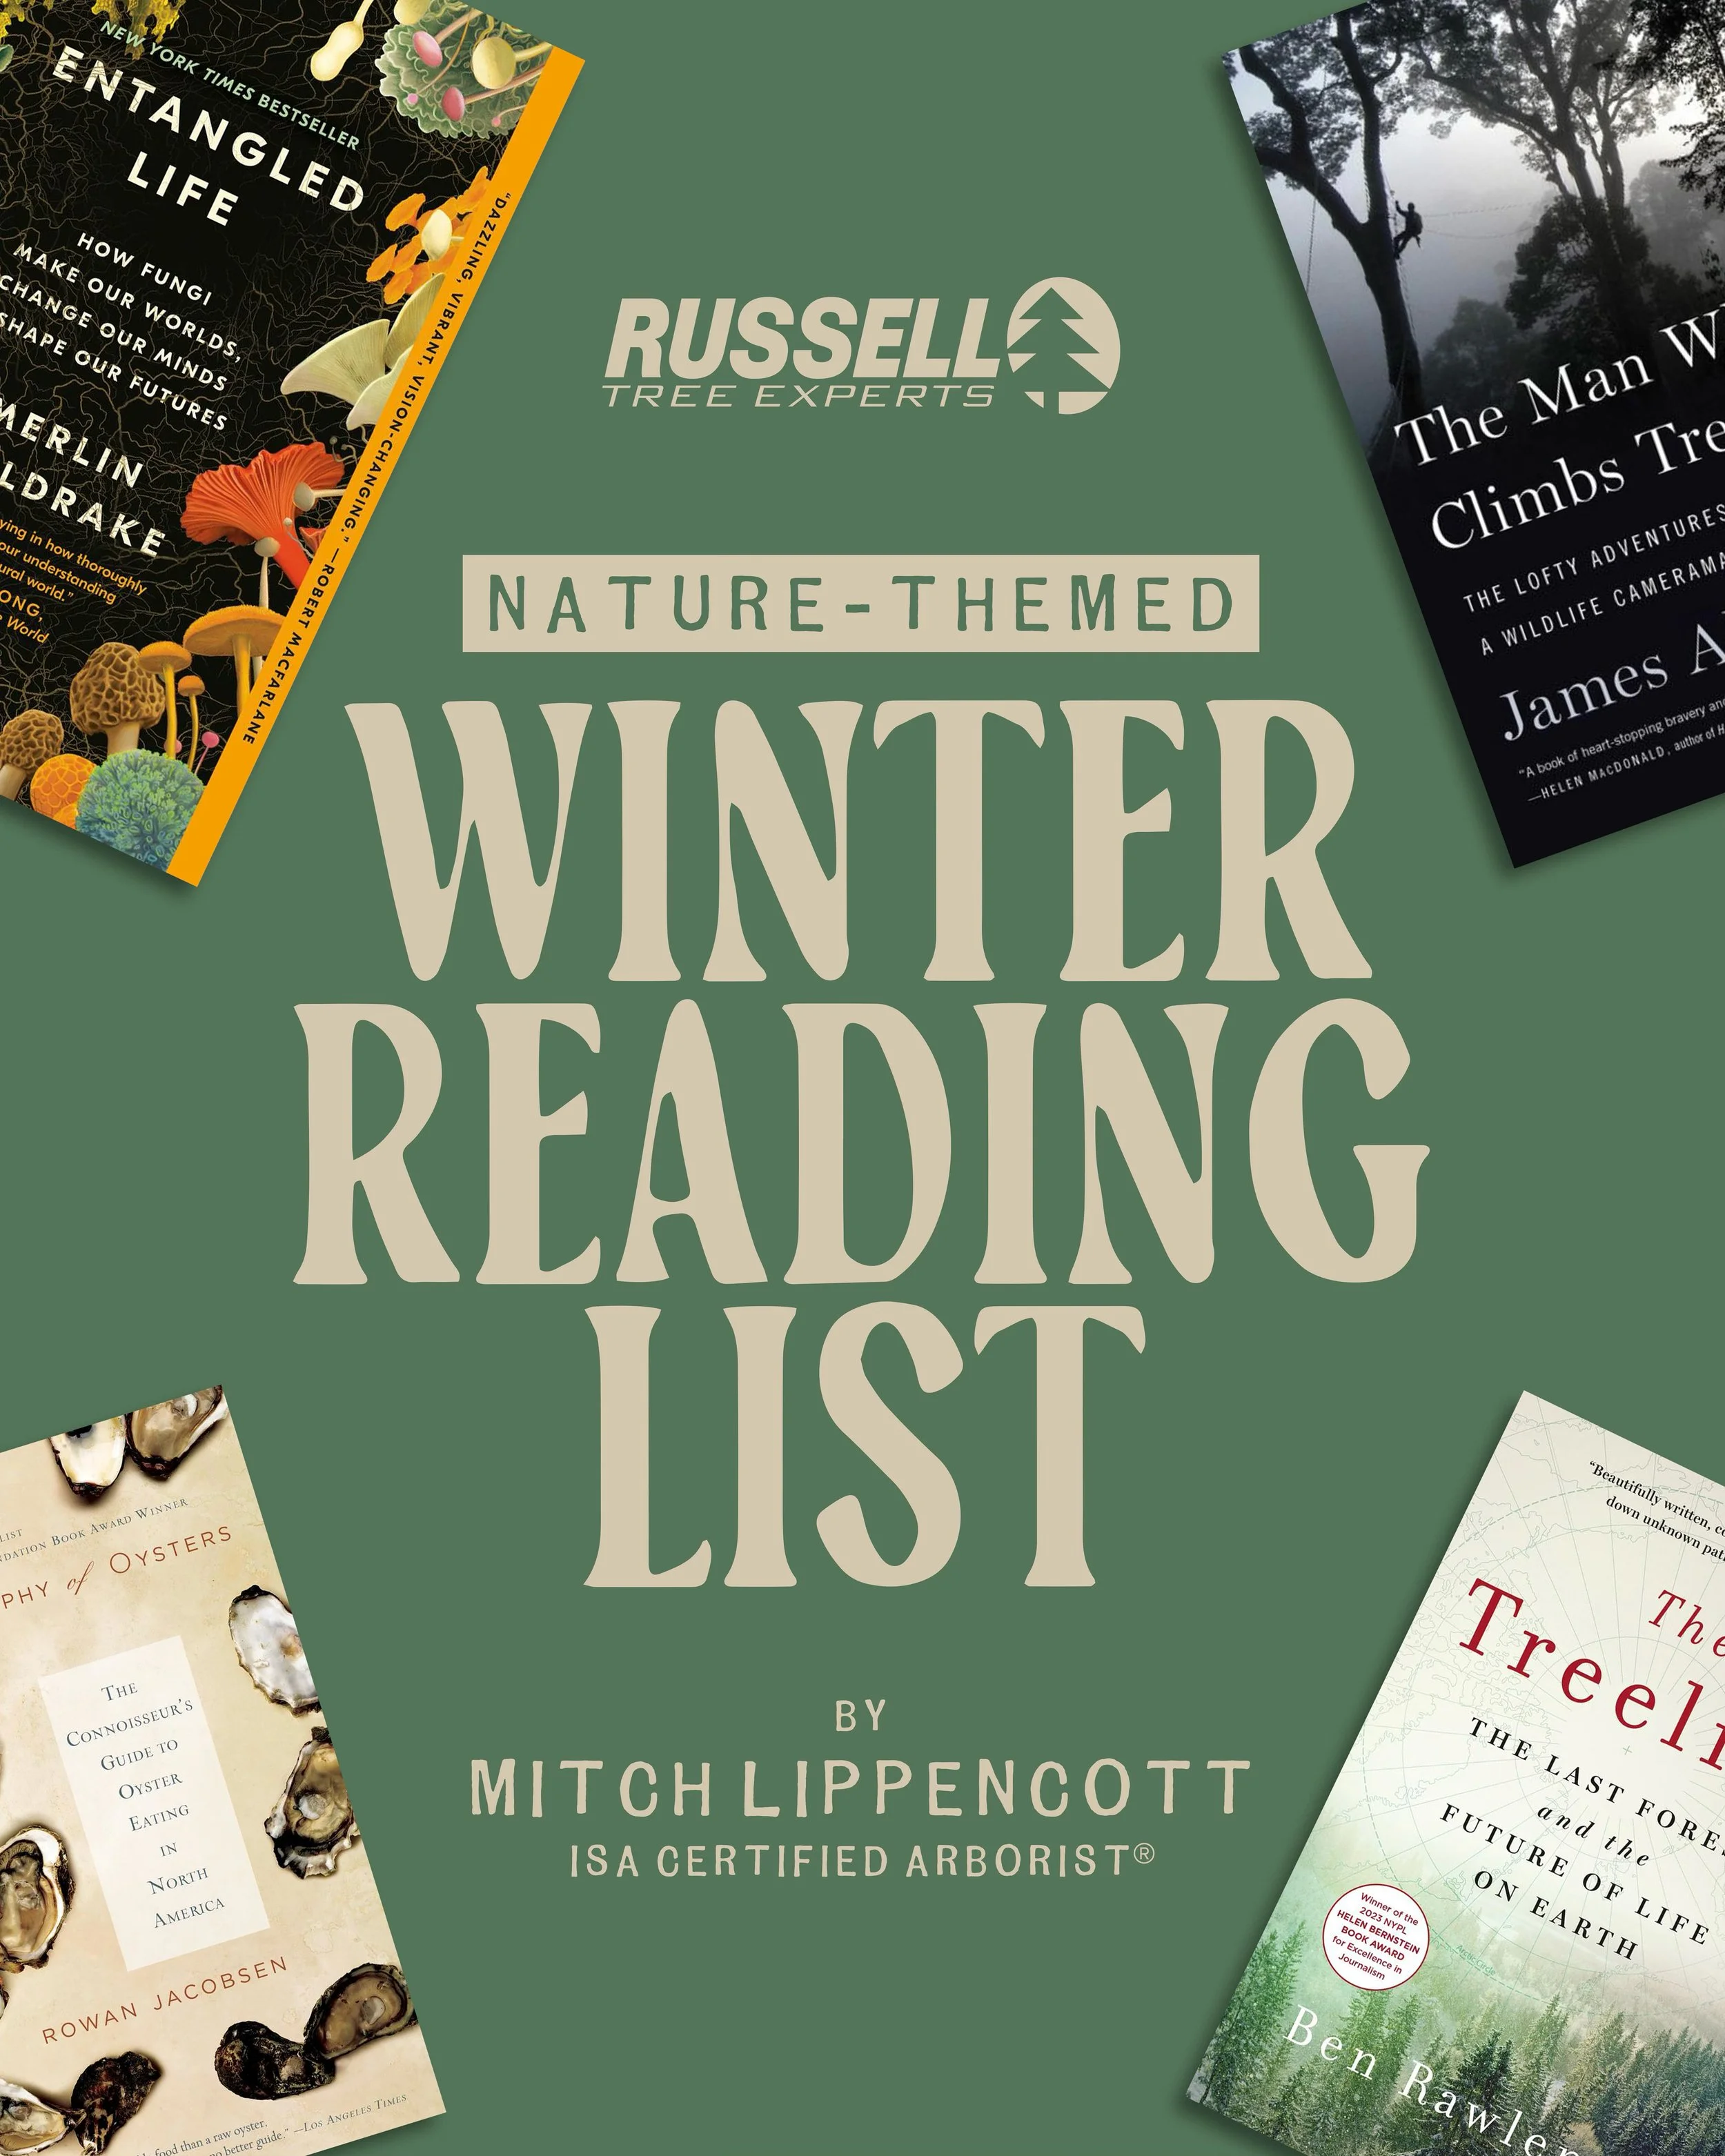
Winter Reading List
By Mitch Lippencott
ISA Certified Arborist® OH-6715A
December 11, 2025
For me, Thanksgiving marks the end of lawn and garden work for the year. It’s time to get to work on the indoor tasks I’ve neglected all summer. It’s time to get back to the gym. It’s time to catch up on some reading.
Here are four of my favorite nature books, plus two others I’ve enjoyed recently that are only partially nature-themed.
1) The Man Who Climbs Trees (James Aldred, 2017)
Not only my favorite nature book—my favorite book, period.
In it, wildlife cameraman James Adlred recalls his travels to the world’s most untamed locations and his climbs in the the planet’s largest trees, as he pioneered techniques to film exotic animals for National Geographic and the BBC.
His concise writing style and matter-of-fact outlook keep the tempo fast and the adventures harrowing.
As another man who climbs trees, I’m profoundly jealous Mr. Aldred found a much cooler way to put our shared skill set to use!
2) Entangled Life (Merlin Sheldrake, 2020)
The science will be too science-y for some, but the facts Mr. Sheldrake presents here are fascinating! Fungi are among the most adaptable, industrious, and dare I say, intelligent? life forms on the planet. We are only beginning to scratch the surface of their capabilities and potential benefit to humanity.
Once you get pulled into this one, you’ll have trouble putting it down. You’ll also annoy your friends and family reciting all the incredible things you’ve learned!
3) The Treeline (Ben Rawlence, 2022)
As our planet continues to warm, the boreal forests of the Arctic Circle march rapidly northward. In this book, environmentalist Ben Rawlence traveled to Greenland, Canada, Alaska, Scotland, and Siberia to see these forests, meet the people they impact, and learn from the scientists studying there.
It takes a while to get moving, and the tempo is much slower than The Man Who Climbs Trees. Stick with him, though, because his concluding statement on climate change is profound!
4) The Light Eaters (Zoë Schlanger, 2024)
I listened to this on audiobook. Between the author’s fascinating content and pleasant reading, I found myself hoping for red lights.
Much like Entangled Life, this one is science-heavy but mind-blowing! While she never goes so far to suggest sentience, Ms. Schlanger makes a strong case plants can feel, hear, communicate, remember, and even plan ahead.
5) The Drunken Botanist (Amy Stewart, 2013)
Do you like plants and booze?
Me too! And we’re not alone.
In this best-seller, Ms. Stewart details how humans of all eras and all locations have been turning fruits, nuts, seeds, grains, herbs, trees, mushrooms, and just about anything else we can find into hooch. She even shares cocktail recipes and plant growing guides.
While the descriptions are entertaining and easy to digest, this book’s format reads more like a reference than a page-turner…I suspect you’ll find yourself pulling it off the shelf more than myother recommendations but will likely never read it cover-to-cover.
6) A Geography of Oysters (Rowan Jacobsen, 2007)
Rowan Jacobsen is another author I enjoy reading but am envious of! He has turned his passion for food and the places it comes from into a James Beard Award winning career.
Here, he travels the oyster-farming regions of North America, highlighting how their shape, color, and flavor are tied directly to the environment they are grown in. Yes, it’s more about food than nature, but this book’s emphasis on terroir will leave you hungry to travel our continent’s coasts and protect its waterways.
—-
So there you have it! – four of my favorite nature books and two more I enjoy that are nature-adjacent. I hope this winter finds you diving into one or more of them – ideally with a cocktail or plate of bivalves at your side!
COMPLIMENTARY CHRISTMAS TREE DROPOFF (FOR RECYCLING!)
For those who live in a home where it is difficult to dispose of your tree, you can drop off and dispose of your old Christmas tree for free anytime at Russell Tree Experts (3427 E Dublin Granville Road Westerville, OH 43081) between Friday, December 26th 2025 and Friday, January 9th 2026. The drop-off zone will be at the front yard of our office with marked cones and signage! If you need any assistance, you can knock on our front door between 8:30 AM to 4:30 PM from 1/5/26 to 1/9/26 and one of our friendly staff members will lend a hand! We’ll ensure that your Christmas tree gets reused to become mulch or compost!
ADDITIONAL ARBOR ED ARTICLES!


Mitch Lippencott I Regional Manager, Russell Tree Experts
Mitchell Lippencott joined Russell Tree Experts in 2020. With past experiences ranging from a landscape design company, a retail garden center, and two municipalities, he has accrued more than 20 years in the green industry. Mitch is a graduate of the Ohio State University, a licensed pesticide applicator, a qualified tree risk assessor, and an ISA Certified Arborist®. Outside of work, Mitch plays guitar and banjo poorly.
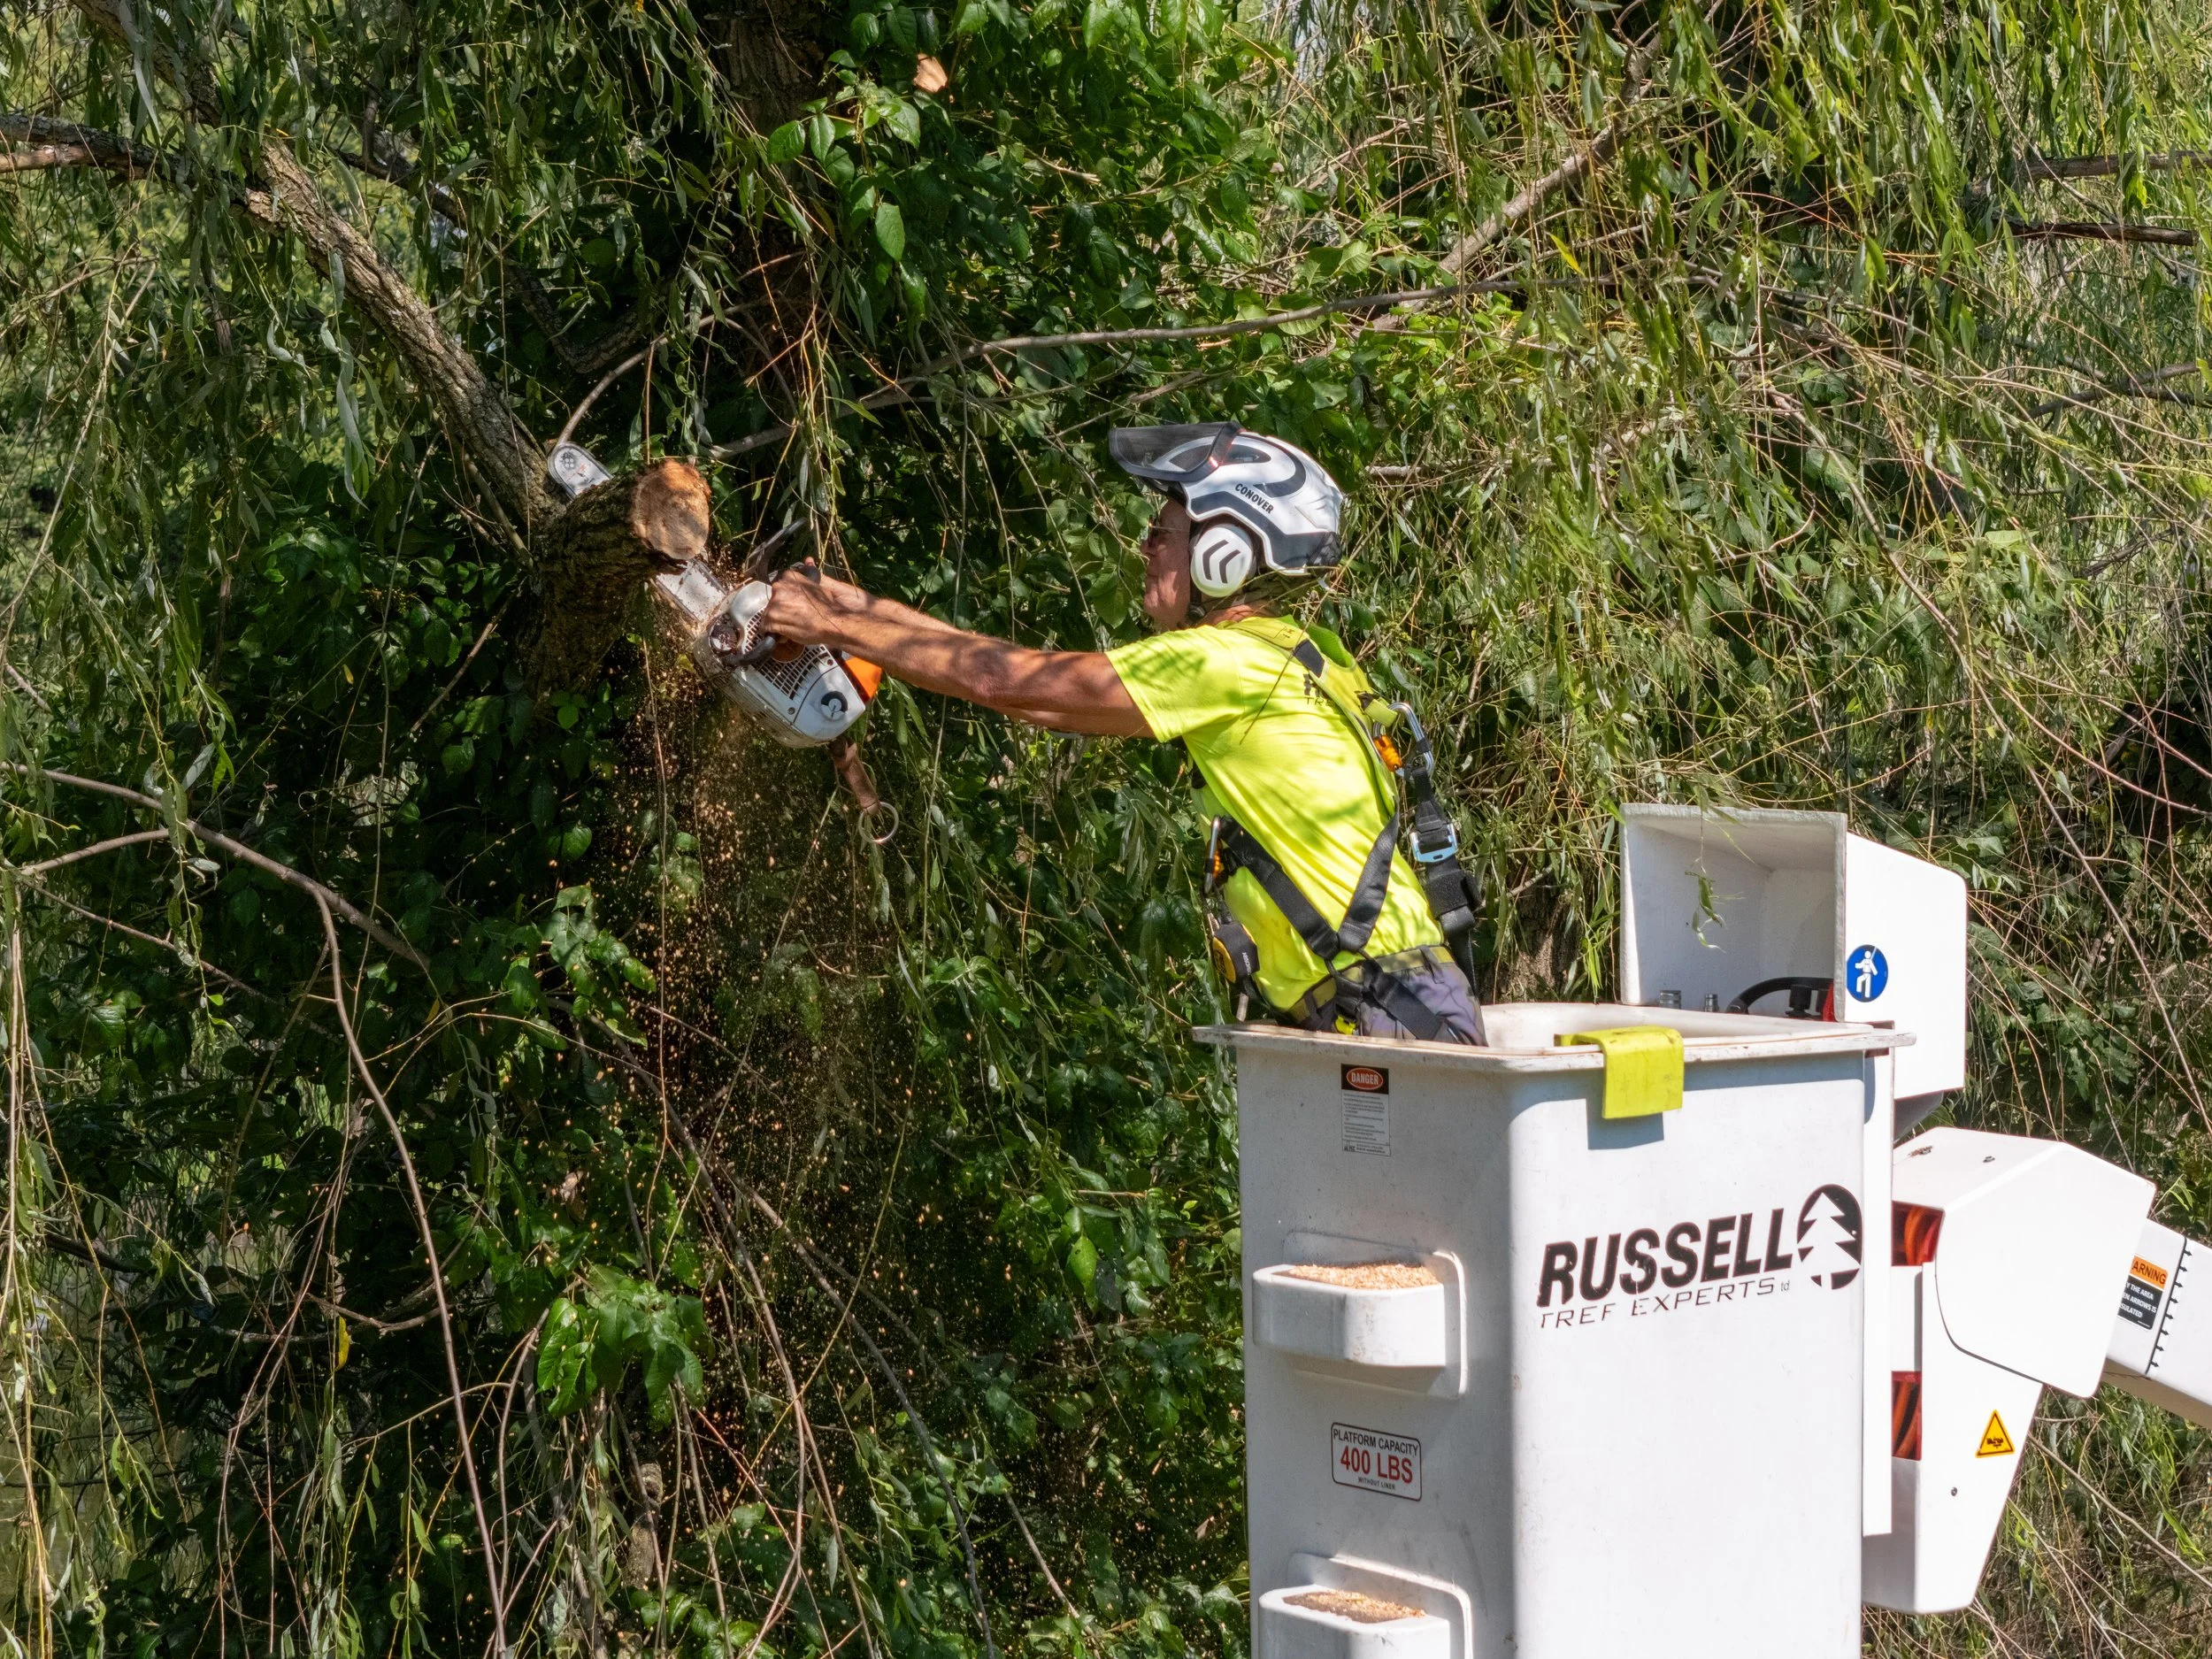
Behind the Scenes: Hurricane Relief

By Tyler Ford
ISA Certified Arborist® OH-6877A
December 4, 2025
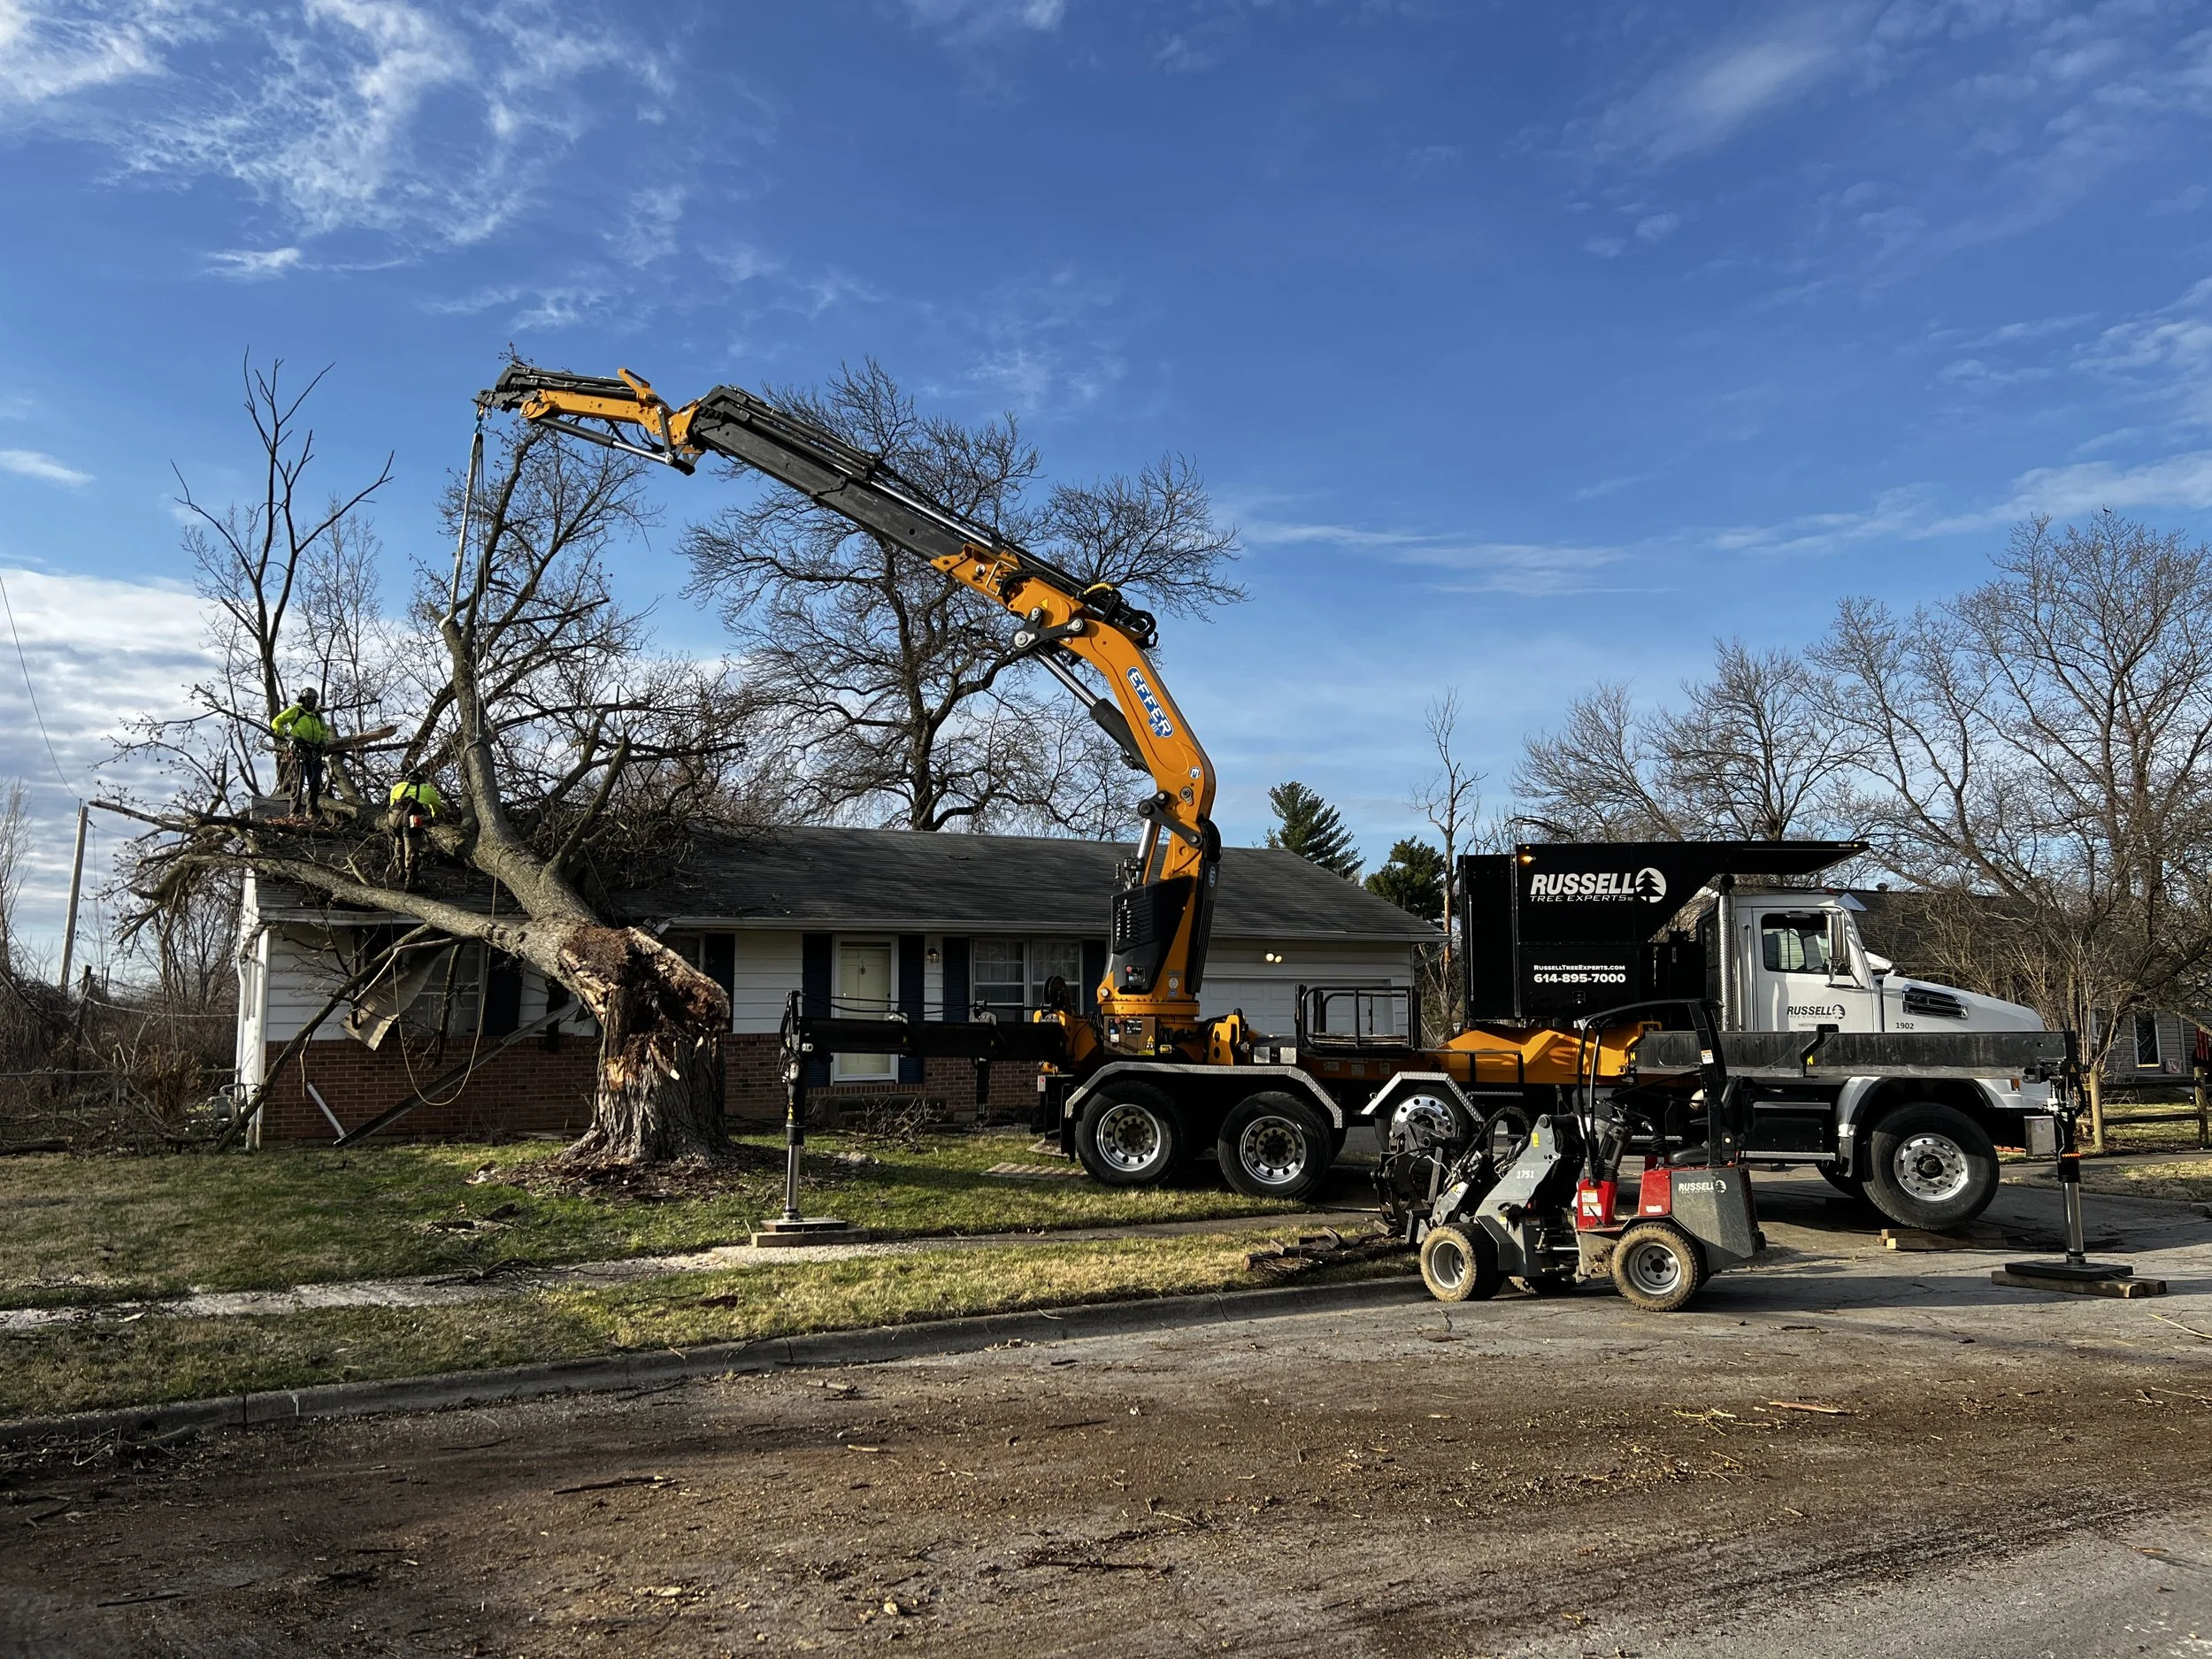
Ever since Hurricane Sandy carved its name into history in October 2012, Russell Tree Experts has rapidly responded to some of this nation’s most devastating natural disasters. A few notable disaster cleanup and hazardous tree removal projects we have provided response for were Hurricanes Matthew, Irma, Michael, and Ian, as well as other severe storms like tornadoes, ice storms, and wildfires. Quite literally, we have traveled coast-to-coast from as far west as California, to as far northeast as Massachusetts, and as far southeast as Florida. Most recently, we were in Augusta, Georgia from about October 2024 to February 2025 cleaning up about 525,000 cubic yards of woody debris left behind by Hurricane Helene.
Day 1
Today is the morning of October 7, 2024. Eight grapple truck operators, a mechanic, and I are rolling out with a fleet of grapple trucks and storm trailers, a service truck and a pickup truck toward Augusta, GA. We have no idea how long we’ll be gone for and no sense of how bad the damage truly is. (I didn’t know that what awaited us was the most destruction I had witnessed in my over ten years of storm response experience.)

©Russell Tree Experts
Upon arrival, I passed by hundreds of trees still laying on houses and complete neighborhoods lined with piles of vegetation and house rubble fifteen feet in height. Towering loblolly pines twisted and snapped like toothpicks. Power lines tangled with uprooted trunks. Neighborhoods that were once beautiful with various woody species were left decimated. It was at this point that I knew we’ll be cleaning up for quite some time.
Day 71
After seventy one long days with very little time off, losing track of days, let alone which week, is very common. The only thing that felt normal was the conversations with my crew and the precious moments during video calls with the family at home at the end of yet another long day.
The residents of the community have gotten very familiar with our trucks and so very grateful. Many residents have offered us coffee, water and tasty snacks!


This day is very special and eye opening to me as I brought up an idea to the crew of donating toys for the toy drive of Augusta this holiday season. It would’ve been very understandable for the crew to not participate as they had been putting in full effort to restoring the community. However, without hesitation, after a long week of work, everyone agreed to join me for a couple hours in purchasing and donating over a thousand dollars’ worth of toys. Although there’s still no end in sight, this was for me a vital piece of refocusing for the future of the project.


Day 140
After one hundred and forty days with little time off like two days off for Thanksgiving and five days off for Christmas and an OSU Buckeyes national championship playoff run, the community is officially cleaned up and we are set to head home. I can see kids playing in the yard and residents mowing growing, green grass in areas that used to be cluttered by trees and rubble like concrete, wood, and pieces of roofing shingles.
Montage video of our woody debris cleanup in Augusta, GA from Hurricane Helene
As we pack up our equipment and prepare for the long drive home, I find myself reflecting on the people who carried out this mission from start to finish: Scott, Andrew, Angel, Steve, Juve, Todd, Storm, Brian, and Wyatt. To the residents of Augusta, even in the middle of an unimaginable loss, you welcomed us with kindness, patience, and generosity. Your shared stories, your encouragement, your offers of coffee on cold mornings and water on hot days. These small gestures mean more to me than you may ever know.

©Russell Tree Experts
From left to right: Scott, Andrew, Angel, Wyatt, Tyler, Steven, Brian, Juve, Todd, and Storm.
To the crew and my family at home, you are the heart of this article. The crew for one hundred and forty grueling days, through early mornings, late nights, sore muscles, and homesickness, showed up with unwavering dedication. You all worked with integrity, you lifted each other up, and even after the hardest days, you still found the compassion to give back, whether through a brief conversation with a resident or generosity to the Augusta toy drive.
This project was more than a cleanup. It was a testament to what can be accomplished when skilled hands, strong hearts, and a community’s spirit come together. Though the scars of Hurricane Helene will remain for years, the path to recovery was built on gratitude, teamwork, and hope.
Interviewing our mechanic Brian about his experience in Augusta, GA
COMPLIMENTARY CHRISTMAS TREE DROPOFF 2025
For those who live in a home where it is difficult to dispose of your tree, you can drop off and dispose of your old Christmas tree for free anytime at Russell Tree Experts (3427 E Dublin Granville Road Westerville, OH 43081) between Friday, December 26th 2025 and Friday, January 9th 2026. The drop-off zone will be at the front yard of our office with marked cones and signage! If you need any assistance, you can knock on our front door between 8:30 AM to 4:30 PM from 1/5/26 to 1/9/26 and one of our friendly staff members will lend a hand! We’ll ensure that your Christmas tree gets reused to become mulch or compost!

ADDITIONAL ARBOR ED™ ARTICLES!


Tyler Ford I Offsite Project Manager, Russell Tree Experts
Tyler joined Russell Tree Experts in 2013. He is an ISA Certified Arborist® and is certified with EHAT, TRAQ, OSHA 30, CPR, and first aid! In his free time, Tyler enjoys spending time with his family and exploring nature at Great Smoky Mountains National Park. His favorite tree is the southern magnolia (Magnolia grandiflora), so much so that he named his youngest daughter Magnolia!
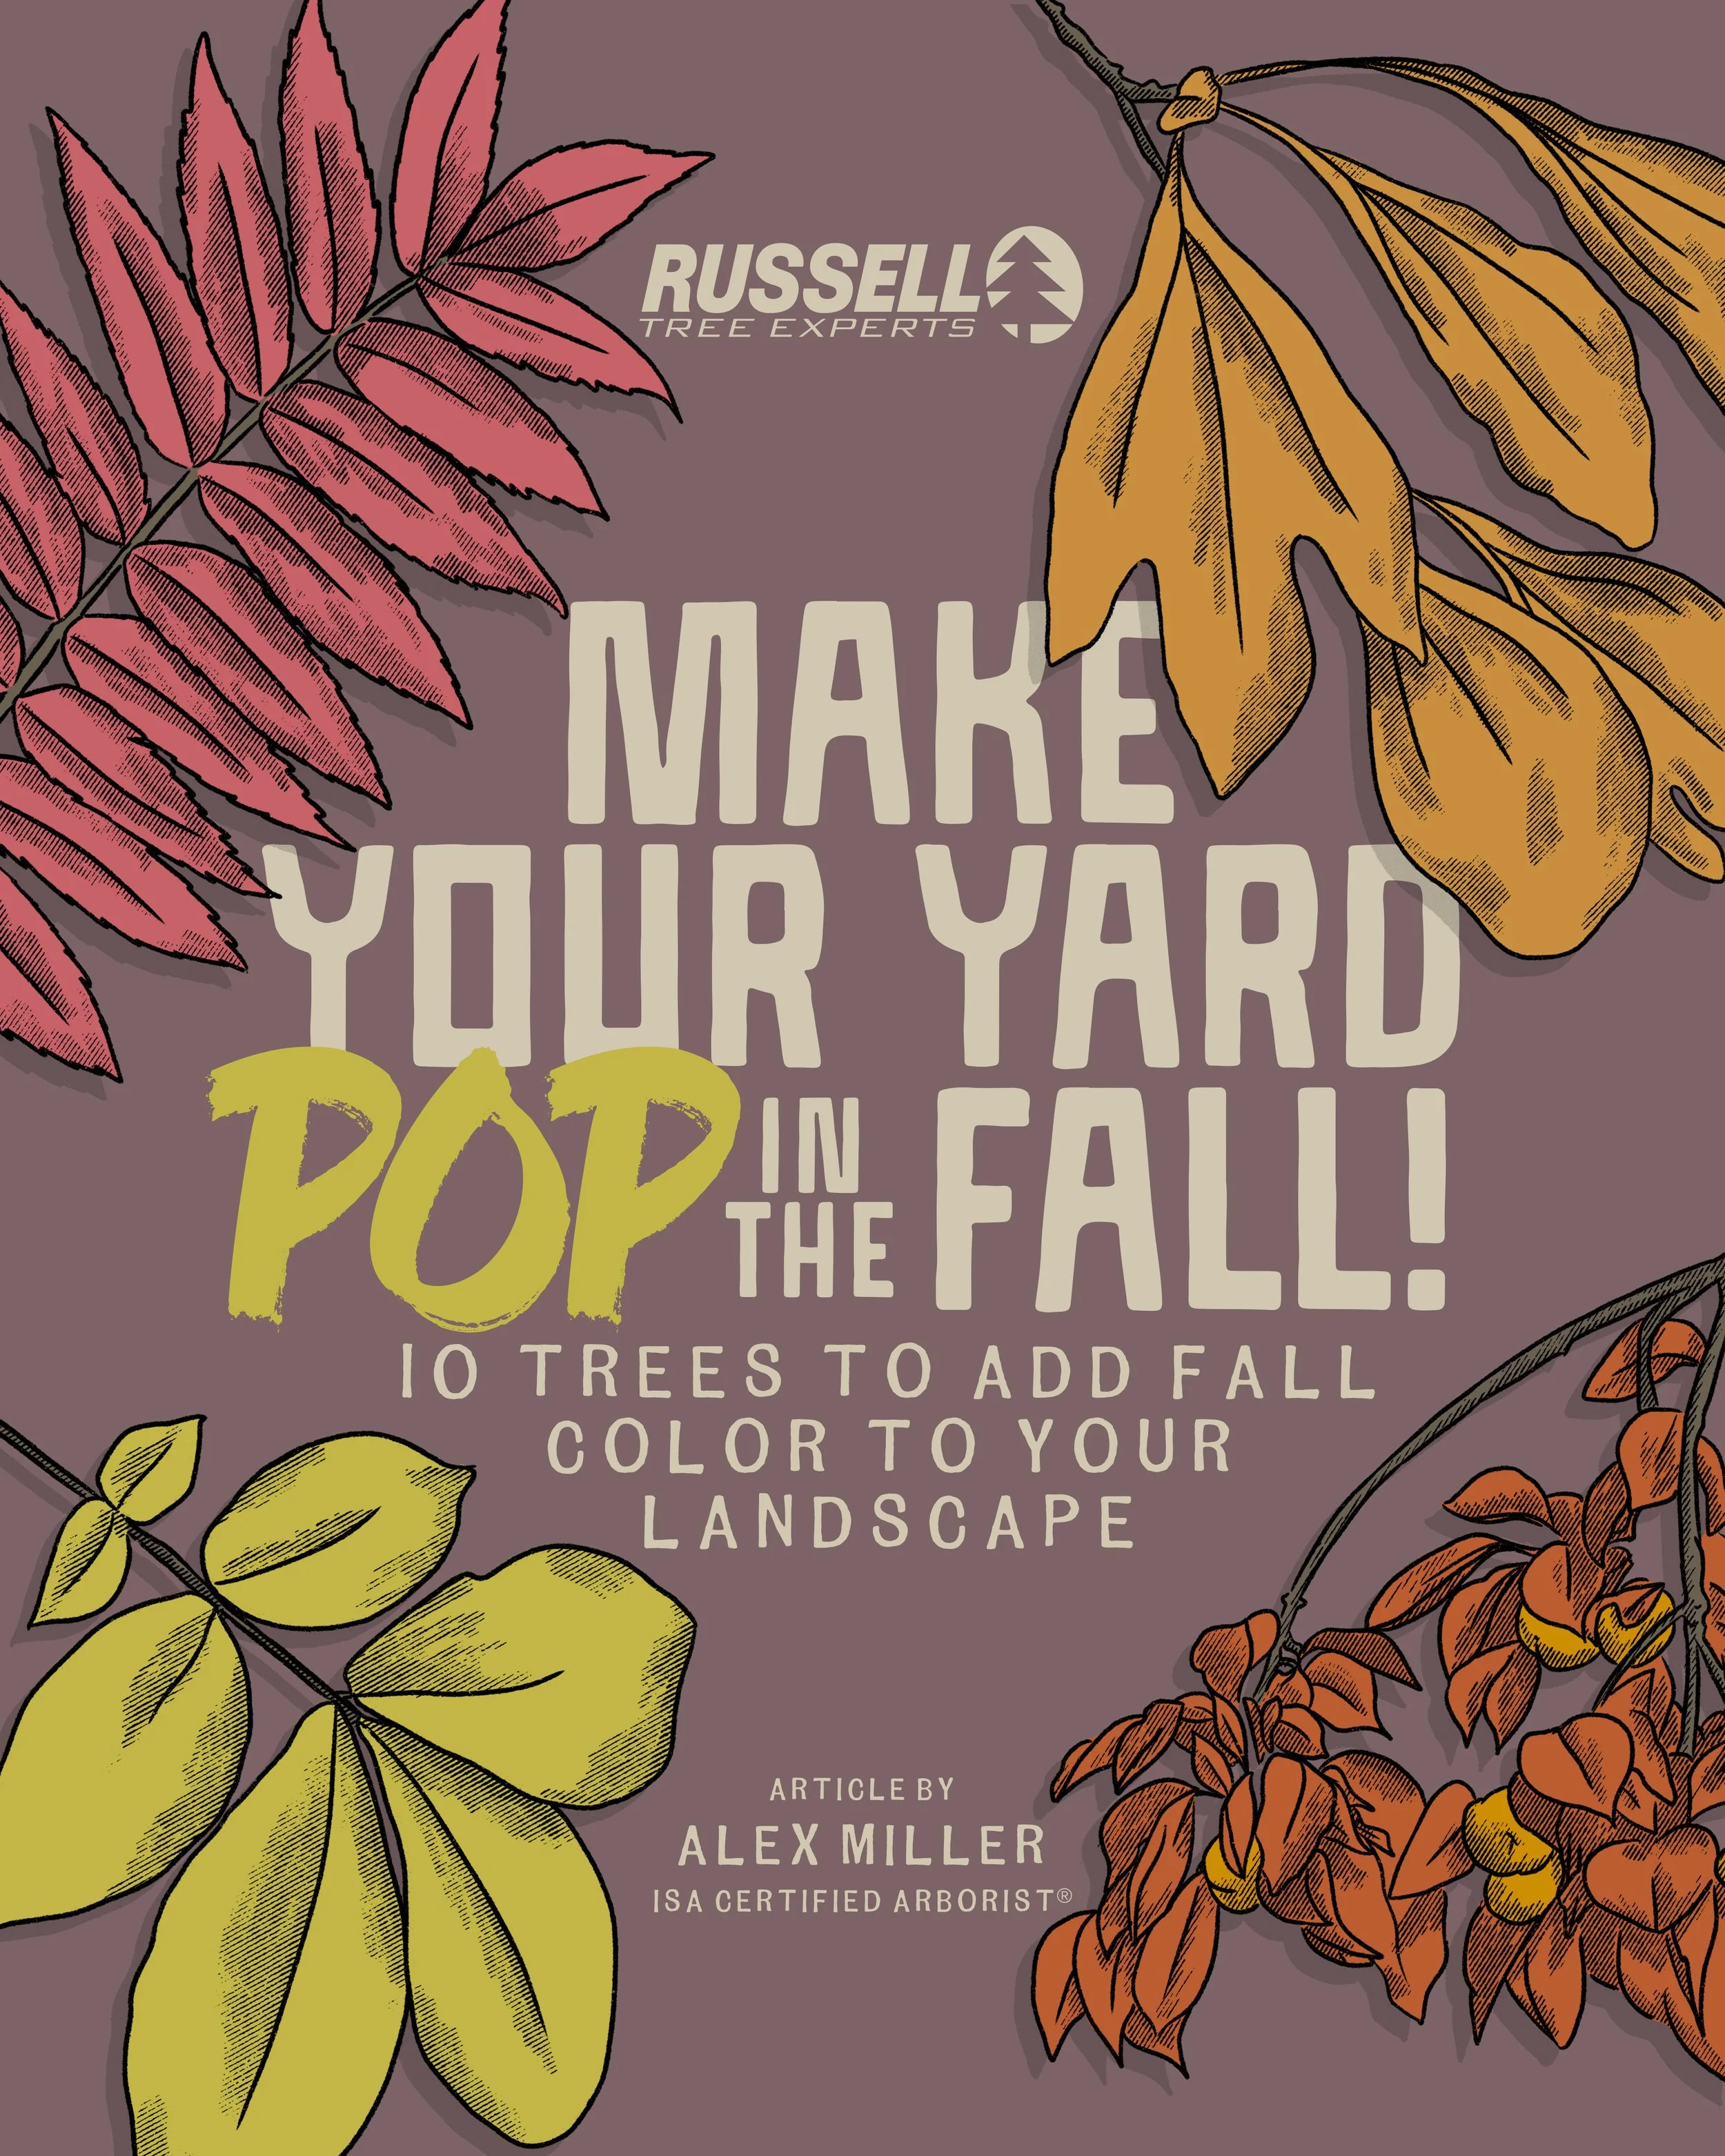
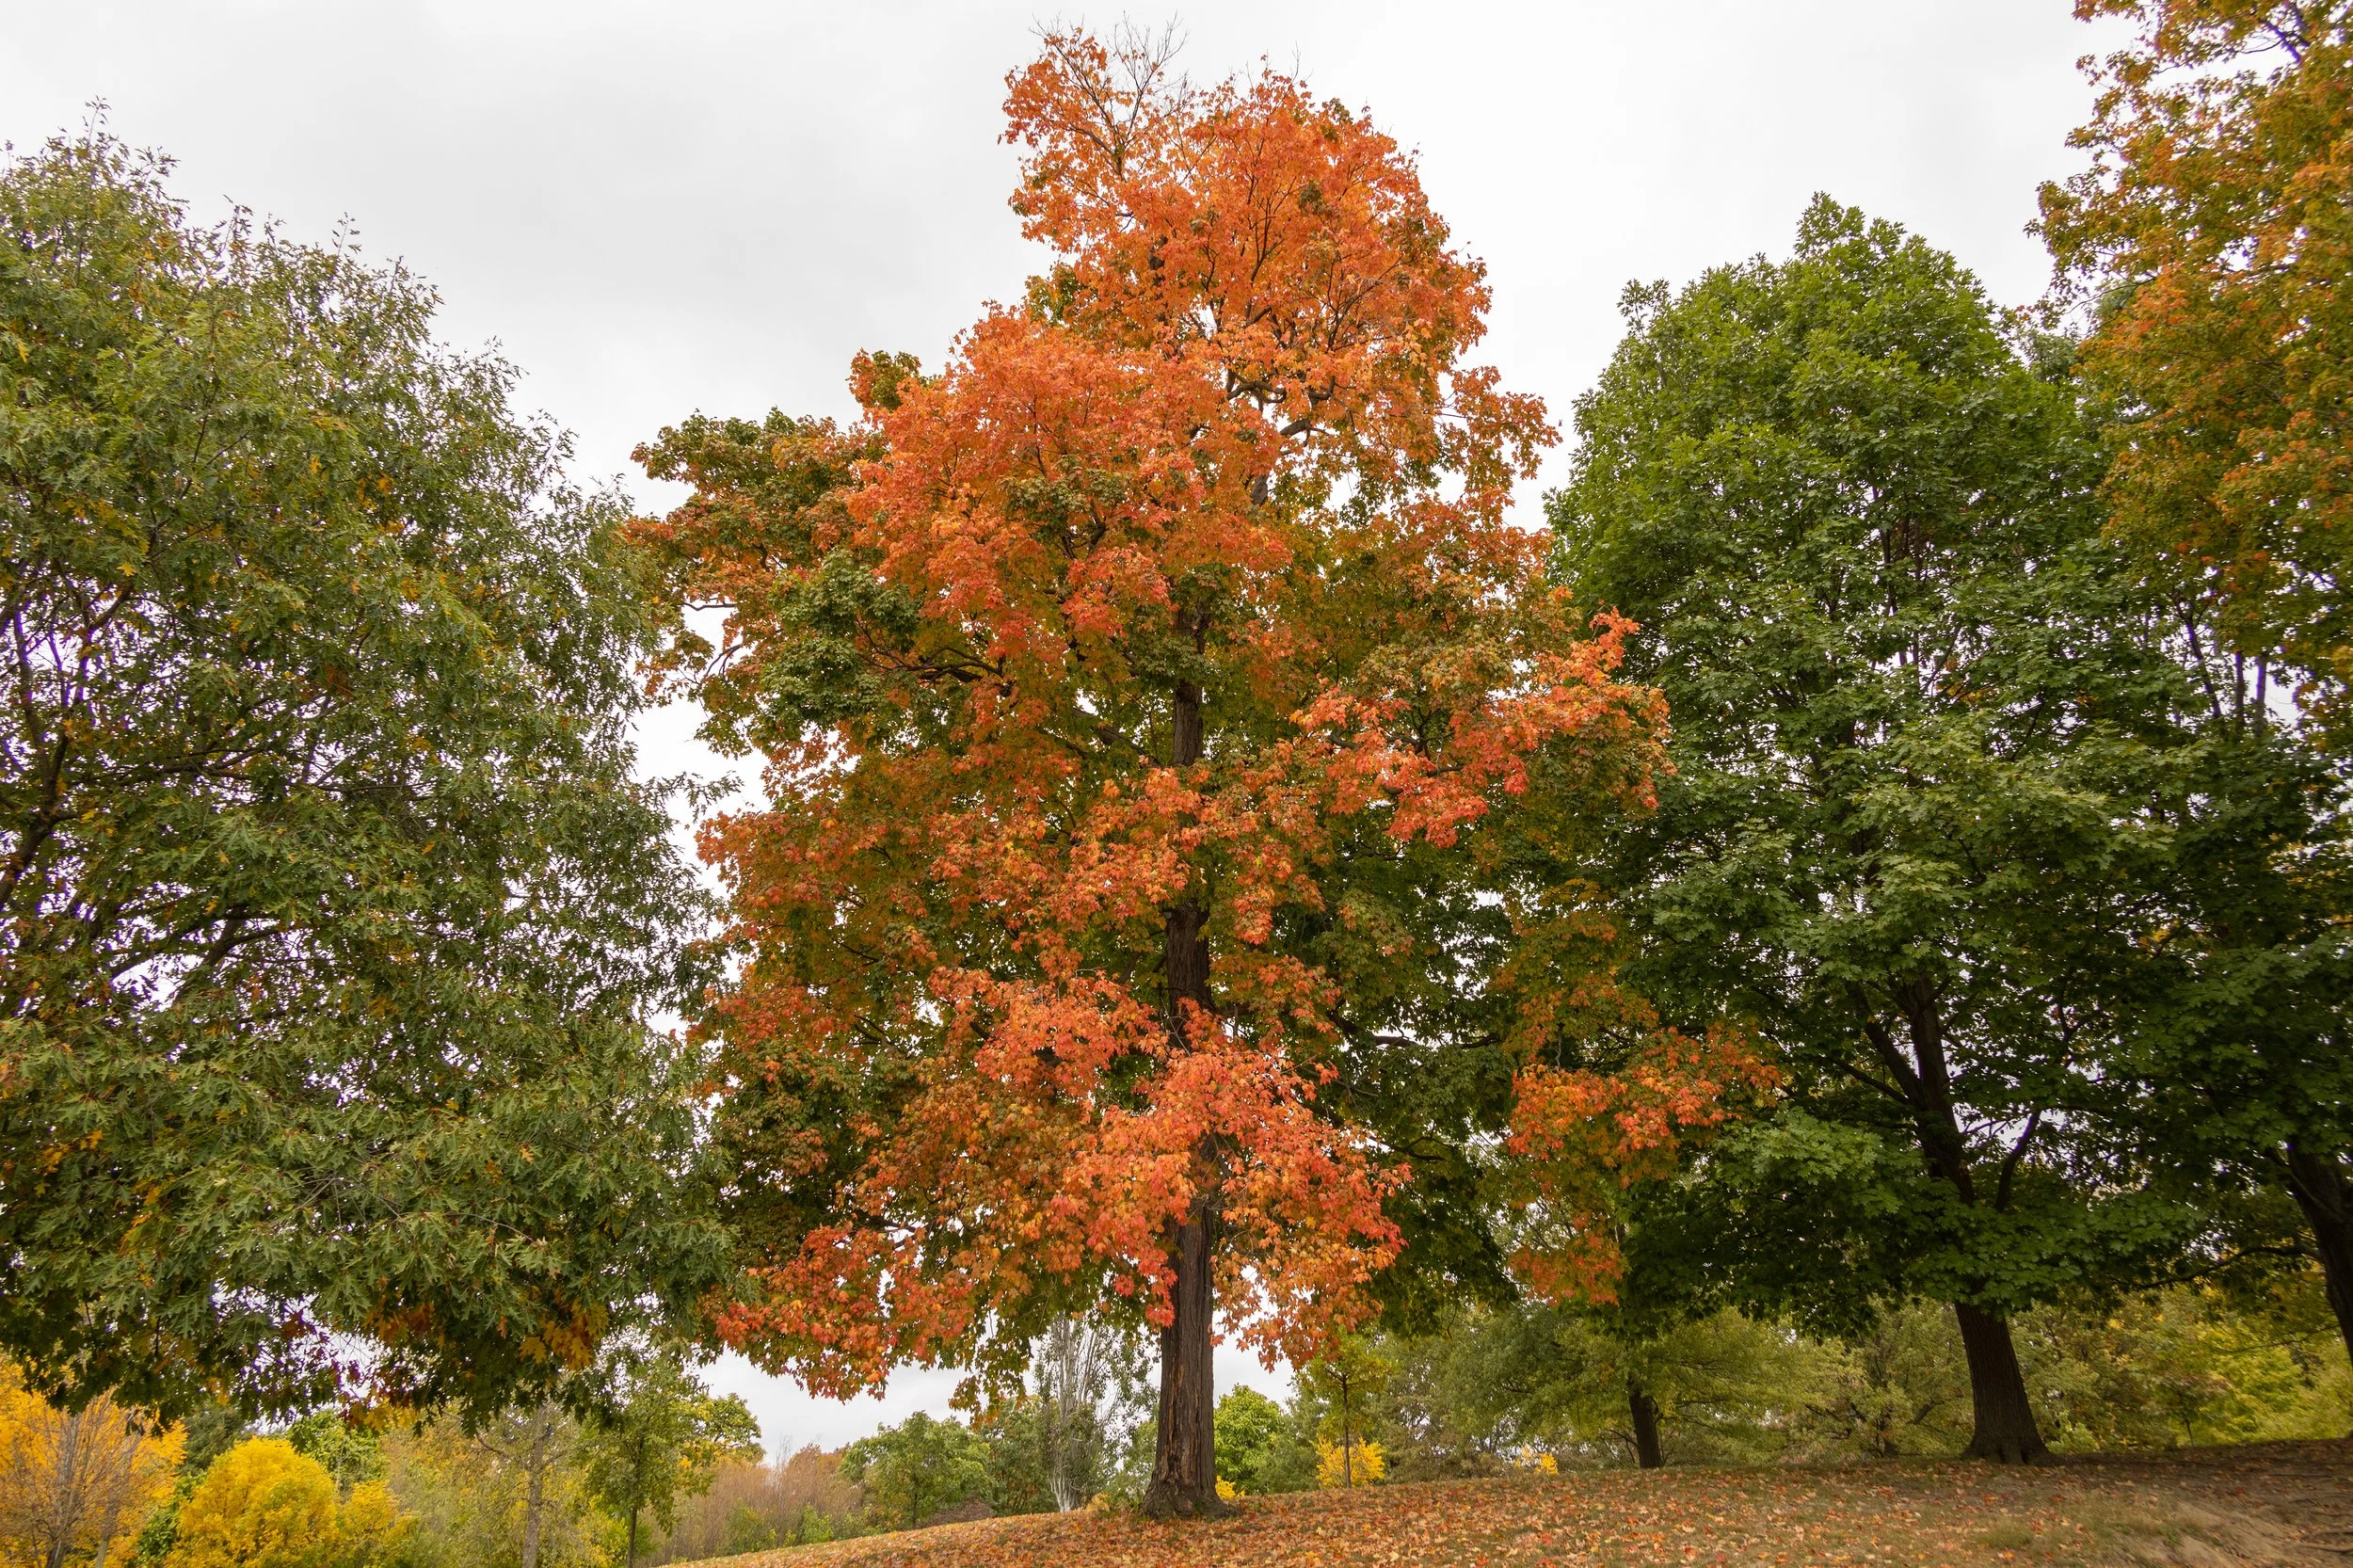
Make Your Yard POP in the Fall: 10 Trees to Add Fall Color to Your Landscape!
By Alex Miller
ISA Certified Arborist® OH-7168A
October 23, 2025
Autumn is upon us! And one of the joys of the season is admiring a vast array of fall foliage. If you are considering adding trees to your landscape, you may be wondering which trees provide the best fall color. Look no further! The list below includes my top 10 picks for trees of various sizes known for their outstanding fall foliage.
Smooth Sumac
Smooth sumac is often overlooked when it comes to landscape plants, but it delivers some of the most vibrant early fall color out of any smaller sized tree. Smooth sumac also has the benefit of being well adapted to a wide array of soils making it a relatively low-maintenance tree. It’s also accompanied by scarlet red berry clusters that if left unharvested will persist after leaf drop extending its landscape value into winter.
Scientific Name: Rhus glabra
Mature Height: 10 to 15 feet
Mature Width: 15 to 20 feet
Sun Preference: Full sun to partial shade
Fall Color: Orange to scarlet or crimson red
2. Washington Hawthorn
Making a reappearance off our article, 10 Trees to Add Spring Color to Your Landscape!, the Washington hawthorn also provides excellent fall foliage as the dark green leaves turn to various shades of orange and red. Similar to the Smooth sumac, the red berries endure after leaf drop and provide tasty snacks for song birds trying to make it through winter. If the thorny branches do not deter you, then this small to medium sized tree is a great year-round choice.
Scientific Name: Crataegus phaenopyrum
Mature Height: 25 to 30 feet
Mature Width: 15 to 25 feet
Sun Preference: Full sun
Fall Color: Oranges and reds
3. Black Tupelo (or Black Gum)
Black tupelo, or black gum as some call it, is one of the most striking native trees for fall color. Its glossy green summer leaves turn into a fiery mix of yellow, orange, scarlet, and maroon. Black tupelos are medium-sized trees with a pyramidal shape when young that become more round with age and prefer moist, acidic soils. Their brilliant color, wildlife value, and tolerance of wet or compacted soils make it a fantastic specimen forboth residential and natural landscapes alike.
Scientific Name: Nyssa sylvatica
Mature Height: 30 to 50 feet
Mature Width: 20 to 30 feet
Sun Preference: Full sun to partial shade
Fall Color: Variety of oranges and reds
4. American Persimmon
Persimmon trees are known for their sweet fruit that ripen in late fall just in time to make their way into pies, cakes, cookies, and sorbets. But that is not the only thing they bring to the table in fall. They also provide excellent yellow to orange fall color for a medium sized tree. Persimmons can be a bit slow growing, certainly taking their time to mature to “fruit-ion”, but those willing to wait will soon find themselves the family favorite come Thanksgiving.
Scientific Name: Diospyros virginiana
Mature Height: 30 to 55 feet
Mature Width: 20 to 30 feet
Sun Preference: Full sun to partial shade
Fall Color: Yellow to orange
5. Sassafras
This fun to say tree is a welcome addition to any landscape, easily identifiable by its unusually shaped leaves smelling of root beer in the spring and of citrus in the fall. These leaves can be oval, mitten-shaped, or lobed but come fall they will burst into brilliant combinations of yellow, orange, and red. The bark on sassafras is also known for its aromatic scent of cinnamon, citrus, and vanilla. This medium sized, drought tolerant fall spectacle of a tree is a perfect fit for homeowners who want to “spice up” their landscape.
Scientific name: Sassafras albidum (most common)
Mature Height: 30 to 60 feet
Mature Width: 20 to 35 feet
Sun Preference: Full sun to partial shade
Fall Color: Varies from yellow to deep reddish purple
6. River Birch
River birch is often planted for its ability to thrive in less-than-ideal drainage situations and for its unique bark texture that brings strong visual appeal year-round to the landscape. The beautiful golden yellow fall leaves are but another reason to add to the long list of reasons to consider adding a river birch to your landscape. However, some soils may prove difficult for river birch to access all of the nutrients it needs. Thankfully this can be remedied easily and here’s an article by another one of our arborists on this topic, Iron and Manganese Deficiency.
Scientific Name: Betula nigra
Mature Height: 40 to 60 feet
Mature Width: 25 to 40 feet
Sun Preference: Full sun to partial shade
Fall Color: Golden yellow
7. Ginkgo
Dating all the way back to the mid-Jurassic period, Ginkgo trees are some of the oldest and toughest trees around. Little known fact, four ginkgo trees survived the bombing of Hiroshima and are still around to this day. If this tree can survive the unfortunate circumstances of an atomic bomb, then this tree will do just fine in your heavily urban landscape. On top of this tree’s incredible resilience, it also boasts spectacularly bright yellow fall foliage that is sure to amaze. Just be sure when you are selecting this tree that you get a male ginkgo as the females produce fruit with a rather unpleasant odor.
Scientific Name: Ginkgo biloba
Mature Height: 40 to 70 feet
Mature Width: 30 to 40 feet
Sun Preference: Full sun to partial shade
Fall Color: Brilliant yellow
8. American Beech
Some may be surprised to see me recommend an American beech tree in light of my previous article, Beech Leaf Disease: The Looming Threat to Central Ohio’s Beeches, but any list of trees talking about fall color would be remiss without its inclusion. The silvery smooth bark of the American Beech is complimented by golden amber fall leaves that hold on long into winter after most other trees have long since gone bare. It is slow growing, but sure to impress for a long time.
Scientific Name: Fagus grandifolia
Mature Height: 50 to 80 feet
Mature Width: 40 to 60 feet
Sun Preference: full sun to partial sun
Fall Color: Bronze to copper
9. Red Oak
As the name would imply, red oaks provide a tower of brick red leaves that can easily command over a large landscape. Their ability to grow quickly while juvenile and thrive in our native soils makes the mighty red oak a staple for new planters looking for a cornerstone piece in a larger more natural landscape. However, in the compacted soils and confined spaces of our more urban areas, the red oak can face challenges that limit its growth and diminish the vibrant color it is known for.
Scientific Name: Quercus rubra
Mature Height: 60 to 80 feet
Mature Width: 60 to 80 feet
Sun Preference: Full sun to partial shade
Fall Color: Dark reddish brown
10. Shagbark Hickory
Truthfully all members of the hickory family are going to give you an outstanding yellow fall foliage and deserve a place on this list, but I chose to highlight the shagbark hickory for the additional appeal of its iconic peeling bark. Hickory trees are incredibly durable and long-lived trees that also require minimal care once established. If you are looking for a unique, low-maintenance tree that will provide excellent shade, beautifully vibrant yellow fall foliage, and habitat for wildlife for tens of generations, then look no further.
Scientific Name: Carya ovata
Mature Height: 70 to 80 feet
Mature Width: 50 to 60 feet
Sun Preference: Full sun to partial shade
Fall Color: Brilliant yellow
And that’s my list! Whether you’re looking for bold reds, glowing golds, or a striking mix of fall hues, these 10 trees offer some of the best autumn color nature has to offer. And here at Russell Tree Experts we offer various tree care services to keep your landscape display breathtaking for years to come, such as deep root irrigation, fertilization, insect and disease management, tree pruning, and much more! For a free tree work quote on how to elevate your landscape by one of our 25+ ISA Certified Arborists®, please visit RussellTreeExperts.com/Quote or call us at (614) 895-7000. Happy planting!
ADDITIONAL ARBOR ED™ ARTICLES!


Alex Miller I Regional Manager, Russell Tree Experts
Alex joined Russell Tree Experts in 2021 and has been in the green industry since 2020. He is an ISA Certified Arborist®, EHAT certified, CPR and first aid certified, OSHA 10 certified, and holds an ODA commercial pesticide license. Alex’s favorite tree is a magnolia tree! When not at RTE, he enjoys rock climbing and his favorite movie series: The Lord of the Rings!
Put that Rake Away! Leave the Leaves!
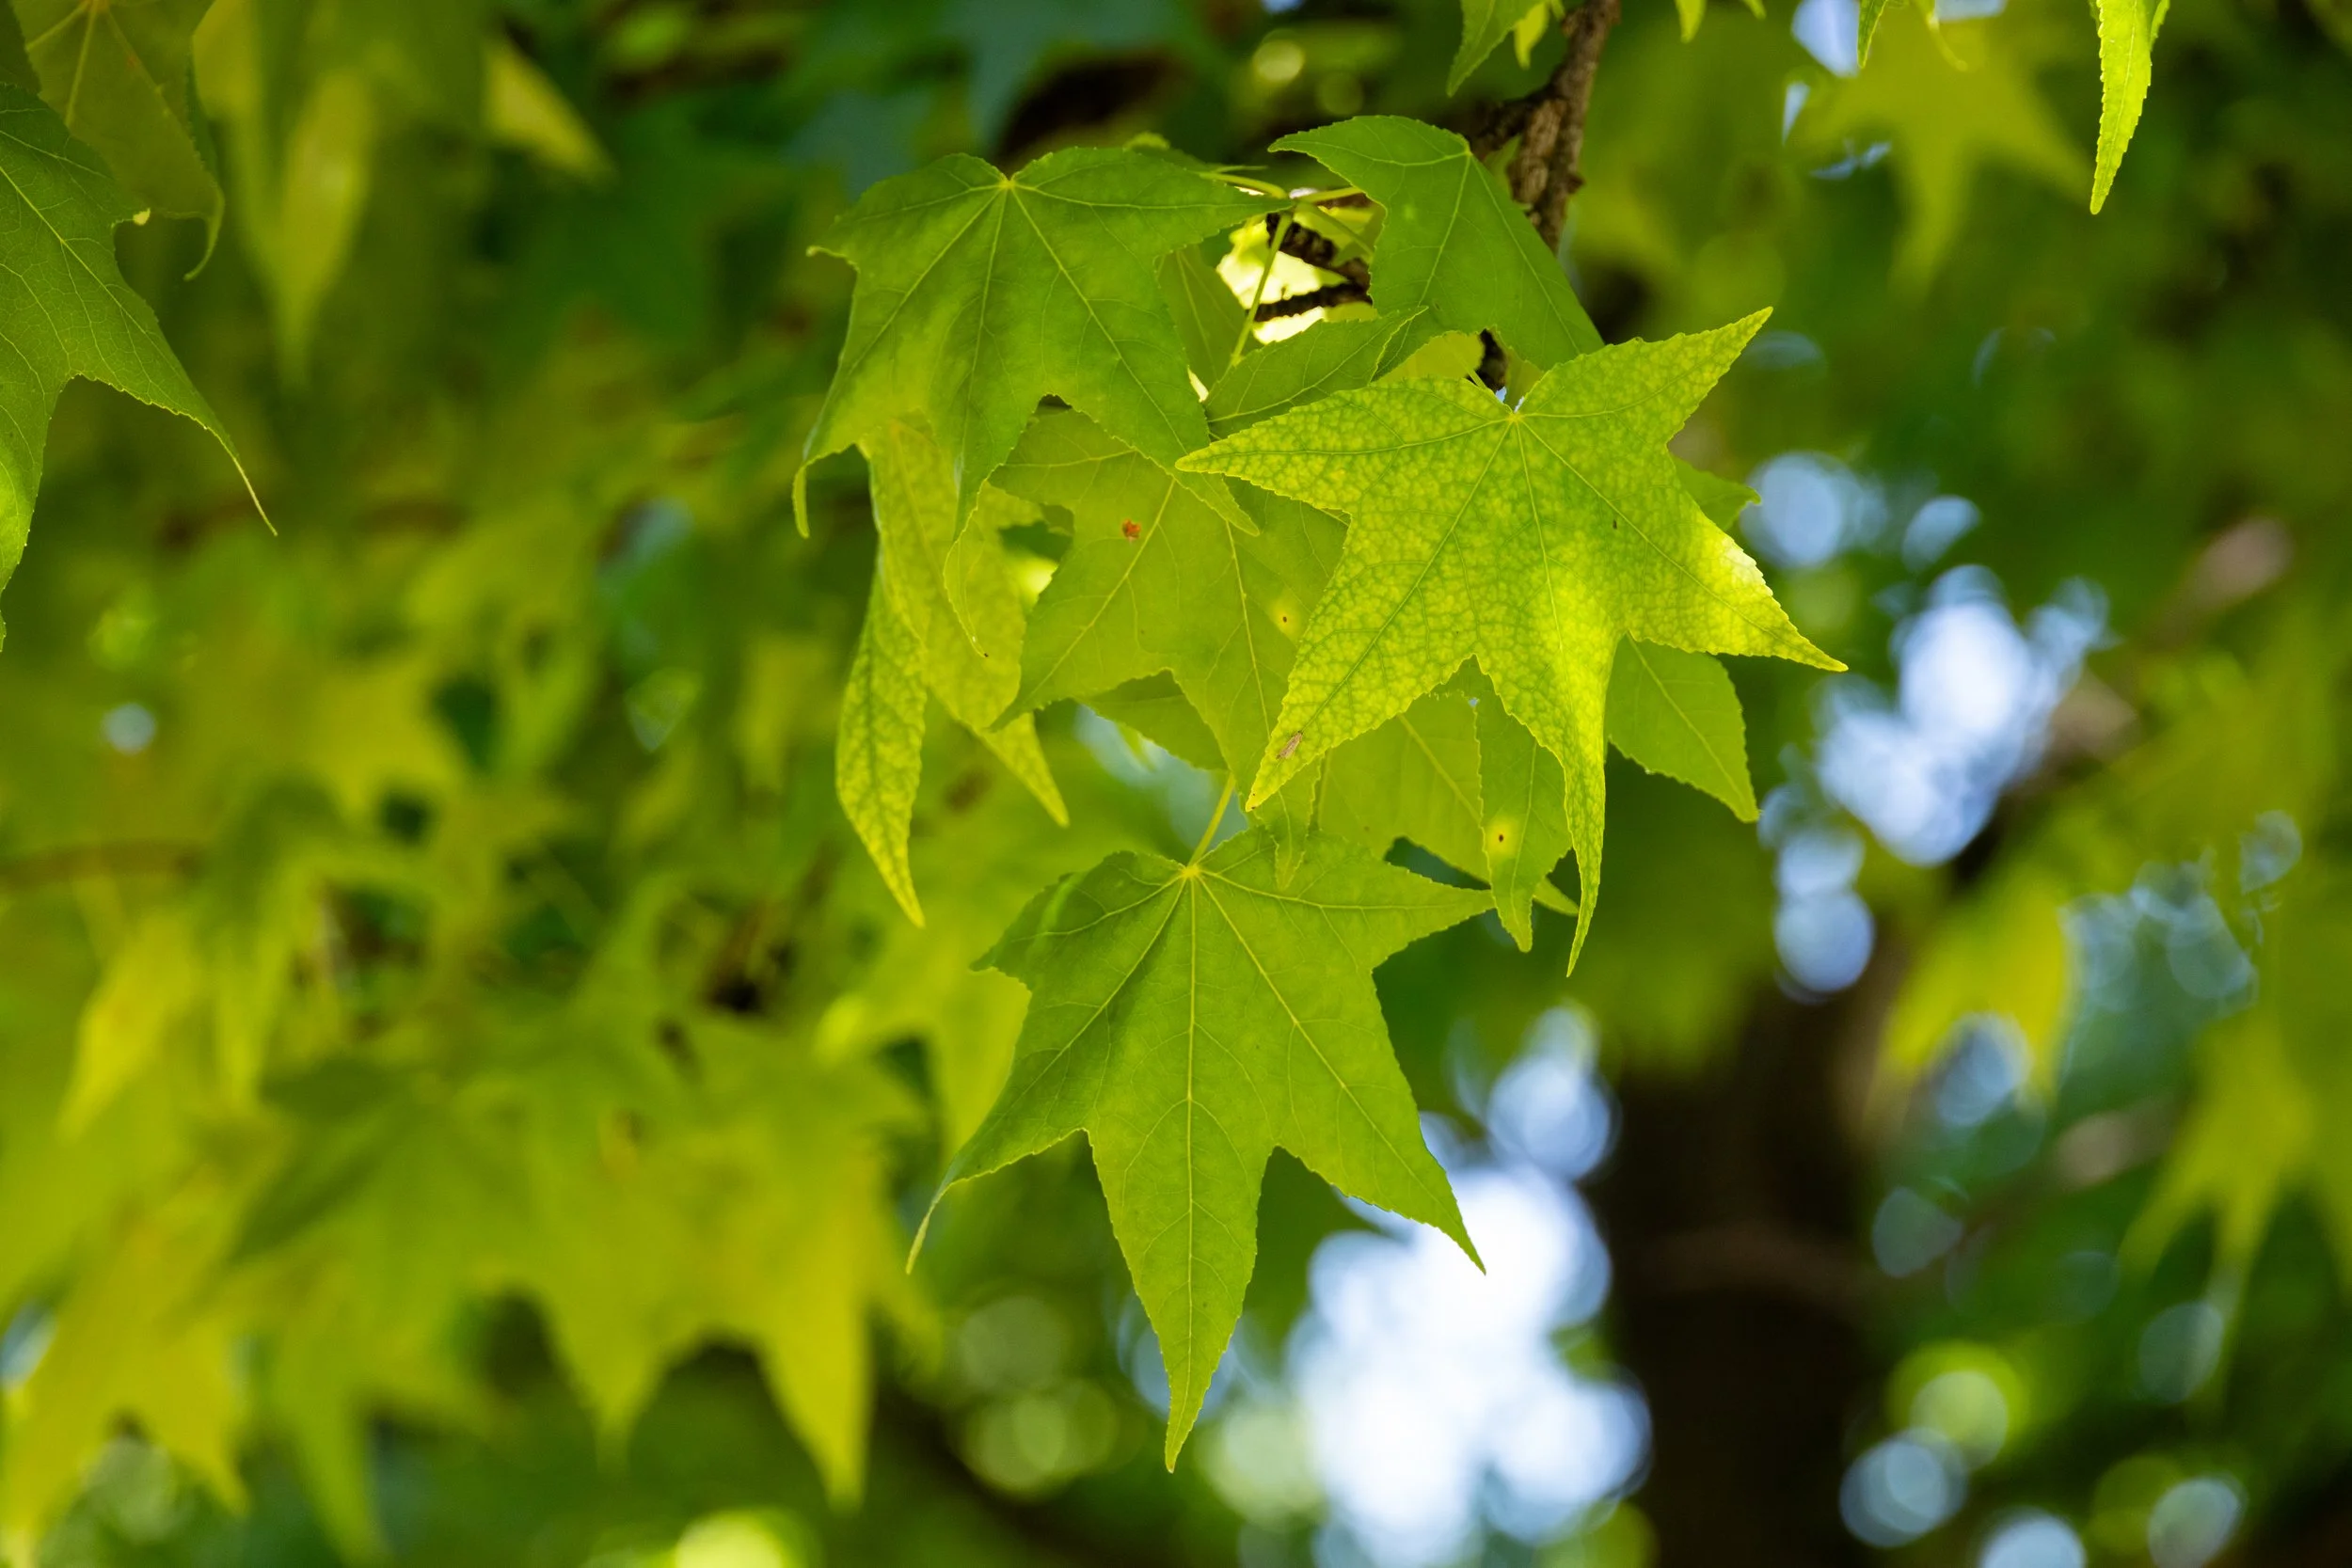
As we transition into Autumn here in central Ohio, that means many things: shorter days, cooler temperatures, football season, pumpkin spice everything, and more specifically, fall foliage! Green, deciduous tree leaves start to turn into beautiful shades of orange, yellow, red, and more until they eventually fall off of the tree in an effort to conserve water and energy.

By Enrique Arayata
ISA Certified Arborist® OH-7252A
October 16, 2025
As we transition into Autumn here in central Ohio, that means many things: shorter days, cooler temperatures, football season, pumpkin spice everything, and more specifically, fall foliage! Green, deciduous tree leaves start to turn into beautiful shades of orange, yellow, red, and more until they eventually fall off of the tree in an effort to conserve water and energy. Commonly, you might see homeowners and property managers raking up these leaves to put them in piles by the curb or into yard waste bags. If you are one of these people, I’d like to take a moment in today’s article to persuade you to think otherwise and to… leave those leaves!
Fallen tree leaves don’t have to be yard waste. Sure they can choke out your grass, be a slipping hazard on concrete, or be subjectively unsightly, but an alternative to spending money on yard waste bags and laboriously bagging up your leaves is to rake or blow them around the base of a tree! This low-cost action comes with many benefits that your tree will thank you for!
Cost-Savings
Yard waste bags can add up, and so can mulch and soil amendment! Leaves can serve as a natural mulch and soil amendment alternative. By placing fallen leaves around your tree, it can save you money by not having to purchase yard waste bags, mulch, and soil amendment.
Weed Suppression
One reason for removing leaves is that it can choke out grass in your lawn. The same can be said for weeds. Fallen leaves can act as a natural tree ring to choke out weeds and reduce resource competition from aboveground weeds for water, soil nutrients, space, and more.
Wildlife Habitat
Leaves can be a habitat for microorganisms (bacteria, fungi, and more), worms, insects, birds, pollinators, and more! Leaf litter can help keep the natural food chain in motion and aid in the life cycle for certain insects like moths and fireflies. Additionally, as leaves get consumed and processed out from insects, more organic matter gets put back into the soil and increases its quality.
Natural Soil Fertilizer
As leaves decompose and break down, thanks to some of the microorganisms mentioned earlier, nutrients are put back into the soil for tree roots to intake for increased health and vigor of the tree! This will help to create a more renewable cycle of tree care, thus reducing the amount of human intervention needed for the tree such as watering, fertilization, etc.
Temperature and Moisture Regulation
Similar to mulch, leaves can act as a temperature and moisture regulation for a tree. It’ll keep the belowground soil more consistent with its temperature and moisture level. During hotter parts of the day, it’ll keep the soil cooler. During cooler parts of the night, it’ll keep the soil warmer. Leaves retain water and can help add moisture back into the soil for a tree’s roots to absorb, thus leading to less frequent watering in the case of drought or newly planted trees.
~
Hopefully the benefits outlined in this article have made you think twice about bagging away those leaves! It is definitely a valid concern to not have wet leaves be a slipping hazard on your side walk, have leaves choke out your grass, or have the leaves make your lawn look messy, but raking or blowing them into a ring around a tree’s base is one way to reduce those three worries and help your tree out in the process. A 2-to-4-inch deep circular ring around the tree’s base is more than plenty to help your tree out. In terms of diameter, the leaf ring can be as wide as your landscape space might allow, as wide as the amount of leaves might allow, or up to the canopy drip line of a tree (the outermost perimeter of the tree canopy). My only warning to you would be to keep the base of the tree exposed! Do not pile up the leaves and create a volcano or mound shape. The ring should be generally flat or in-line with the surrounding grade.
Tree leaf ring installations nor yard waste bag pickups are services that we at Russell Tree Experts provide. However, if there is a different tree care service that we can help with such as removal, pruning, stump grinding, cabling, fertilization, clearing, and more, please visit RussellTreeExperts.com/Quote or call us at (614) 895-7000 for a free tree work quote by one of our 25+ ISA Certified Arborists®!
ADDITIONAL ARBOR ED™ ARTICLES!


Enrique Arayata I Media Production Manager, Russell Tree Experts
Enrique is an ISA Certified Arborist® and FAA Certified Remote Pilot. In his free time, he enjoys working out, hanging out with his family and girlfriend, video production, photography, cars, technology, and cooking. Enrique has a BA in moving image production with a double minor in film studies and studio art specializing in photography from The Ohio State University, and an AA in web graphic design from DeVry University. His favorite tree is the Kwanzan cherry tree.
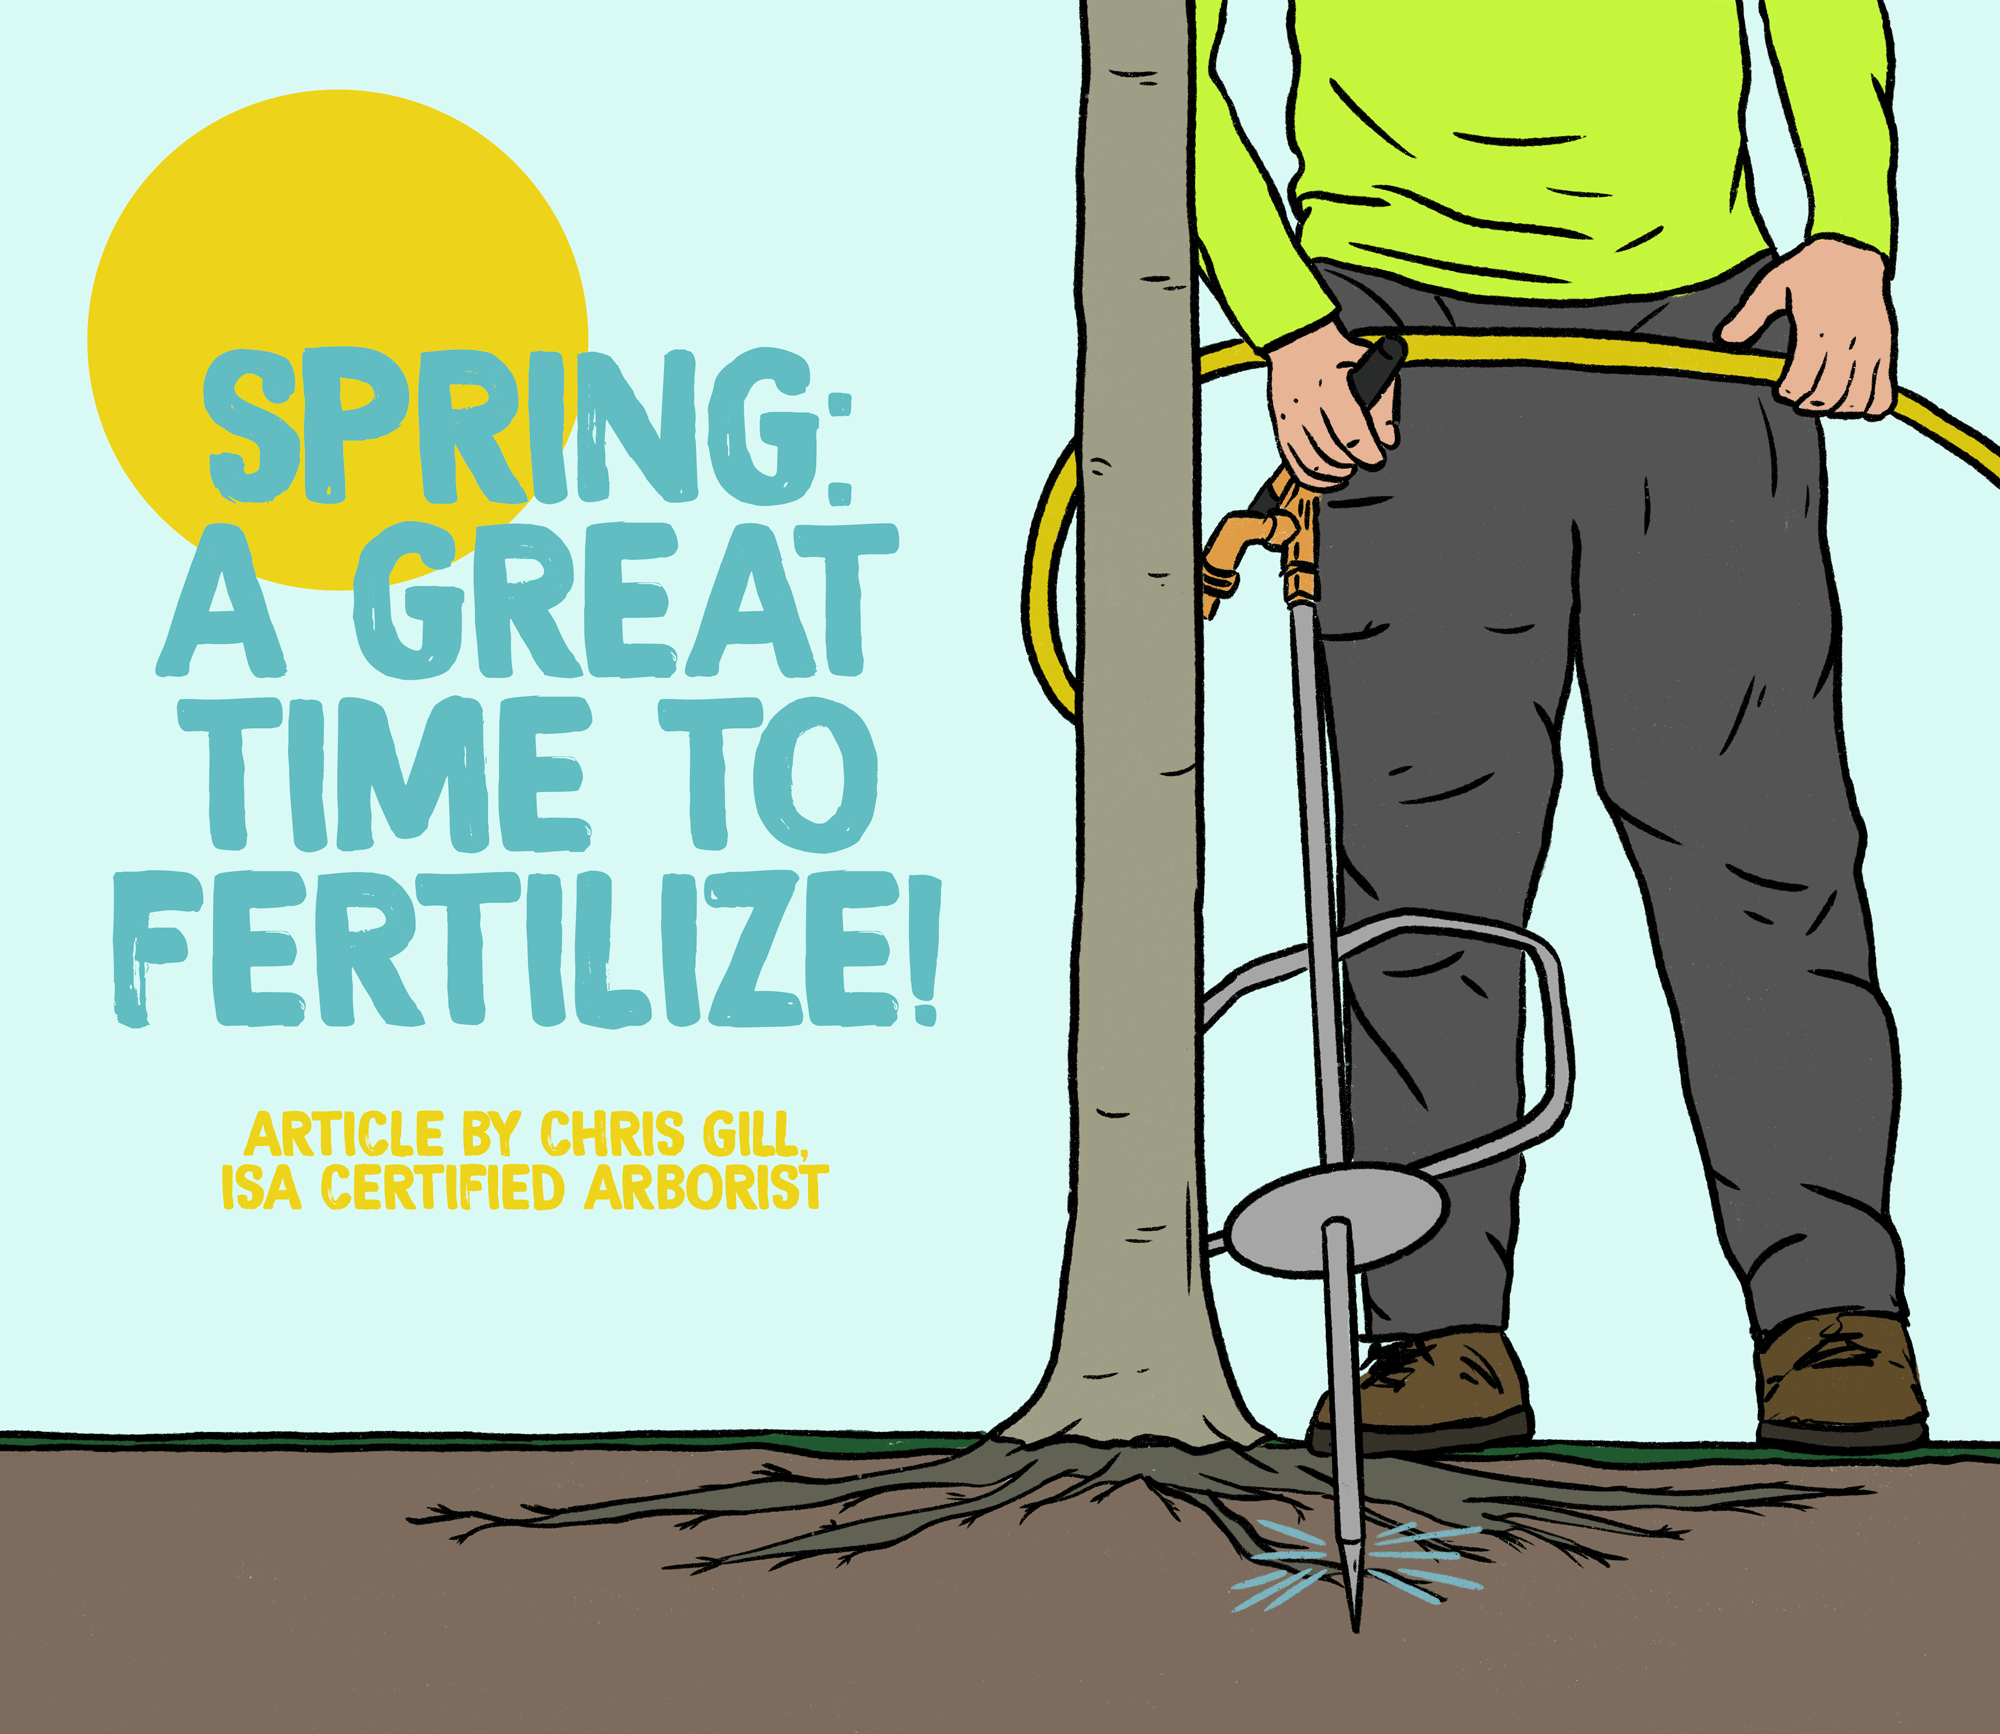
Fall Fertilization: A Boost For Tree Health and Growth!

By Chris Gill
ISA Certified Arborist® OH-6416A
October 9, 2025
As the leaves turn vibrant shades of orange and red and the air grows crisp, fall signals a time of transition for trees. While many of us associate fertilization with spring, fertilizing trees in the fall offers unique and powerful benefits that can set your trees up for success. By giving your trees a nutrient boost as the growing season winds down, you’re helping them thrive through winter and into the next year. Additionally, combining fall fertilization with spring fertilization can amplify these benefits, helping to ensure your trees remain healthy, strong, and beautiful year-round.
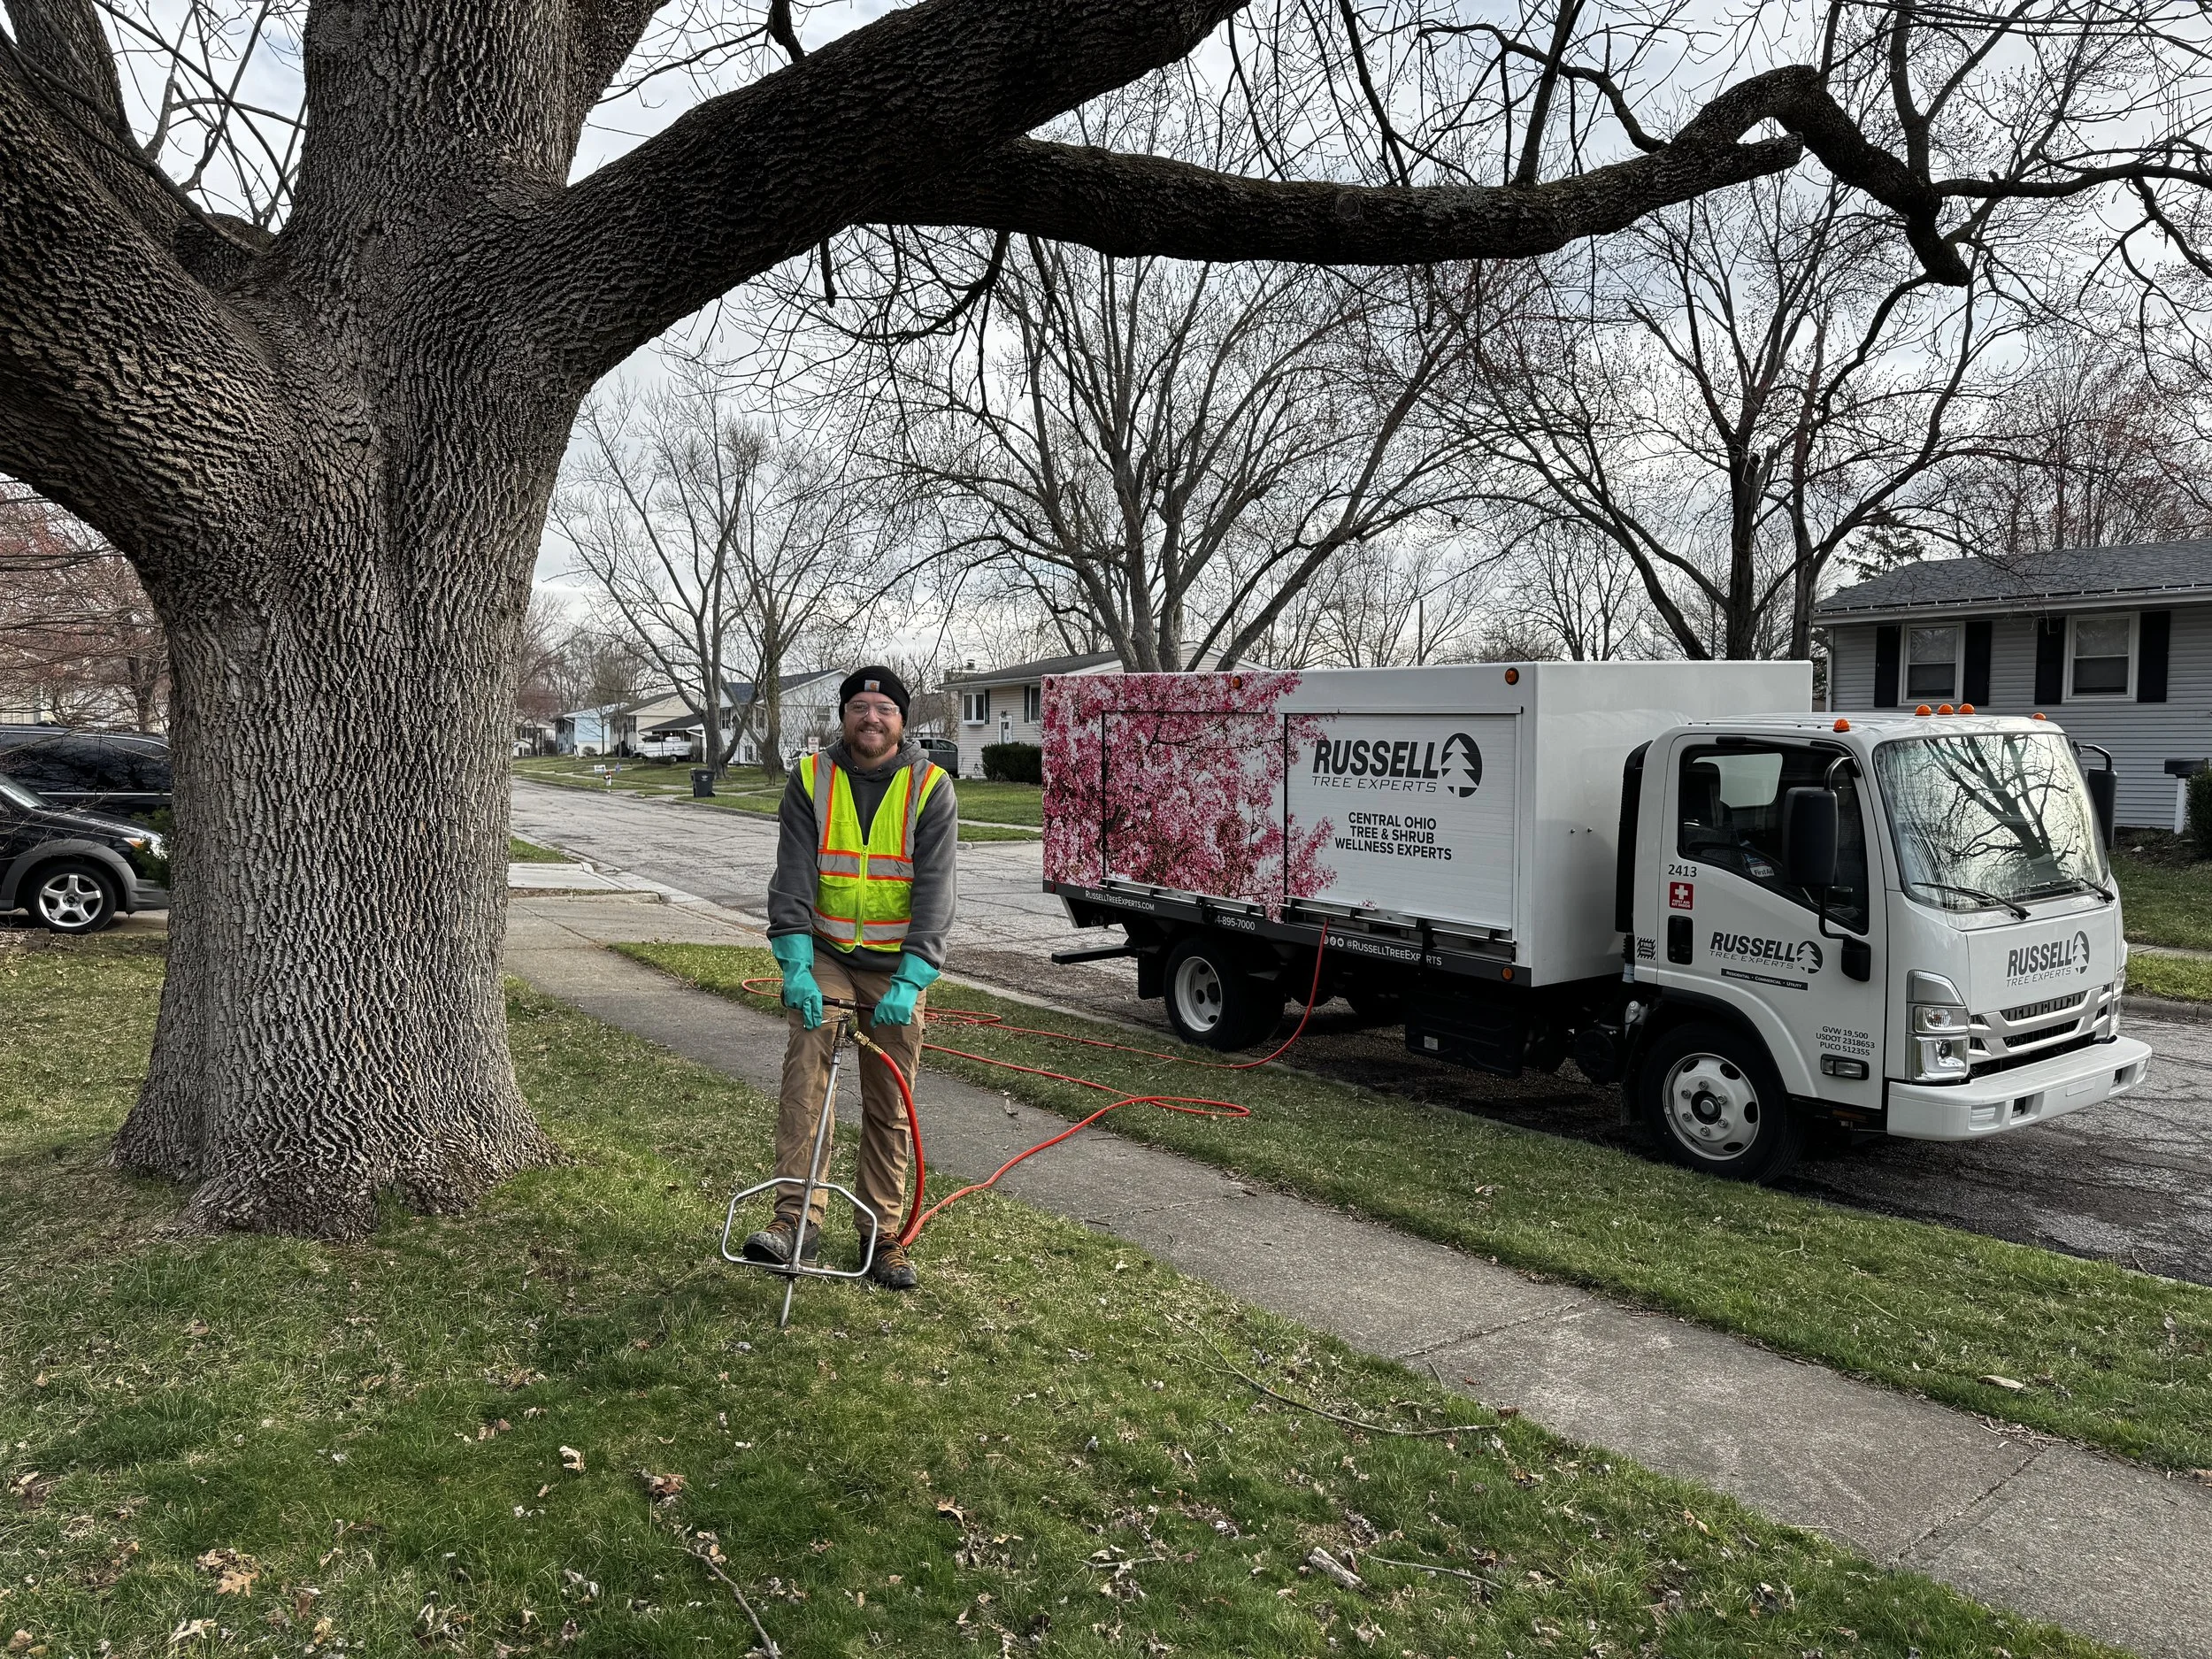
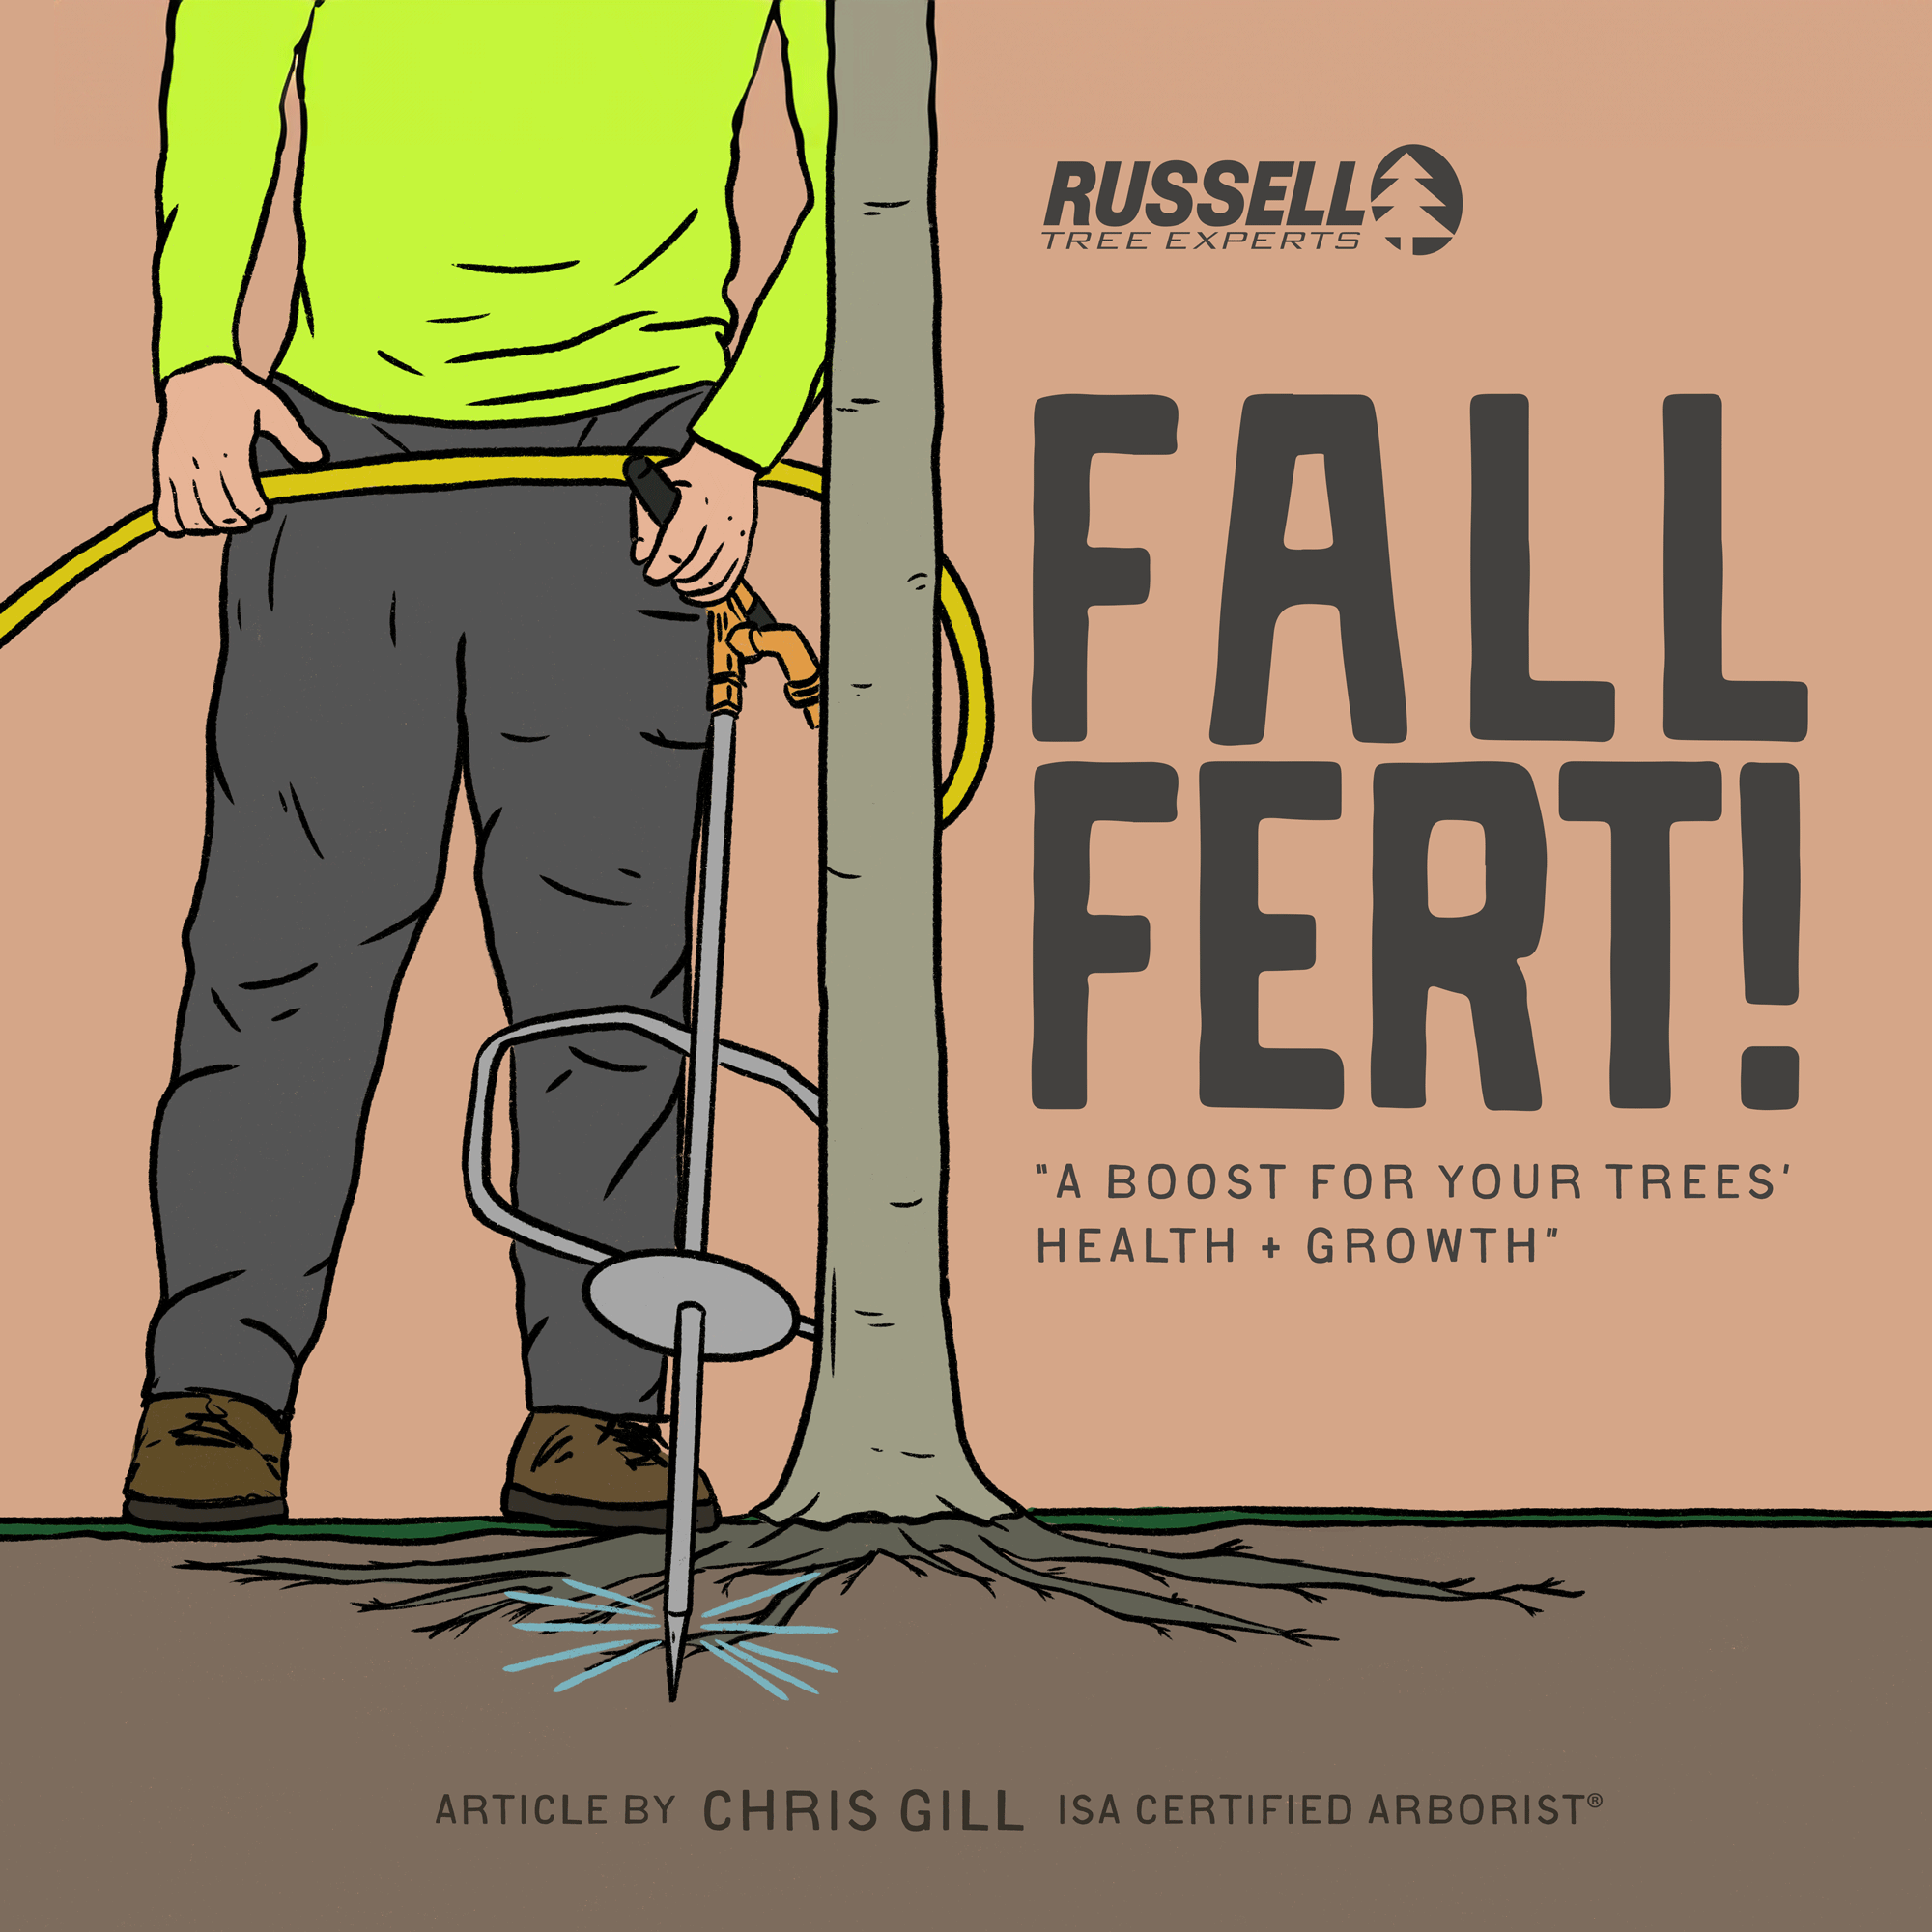
At Russell Tree Experts, we fertilize trees through a technique called deep-root fertilization. We perform deep-root fertilization by using a lance to inject liquid fertilizer under pressure deep into the feeder root system in a soluble form that is easy for the tree to take up. This is superior to a traditional surface application where a granular fertilizer is spread over the root system of a tree but still requires time for the product to break down and work itself into the soil. Deep-root fertilization allows nutrients to pass by the competitive roots of turf, weeds, and other ground covers to maximize uptake for the tree. The process of deep root fertilization also helps to loosen up compacted soil around the tree to promote better root growth while also allowing water and oxygen to more easily reach the roots. Compacted soil is a common problem in urban landscapes and can reduce a tree’s ability to access nutrients.

Why Fall Fertilization Matters
In the fall, trees shift their energy from producing leaves and growing branches to strengthening their root systems and preparing for dormancy. This is a critical time for trees, as they store nutrients to survive the cold months ahead. Fertilizing in the fall provides the essential nutrients trees need to bolster their roots, improve resilience, and prepare for a robust start in spring.

©Russell Tree Experts
One method of fall fertilization is through the use of an irrigation lance to deliver nutrients below ground, closer to a tree’s roots.
One of the biggest benefits of fall fertilization is root development. During autumn, trees focus on growing their roots, which anchor them and absorb water and nutrients. By applying fertilizer in the fall, you give trees the building blocks they need to expand and strengthen their root systems. Stronger roots mean trees are better equipped to handle drought, storms, and other environmental stresses.
Fall fertilization also helps trees store nutrients for winter. As trees enter dormancy, they rely on stored energy to survive until spring. Fertilizer provides a nutrient reserve that trees can draw upon during this period, to help them emerge from winter in a healthy condition. This nutrient boost supports overall tree health, leading to better resistance against pests, diseases, and harsh winter conditions.
Another advantage of fall fertilization is improved bud and flower formation. The nutrients provided in the fall contribute to the development of next season’s buds, which means healthier blooms and foliage when spring arrives. Trees that are well-nourished in the fall often produce healthier flowers and lusher leaves, enhancing your landscape.


The Power of Combining Fall and Spring Fertilization
While fall fertilization lays a strong foundation for tree health, pairing it with spring fertilization creates a dynamic duo for year-round vitality. Spring is a time of rapid growth, as trees produce new leaves, flowers, and branches. Fertilizing in the spring provides an immediate supply of nutrients to fuel this growth. It supports vigorous shoot development, leading to fuller canopies and stronger branches. Spring fertilization also enhances photosynthesis, helping trees produce the energy they need to grow and thrive.
When you fertilize in both seasons, you’re giving your trees a balanced nutrient plan. Fall fertilization builds the root system and prepares trees for winter, while spring fertilization supports above-ground growth and energy production. Together, they help your trees have the resources they need at every stage of their growth cycle. This combination promotes long-term health, making trees more resilient to environmental challenges and helping them live longer, more productive lives.
In summary, fall fertilization is a simple and effective way to support your trees’ health, strengthening their roots and preparing them for winter. By taking the time, this fall to nourish your trees, you’ll help them thrive for seasons to come. For a free tree work quote by one of our 25+ ISA Certified Arborists®, visit RussellTreeExperts.com/Quote or call us at (614) 895-7000!
ADDITIONAL ARBOR ED™ ARTICLES!


Chris Gill I Regional Manager, Russell Tree Experts
Chris joined Russell Tree Experts in 2015 and has been in the green industry for over 15 years. When not at RTE, he enjoys spending time with wife & son, wakeboarding, and hunting. His favorite trees are the white oak & sugar maple for their beauty and uses beyond the landscape. Chris is an ISA certified arborist, EHAT certified, CPR and first aid certified, holds an ODA commercial pesticide license, and holds a tree risk assessment qualification (TRAQ).
Why Do Leaves Change Color?

How and what does a tree eat? Why do leaves change colors in the fall? Why do trees drop their leaves?
Trees, just like humans, need nutrients, oxygen, water, and the sun to thrive. Also, adaptations for surviving our climates have occurred in both trees and humans, but ours are less showy in the fall.
Let's start with the first question: how and what does a tree eat?
When we eat carbohydrates, our bodies produce glucose, aka sugar, which we either use instantly or store for later. Similarly, trees also utilize carbohydrates in their growth, but instead of eating a sandwich, they use water from their leaves and roots, carbon dioxide (CO2) from the environment, and energy from their leaves through a process called photosynthesis. Photosynthesis uses the leaves’ stored chlorophyll, which produces? … You guessed it, carbohydrates! Science note: Chlorophyll is also why leaves appear green… more on that shortly!


So, how does this tie into the next question: Why do leaves change colors in the fall?
Well, simply put, the sun is to blame for the fall colors we get to enjoy. Because the sun is getting further away from our hemisphere, the days become shorter, and the temperatures start to drop. This causes the tree’s adaptation to enter the chat. Remember the tree needs water, sunlight, and CO2 to make its food (glucose), and what is beginning to decrease? … That's right, the amount of sunlight the stored chlorophyll can use to make energy with.
For the tree to survive the coming months of less water absorption from frozen soil, no rain, and reduced sunlight, the tree must dramatically reduce its energy needs. The cooler weather and shorter days trigger the trees to stop producing and start reclaiming the existing chlorophyll nutrients.


Remember the science note from earlier? This reduction and reclaiming of the existing chlorophyll cause the leaves to change colors. Chlorophyll absorbs red and blue light, causing most of us to see leaves as green. As the level of chlorophyll continues to decrease, we get to see the other colors in the spectrum. Remember ROY-G-BIV? Once green gets out of there, the fall show can really start.
My friend Kim Frye is an environmental scientist, and while I was chatting with her about this article, she shared a fun detail about leaf pigments: "[trees produce] xanthophyll (yellow orange) and anthocyanins (red purple blue), and they also help all year long when the light changes in the mornings and at nightfall. Those wavelengths become more predominant as we head into fall and maximize photosynthesis beyond the wavelengths chlorophyll uses."
Now onto the last question: Why do trees drop their leaves?
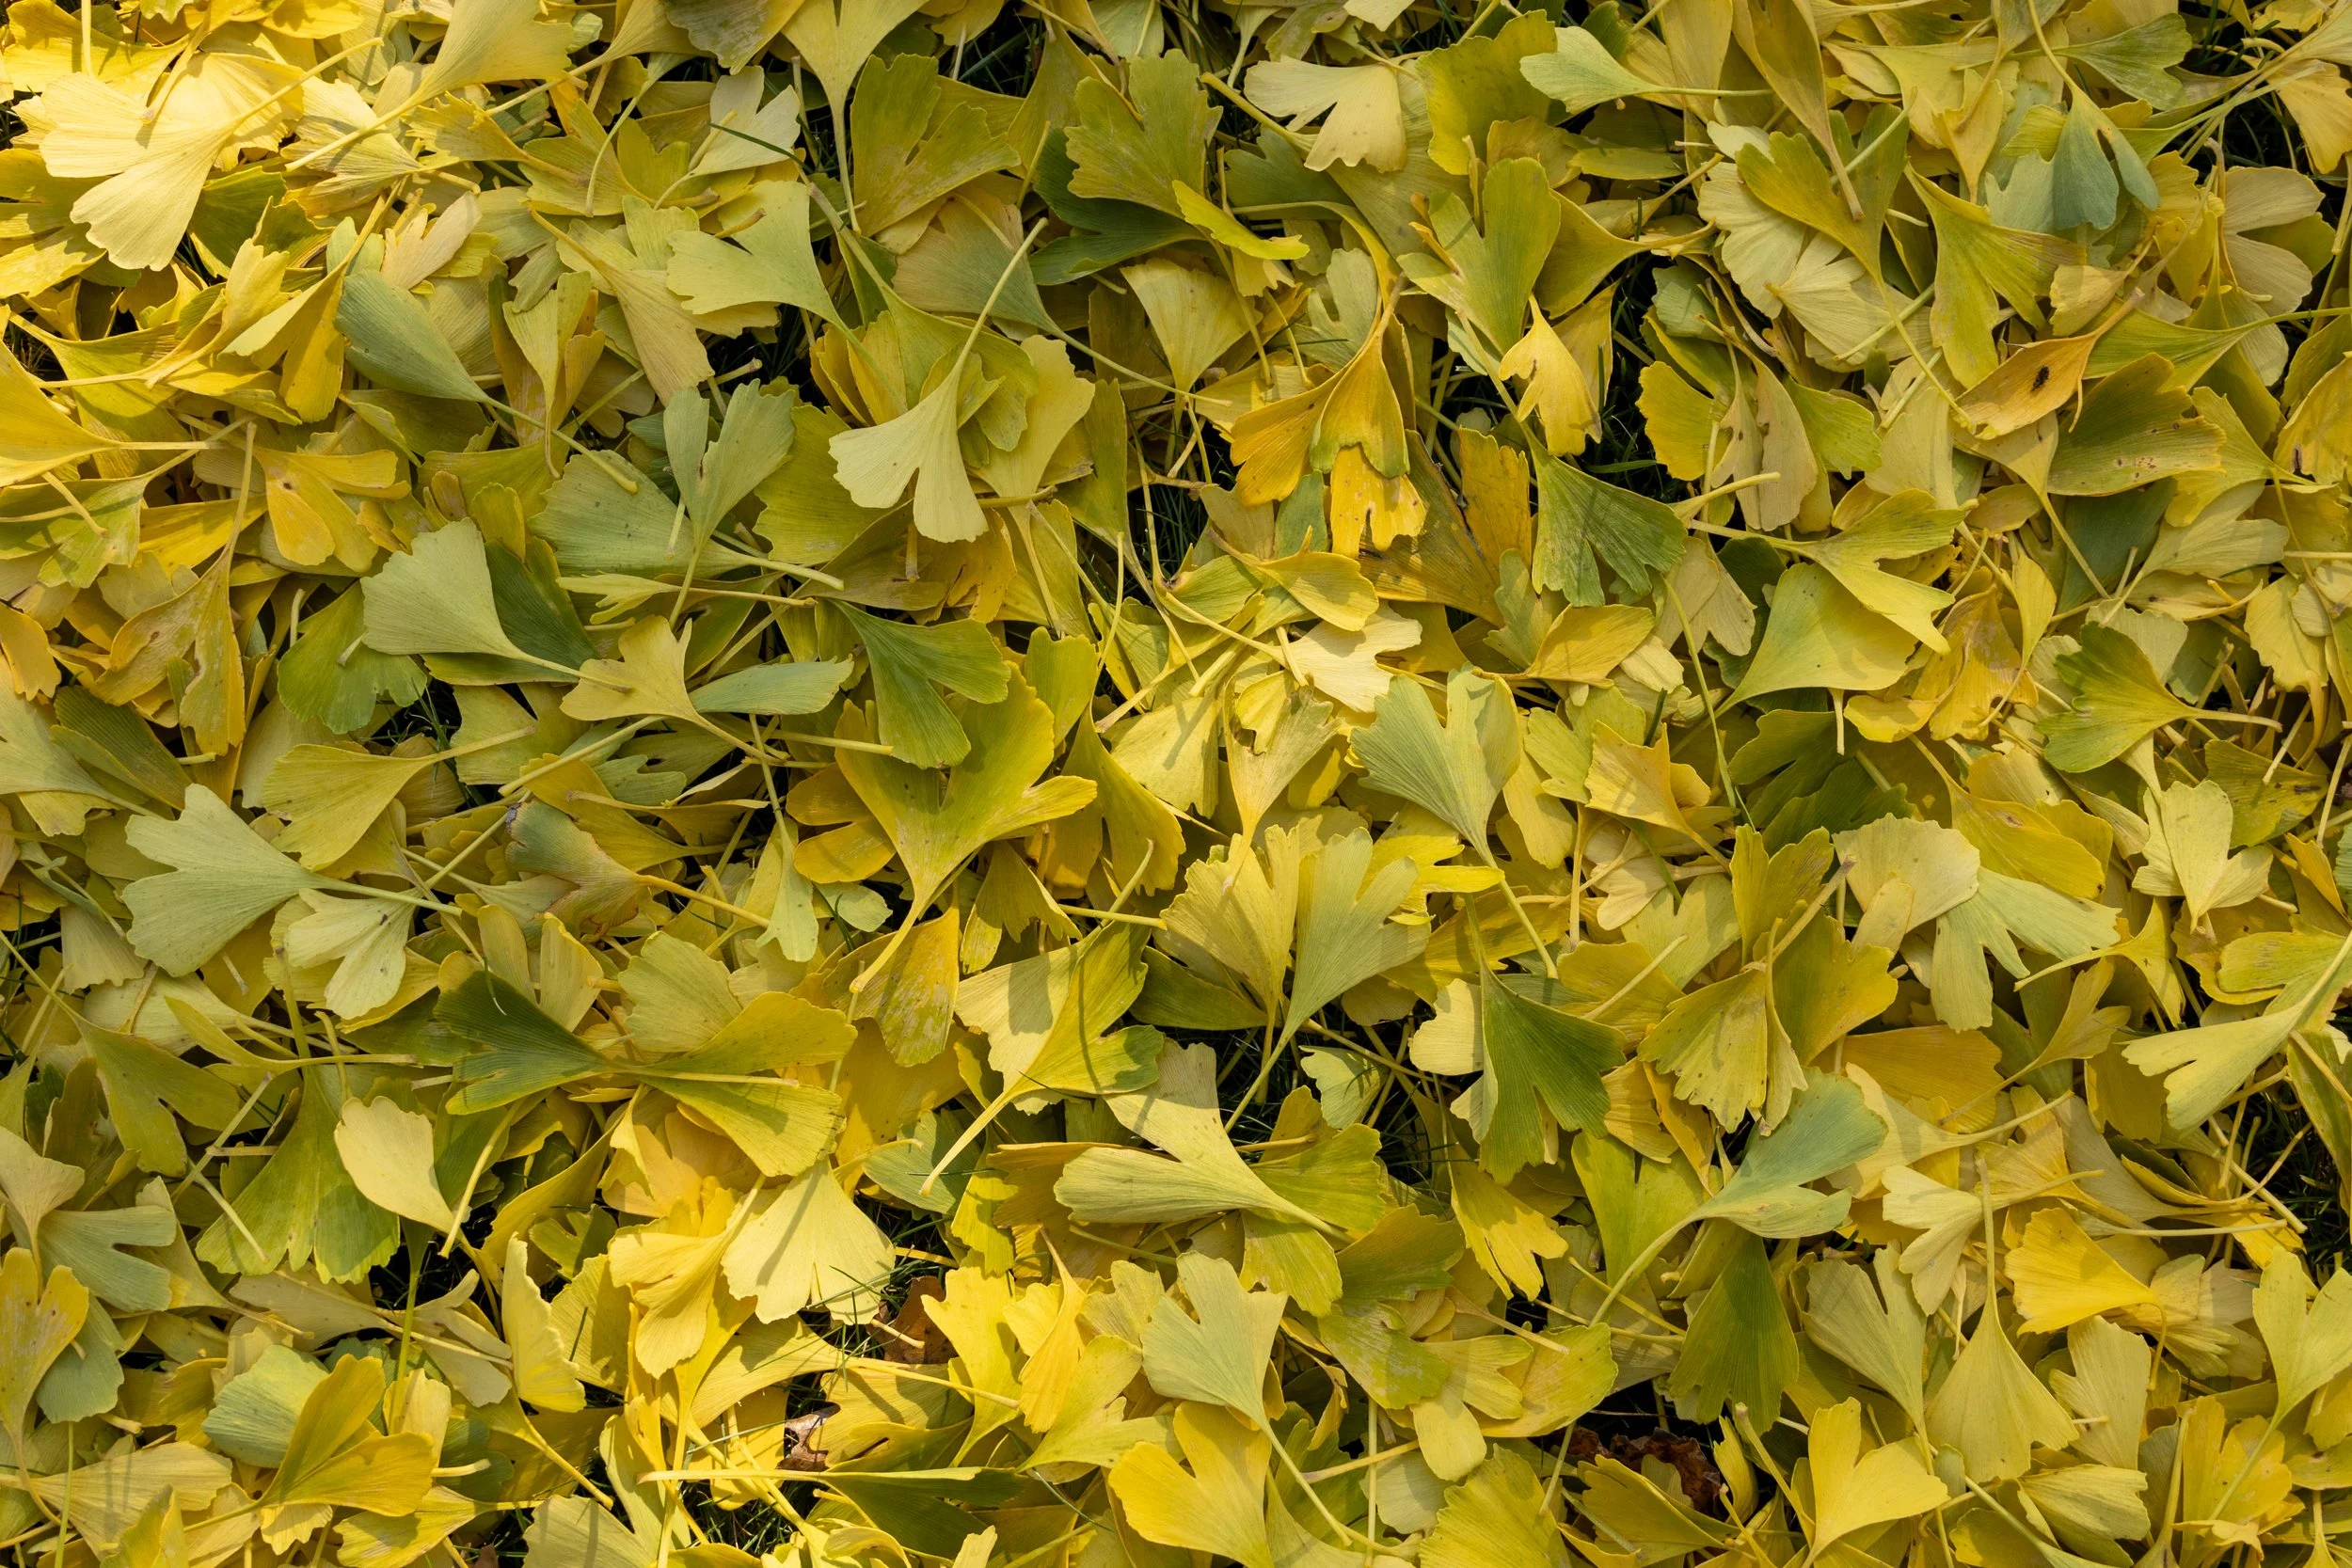
©Russell Tree Experts
Ginkgo tree leaves (Ginkgo biloba)
Once the tree has reclaimed all the available chlorophyll stored in its leaves, an important step in the tree’s survival happens: it drops its leaves. It does this for a few reasons, but the main one is to reduce energy needs and conserve as much water and stored energy as it can. This increases its survival during the winter months when it can't produce energy from the sun and absorb water through the frozen ground. This also ensures the tree has enough energy come springtime to grow and produce new leaves to begin the photosynthesis cycle again. I bet that it is a re-leaf to trees each spring!
Think of the complex and inspiring work all of the colors mean as the leaves put on their show, the next time you are enjoying leaves. Whether that is in the spring when everything is green and energetic, or in the fall with the beautiful multi-colored show ushering in a restful period for plants.
ADDITIONAL ARBOR ED™ ARTICLES!


Laura Howell | Human Resources Generalist, Russell Tree Experts
Laura joined Russell Tree Experts in January 2025. She supports our staff through her role in the HR department. Laura is an alum from Franklin University and CSCC with degrees in forensic accounting and finance. Outside of work she enjoys traveling, gardening, and camping.
Stressful Situations

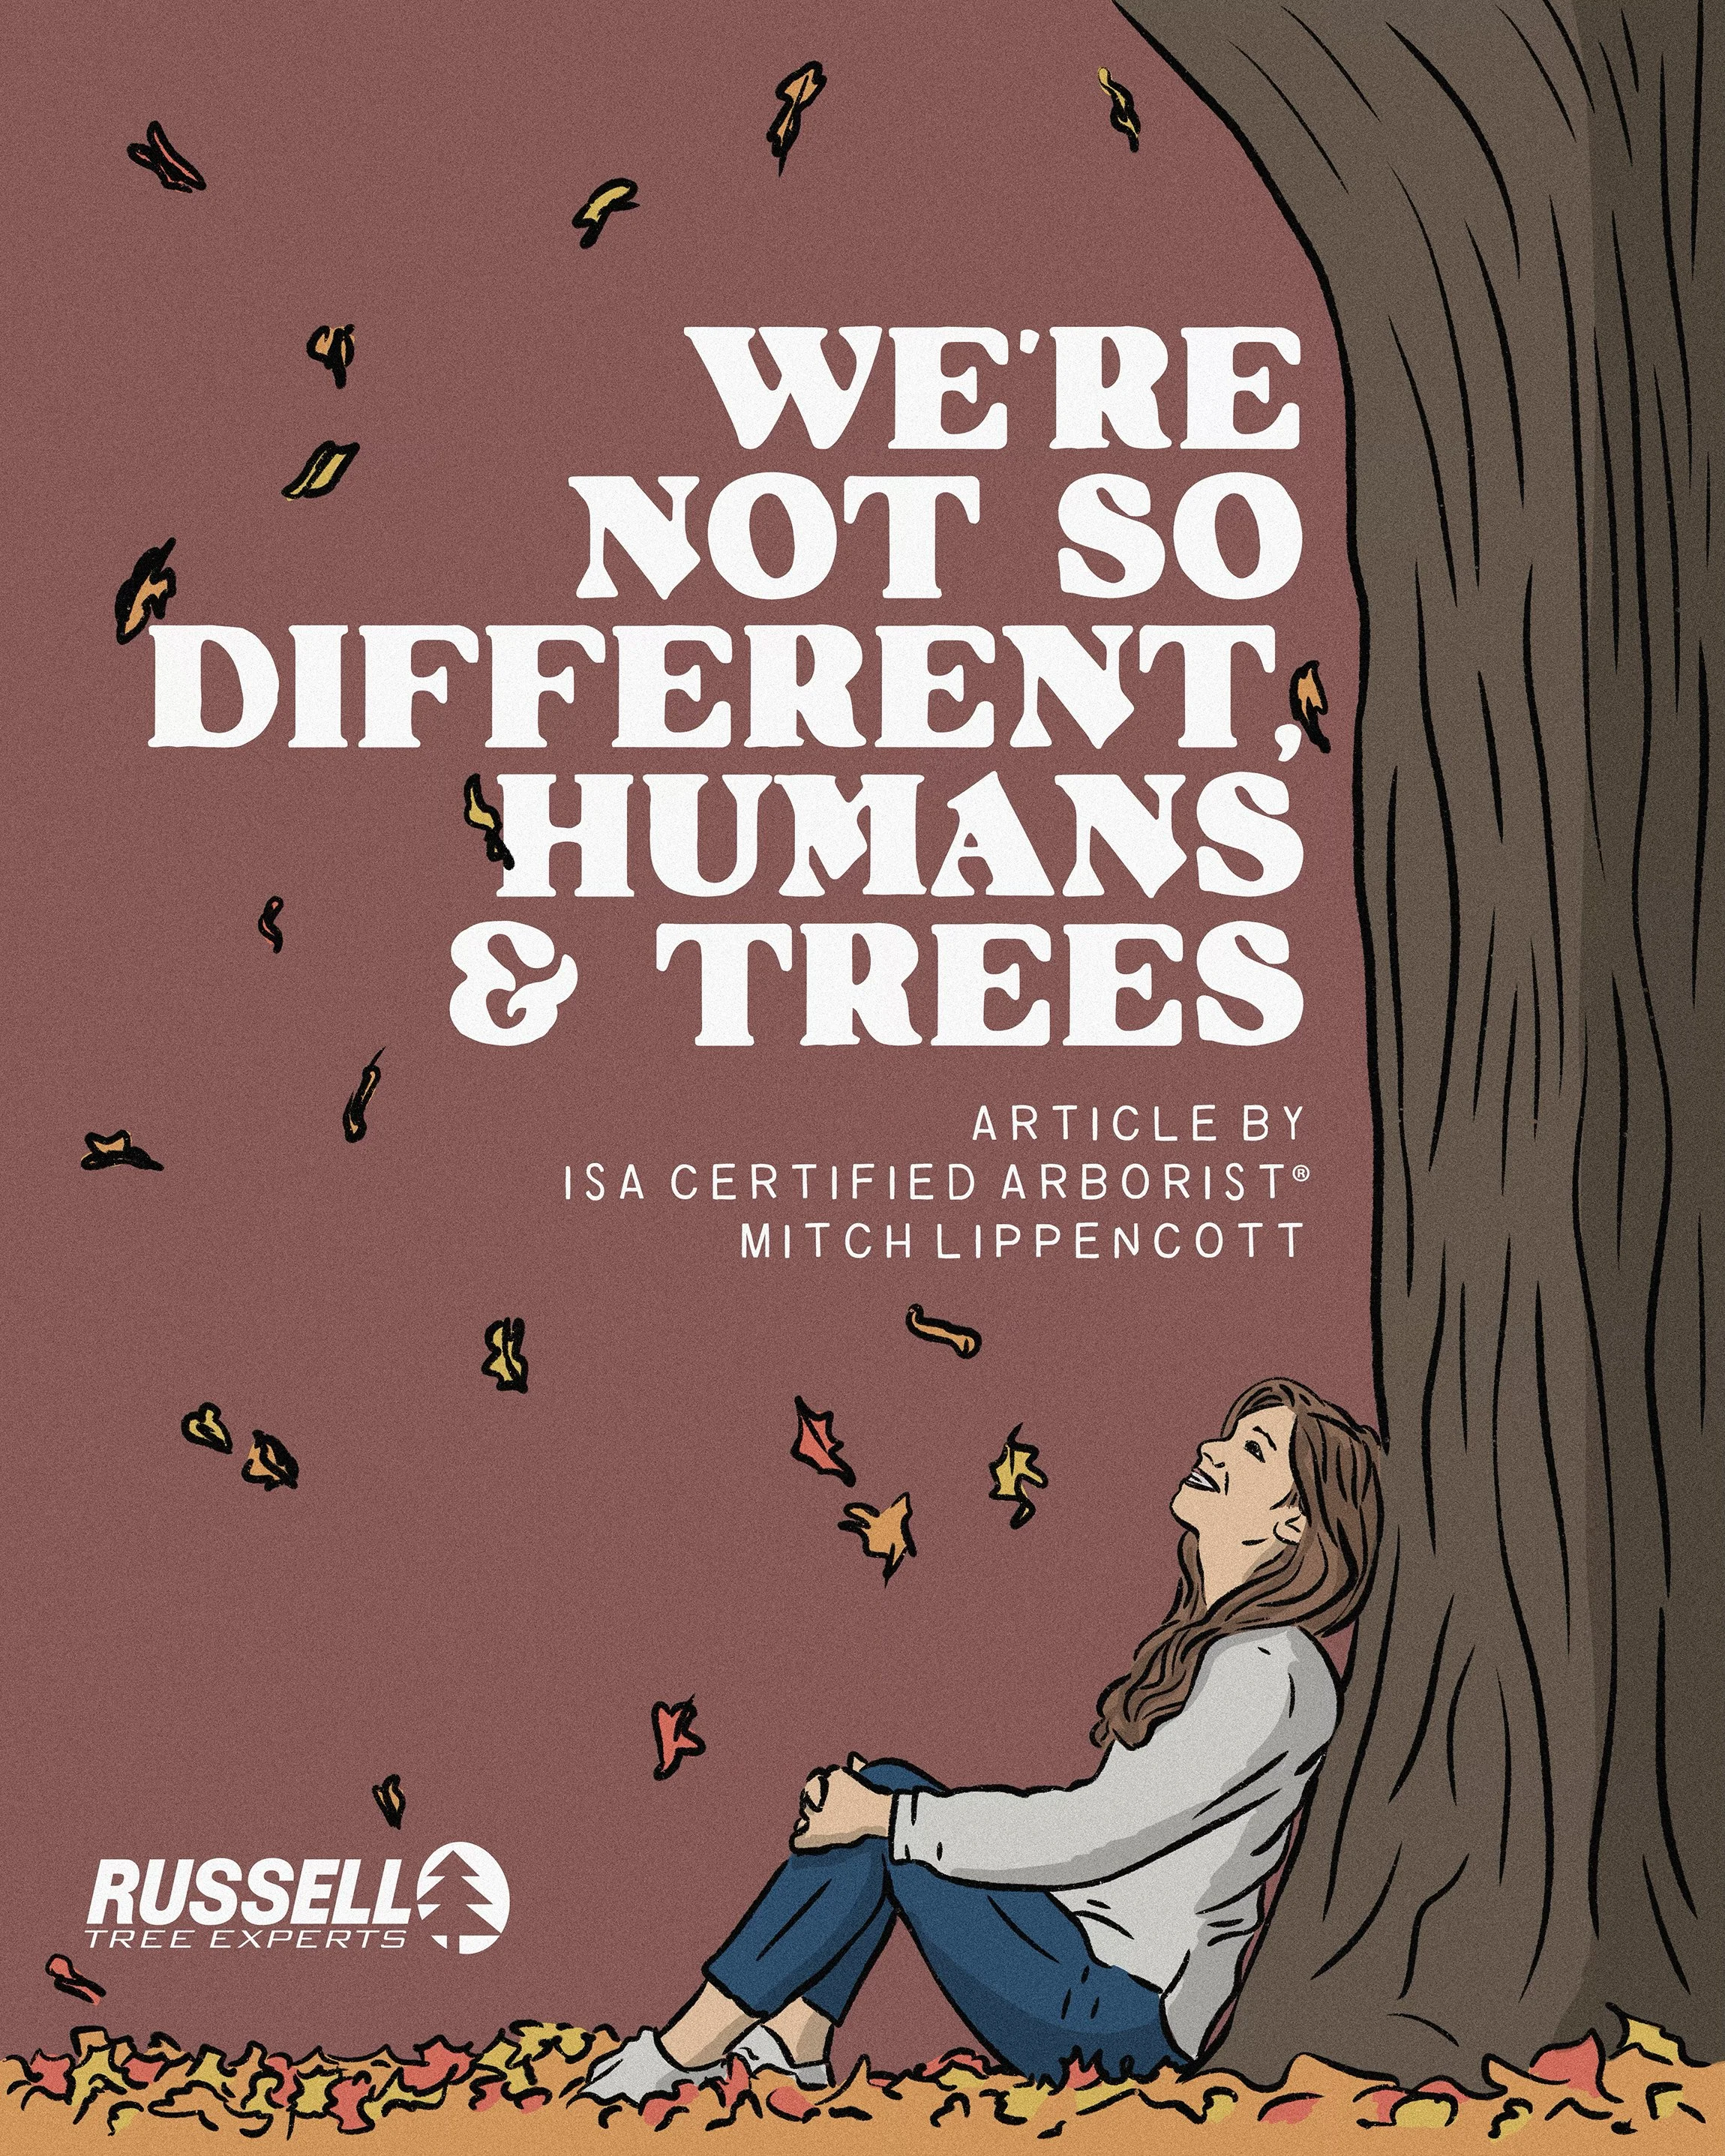
By Mitch Lippencott
ISA Certified Arborist® OH-6715A
September 11, 2025

We're not so different, humans and trees. We're both born with tools to keep ourselves upright and thriving. We are impacted by many of the same stressors and overcome them in similar ways. But because the majority of you reading this are people, not plants, human responses to stress may seem obvious, while tree responses are a mystery.
Let's close this gap in understanding by focusing on common tree stressors, what they look like, and how to manage them in human terms. To maintain a light degree of stress, I'll even include a quiz at the end (not a joke - read closely!).
2 diagrams will be critical to keep in mind as you read - the disease triangle and the integrated pest management pyramid.
The disease triangle shows disease is only possible when a pathogen, a susceptible host, and a favorable environment are all present. If any of those is lacking, disease cannot happen.
The integrated pest management control pyramid shows the most responsible and long-term solution to pest prevention is proper culture. This means native trees planted in appropriate locations, soils rich in microorganisms, and gardens promoting pollinators and predators. In this model, chemicals are the least-used option.
©Russell Tree Experts
Our team member Scott making a tree pruning cut!
Pruning
Luckily, the days of bloodletting as medicine are long gone. Today, we would never cut our calf to cure influenza or apply leaches to arthritic joints. Yet, that's still how we treat our trees. Aside from a few specific fungal situations and removing co-dominant leads from young trees, pruning stressed trees makes the situation worse. As with the human body, wounds should be kept as minimal and as small as possible.
Nutrient Deficiency/Toxicity
When we're hungry, we eat. Trees do, too -- an unobstructed root system and full canopy can provide a tree all it needs to succeed.
We know what starvation looks like in humans and understand the problems caused by lack of specific nutrients (decreased immune system from lack of vitamin C, fatigue and pale skin from iron deficiency, etc.), but we don't think of tree nutrition in the same way.
©Russell Tree Experts
An example of chlorosis in a tree, likely due to an iron or manganese deficiency
In trees, nutrient deficiencies can be indicated by small, misshapen, and/or discolored leaves. A hungry tree may look wilted, or droop. It may begin to produce branches on the trunk because it no longer has the energy to pump water to existing leaves. Like us, trees can be otherwise healthy, but suffer because of a single lacking nutrient (yellow leaves due to manganese deficiency, for example).
While organic fertilizers like the ones we apply at Russell Tree Experts are nearly impossible to over-apply, excess petroleum-based fertilizers can be as deadly to trees as excess donuts to humans. Over-fertilized trees may develop bark cracks or poor structure from rapid expansion. More critically, they may outpace the natural microorganisms in the air and soil around them, leaving them reliant on humans to provide necessary food.
The point of all this is trees and humans both require a diverse diet, and are typically able to achieve it with natural feeding. Supplementation to fulfill those dietary needs is only needed if there's a specific deficiency. Fertilizing a tree stressed from drought is no more helpful than giving a sandwich to a man who's been burned.
Heat/Drought Stress
We all know the misery of standing in the sun on a hot day. Unlike us, though, trees can't sweat or jump in a pool. Instead, they close their stomata (the pores on their leaves) to help preserve water, and shed leaves to decrease the surface area the sun can dry out.
Heat and drought stressed trees often look wilted, with dry, brown, curled leaves falling in summer. The takeaway? If you're in heat, a dose a cough syrup won't make you less hot, but drinking plenty of water will allow you to sweat and cool naturally. Similarly, it's common for trees to look unhealthy in summer, but the only solutions are cooler temperatures and more water - pruning or fertilizer only make things worse.
Pathogens
Like most illnesses in humans, most tree infections are short-lived and controlled by the tree itself. We rely on beneficial fungi, bacteria, and viruses in our guts. But trees create symbiotic (helpful for both) relationships with microorganisms in the air, water, and soil. If a disease gets past a tree's microorganism army, the tree can block its own vascular system to isolate the pathogen in place.
Also like us, healthy living prevents tree disease and shortens recovery. This means mulching the root zone, watering during drought, and yes, even applying fertilizer and pruning out diseased branches.
The signs and symptoms of tree pathogens vary broadly. Cherry black knot and cedar-hawthorn rust develop fruiting bodies on branch tips and fruits. Crabapple scab causes premature leaf drop, while rhizosphaera needlecast causes permanent needle loss in spruces. All are host-specific - they cannot pass from one type of tree to another.
In both humans and plants, some pathogens require additional action. As with drugs in humans, fungicides should only be used on plants in specifics dosages and intervals, and should only be used as needed to prevent resistance.
QUIZ TIME!
We’ve made it to the end of this article, which means quiz time! Time to put your newfound knowledge to the test! Tip: It is an open-note quiz. If you take and submit the quiz with a passing grade (3 or more correct answers), you’ll be entered in to win a free RTE gift bag. Shipping and handling free for those in the 48 contiguous United States. Winner will be drawn on Thursday, September 18th. You may retake the quiz if you only scored 1 or 2 correct answers in your first attempt! As always, thank you for taking the time to read our articles. For a free tree work quote by 1 of our 25+ ISA Certified Arborists®, call us at (614) 895-7000 or visit RussellTreeExperts.com/Quote!
Take the quiz HERE.
ADDITIONAL ARBOR ED™ ARTICLES!


Mitch Lippencott I Regional Manager, Russell Tree Experts
Mitchell Lippencott joined Russell Tree Experts in 2020 and has been in the green industry for over 20+ years with a diverse background ranging from working for a landscape design company, a retail garden center, and two municipalities! Mitch is an alum from The Ohio State University, a licensed pesticide applicator, a qualified tree risk assessor, and an ISA Certified Arborist®. Outside of work, he enjoys traveling, cooking, and gardening!
Beech Leaf Disease: The Looming Threat to Central Ohio’s Beeches

By Alex Miller
ISA Certified Arborist® OH-7168A
September 4, 2025
If you’ve got a beautiful beech (Fagus) tree in your yard or your property backs up to one of central Ohio’s native woodlands, then you’ve likely noticed just how special these trees are. Their smooth gray bark, golden amber fall foliage, and nut production for local wildlife make them a favorite in both natural and landscaped settings. But in recent years, a troubling new disease has been silently making its way through Ohio’s forests, beech leaf disease (BLD).
First spotted in northeastern Ohio in 2012, BLD has quickly spread across the eastern U.S. and into parts of Canada. It’s been linked to a microscopic worm, called a nematode, that attacks beech leaves and buds. Beech leaf disease is easily recognizable by its distinctive dark green bands between the leaf veins. In the fall, the affected leaf bands can appear yellow. As the infection worsens, the leaves thicken and take on a leathery feel and may begin to curl while the nematodes spread to new leaf buds. This damage prevents the leaves from photosynthesizing properly. Repeated damage can kill young beech trees in 2 to 5 years. Larger, more mature beech trees seem to be able to hold out longer, but are still affected. Some have shown to begin losing branches from the bottom of the canopy and work upwards year over year.
Fortunately for Franklin County and our surrounding neighbors, no infected beech trees have been observed so far. However, Delaware and Licking county residents should be on high alert because Morrow, Coshocton, and Muskingum counties are all actively dealing with BLD moving through their forests and landscapes, and it’s not showing any signs of slowing down. Thankfully, Ohio State University plant pathology professor Enrico Bonello, and assistant professor Kayla Perry are hard at work developing better diagnostic tools and treatment plans to better identify and counteract beech leaf disease. Specifically, Benello has come up with ways to identify infected but not yet symptomatic beech trees, and Perry has promising research suggesting that nematicides and potassium fertilizers can at least slow the progression, if not cure the tree. Further research is still needed, and rest assured, we at Russell Tree Experts are following them closely as the knife that is BLD plunges ever deeper towards the heart of Ohio. As a resident of Central Ohio, especially those of you in Delaware and Licking counties, you can help by taking a look the next time you see a beech tree and reporting any sightings of beech leaf disease to your local OSU extension.
If you’ve ever enjoyed the shade of a beech tree, admired its golden amber leaves in the fall, or watched birds and squirrels dart through its branches, you already know how much these trees contribute to life in central Ohio. BLD is a serious threat. By staying informed, taking care of the trees we have, and supporting ongoing research, we can protect these iconic trees for future generations. Even if you don’t have a beech tree in your own yard, you’ve probably passed by one in your neighborhood, a nearby metro park, along a bike trail, or at a local school. Now’s the time to look up, take notice, and lend a hand (or a rake) in the fight against beech leaf disease. As always, for a free tree work quote by one of our 25+ ISA Certified Arborists®, give our local office staff a call at (614) 895-7000 or visit RussellTreeExperts.com/Quote!
ADDITIONAL ARBOR ED™ ARTICLES!


Alex Miller I Regional Manager, Russell Tree Experts
Alex joined Russell Tree Experts in 2021 and has been in the green industry since 2020. He is an ISA Certified Arborist®, EHAT certified, CPR and first aid certified, OSHA 10 certified, and holds an ODA commercial pesticide license. Alex’s favorite tree is a magnolia tree! When not at RTE, he enjoys rock climbing and his favorite movie series: The Lord of the Rings!
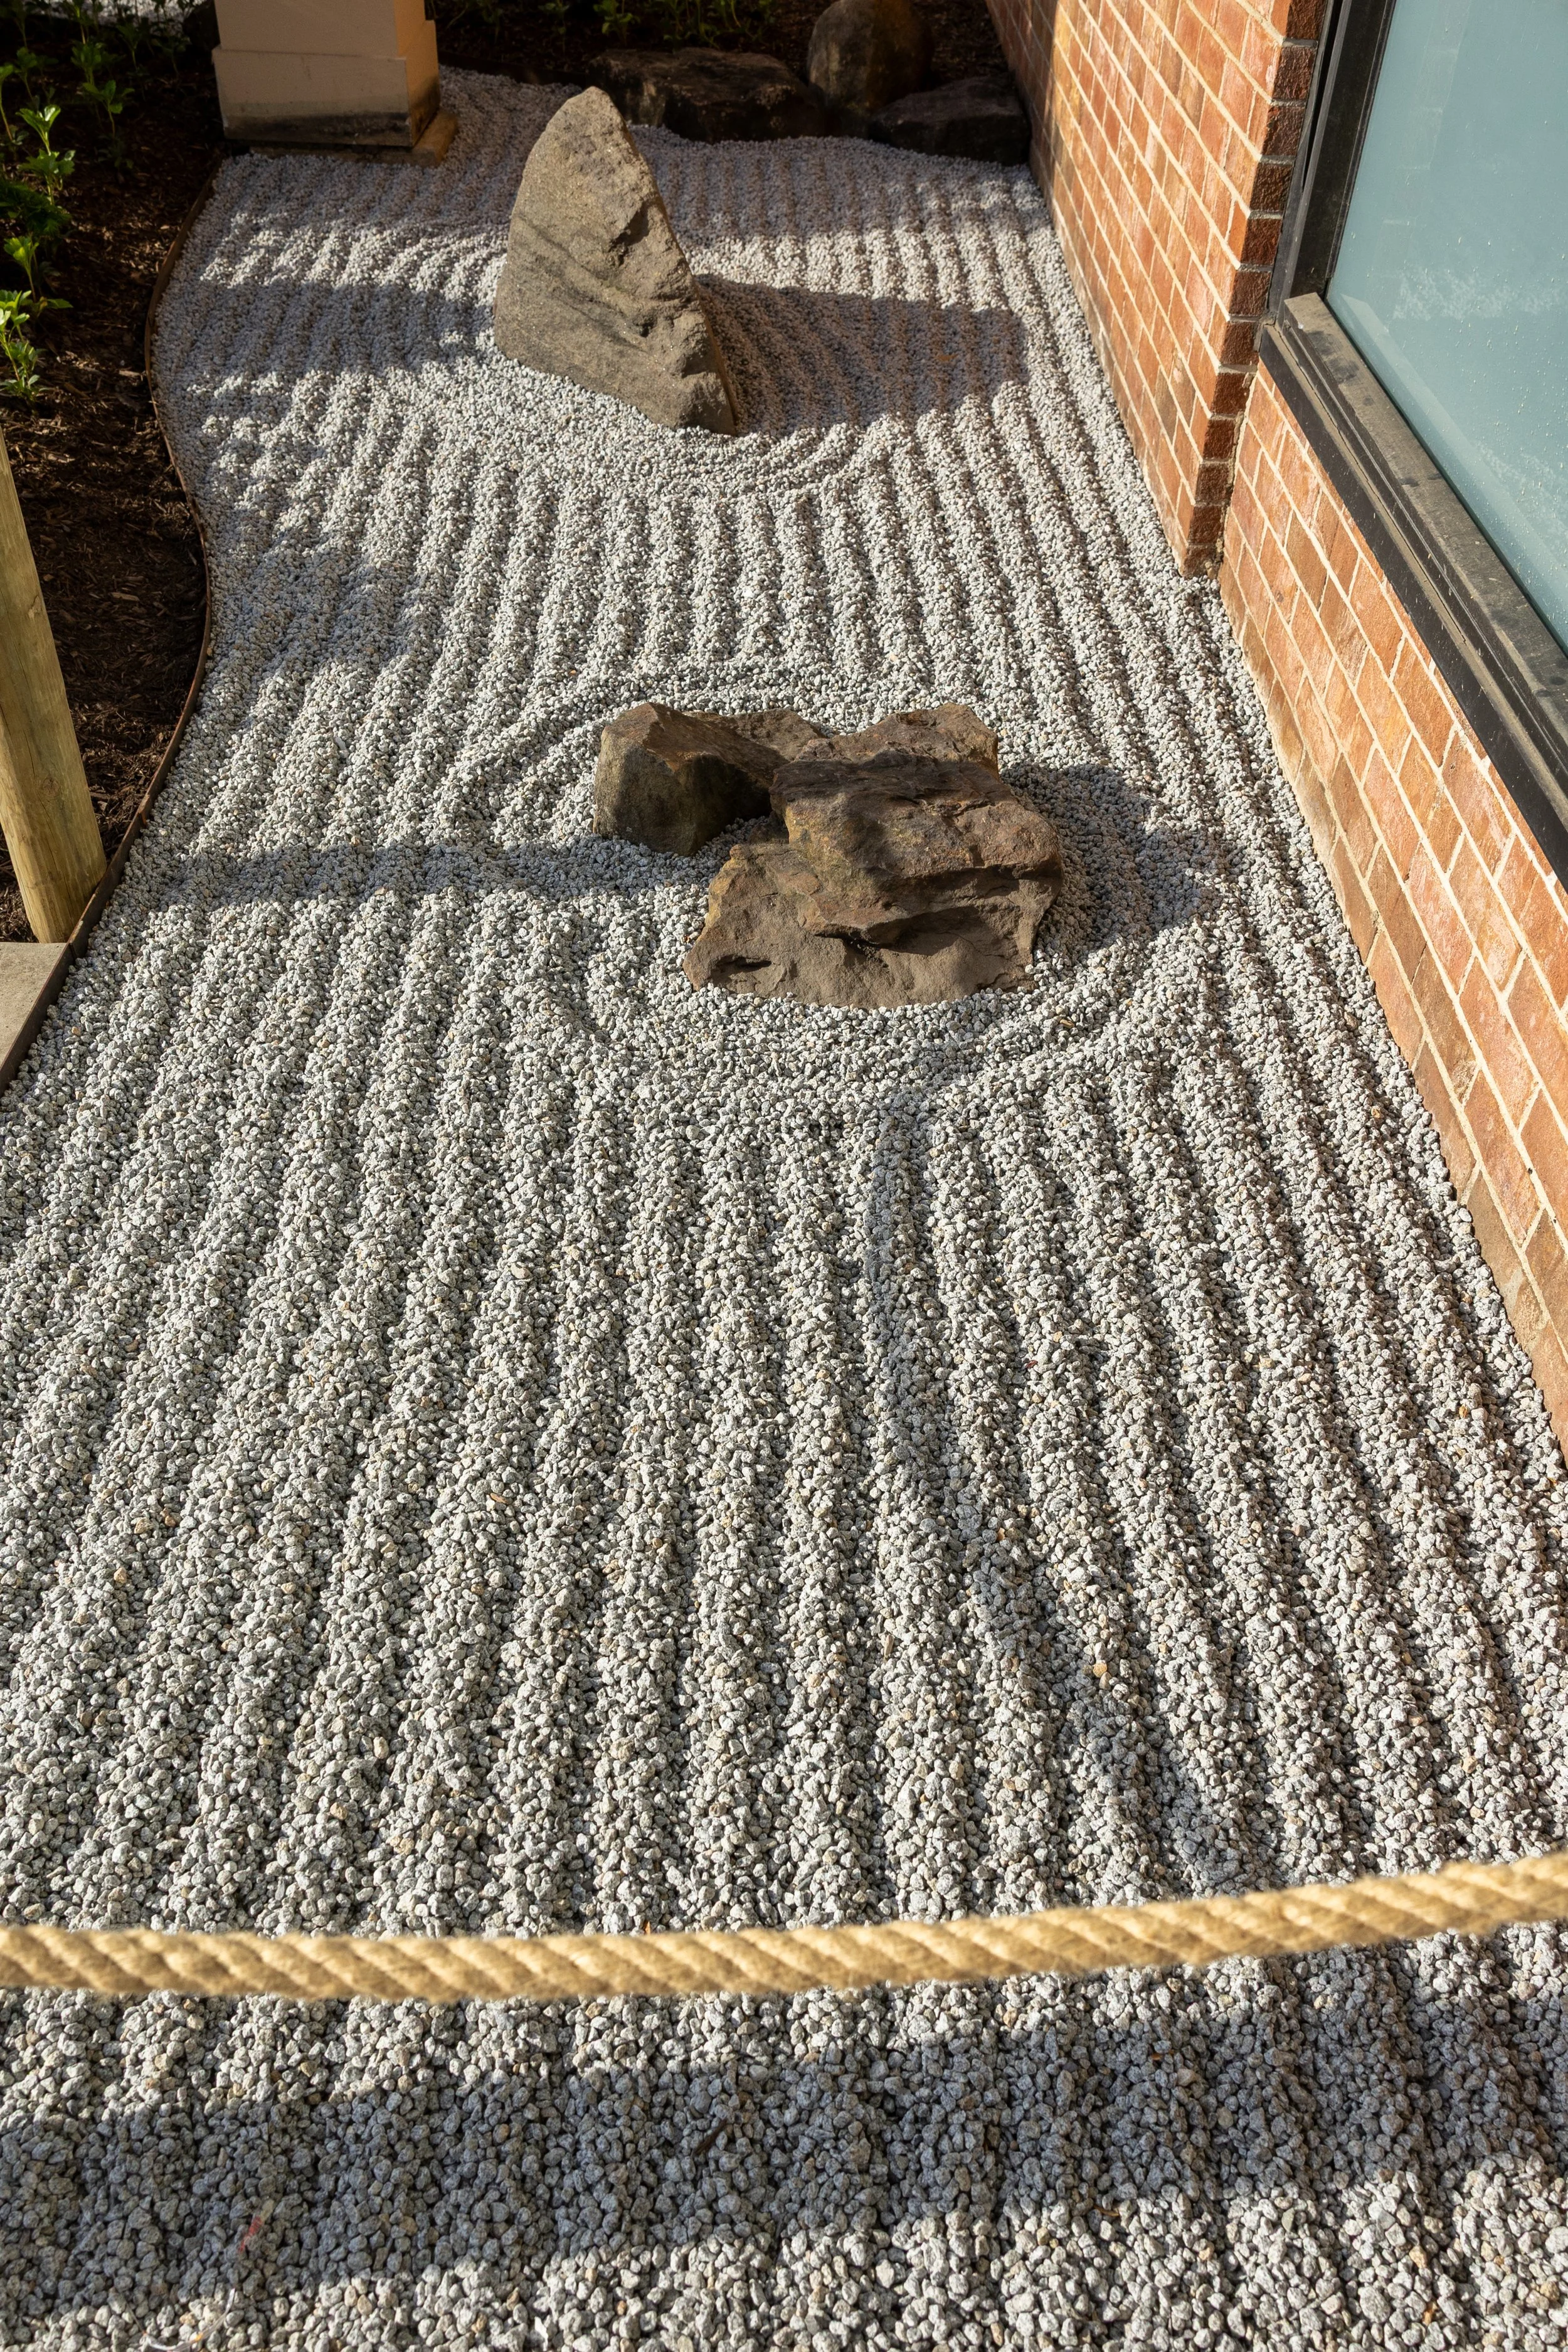
Set in Stone: A Letter of Gratitude, Farewell, and Exciting New Worlds
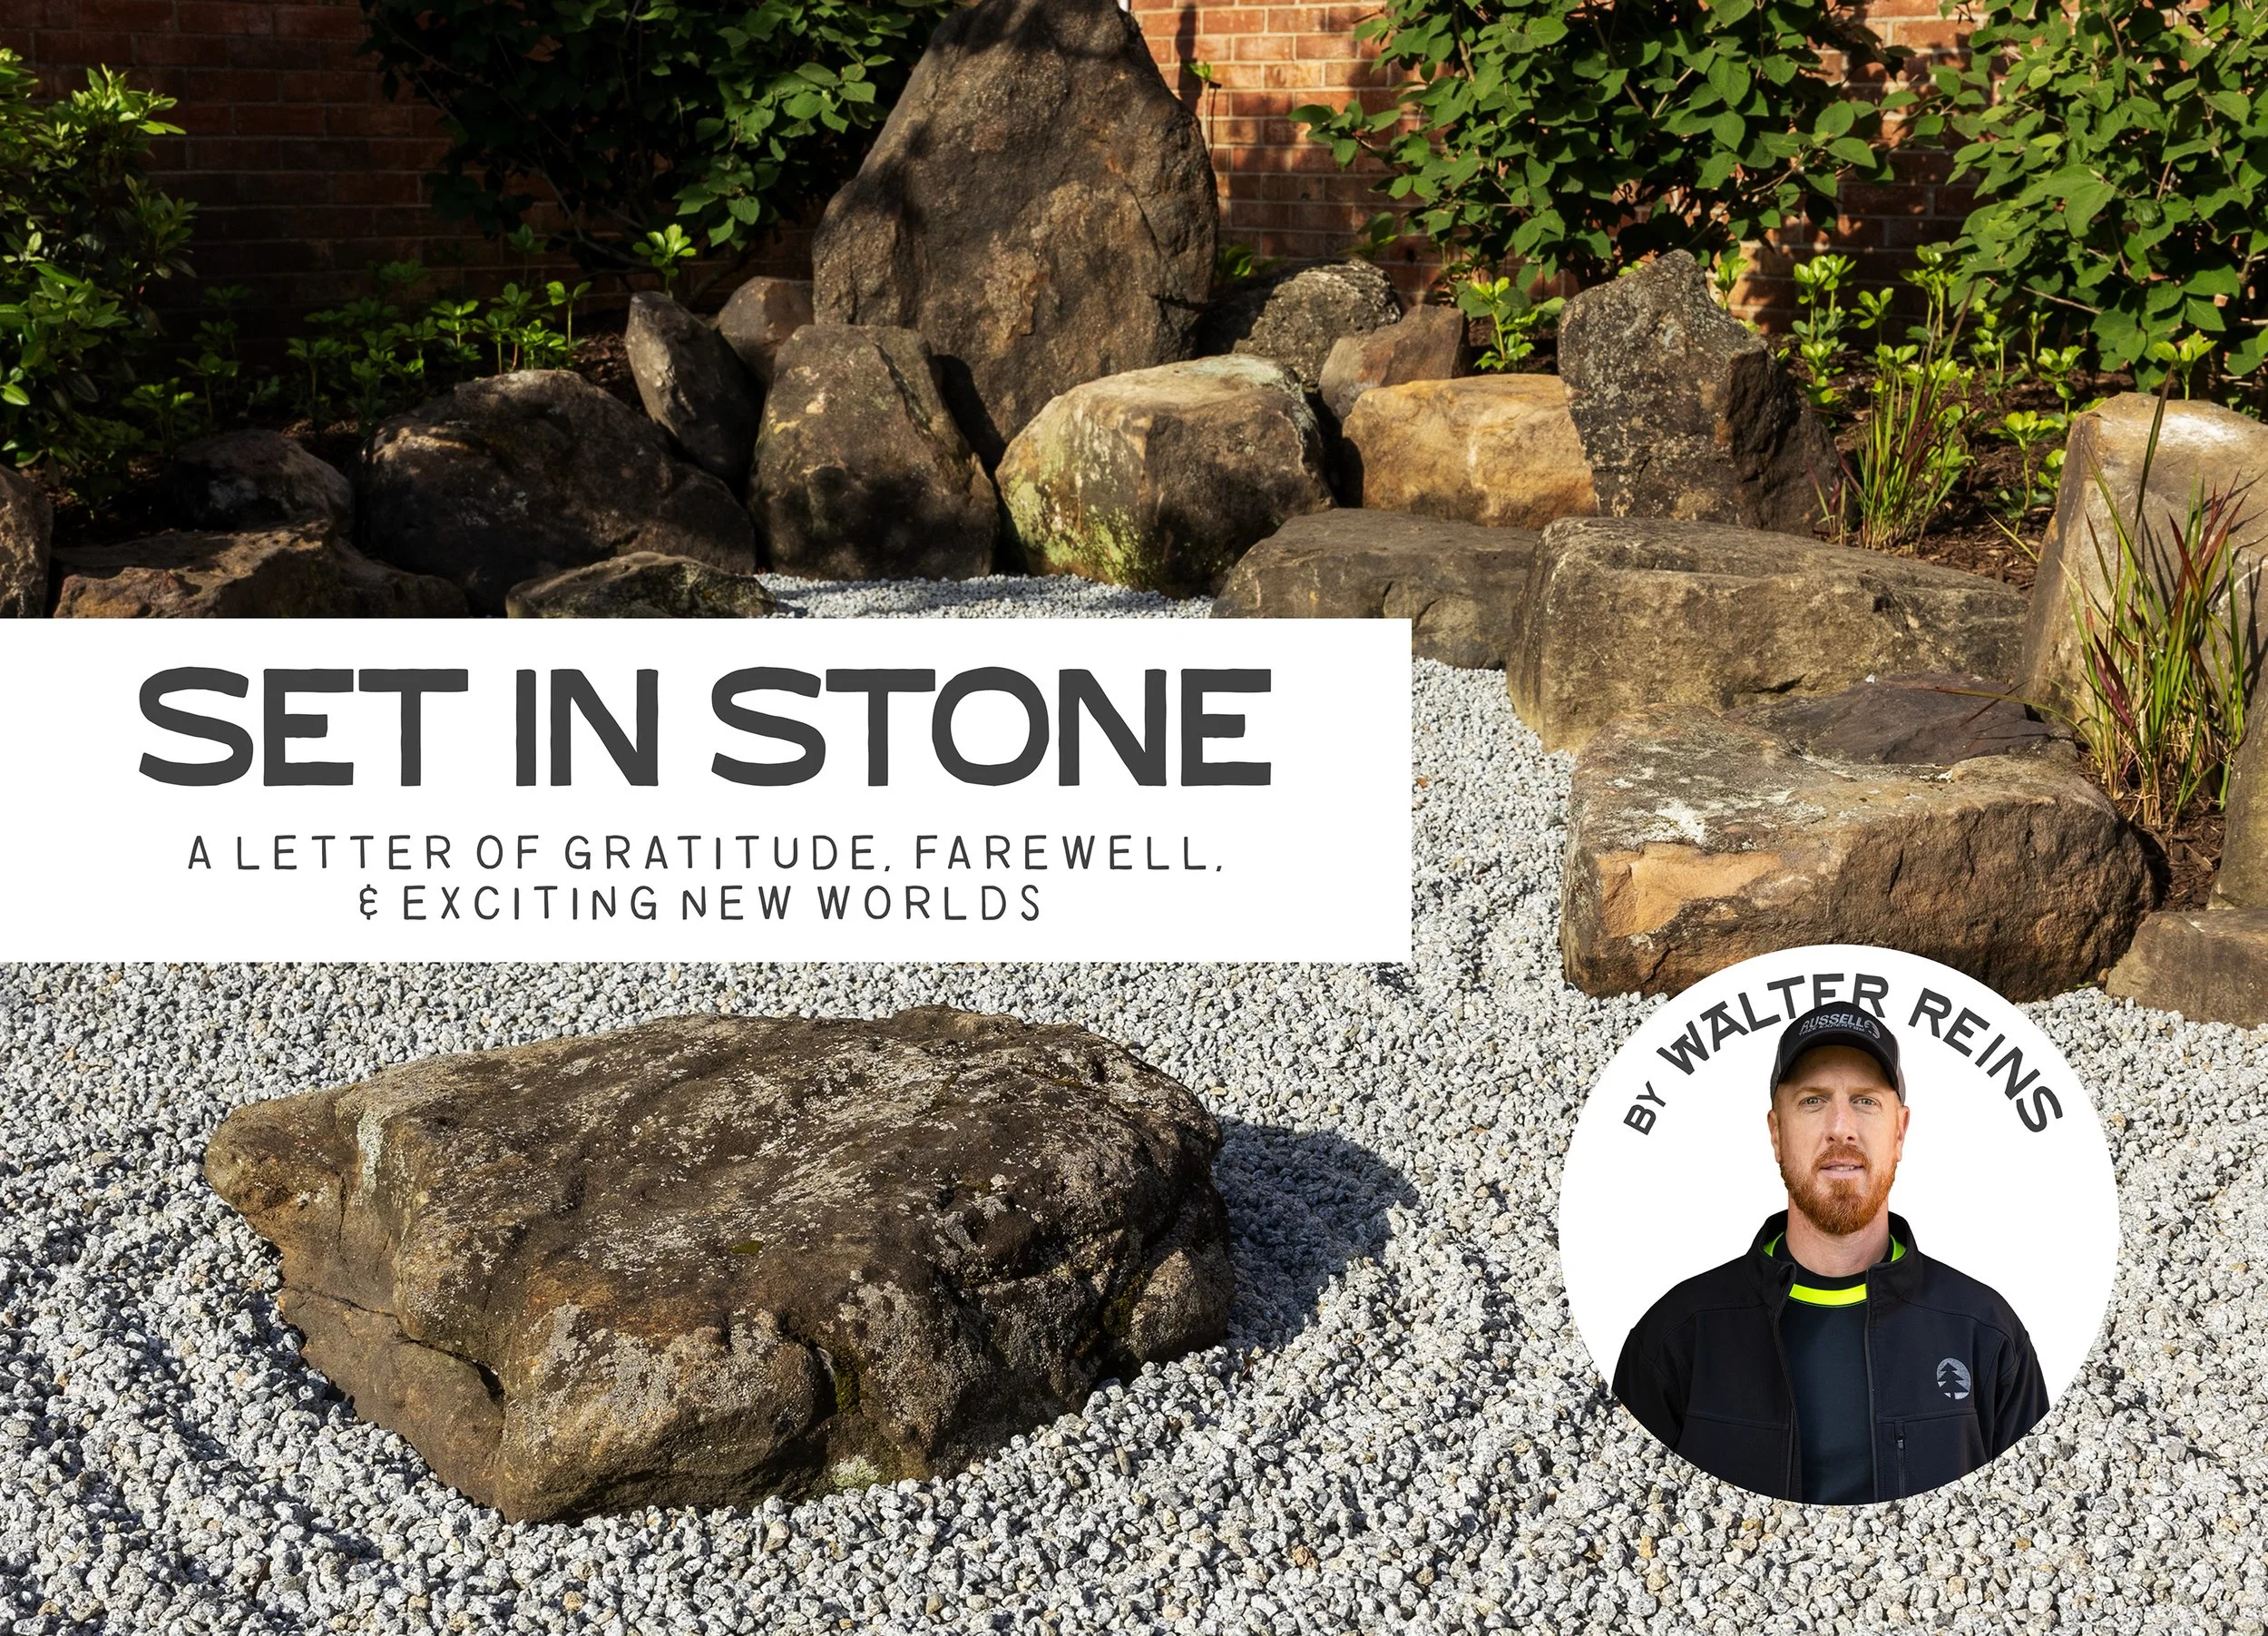
By Walter Reins
ISA Certified Arborist® OH-5113A
August 21, 2025
It’s not everyday that life-changing experiences come along that alter the trajectory of your career. It’s also not everyday that you find a supportive and inspiring employer like Joe Russell and Russell Tree Experts, that encourages you to pursue what drives you. I’ve had the good fortune of both.
I met Joe Russell in 2004 when we worked together briefly at another tree care company. The very next year, Russell Tree Experts opened for business. I began working there in 2011, took a small break from the profession after going back to school and pursuing a different field of work, and ultimately made my way back in 2019. Fast forward to 2022, and as the world is finding its way back to some level of normalcy after the pandemic, a series of events and chance encounters led to an opportunity to work abroad as a gardener and arborist in Japan. I remember how much thought I gave to this, the weight of that decision, not sure what the right decision even was. When I finally brought it up to Joe, I think he was almost more excited and sure of it than I was. Never one to miss an opportunity to lift up others around him, he said, “You gotta do it!”
The time I spent living and working as a gardener in Japan, to put it simply, had a more profound impact on my life than perhaps anything else ever has. In my work, I was able to approach new methods of pruning and garden care with a beginner’s mind while simultaneously applying over two decades of work experience. And being fully submersed in a different culture on the other side of the world was in itself an amazing experience. Having that opportunity arise in mid-life, with a few more years of life’s wisdom under my belt, made for a different experience than it would have been in my 20s, an age when people typically have the chance to pursue a travel-abroad adventure just after college. While others would probably fill their free time in Japan with Tokyo’s night-life and taking in all of the amazing food the culture has to offer, I spent mine visiting gardens. Dozens and dozens of gardens. In the last 3 months of my time there, I moved to Kyoto, the once-capital of and historic epicenter of the country, and pursued a self-study intensive of over 100 gardens throughout the city and surrounding countryside. I knew before leaving that I wanted to share what I learned and saw with others when I returned to Ohio. And, as if having the support of Joe Russell to leave and pursue a dream in the first place wasn’t amazing enough, I had a job waiting for me at Russell Tree Experts when I returned. However, as I settled back into everyday life in Ohio, a flame that had been lit inside me from my time abroad refused to go out. In fact, it grew with each passing day.
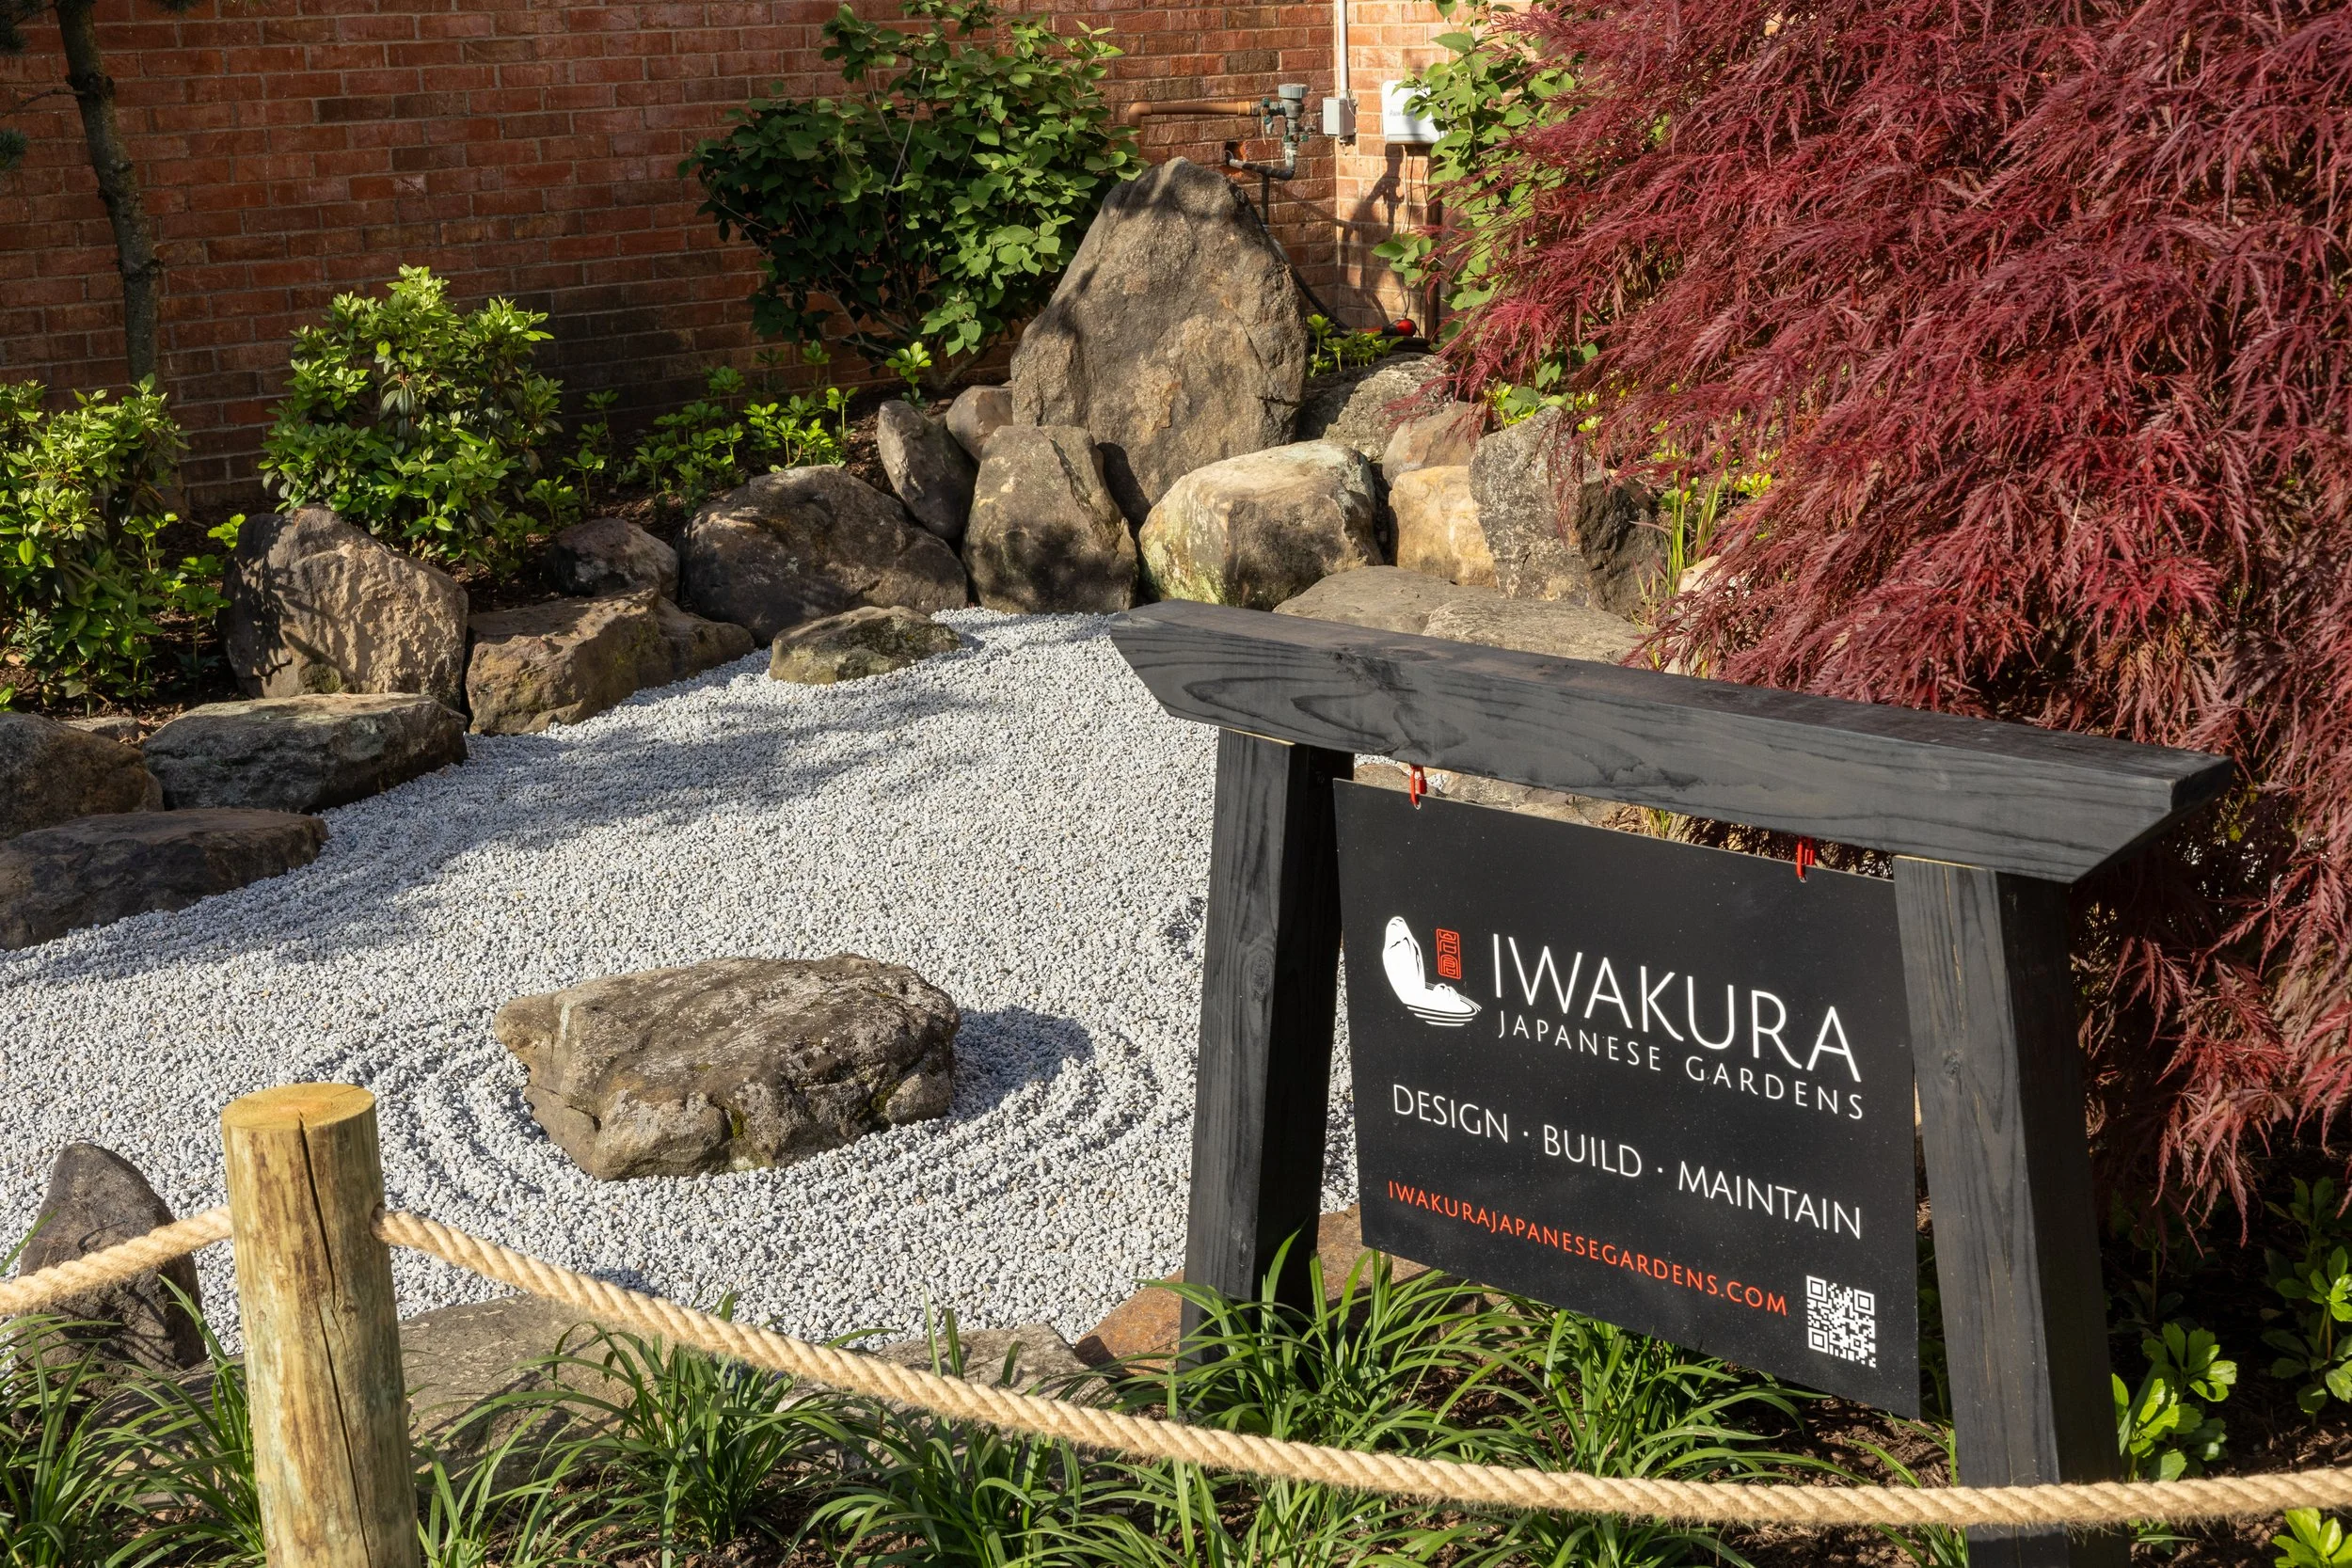
Iwakura Japanese Gardens began as a side-venture landscape business, born from that flame. I found a sense of peace and stillness in my soul while working in and visiting so many sacred spaces in Japan, and that felt like something worth sharing. The pursuit of an offering so niche as designing and building Japanese gardens, in Central Ohio of all places, may sound like a fruitless undertaking. But a “build it and they will come” approach has so far been met with a positive reception. From business locations to private residences, I’ve been pleasantly surprised by the number of individuals that express a real interest in having the Japanese garden aesthetic, or parts of it, in their landscapes. Enough so that it now makes sense to pursue it full-time.

Iwakura (e-wa-ku-ra) Japanese Gardens specializes in the design and build of Japanese-style gardens and landscape features. With a focus on minimalism, elements like stone, wood, water, and select plants are used to create spaces that mimic scenes and experiences of the natural world. Empty spaces in the garden are just as important as the physical elements themselves, allowing the eyes to “rest” between elements as the garden is viewed. Like the feeling we get when we declutter a living space, a Japanese garden has strong elements, but fewer of them and only what’s essential, creating a space around you that calms and quiets the mind. For those that do not explicitly want a Japanese-style garden, many of the design elements can still be incorporated into a more traditional midwest landscape to create outdoor spaces that work with the home’s architecture and use-requirements for the space. Larger stones can be incorporated into bed spaces as a strong, anchoring element. Groundcovers and stone borders can take the place of, or reduce, the need for typical edging and mulching practices. A small water feature placed next to a patio or screened porch in the backyard can bring the peaceful sound of water and a touch of the Japanese aesthetic to the landscape. Japanese gardens work wonderfully in the biggest and smallest of spaces alike.
I’ve had the pleasure of working directly with many of you who are reading this article. A few of you even expressed words of encouragement when I informed you that I was leaving and going to Japan. For that, I thank you. My role at Russell Tree Experts may be coming to an end, but I look forward to working with them in a different capacity, and I’m grateful to be able to refer my friends, family, and landscape clients to such a trusted and respected tree care company when the need arises. Ironically, my bittersweet departure from Russell Tree Experts reminds me that nothing is set in stone, even as the gardens and landscapes that I now create are quite literally set in and designed with stone as a primary aesthetic.

I hope you will continue to place your trust in Russell Tree Experts, benefit from the educational articles they write, and support the health and preservation of trees and beautiful outdoor spaces!
ADDITIONAL ARBOR ED™ ARTICLES!


Walter Reins I Regional Manager, Russell Tree Experts
Walter became an ISA Certified Arborist® in 2003 and has a degree in landscape horticulture. He has 25 years of experience in the tree and landscape industries and originally began working at Russell Tree Experts in 2011. Walter is also the owner/operator of Iwakura Japanese Gardens, a small design/build/maintenance firm specializing in Japanese-style gardens, and also offers responsible tree planting for all landscapes.
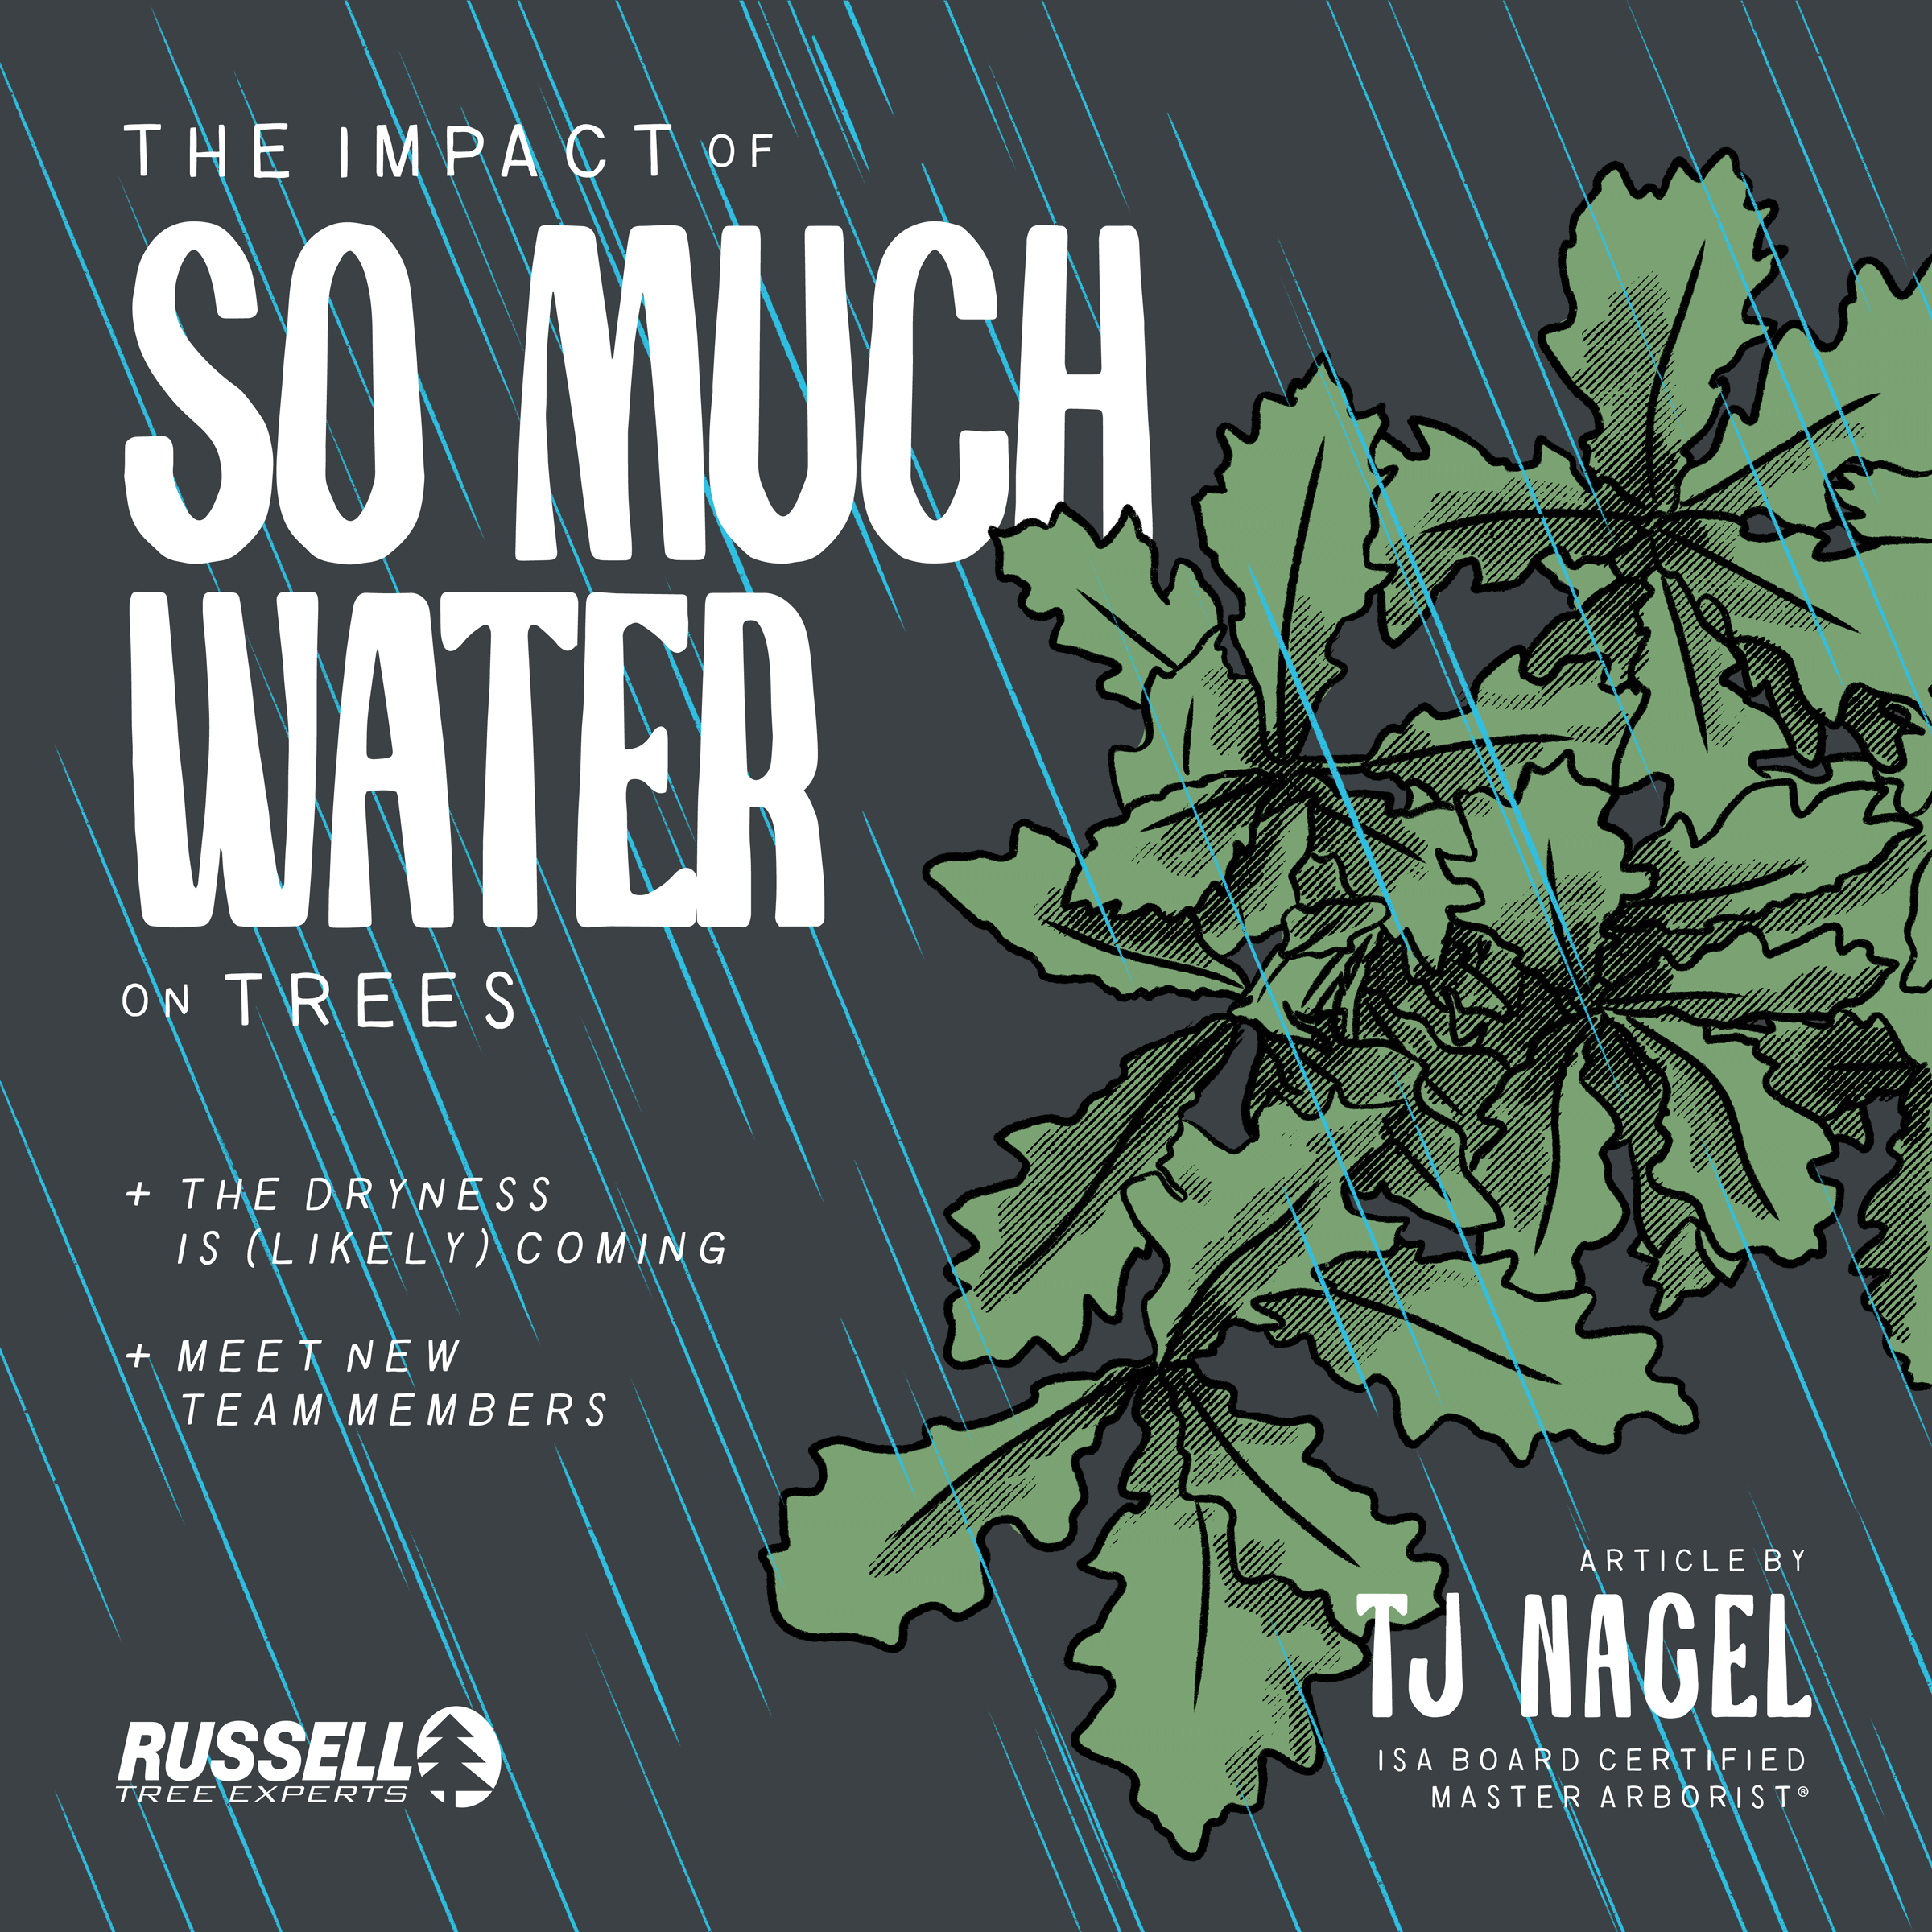
The Impact of SO MUCH Water on Trees!
By TJ Nagel
ISA Board Certified Master Arborist® OH-6298B
August 1, 2025
Happy Friday, August 1st! Here are 3 quick thoughts I’d like to share this morning:
1. SO MUCH RAIN!
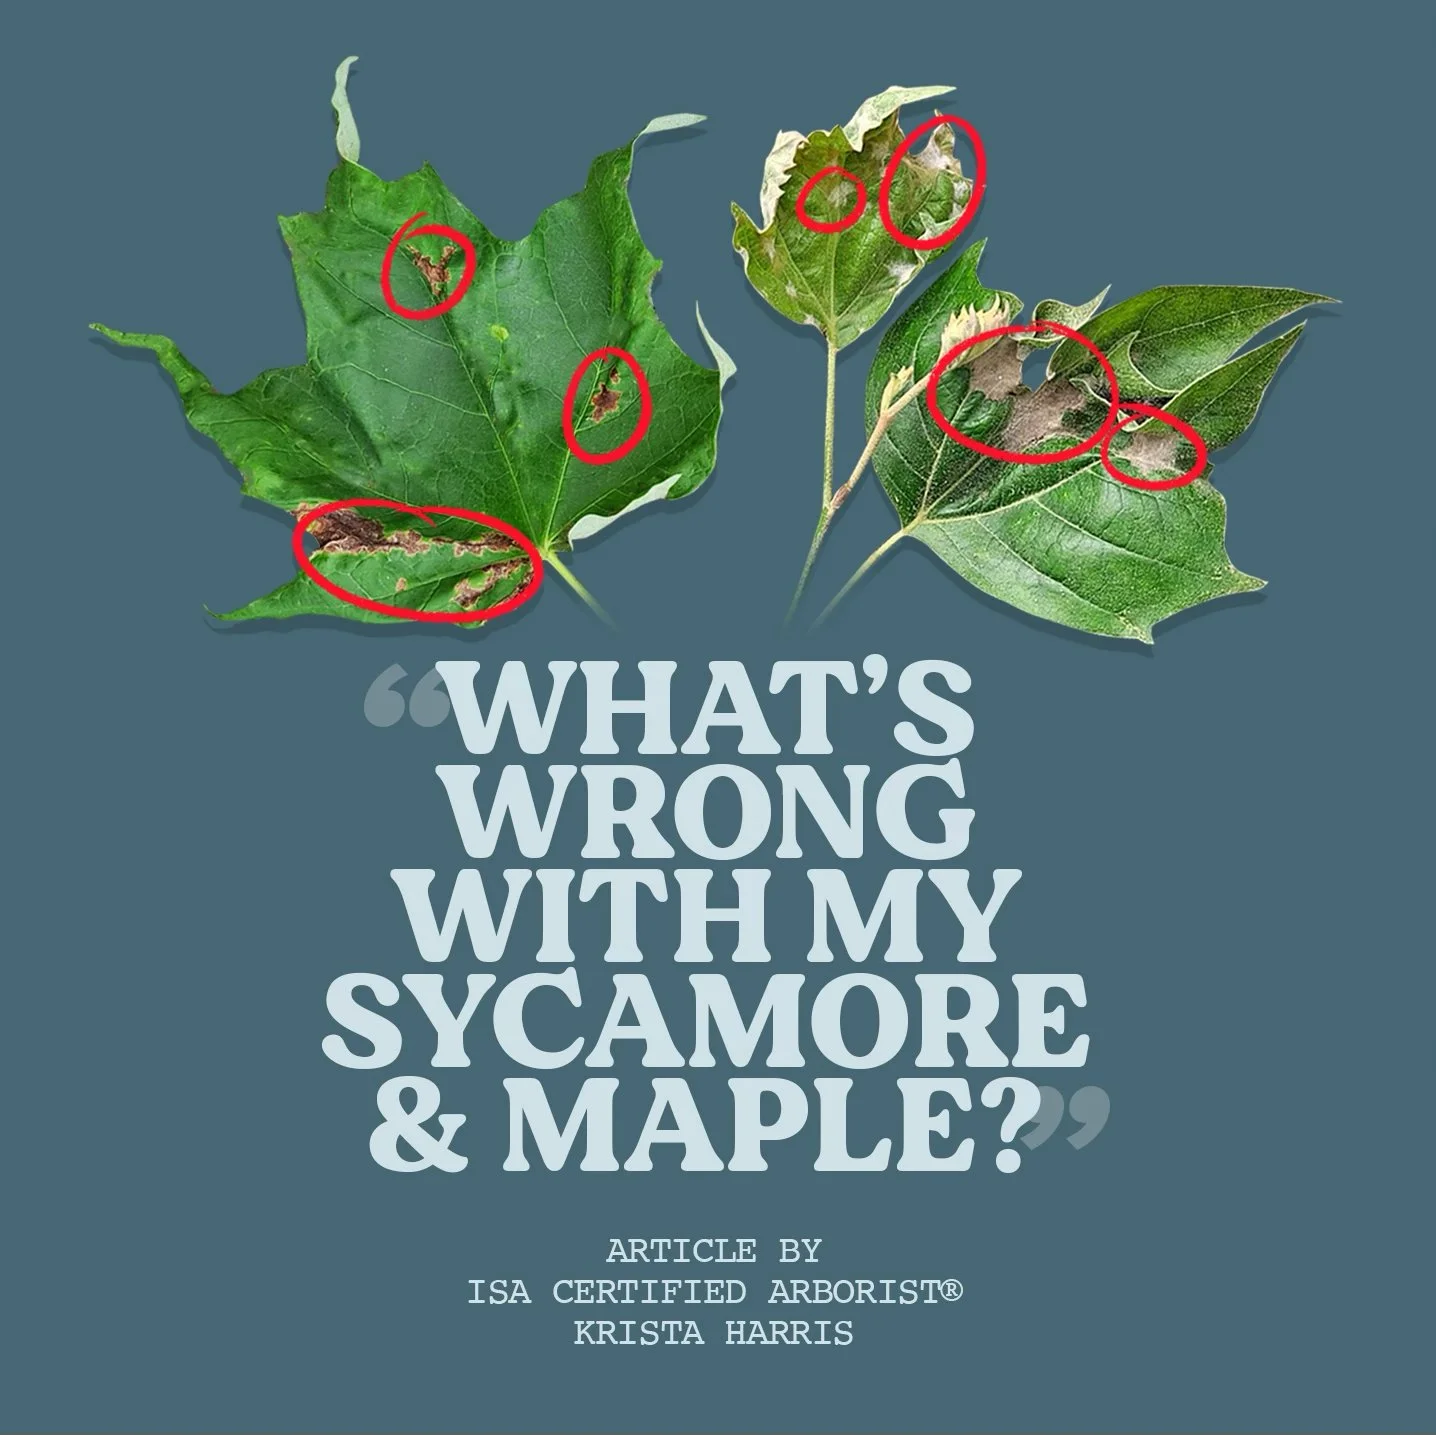
This is the wettest growing season I can recall to date in my professional career as an ISA Board Certified Master Arborist®. Normally by this point in the year, I’m watering different parts of my garden daily and have set up the sprinkler on my lawn at least a few times. I have done neither of those things thus far and even found myself moving some of my container grown trees this past weekend onto the porch because they were being over-watered by mother nature and starting to show signs of stress. Despite the beautiful green lawns and lush new growth in our trees and shrubs, the high volume of rain mixed with cool overnight temperatures have resulted in some of the most prolific foliar fungal disease symptoms I have observed to date. Anthracnose, a common foliar fungal disease of oak, maple, ash and sycamore has run rampant through central Ohio and I’m even noticing it in native forest grown trees. Applescab, black spot and rust diseases on foliage have also been unusually bad. Even some trees that have been preventatively treated in the spring are developing symptoms due to the longer than normal “spring-like” wet season we’re experiencing. The good news is that most of the foliar fungal pathogens we deal with are aesthetic in their damage, often just causing leaf distortion, brown spots on the leaf surface or partial defoliation, and have little impact on the overall long-term health of the tree. Some of these diseases can be easily managed so give us a call if we can help!
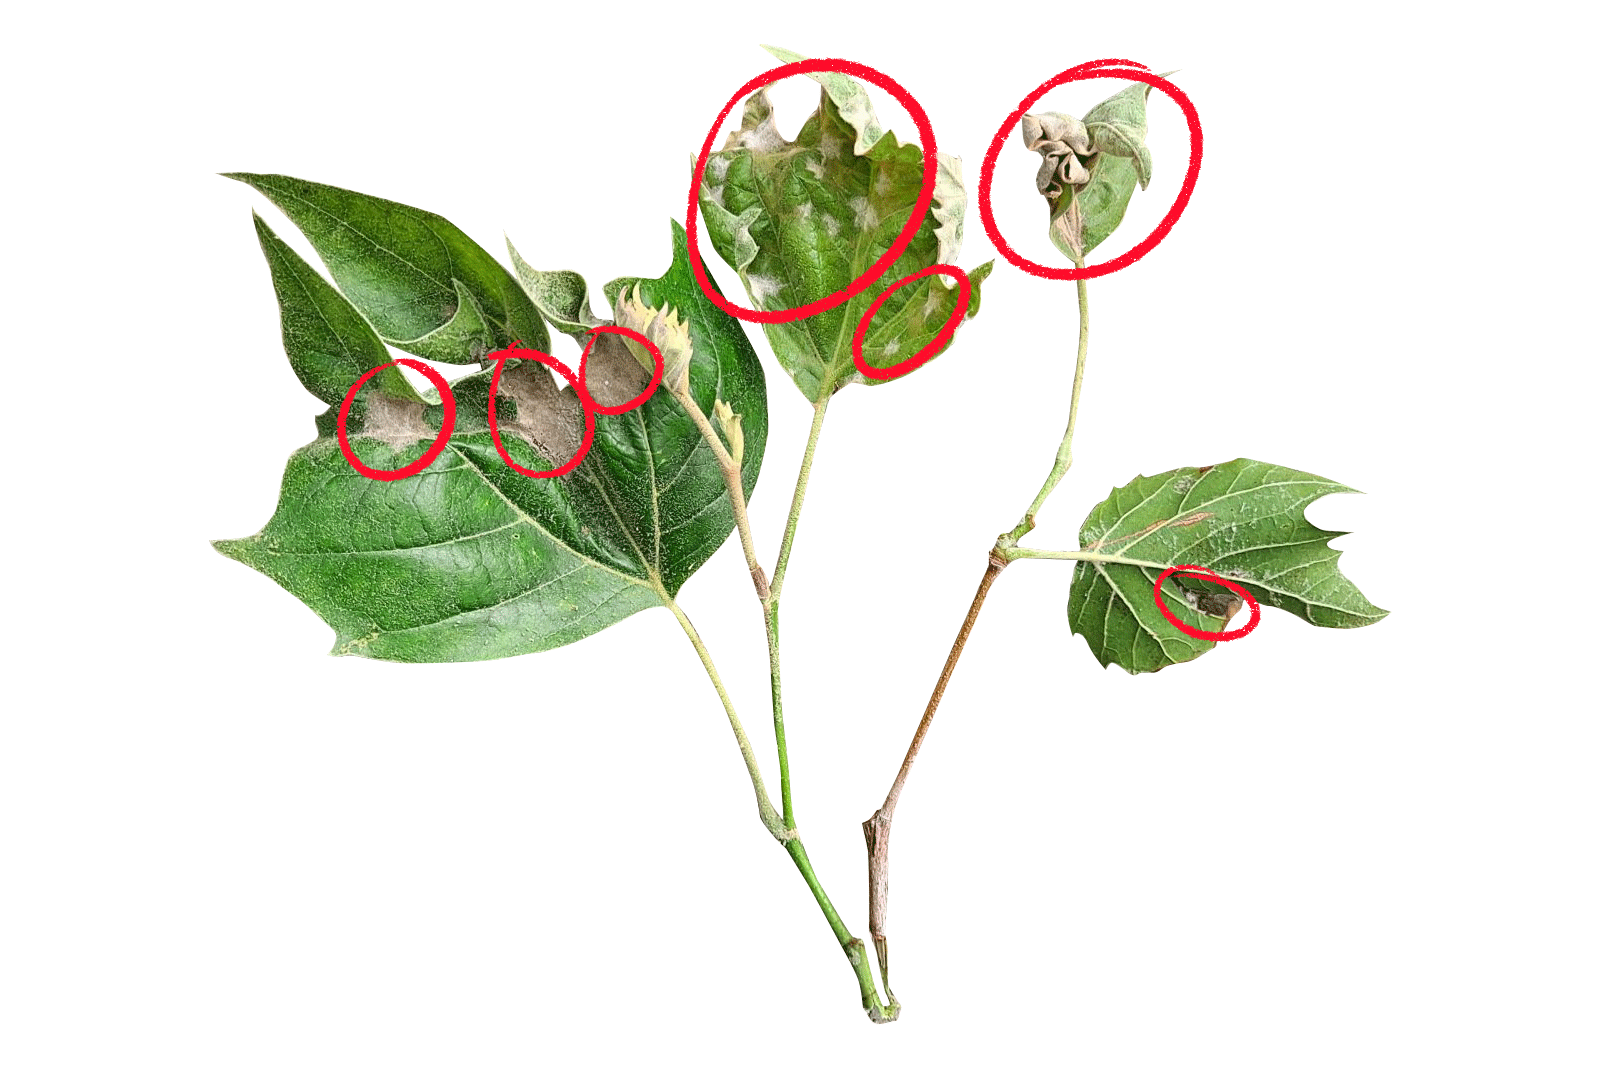
©Russell Tree Experts
An example of anthracnose
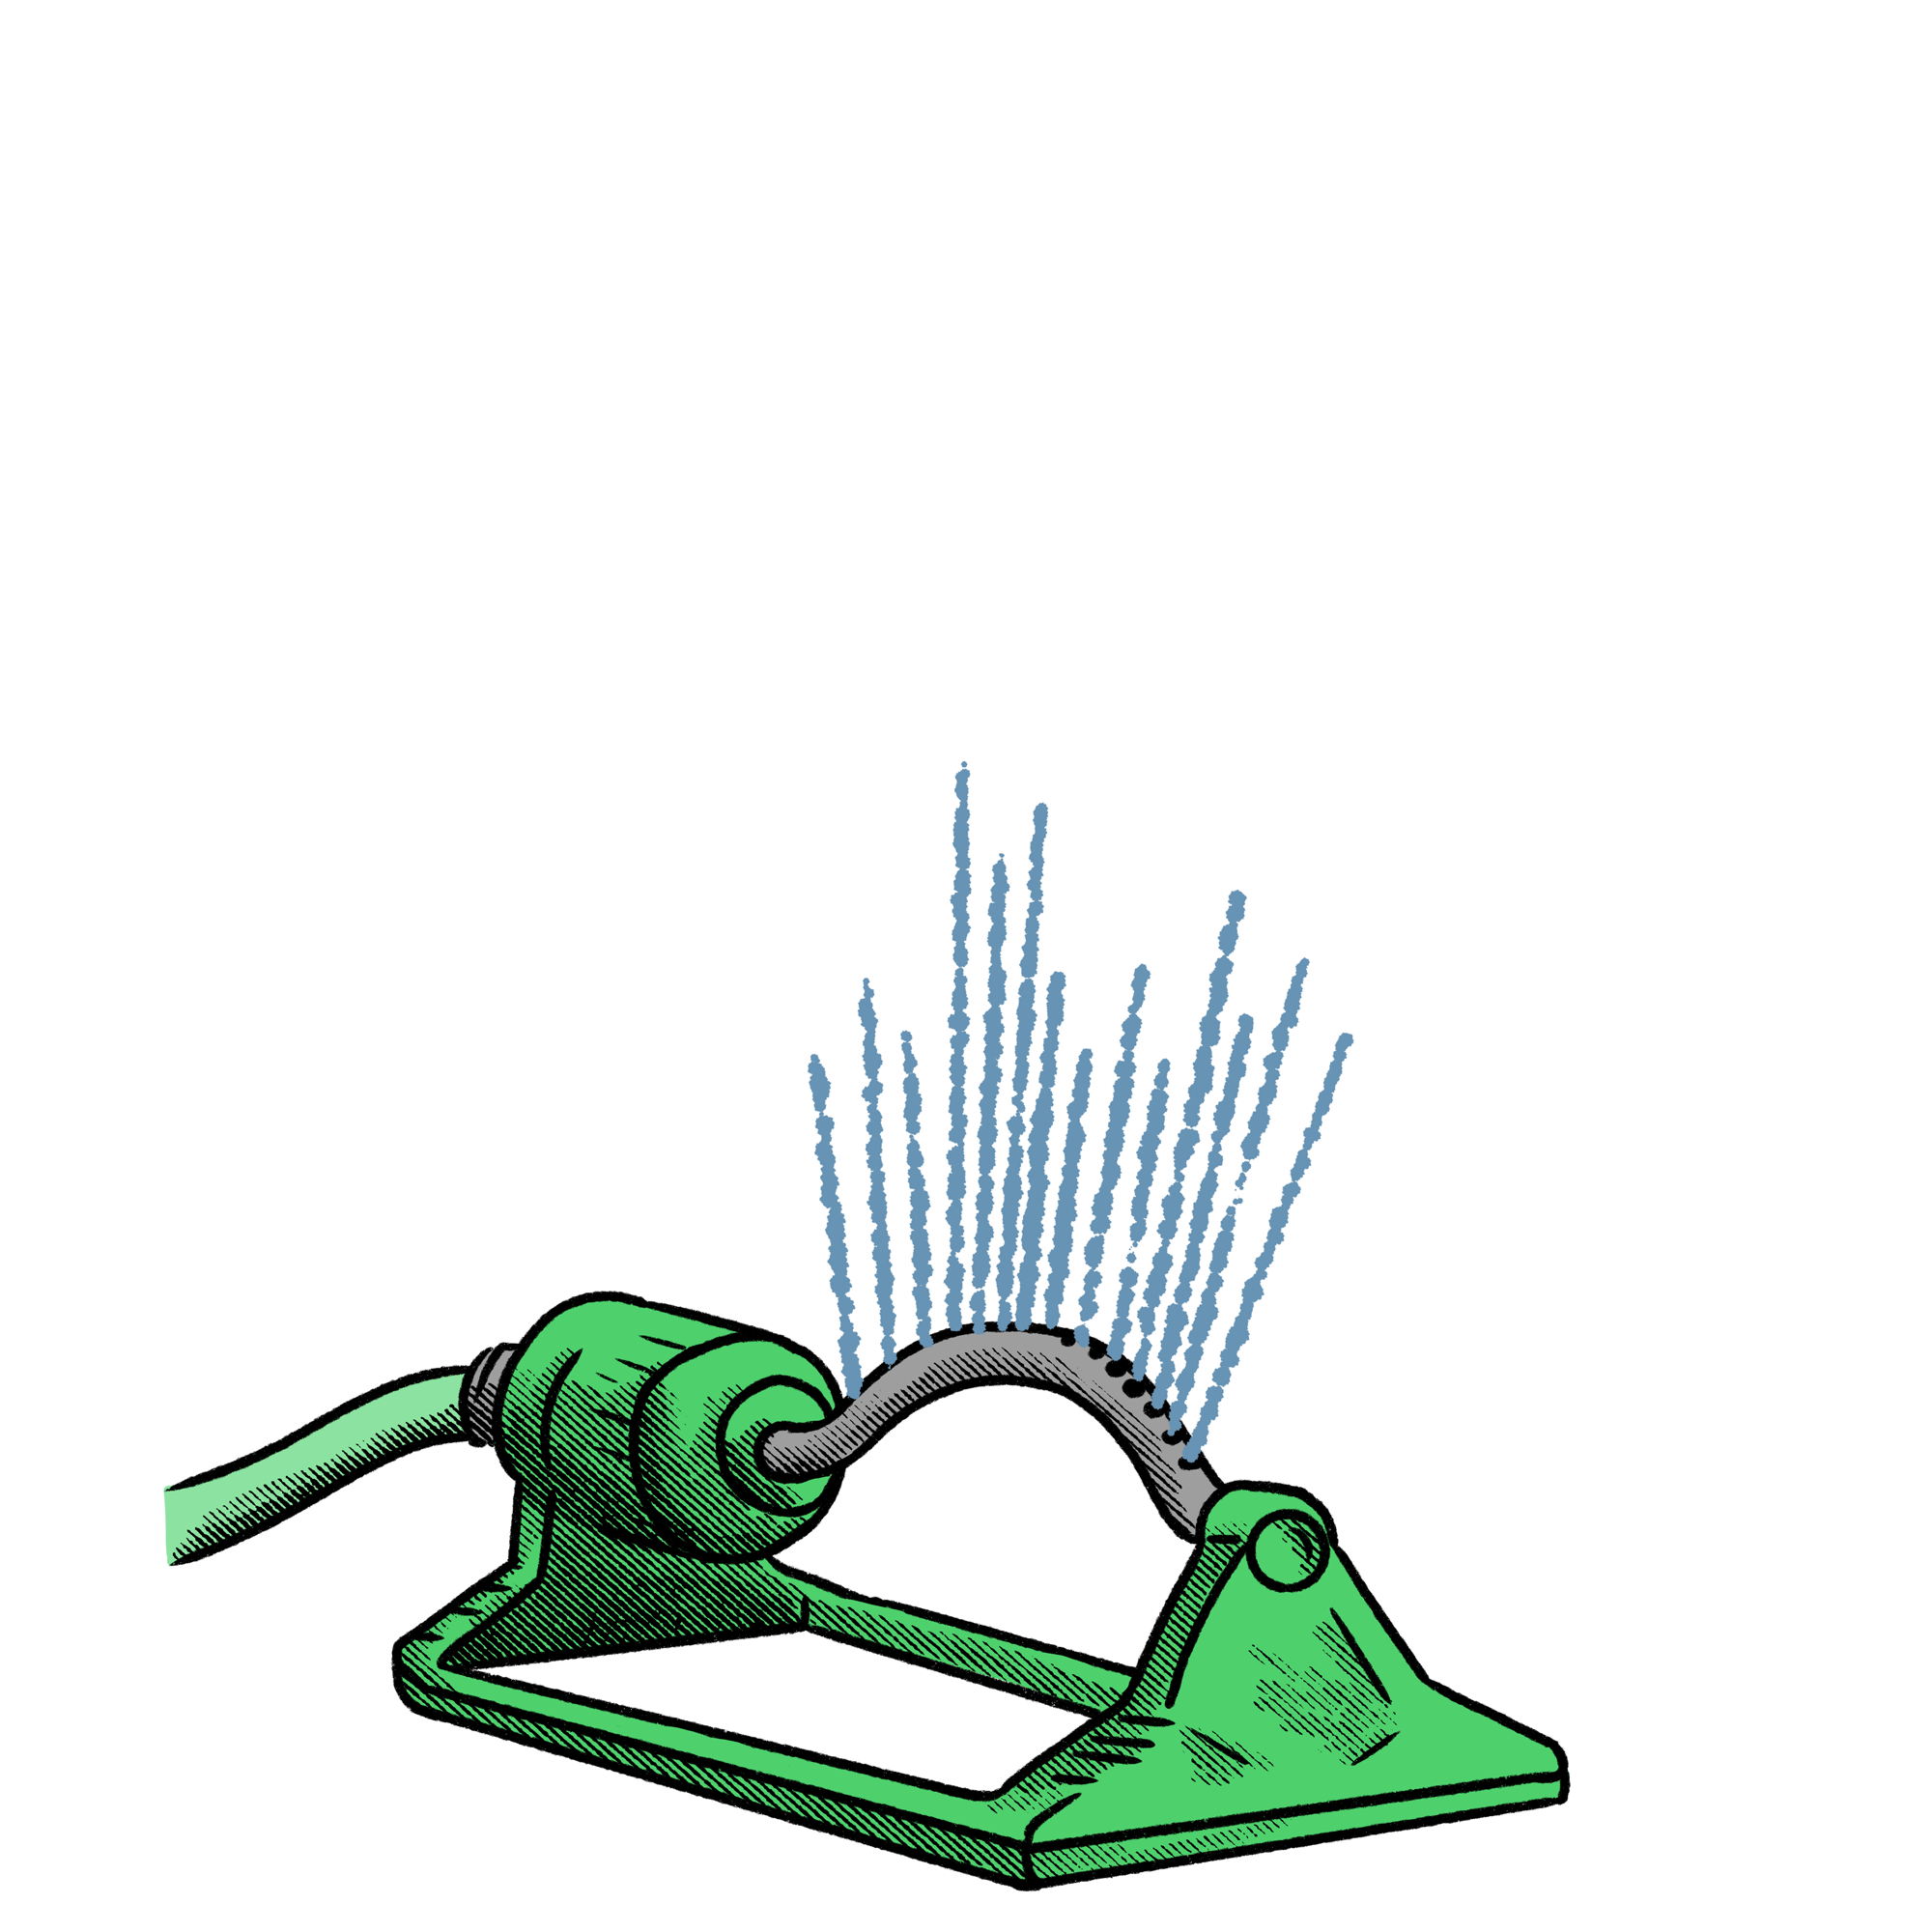
2. The Dryness is (Likely) Coming
Despite the excessive moisture we’ve had throughout the summer so far, we’re at the beginning of what has historically been the driest part of the growing season in central Ohio. August and September are the two months that I see the highest mortality of newly planted trees and shrubs due to drought stress. The drought of last August and September 2024 was historic and for the first time, I observed established trees that had been planted correctly and in the ground for over a decade dry up and die. Generally, healthy and established trees that have been in the ground for over 5 years do not require supplemental water to get them through the growing season. When we have stretches of 6 to 8 weeks without rainfall, even your established trees need help. Do not let yourself be fooled by how wet the season has been thus far. When conditions change this month, be sure to have your watering wands (and buckets) out and ready. Remember that delivering water to trees and shrubs slowly and deeply is the key and that in most cases, irrigation systems and sprinklers, although great for lawns and flower beds, will not reach the depths required to sufficiently hydrate tree roots. Last year, Russell Tree Experts began offering a new service called deep root irrigation (DRI). DRI uses a lance to inject water deep into the root system of trees and shrubs. This method helps bypass the roots of turf, weeds, or ground cover and delivers water directly to the tree roots while also reducing water lost to runoff or evaporation like you might experience if applying water at the surface level. We saved many newly planted trees and woody landscapes with this service through the end of last summer/early fall and kept a lot of newly planted trees hydrated while their owners were on vacation. Let us know if we can help you with your tree watering needs!


3. Meet New Team Members!
Lastly (but not leastly), I’d like to introduce the two newest members of our management team, Andrew Hendricks and Alex Miller. Both of these gentlemen are ISA Certified Arborists®, have a long history of excellence at Russell Tree Experts and have likely been in your yard already to prune a tree or treat for a disease/insect problem. Andrew joined Russell Tree Experts in 2020 and has been working in the green industry for over a decade. He holds degrees in forestry and wildlife management and is an avid gardner and outdoorsman. Alex has a strong background in the nursery industry and has been working to keep your trees maintained and healthy at Russell Tree Experts since 2021. These guys are dedicated to the long term care of trees and to making the world a better place. We’re fortunate to have them on staff! They’ll be out and about regularly performing consultations and estimate requests so don’t be shy if you see them in your yard. You’ll be in great hands. As always, for a free tree work quote by one of our 25+ ISA Certified Arborists®, visit RussellTreeExperts.com/Quote or speak with our friendly, local office at (614) 895-7000!


ADDITIONAL ARBOR ED™ ARTICLES!


TJ Nagel I Scheduling Production Manager, Russell Tree Experts
TJ joined Russell Tree Experts in 2012 and loves trees. He is an avid gardener and plant collector. TJ graduated from The Ohio State University with a B.S. in Agriculture with a major in Landscape Horticulture and minor in Entomology. TJ is an ISA Board Certified Master Arborist® and well versed in plant pathology and tree ID.
5 Tree Watering Methods Ranked Worst to Best!

By Enrique Arayata
ISA Certified Arborist® OH-7252A
July 24, 2025
WHY WATER A TREE?
Water is one of the most important resources for a tree’s health and vigor. Without sufficient water, a tree will stop growing and eventually decline to its death. However, on the flip side, too much water for a tree and its root zone can also lead to a tree’s decline. As with many things in life, proper tree watering is about finding that balance and being somewhere between too little and too much watering. Let’s go over 5 different ways to water a tree from worst to best!
HOW TO WATER A TREE?
OPTION 1
LAWN SPRINKLER
Watering a tree with a sprinkler or hose is one method of tree watering, however, it is typically inefficient for trees and woody plants. A tree takes in water through its roots, and it is common to see sprinklers and hose operators spray water on the tree’s trunk and leaves. Not only is this an inefficient use of water, but it can lead to leaf scorch if watering is done during a bright and sunny day. A slightly more effective method would be to point the water towards the tree roots, but another issue to be cautious of is water running off and ending up elsewhere such as nearby grass, plants, concrete, or towards a sewer drain. Over time, this can also contribute to erosion through soil displacement. This can be minimized by installing a tree mulch ring with a subtle berm around the perimeter so that the mulch can retain as much water for the tree as possible. Out of the 5 tree watering methods discussed here, this would be my last option, but it is better than nothing and is a good alternative to not watering at all.
Overall Rating: ★☆☆☆☆
OPTION 2
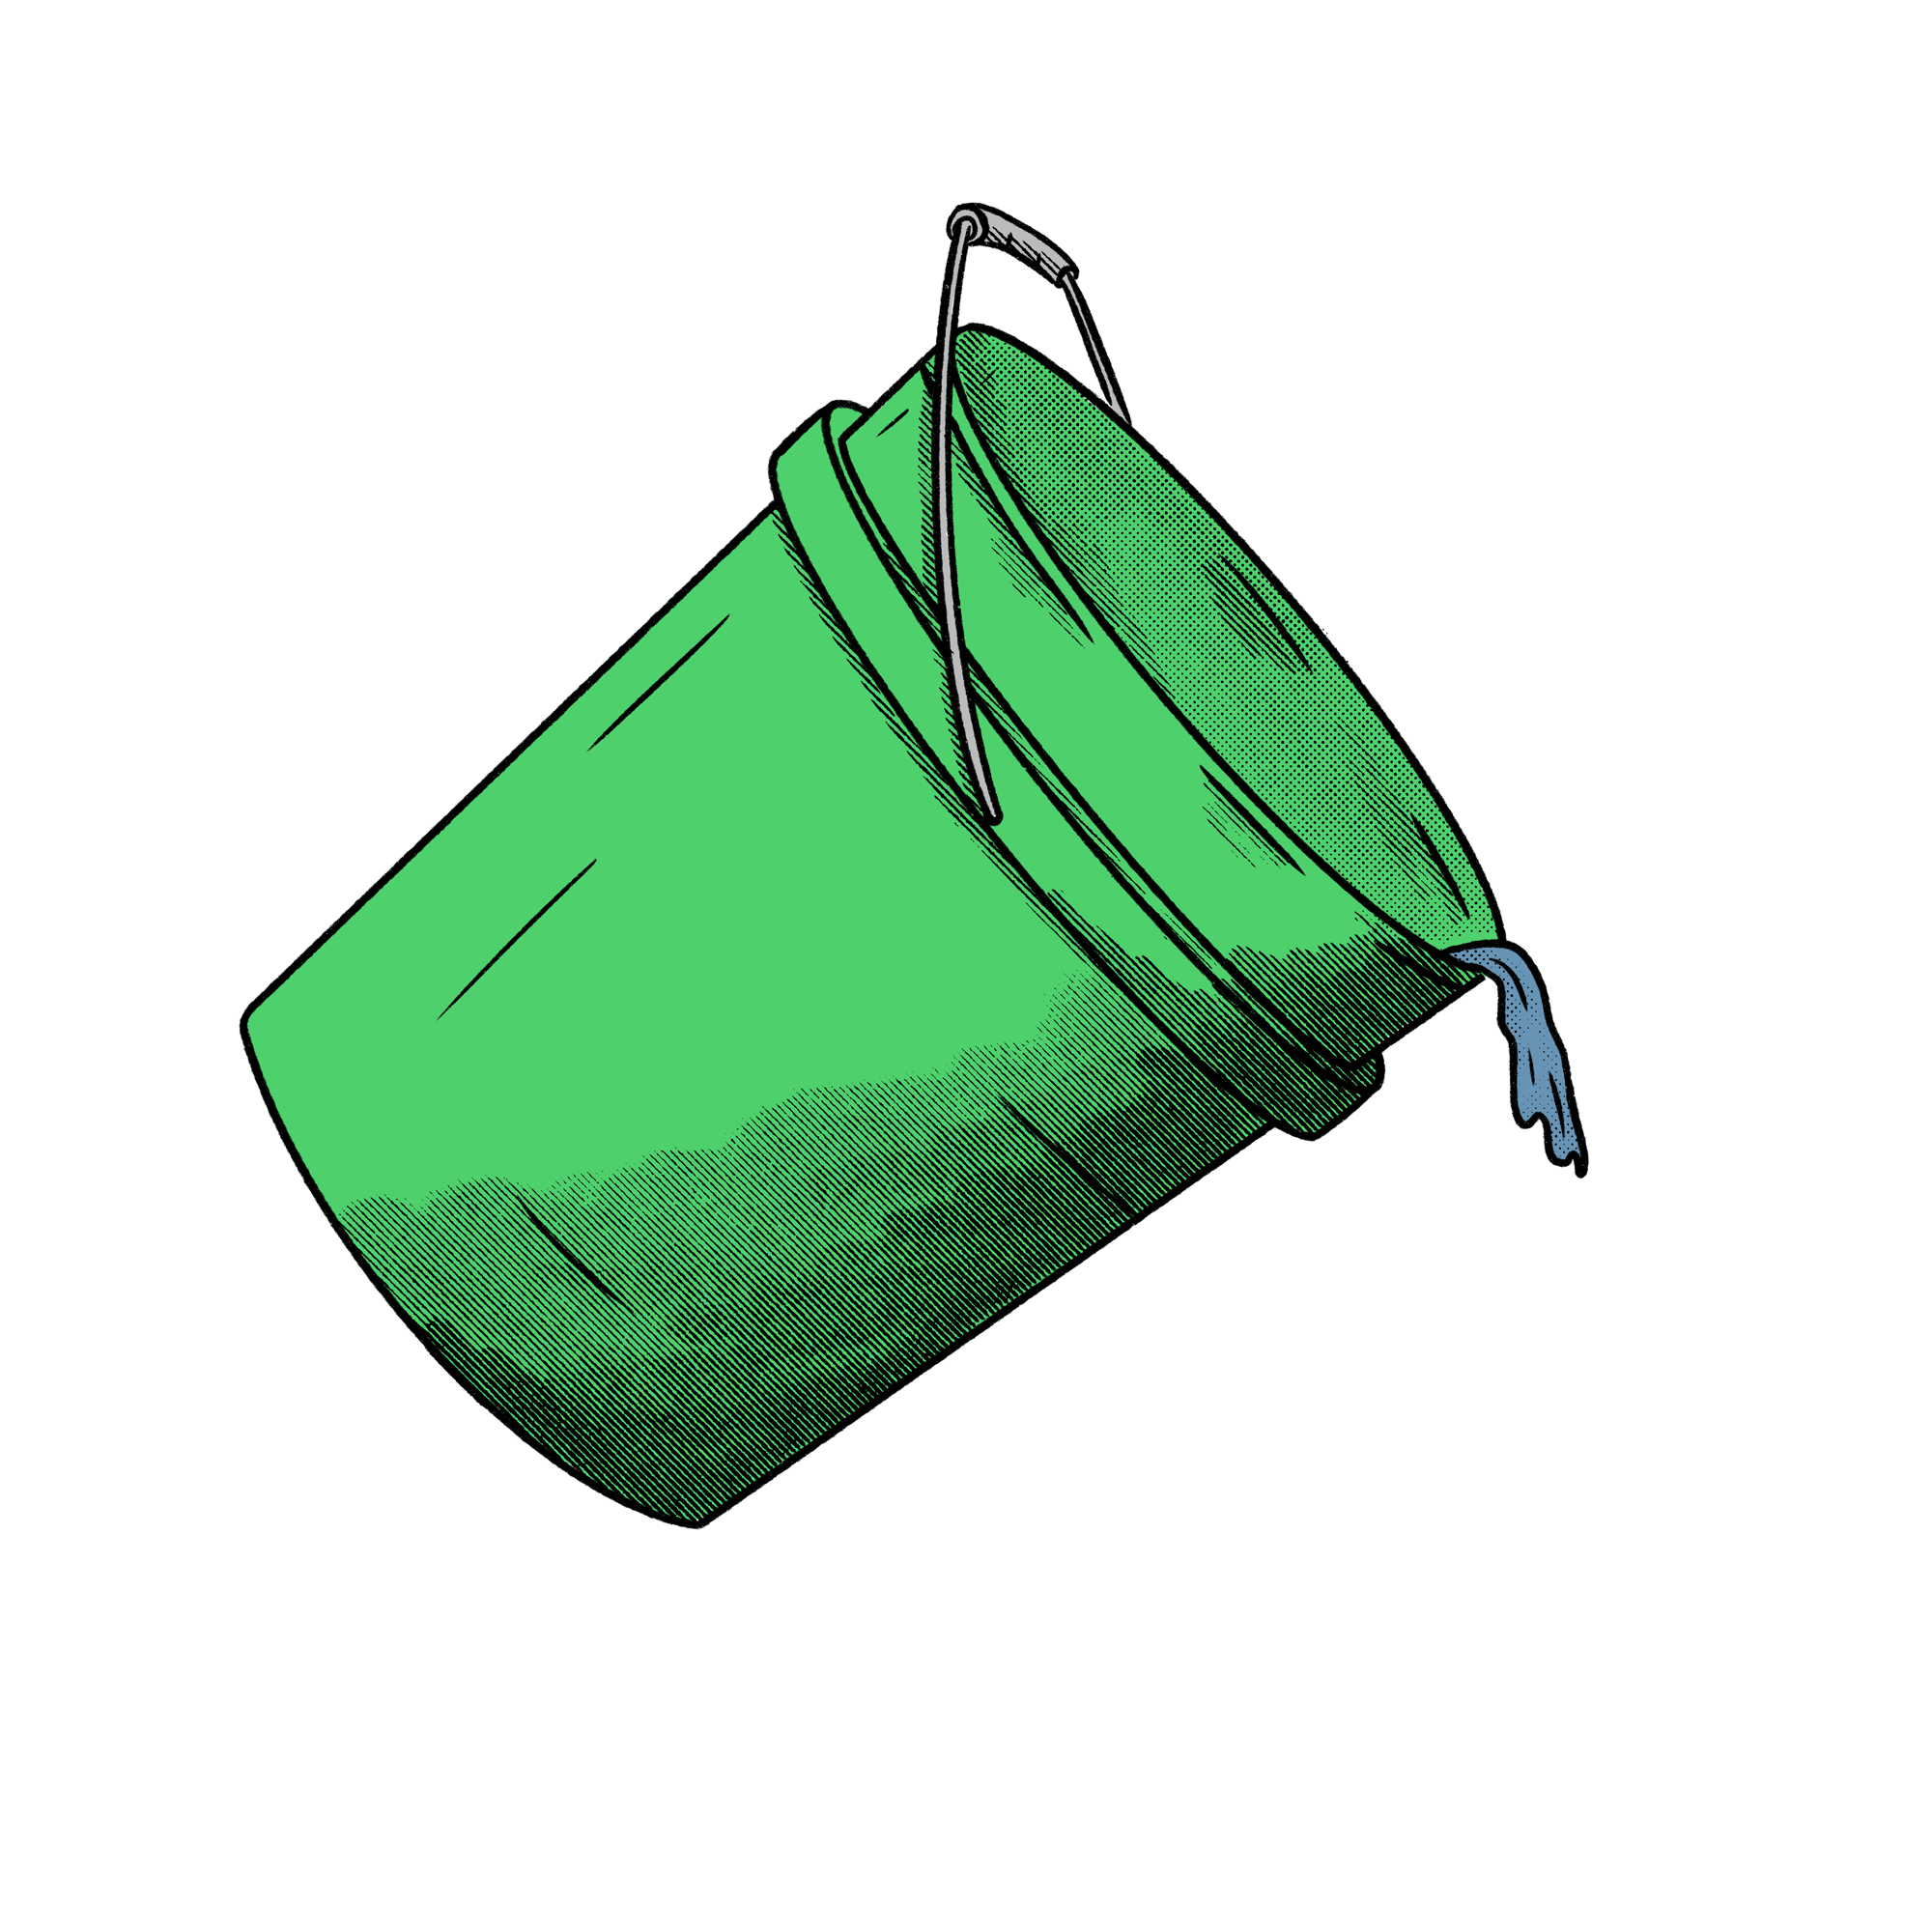
Water BUCKET
A second way to water a tree would be to grab a bucket, fill it with water, and then dump it over the tree’s root zone. This will do a better job at targeting the tree’s roots for proper water absorption and minimize any risk of leaf scorch by keeping the leaves dry, but water runoff can still be a concern, especially if you dump the water all at once. To minimize this, the bucket of water can be slowly distributed in a circle around the tree anywhere from 1 to 3 feet away from the trunk. A disadvantage to this approach is that too much water at one time can lead to runoff.
Overall Rating: ★★☆☆☆
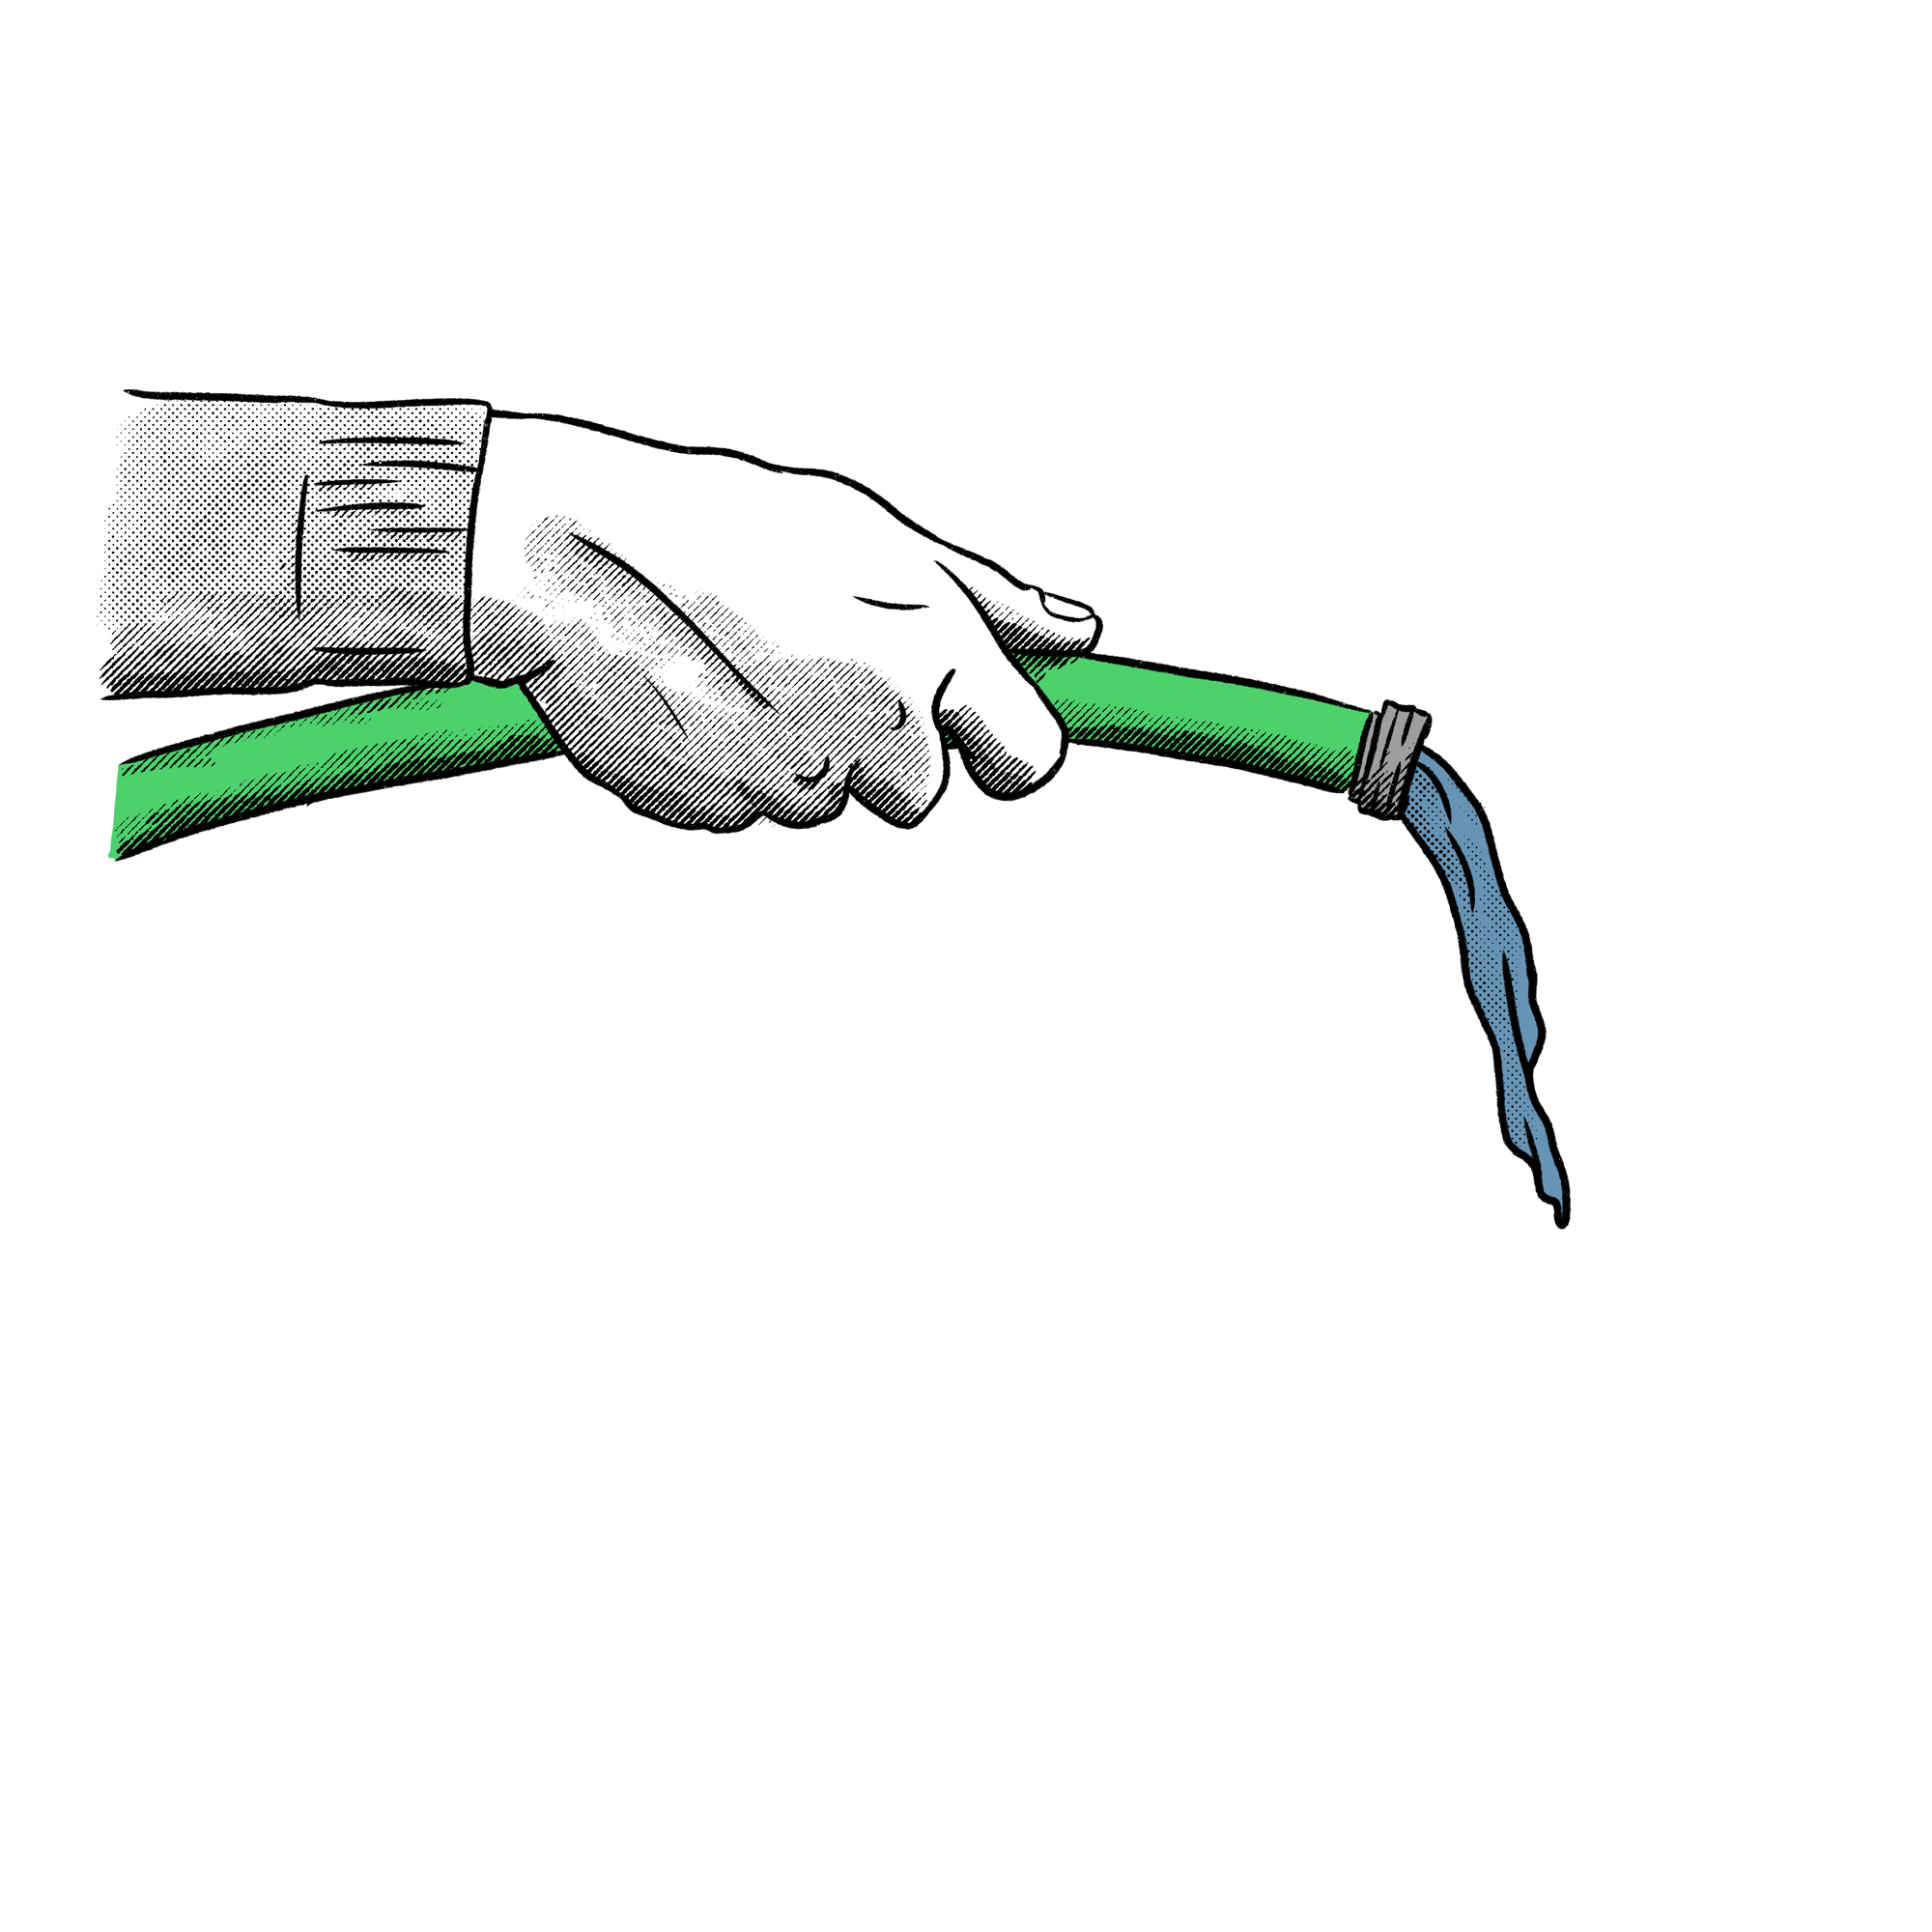
Option 3
WATERING CAN/GARDEN HOSE
Another tree watering method would be to slowly water the tree using a watering can or a garden hose on a slower, softer setting. Avoiding the trunk and canopy of the tree will eliminate the risk of leaf scorch and reduce the rate of evaporation. Watering at a slower, longer duration will help water infiltrate deeper into the root system and encourage more outward root growth. If using a watering can, I recommend watering 1-2 inches away from the surface and in a circle around the canopy drip line to minimize water runoff.
Overall Rating: ★★★☆☆
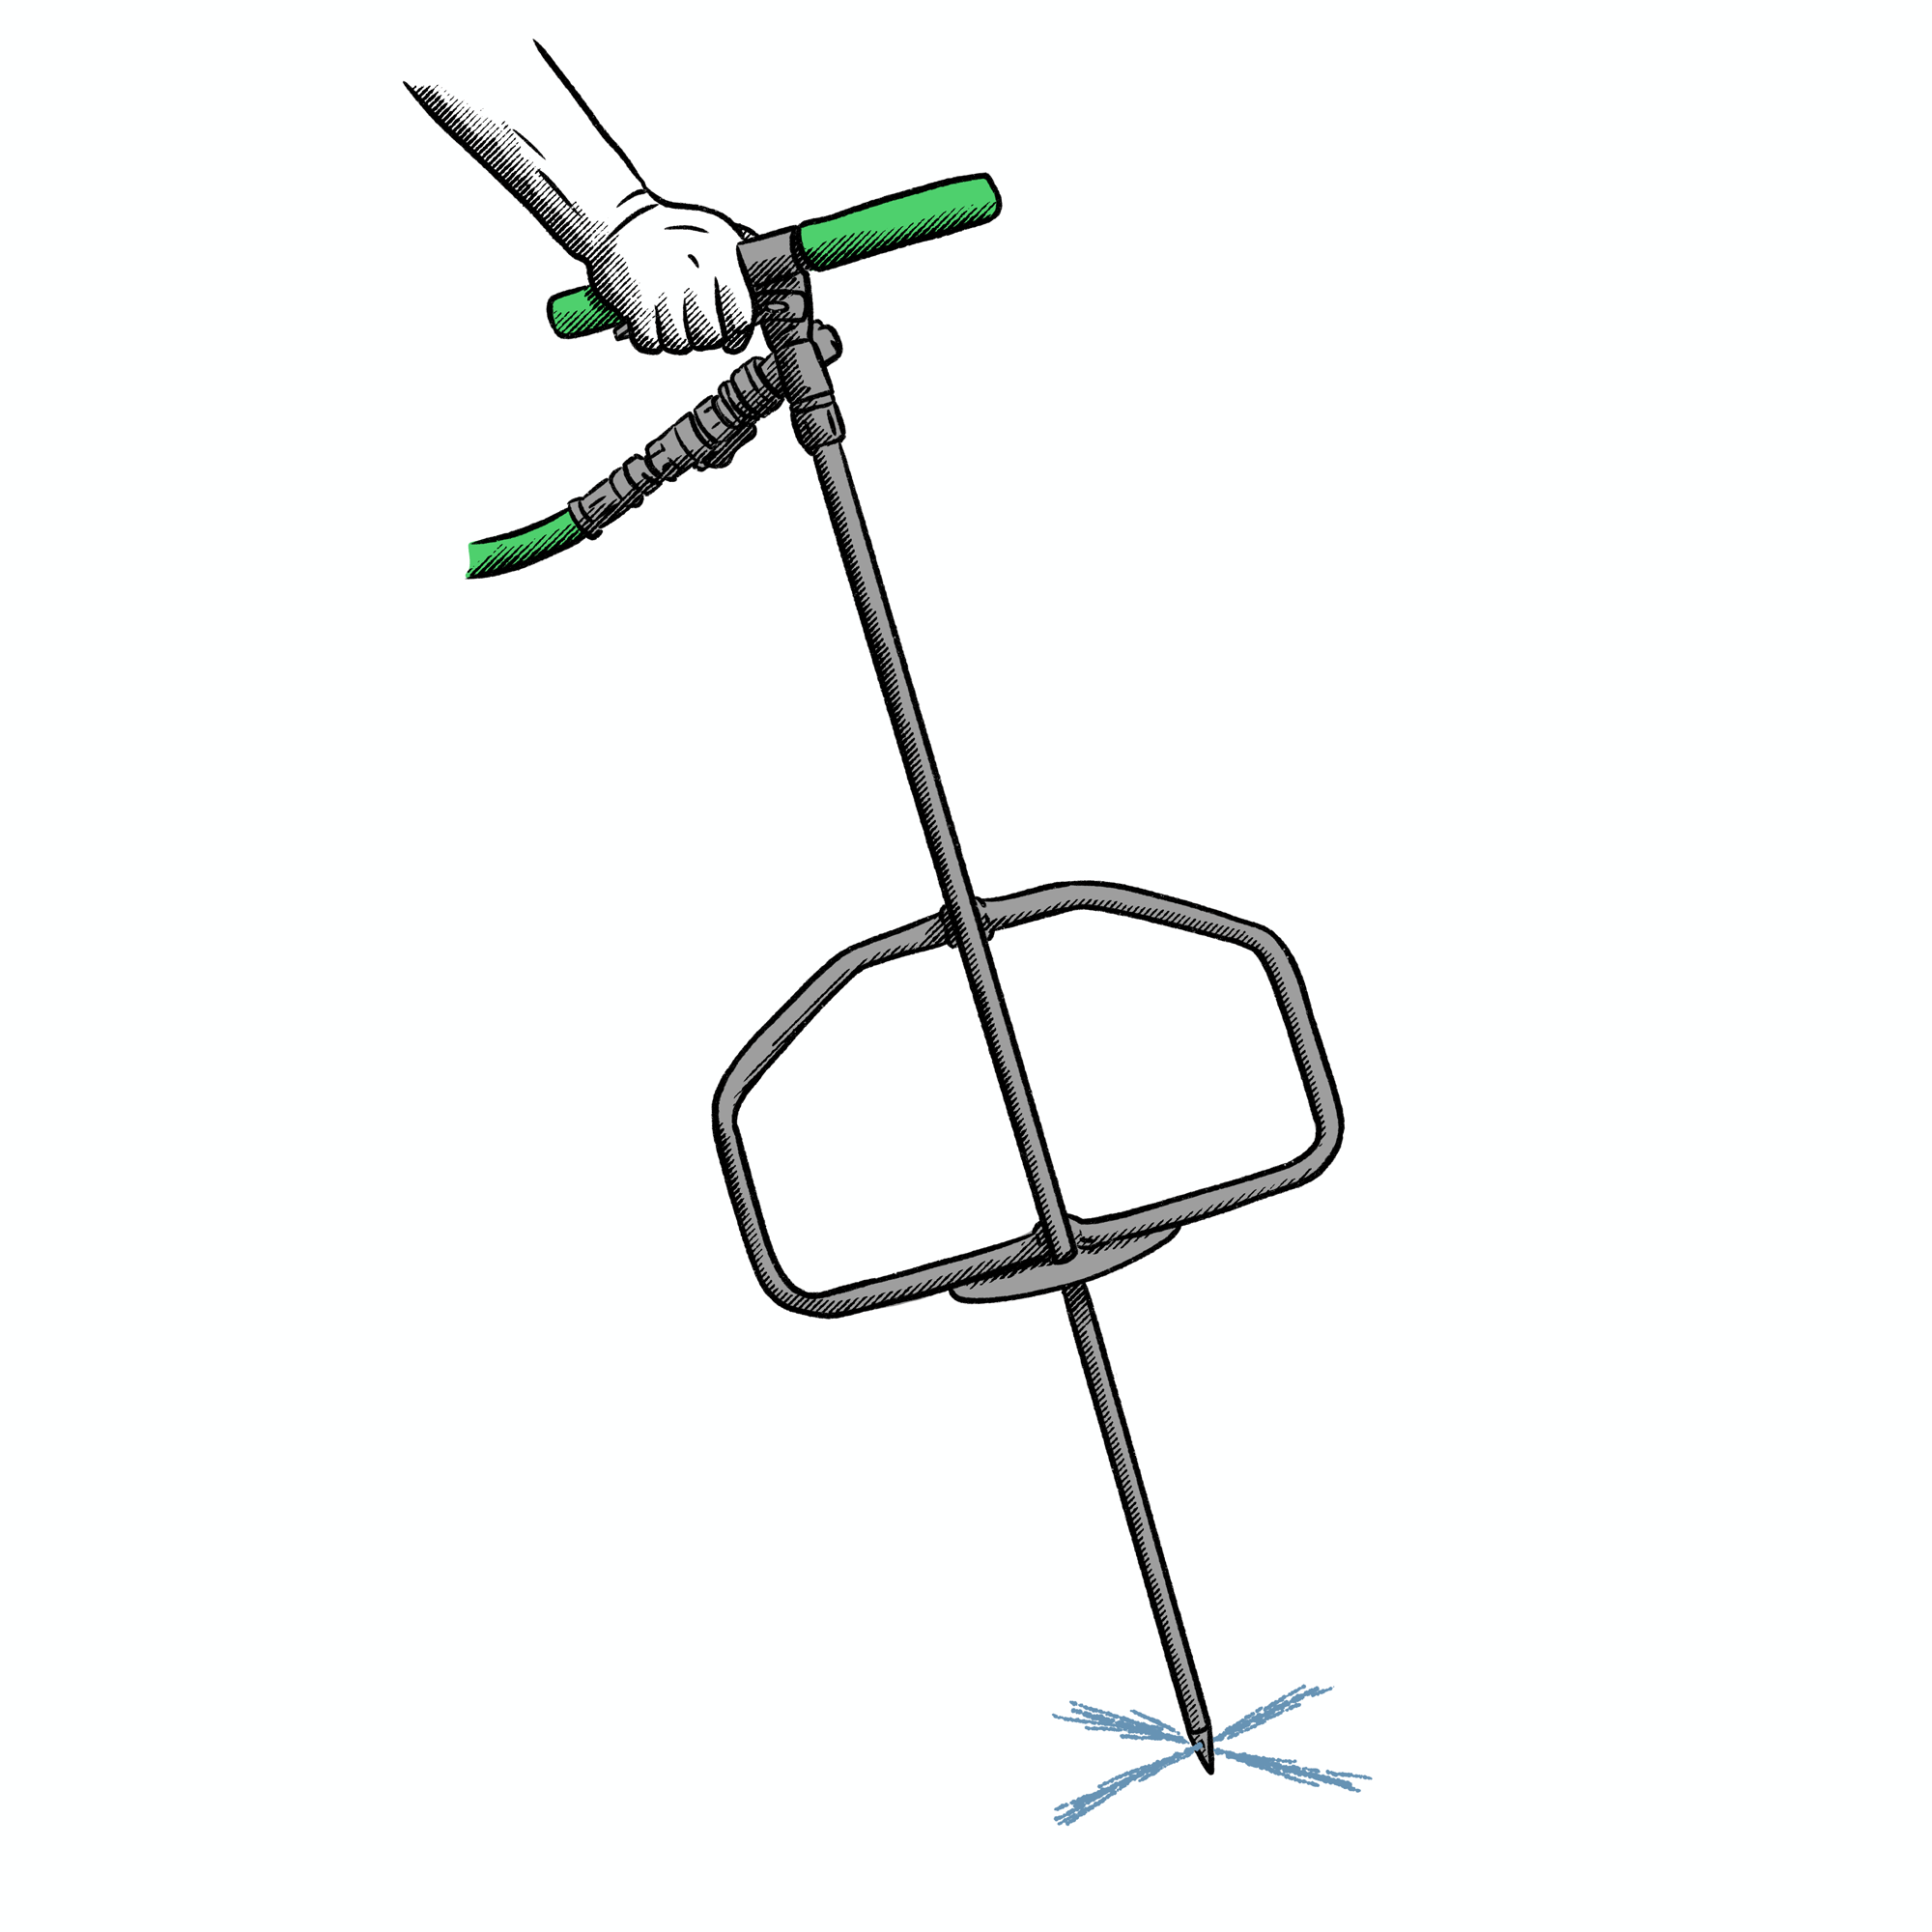
OPTION 4
IRRIGATION LANCE
Next up, is watering a tree with an irrigation lance! Deep root irrigation (DRI) involves the use of an irrigation lance to penetrate the surface of the soil and inject water a few inches below ground level, directly targeting the root zone of the tree. Benefits of this watering method are that it minimizes water absorption by aboveground, competing plants, and eliminates any water runoff. Additionally, the water comes out of the lance at about 200 psi and splits into four separate streams that help to break up compacted soil and add valuable pore space into the soil profile for future root growth.
Deep root irrigation is a service that Russell Tree Experts offers to customers, but an irrigation lance can also be purchased at a home-and-garden store that can connect to your garden hose at home. One detail to consider is that the water from your garden hose may not come out at a high enough psi to break up some compacted soil, but you would still be achieving the goal of watering your trees! One benefit of having Russell Tree Experts water your trees is that we can access trees hard to reach by garden hose (if they are far away from the hose bib) and also water your trees if you are not home, such as on vacation!
Overall Rating: ★★★★☆
More on deep root irrigation!

OPTION 5
DRIP IRRIGATION
And lastly, one of the most effective and efficient methods of watering a tree is through drip irrigation. This is the process of applying water slowly over an extended period of time. Drip irrigation is very similar to method 3 (with the watering can/garden hose), but the difference is that you slow it down significantly and water over the course of an hour, or even longer depending on the size of the tree. This heavily reduces the potential for water runoff, soil/mulch erosion, and water evaporation. Due to the slower release, the tree will take in water for longer compared to a quick, few minutes of hose spraying. Less water can be used as a higher percentage of water will be targeted towards the tree and not stolen by nearby grass and plants or evaporated by the sun.
The most expensive way to perform drip irrigation is to install an underground irrigation system with aboveground drippers poking out near the tree’s root system. A cheaper alternative is to use a garden hose nozzle with a locking system, on a low output setting like mist or soaker, to water your tree! Just don’t forget to pick it up once you’re done! Another solution is to use a bucket of water and poke 2 to 3 tiny holes at the bottom so that the water will slowly release. Be cautious as the holes can be clogged up by debris and, depending on the size of your bucket and tree, you may need to refill the bucket more than once. Lastly, another form of drip irrigation is using a tree watering bag. Garden centers typically sell 20-gallon tree watering bags that can be quickly filled but slowly released. Similar to the bucket, the holes can also get clogged up by debris and will need to be inspected periodically.
Overall Rating: ★★★★★
Drip irrigation in action!
HOW MUCH WATER FOR A TREE?
Now that you have learned about the worst and best ways to water a tree, you may be asking yourself “how much should I water my tree?” Well... it depends! The International Society of Arboriculture (ISA) does not have set guidelines, and neither does Russell Tree Experts. A general rule of thumb is somewhere around 5 to 10 gallons per inch of trunk diameter at breast height (dbh). Various factors can affect the exact volume such as water runoff, evaporation rate depending on if it’s sunny or hot versus cold and cloudy, competition from nearby grass and plants, level of tree establishment, amount of precipitation during the week, and your patience and commitment to watering. For instance, a newly installed 2-inch dbh tree in the summer at full sun may need 20 gallons of water while an established, more mature 10-inch dbh tree on a cloudy, fall day may only need 50 gallons of water.
WHEN TO WATER A TREE?
The best time of day to water a tree is during sunrise or sunset. Temperatures are generally cooler, and the sun is less prevalent, leading to reduced evaporation and leaf scorch. Wet leaves overnight have a risk of fungal and disease issues while wet leaves in the middle of a sunny day have a risk of leaf scorch.
In terms of frequency... it depends! A newly planted container tree will benefit from watering every 2 to 3 days and a newly planted balled-and-burlapped tree once per week for at least the first 2 to 3 growing seasons (spring through fall). A large, mature tree may not need to be watered except in periods of extended drought and can water itself through its large root system or natural rain. During sunny, summer weather, all trees can benefit from tree watering every few days. During colder, winter weather after first frost, trees may not need to be watered at all except in fringe cases such as planting an evergreen tree late in the fall. If you want the broadest rule of thumb that comes with many exceptions and caveats, water your tree 3 to 4 times per week in the summer, 2 to 3 times per week in the fall and spring, and 0 times per week during most winters, adjusting this based on the tree’s root establishment, weekly temperature, and level of precipitation during a given week.
WHERE TO WATER A TREE?
The answer to this question does NOT depend! The best location to water a tree is in a circle around the tree between the trunk and canopy drip line. The canopy drip line of a tree is the furthest point that a tree’s leaves reach out to and will drip water during a rainy day. In other words, if you look straight up and do not see any leaves, you are past the canopy drip line. There is a common misconception to water a tree right next to the trunk a few inches away. Although this is not a bad location, a tree can take in water from even further away and water should be as uniformly distributed as possible to promote healthy and outward root growth!

©Russell Tree Experts
The canopy drip line of a tree is the furthest point that a tree’s leaves reach out to and will drip water during a rainy day.
CONCLUSION
And there you have it, the essentials of what you need to know about watering a tree! The only other tip I recommend is to install a 2- to 4-inch-deep tree mulch ring around the tree to help conserve water for the tree. A tree mulch ring has a plethora of other benefits such as increased nutrient availability, better temperature regulation, decreasing the risk of stem-girdling roots, outcompeting with other plants, minimizing trunk damage, soil decompaction, and increased visual aesthetics! Just be cautious of piling mulch near the root flare/base of the tree! The mulch ring should be level, and the root flare should be exposed. As my friend and coworker TJ Nagel, an ISA Board Certified Master Arborist®, once said, “watering is the single most importance maintenance factor in the care of newly planted trees.” For a free tree work quote by one of our 25+ ISA Certified Arborists®, including deep root irrigation, visit RussellTreeExperts.com/Quote or speak to our friendly, local office staff at (614) 895-7000!
ADDITIONAL ARBOR ED™ ARTICLES!


Enrique Arayata I Media Production Manager, Russell Tree Experts
Enrique is an ISA Certified Arborist® and FAA Certified Remote Pilot. In his free time, he enjoys working out, hanging out with his family and girlfriend, video production, photography, cars, technology, and cooking. Enrique has a BA in moving image production with a double minor in film studies and studio art specializing in photography from The Ohio State University, and an AA in web graphic design from DeVry University. His favorite tree is the Kwanzan cherry tree.
3 Tree Tips From an RTE Insider!
By TJ Nagel
ISA Board Certified Master Arborist® OH-6298B
July 17, 2025
I'm fortunate to have a partner that loves trees as much as I do. When I met Annette working in the nursery industry twenty-ish years ago I just thought she was cute, she made me laugh and I admired the way she helped people and animals. Over the years, Annette and I have worked together in various gardens, we have spoken together at gardening events, cared for the same clients and we have both become professional arborists. We share a passion for the outdoors, seeing new trees in new places and collecting new plants for our garden when we discover them. In short, she gets me.
Through her gardening and consulting business, Annette has always proudly promoted responsible tree care and the work that Russell Tree Experts performs. When an opportunity came up this Spring to hire a seasonal Tree Wellness technician, I (somewhat jokingly) suggested that she apply and see things from the other side. She got the position and we got to work together once again! Over the last four months our dinner chats and evening conversations have been filled with observations, debate and education. Listening to her learn the industry was nostalgic and reminded me of why I got into the tree care industry. Annette is back to running her own business again but she will always be a part of Russell Tree Experts. Here are a few things she wanted every client to know - written in her own words.
1. Mulch Madness!
Don't smother your plants. In no less than 90% of the yards I visited, mulch was overdone—especially around the base of trees and shrubs. While mulch has its benefits, piling it too high can actually harm your plants.
Here's why: the root flare—the area where the trunk meets the roots—needs air and water to function properly. When mulch is too thick or pressed against the base, roots may grow upward into the mulch in search of oxygen and moisture. This can prevent them from accessing nutrients in the soil, leading to common problems like chlorosis (yellowing leaves), less vigor. Please don't forget this is important
with shrubs as well.
A visual tip: If a tree looks like a telephone pole going into the ground, it's a sign the root flare is buried—and that's worth checking.

©Russell Tree Experts
An example of a mulch volcano. Note the lack of an exposed root flare.
2. Not All Fertilizers Are Created Equal
One thing that stood out to me was the quality of the fertilizer used by RTE. Unlike synthetic fertilizers that are heavy in quick-release nitrogen (which can cause fast, weak growth that attracts pests), RTE uses their own naturally composted blend. This organic fertilizer acts more like a soil conditioner—enriching the soil with beneficial microbes, improving its structure, and helping roots absorb nutrients more efficiently. It's a smarter, long-term approach to plant health.
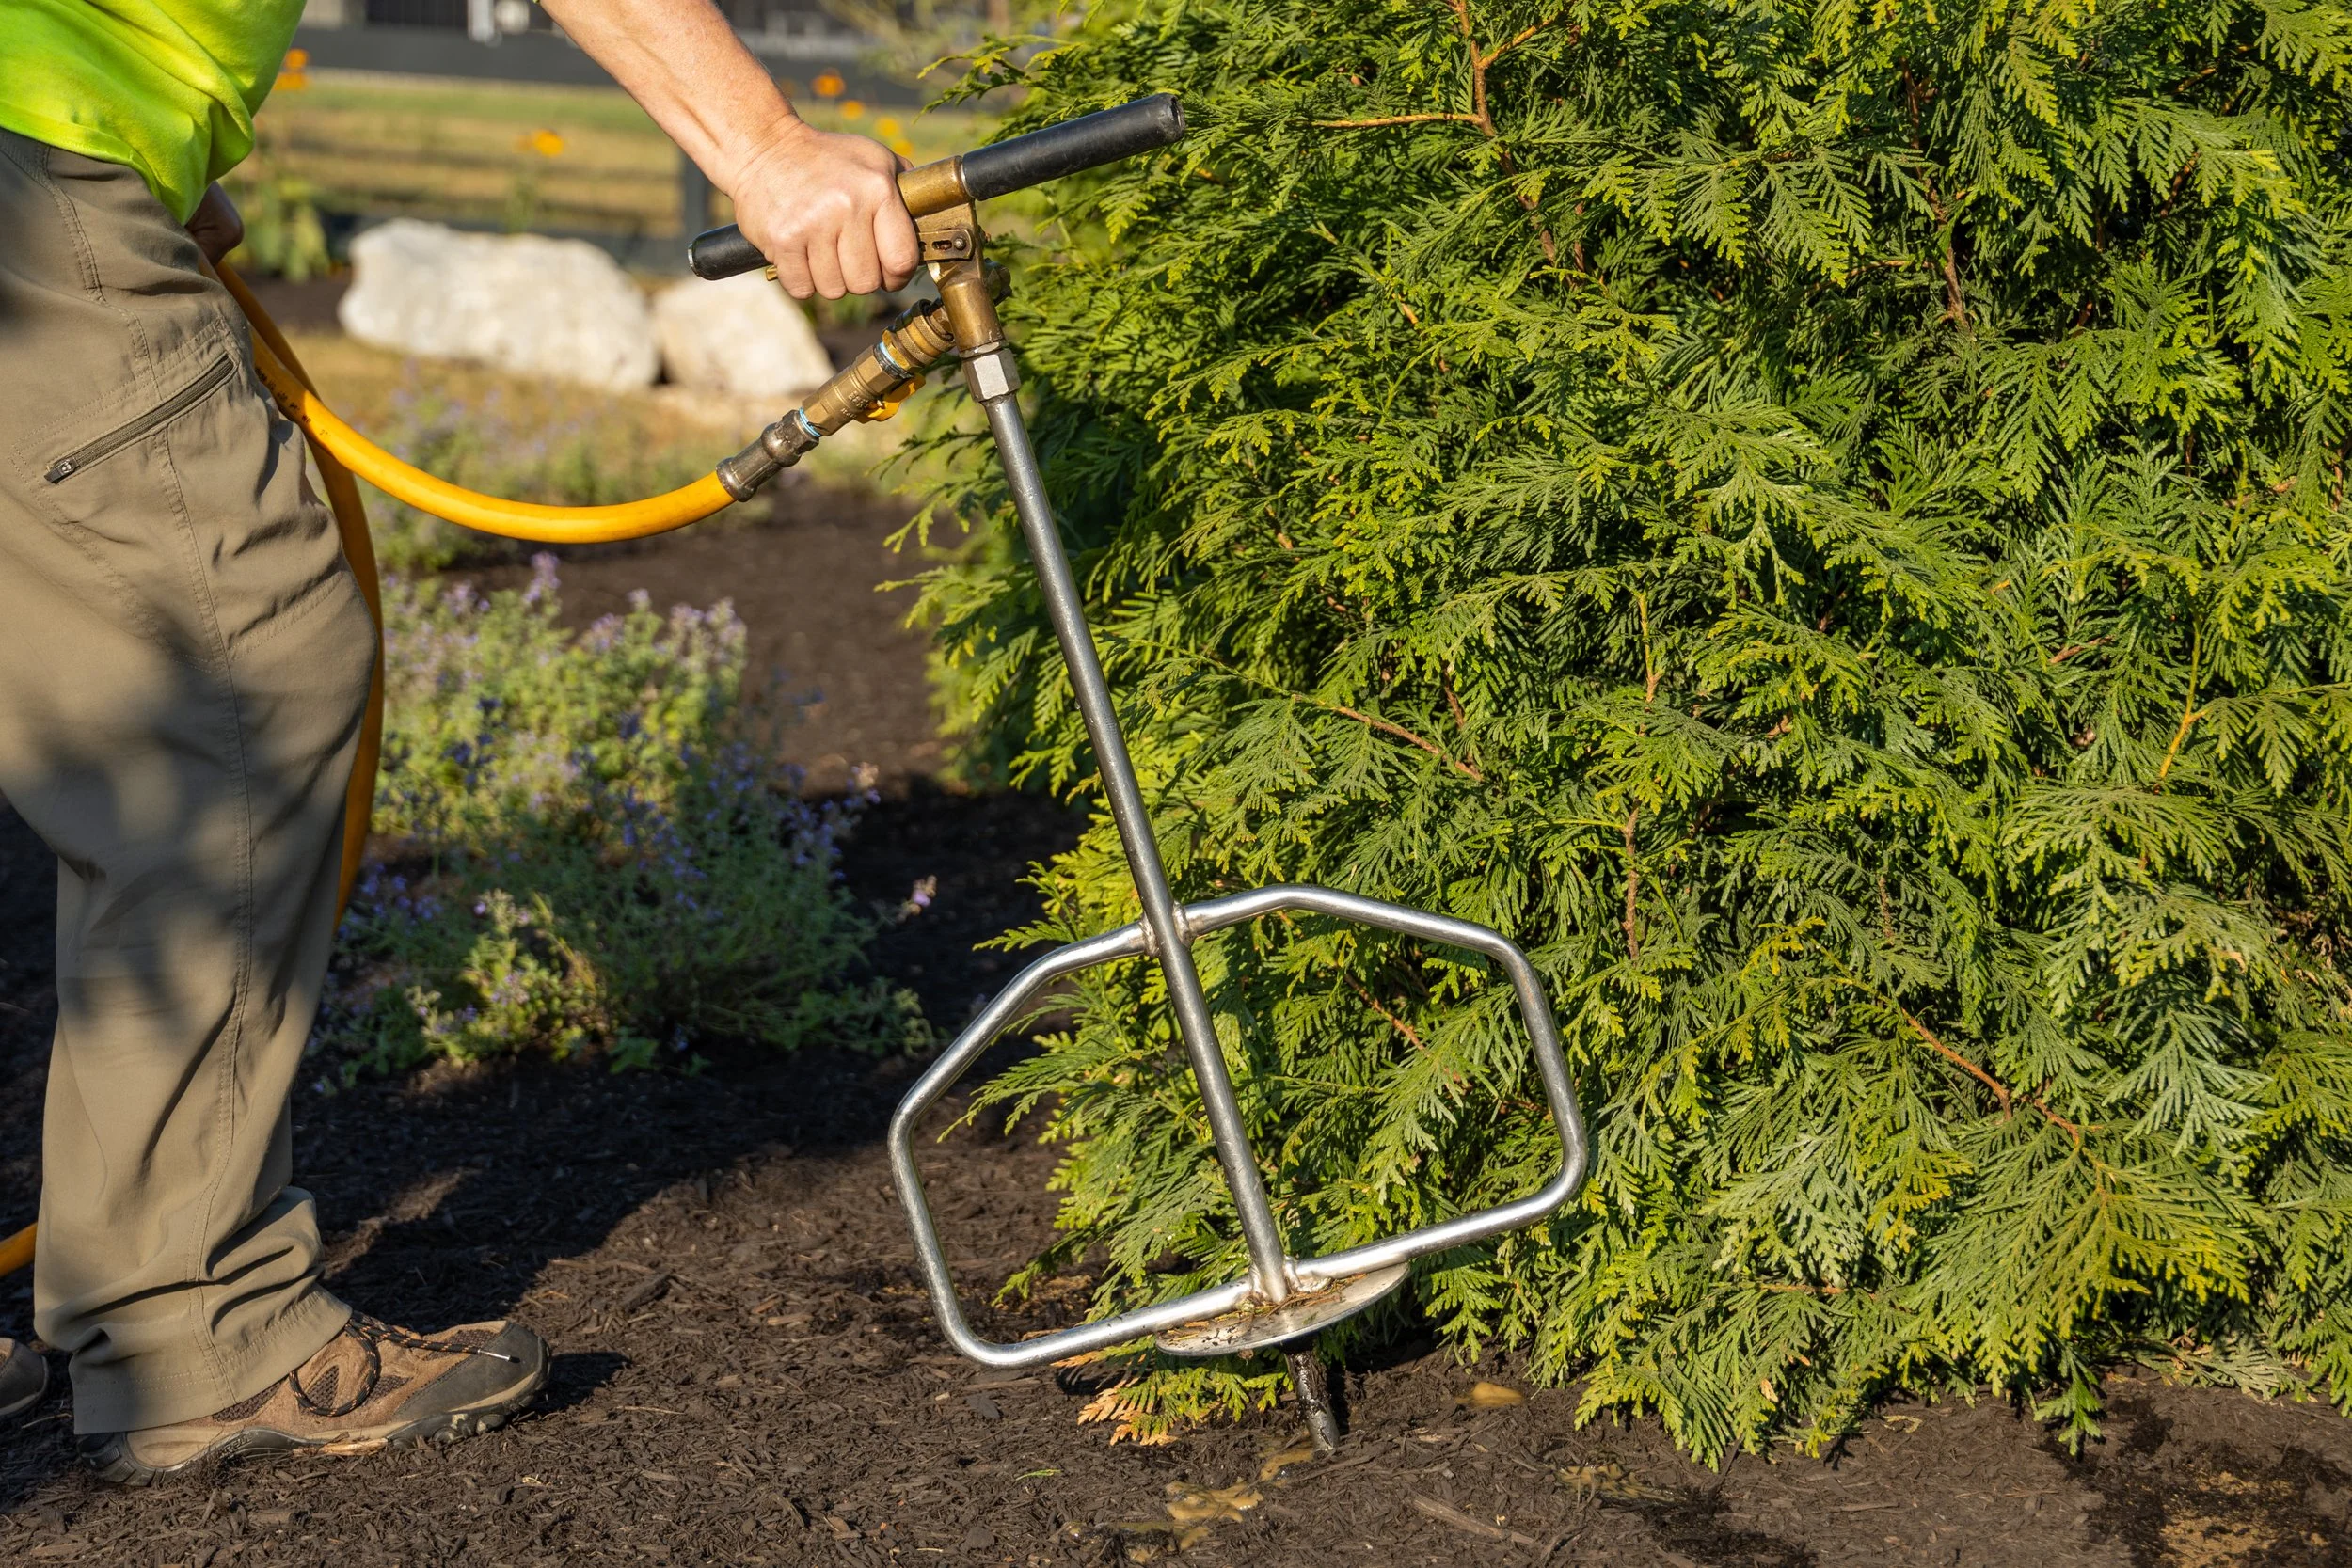
©Russell Tree Experts
An irrigation lance used to fertilize trees below ground level.
3. A Culture That Cares (About Plants and People)
Even after moving on from the role, I still think about how impressed I am with RTE's company culture. From top leadership and gifted mechanics to the crews in the field, the commitment to doing things right was clear.
Each week, the team holds mandatory "tailgate meetings" focused on safety, plant science, the latest climbing techniques and equipment care—something I haven't seen elsewhere in my 35 years of working in horticulture. I'm not in the habit of suggesting to someone to switch companies if they are already happy with the relationship they have with their current tree company, but my third tip is that I am even more confident referring RTE after working on the inside to homeowners or someone who wants a cool career in tree work than I already was as an observer. It is important to choose a tree company who cares about safety and determining the best method of care for the health and vigor of your trees. I'm also grateful to have a platform on which to share my observations.
And yes, I was genuinely proud to drive around in that beautifully wrapped truck with the crabapple blossoms and have so many opportunities to speak with many of you.
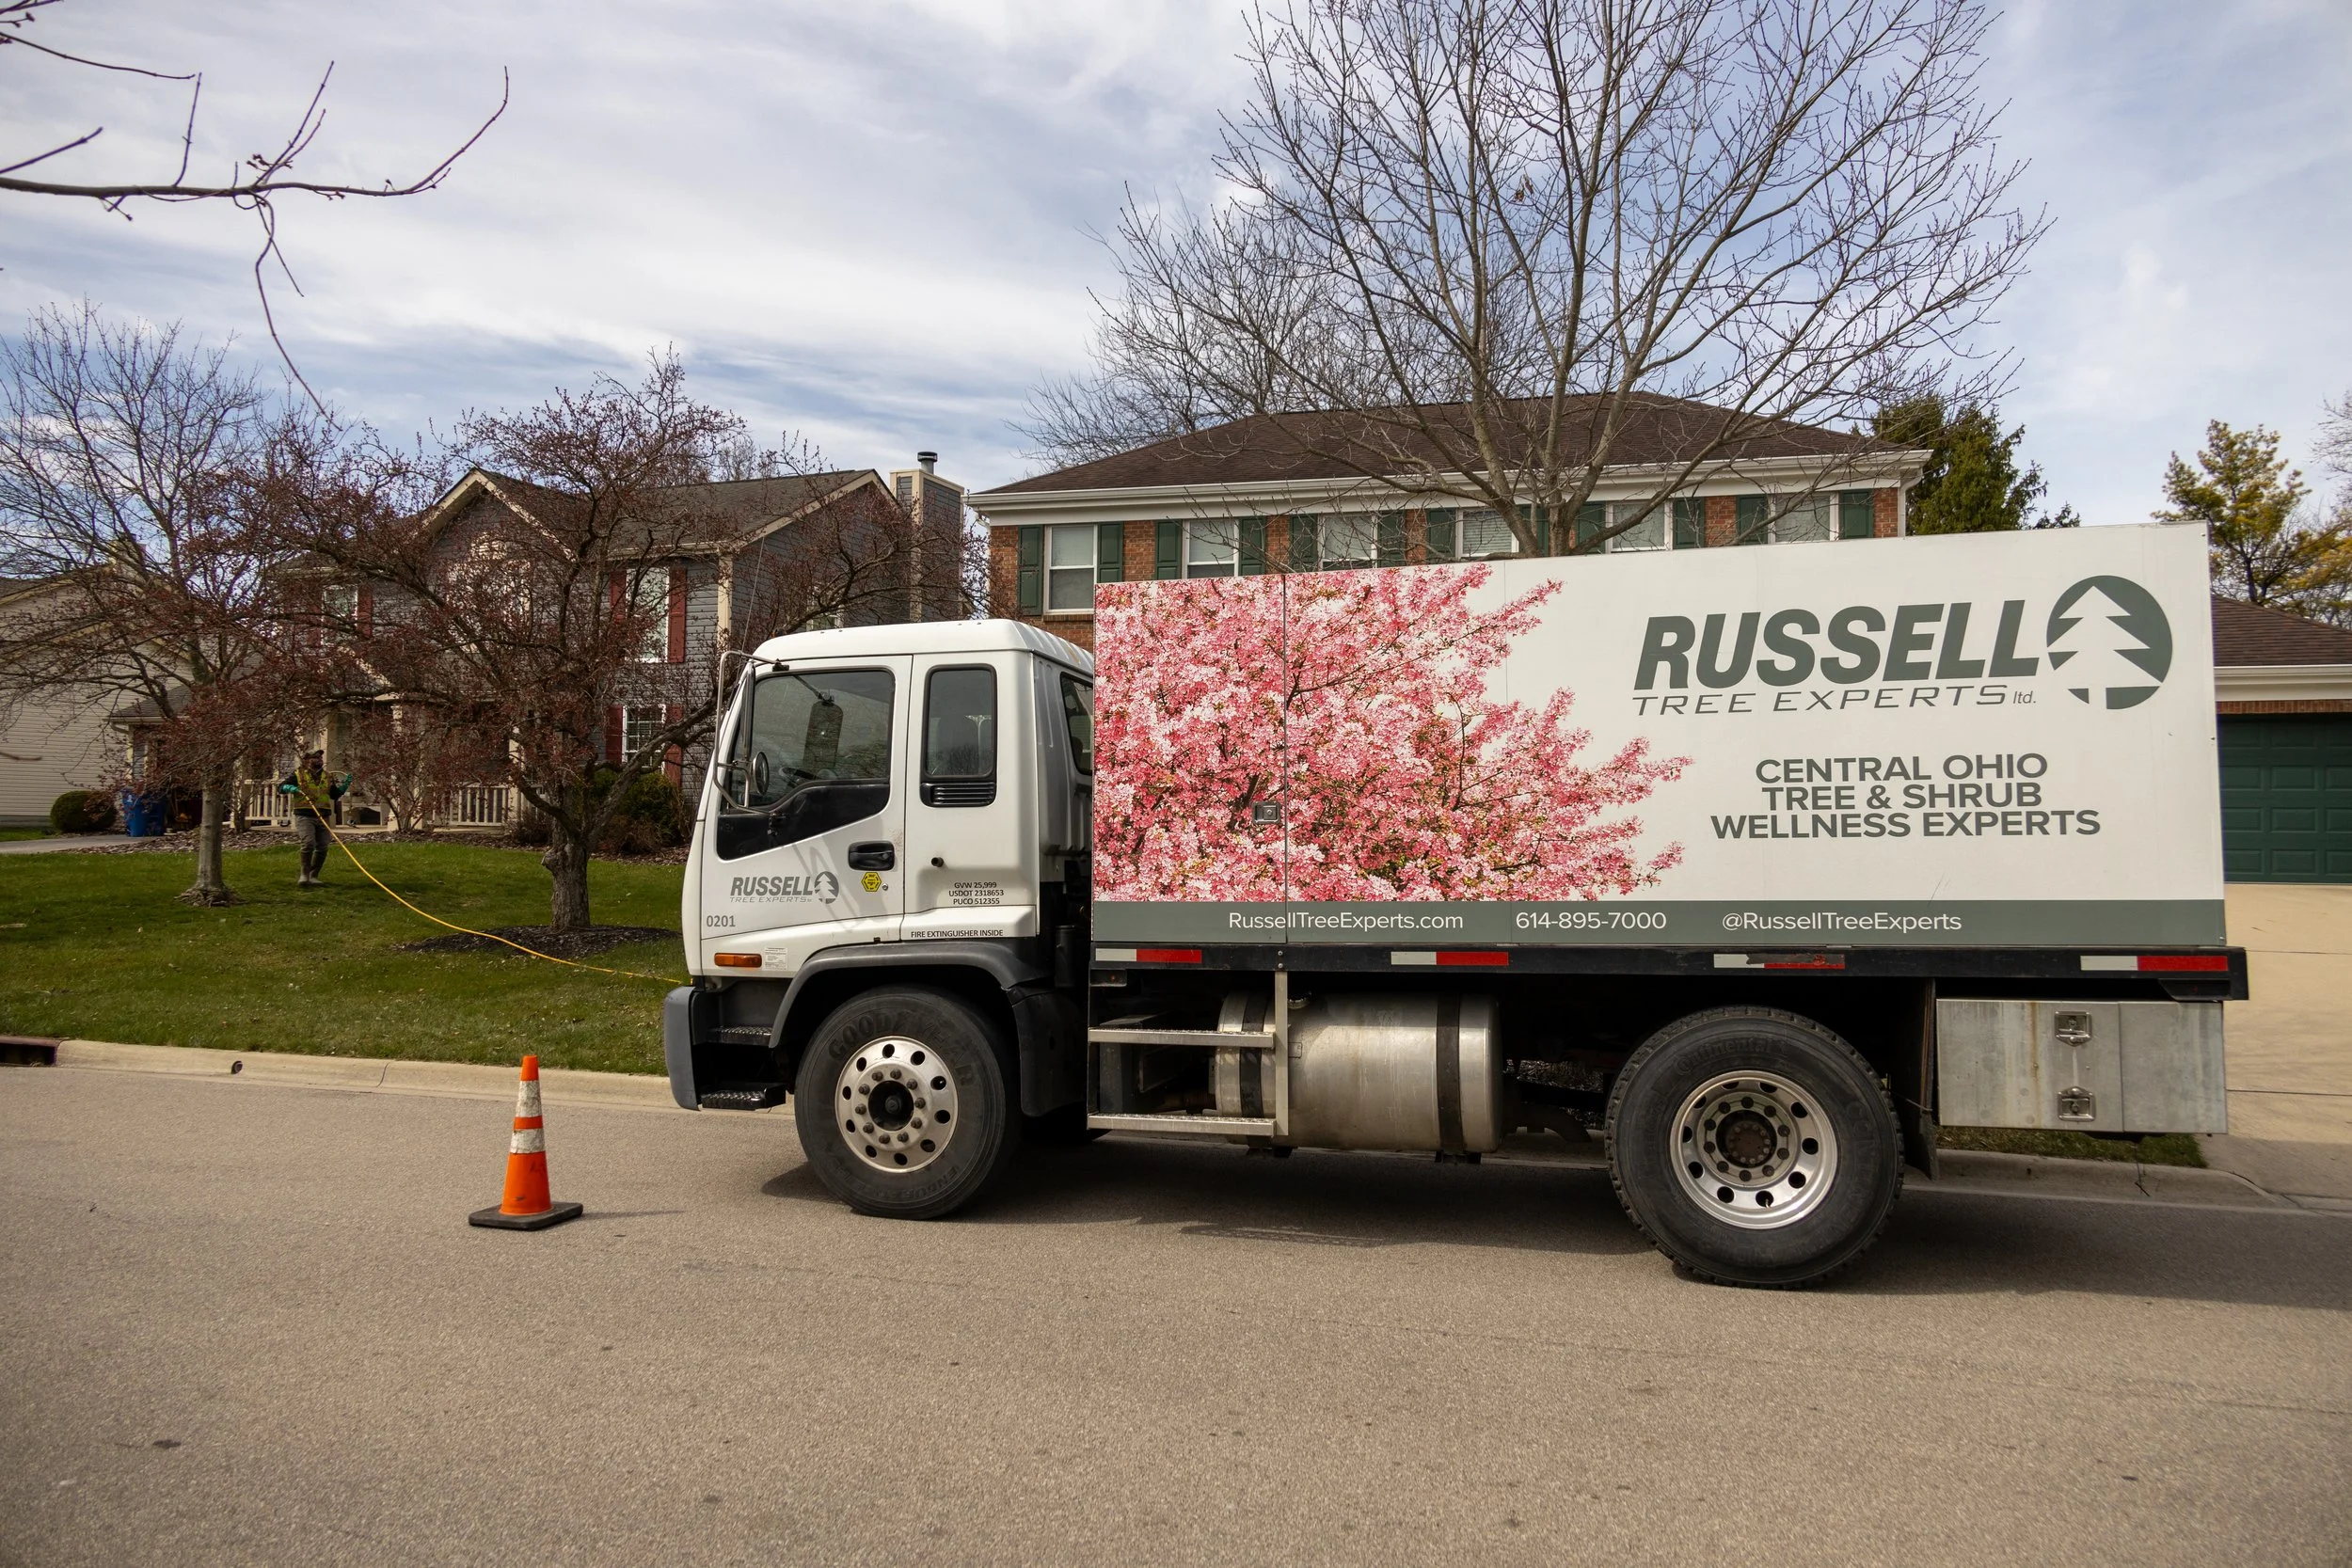
©Russell Tree Experts
One of our multiple plant healthcare trucks used to help maintain and preserve trees across central Ohio!
ADDITIONAL ARBOR ED™ ARTICLES!


TJ Nagel I Scheduling Production Manager, Russell Tree Experts
TJ joined Russell Tree Experts in 2012 and loves trees. He is an avid gardener and plant collector. TJ graduated from The Ohio State University with a B.S. in Agriculture with a major in Landscape Horticulture and minor in Entomology. TJ is an ISA Board Certified Master Arborist® and well versed in plant pathology and tree ID.

The ULTIMATE Tree Planting Guide!

By Enrique Arayata
ISA Certified Arborist® OH-7252A
May 29, 2025
- - - -
We’re in the middle of the growing season, which means tree planting time! There are generally 3 commonly sized trees: Tree saplings, container trees, and balled-and-burlapped trees! In today’s article we’ll be discussing how to best plant each of these 3 tree types. With the focus being on installation, we’re not going in-depth on tree selection, planting site selection, or post-installation watering, maintenance, and protection, but articles written by my fellow coworkers and ISA Certified Arborists® on all these supplemental topics will be linked further in this article!
The first 3 steps for planting any type of tree that I’ll briefly acknowledge but skip past will be to:
SELECT YOUR TREE PLANTING SITE! -> [More Info]
SELECT A TREE THAT’S COMPATIBLE WITH YOUR SELECTED PLANTING SITE!
NOTIFY YOUR LOCAL UTILITY PROTECTION SERVICE! Call before you dig! It might feel like an unnecessary hassle to begin with, but it’s free and a significantly smaller headache compared to hitting an underground line. In Ohio, it’s OUPS and can be contacted by visiting oups.org. Nationally, you can call 811 to speak with your local utility protection service company! -> [More Info]

Since a tree sapling’s root system is so small, bare root trees are the smallest, cheapest, and easiest trees to purchase and plant! Another benefit is that they will establish their roots to the planting site easier than a container or balled-and-burlapped tree, making it less susceptible to leaning or falling over during high winds compared to the other 2 tree types. Some disadvantages to consider are that it will take more time to reach full maturity, and they are harder to spot by a distracted lawn mower operator. Somehow both my dad and my uncle mowed over a tree sapling by accident.
Steps
SOAK YOUR TREE! Soak your tree sapling in water for 5-7 minutes to thoroughly moisten the sapling’s root system.
DETERMINE YOUR HOLE SIZE! Measure the sapling’s base of the root to its root flare (meeting point between the roots and the trunk) to determine the depth of your hole.
DIG YOUR HOLE! Your tree hole needs to only be as deep as the measurement between the root flare and bottom of the tree sapling’s roots. Regarding width, a 1 feet diameter circle is more than enough.
DOUBLE CHECK YOUR MEASUREMENTS! Double check your hole’s depth and width! Adjust if necessary. To test this, place your sapling in the hole and ensure that the root flare is equal to the surrounding soil level. Do not cover or bury the root flare. It should be above ground level.
PLACE YOUR TREE IN THE HOLE! Make sure the tree is straight and not leaning. Ensure that the root flare is visible at or slightly above ground level.
BACKFILL THE SOIL! Place the dug-up soil back into the hole. Lightly compact the soil as you begin to reach ground level. You can use your feet/shoes to compact the soil around the tree sapling. Optionally, a 2-4 inch layer of organic wood chip mulch is recommended for numerous reasons such as increased water retention, minimizing temperature fluctuations, increased trunk protection, having less grass to mow, and subjectively, improved aesthetics and curb appeal.
WATER THE TREE! Lightly water the soil (or mulch) around your tree to add moisture back into the surrounding ground. This is especially important when planting saplings in dry or summer-like conditions.
AND... DONE! Voila, your tree sapling has been installed!
Video

STEPS
DETERMINE THE SIZE OF YOUR HOLE! The hole should be a few inches wider than the tree’s pot, but 1-4 inches shallower than the height of the soil in the tree’s pot. This height difference is because it’s very common for a tree’s root flare (the boundary between the root and the trunk) to be buried in a nursery pot, which is no good. This will be addressed in an upcoming step. The overall shape of the hole should be half of a sphere with its deepest portion being in the middle.
DIG YOUR HOLE! If you’re digging next to grass and you care about your lawn, I would recommend placing your dug-up grass in a wheelbarrow or on a tarp.
DOUBLE CHECK YOUR MEASUREMENTS! Once you’re done digging, double check your work! Again, the hole should be a few inches wider than the tree’s pot, and the depth should be 1-4 inches below the soil’s height. Make adjustments if necessary.
Many of my fellow ISA Certified Arborists®, including myself, like to plant trees 1-3 inches above the surrounding ground level as trees commonly settle over the next couple of years. This is to also ensure that the root flare is exposed and not buried, which can cause stem girdling roots.
SLICE THE ROOT BALL 4 TIMES! Take the tree out from the pot and slide 4 straight, evenly distributed lines across the root ball every 90 degrees. This will break up and loosen both the dirt and roots which will help minimize the risk of stem girdling roots and encourage outward growth. Optionally, you can also clean up and remove any small or entangled surface roots.
TEST FIT YOUR TREE! Place your tree in the hole! Triple check that the hole’s shape, depth, width, and height is adequate. As mentioned earlier, if the root flare is 1-3 inches above ground level, this is perfectly fine as the soil will likely settle over time. Make adjustments if needed.
BACKFILL YOUR HOLE! It’s perfectly fine to use the existing, dug-up soil, but optionally, you can mix the dirt with a soil amendment like compost, manure, or topsoil in a 1:1 ratio to add more nutrients into the ground. If you want to save yourself some future weeding, I strongly recommend taking the time to remove any grass from the dug-up soil. As you’re backfilling, break up any chunks of dirt to obtain a fine, porous texture to improve water infiltration and gas exchange. Additionally, observe the tree’s lean or lack thereof to ensure that it is still straight and plumb. The tree can easily lean during the backfilling process. Compact the soil every couple of inches with your hands or feet to eliminate any large air pockets. You want to aim for a compaction level between large air pockets that you can hide your penny collection in, and construction-grade compacted soil where little air and water can transfer through.
I strongly recommend adding a 2-4 inch layer of organic wood chip mulch in a ring around the tree. The mulch should match the surrounding grade and not be piled into a mound or volcano-like shape. The radius can be as small as 2 feet wide or as wide as the canopy drip line (the farthest point that leaves or branches extend out to). There are numerous benefits such as reducing the risk of stem girdling roots, less resource competition with nearby grass and above-ground plants, increased water retention, minimizing trunk damage, soil decompaction, and subjectively, increased visual aesthetics and curb appeal.
WATER THE SOIL! You want the soil (or mulch) to be dark brown and saturated with water. Avoid any sitting or pooling water.
PRUNE YOUR TREE! Perform a few, minor pruning cuts. Look for any branches that are rubbing, crossing, or dead and prune them back to the base of a union.
REMOVE TAGS! If there are any tags on the tree and you haven’t removed them already, now’s the time to take them out!
AND VOILA, DONE! Congratulations, your new tree is now installed!
Video

STEPS
DETERMINE THE SIZE OF YOUR TREE HOLE! Measure your tree so you can determine the size of your hole. For a balled-and-burlapped tree, the International Society of Arboriculture (ISA) recommends a hole diameter 1.5 to 2 times larger than the diameter of the root ball. So, if for example your root ball is 3 feet wide, then a hole diameter of 4.5 to 6 feet is recommended. Regarding hole depth, it should be approximately as deep as the root flare of your tree. It is important to note that many balled-and-burlapped trees are already too deep within their own root ball and wire cage. Do not assume that the top of the root ball is the trunk flare. My experience is that more often than not, I have to remove a few inches of soil from above the trunk flare at the time of planting. Many of my fellow ISA Certified Arborist® coworkers and myself like to even plant the tree with the root flare 1-3 inches above ground level to compensate for the soil settling over time. The worst outcome would be for the root flare to be buried and/or below ground level. If the trunk flare is below grade, the tree will be planted too deep and will be more prone to stem girdling roots, reduced vigor, and will become more vulnerable to pests and disease. It is perfectly acceptable if the root flare is slightly above ground level and not perfectly in line with the surrounding grade.
DIG YOUR HOLE! This is definitely the most laborious step, so make sure you have water nearby and you take breaks as needed! Have a game plan for what to do with any dug-up soil and grass. One idea could be to place the top portion of grass into a yard waste bag and place the below-ground soil on a tarp or wheelbarrow. The nearby grassy lawn will thank you for not placing dirt directly on top of it.
DOUBLE CHECK YOUR WORK! Once you’re done digging, double check your measurements! Again, the hole should be 1.5 to 2 times wider than the root ball’s diameter and the depth in the center should be the measurement from the bottom of the root ball to the tree’s root flare. You can be 1 to 3 inches below this measurement in order to ensure that the tree is planted with or slightly above the surrounding grade. Make adjustments to your hole if needed.
TEST FIT YOUR TREE! Place your tree in the center of the hole. Make sure it’s stable before letting go and taking a step back. You can backfill a tiny portion of soil and tamp it against the root ball with your feet. Trust me, I’ve seen a few trees fall down and have broken limbs during this step. After the tree is standing upright in the hole, verify it is positioned correctly: centered, upright and plumb, and at a height where the trunk flare is at or slightly above the surrounding grade. Make adjustments to your hole if necessary. You may or may not have to take the tree of out of the hole.
STABLIZE YOUR TREE! If you’re satisfied with the general shape of your hole and with the general placement of your tree, stabilize your tree a little more to prepare for the next step. Backfill some of the dug-up soil to the bottom of the root ball and tamp it down with your feet once more until the tree feels relatively secure and in-place. The tree may move during this, so when you’re finished, triple check your work and make adjustments if necessary.
REMOVE THE TWINE, TOP 1/3 OF BURLAP, AND TOP 1/3 OF WIRE CAGE. Remove the twine around the trunk, remove the top third of the burlap and remove the top third (approximately) of the wire cage. The purpose of removing these materials is to prevent damage to the trunk and buttress roots as they grow over time. Removing the twine, burlap and wire cage is the subject of much debate amongst landscape contractors, tree producers, and arborists. In an effort to be brief, my recommendation to remove the top third of the wire cage, the exposed burlap (approximately the top third), and the twine is a balance between ensuring root ball stability, new tree survivability, and planning for the long term health of the tree over the next hundred years. There may be some instances, like planting new evergreen trees in exposed/windy sites where it may be acceptable to leave the entire wire cage, burlap and twine intact for one full growing season before returning to remove it later. You will likely need some type of wire cutter or saw to remove a portion of the wire cage, so be sure to wear proper PPE including safety glasses and gloves! This step is also an annoying opportunity for the tree to shift around, so quadruple check the tree’s placement and make adjustments if necessary once you are done!
Optional: If you’re planting a tree in summer or drought-like conditions, I would recommend watering the hole to add moisture back into the soil. You only need to add enough water to turn the soil dark brown, avoid any pools of water.
BACKFILL THE SOIL! You can use only the dug-up soil if you’d like, but you can also optionally mix in a 1:1 ratio of dug-up soil and soil amendments such as compost, manure, or topsoil. It’s your choice and the level of necessity will vary from planting site to planting site. If you want to reduce resource competition for the tree and save yourself some weeding, you can filter out any grass you find during this process. As you’re backfilling, lightly tamp the soil to remove air pockets with your hands or feet but be careful not to overly compact soil as pore space is needed for water and oxygen. You don’t want air pockets where you can hide your penny collection, but you also don’t want construction-grade compacted soil.
MULCH AROUND THE TREE! Apply a 2-4 inch layer of organic wood chip mulch in a circular ring around the trunk of the tree. The width can vary from options such as 1 foot wide, as wide as the dug-up grass, or as wide as the canopy drip line of the tree (the farthest point that leaves or branches extend out to). Avoid covering the root flare of the tree. The mulch should match the surrounding grade of the planting site and not be mounded up in the shape of a volcano. Mulch does a great job of retaining moisture around newly planted trees in addition to reducing competition from weeds, regulating soil temperatures, reducing soil compaction and adding nutrients to the soil. Linked is my previous ARBOR ED™ article on how to create a tree mulch ring including all of its benefits!
WATER AROUND YOUR TREE! Watering a newly planted tree correctly is as important as selecting the right tree. Watering is the single most important maintenance factor in the establishment and success of planting a new tree. The best way to water a tree is slowly and deeply so that water is trickling down into the root ball of the tree and not washing away into the lawn. A newly planted balled-and-burlapped tree should be watered at the time of planting and then once a week until temperatures are consistently below freezing. Watering in this same fashion should resume when the tree breaks dormancy and leafs out the following spring. It generally takes 2 - 3 growing seasons before a balled-and-burlapped tree is established and can fend for its own water. Establishment could take longer with larger trees. For more information on watering, see my coworker, ISA Board Certified Master Arborist® TJ Nagel’s ARBOR ED™ article on proper tree watering!
PRUNE YOUR TREE! If a tree could only be pruned once in its life, pruning at planting is the time to do so. The overall goal of pruning at planting is to improve the structure of the canopy, to remove crossing and broken limbs, or to reduce/remove upright limbs that might be competing to be the central dominant leader. Note: It is equally important not to over-prune a newly planted tree, as having the appropriate amount of leaf area in the canopy next season is essential to maintaining good health and vigor.
REMOVE TAGS AND ENJOY YOUR TREE! Your new tree is now planted! Enjoy it! If there are any tags on the tree and you have not already removed them, you can remove them now!
OPTIONAL: PROTECT YOUR TREE! Protect your tree from mechanical damage. This step may not be necessary for every newly planted tree. If you live in an urban area without deer and have large, generous planting beds free of turf, you can likely skip this step. When planting in rural areas, TJ often recommends using some sort of deer protection to protect the trunk of trees until they have surpassed 8-10 inches in diameter. You can use a 4-foot-tall wire fencing cut into a 7-8-foot length and then then wrap it around the tree. In addition to protecting the trunk, the fencing also makes it more difficult for deer to feed on lower limbs. Trunk guards or corrugated drainpipe can also work to protect tree trunks, but they must be removed before the heat and humidity of the summer. I also recommend trunk protection for folks that have trees in areas where turf is tightly managed with large, fast-moving mowers and string trimmers.
Video
In Conclusion…
Now that your tree has been planted, the next, most important step will be to properly water it! Watering can vary drastically based on tree size and season. If I had to best explain it in 1 sentence, it would be to water a tree slowly through some type of drip irrigation system (such as a tree watering bag, low pressure hose, or watering bucket) in the morning or evening (to minimize evaporation) anywhere from every day to every other day (depending on the season and amount of sunlight the tree receives daily). Other maintenance recommendations that can be optional or highly recommended depending on the tree and planting site would be to create a tree mulch ring (if you have not done so already), add deer protection, and/or stake the tree! Below are articles on some of these mentioned topics!
ADDITIONAL ARBOR ED™ ARTICLES!


Enrique Arayata I Media Production Manager, Russell Tree Experts
Enrique is an ISA Certified Arborist® and FAA Certified Remote Pilot. In his free time, he enjoys working out, hanging out with his family and girlfriend, video production, photography, cars, technology, and cooking. Enrique has a BA in moving image production with a double minor in film studies and studio art specializing in photography from The Ohio State University, and an AA in web graphic design from DeVry University. His favorite tree is the Kwanzan cherry tree.
The 2025 Ironwood Games! See it Live!

By Matt Vaughan
Administrative Director
May 15th, 2025
Hey there, friends!
We’d love to invite you—and your family and friends—to the inaugural IRONWOOD GAMES™, hosted by Russell Tree Experts and proudly supported by our sponsor partners, on Saturday June 14, 2025, starting at 8:00 AM at 11144 Worthington Road Pataskala, OH 43062. Admission is of no cost, it’s completely free!
Over the past year, we’ve been hard at work developing this unique event featuring 10 teams from across the U.S. competing in 12 exciting challenges—from climbing and timbersports-inspired contests to heavy equipment operation and everything in between. Plus, we’ll have 3 fantastic food vendors, a fun kids’ zone, a DJ, and much more to enjoy throughout the day.
The idea for this event started over a year ago during one of those classic Friday afternoon “what if...” conversations between me and my good friend and colleague, Jacob Nau. We sketched out a rough proposal, crossed our fingers, and received overwhelming support from Shari and Joe Russell and our other colleagues at Russell Tree Experts, and the rest, as they say, is history!
The IRONWOOD GAMES™ will showcase regional and national competitors with backgrounds in competitive climbing, forestry, and heavy equipment operation. Throughout the day, they’ll go head-to-head using chainsaws, two-person crosscut saws, ropes, handsaws, skidsteers, Sennebogen, and grapple material handlers, and more—all vying for a shot at one of three top prizes that total more than $6,000.
Click above to meet all the competitors!
We’re incredibly grateful for the generous support of our sponsors and the amazing volunteers who’ve stepped up to help make this event a success. P.S. There’s still time to join our team of volunteers if you’re interested!
Check out the website for more details, and let us know in the comments which event you’re most excited about. My favorite is Mind Over Machine, and Jacob’s is Around the Bur!
LEARN MORE HERE!
HUGE SHOUTOUT TO OUR SPONSORS!

Matt Vaughan I Administrative Director, Russell Tree Experts
Matt joined Russell Tree Experts in 2019 with a background in HR & operations leadership. He graduated from the Pennsylvania State University with a Bachelor of Science in Organizational Leadership. In his time off, he enjoys woodworking and traveling with his wife, and terriers.
Giving Away 1000 Free Trees for Arbor day 2025!

Happy early Arbor Day! Arbor Day is this Friday, April 25th, 2025, and it is a holiday to celebrate trees and encourage everyone to plant more trees!
This Arbor Day, Russell Tree Experts will be giving away 1,000 FREE tree saplings to the public! Just stop by our Westerville office or Birdie Books (Uptown Westerville) to pick up your free tree saplings! There will be various trees of different growing speeds, mature sizes, sun preferences, and notable fruits, flowers, and foliage colors to choose from:

©Russell Tree Experts
Bur Oak
Eastern Redbud
Tuliptree
American Persimmon
Shagbark Hickory
Black Gum
ISA Certified Arborists® will be available at pick-up for any help picking out your tree and to discuss the do’s and don’ts when planting your tree(s) at home! If visiting Birdie Books, also check out their Arbor Day book collection to learn more about our favorite thing…. TREES! We’re excited to see you soon and plant happy trees!
Date:
Friday, April 25th, 2025
Time:
10:00 AM to 4:00 PM
Locations:
Russell Tree Experts: 3427 E Dublin Granville Rd, Westerville, Ohio 43081
TREE PLANTING RELATED VIDEOS
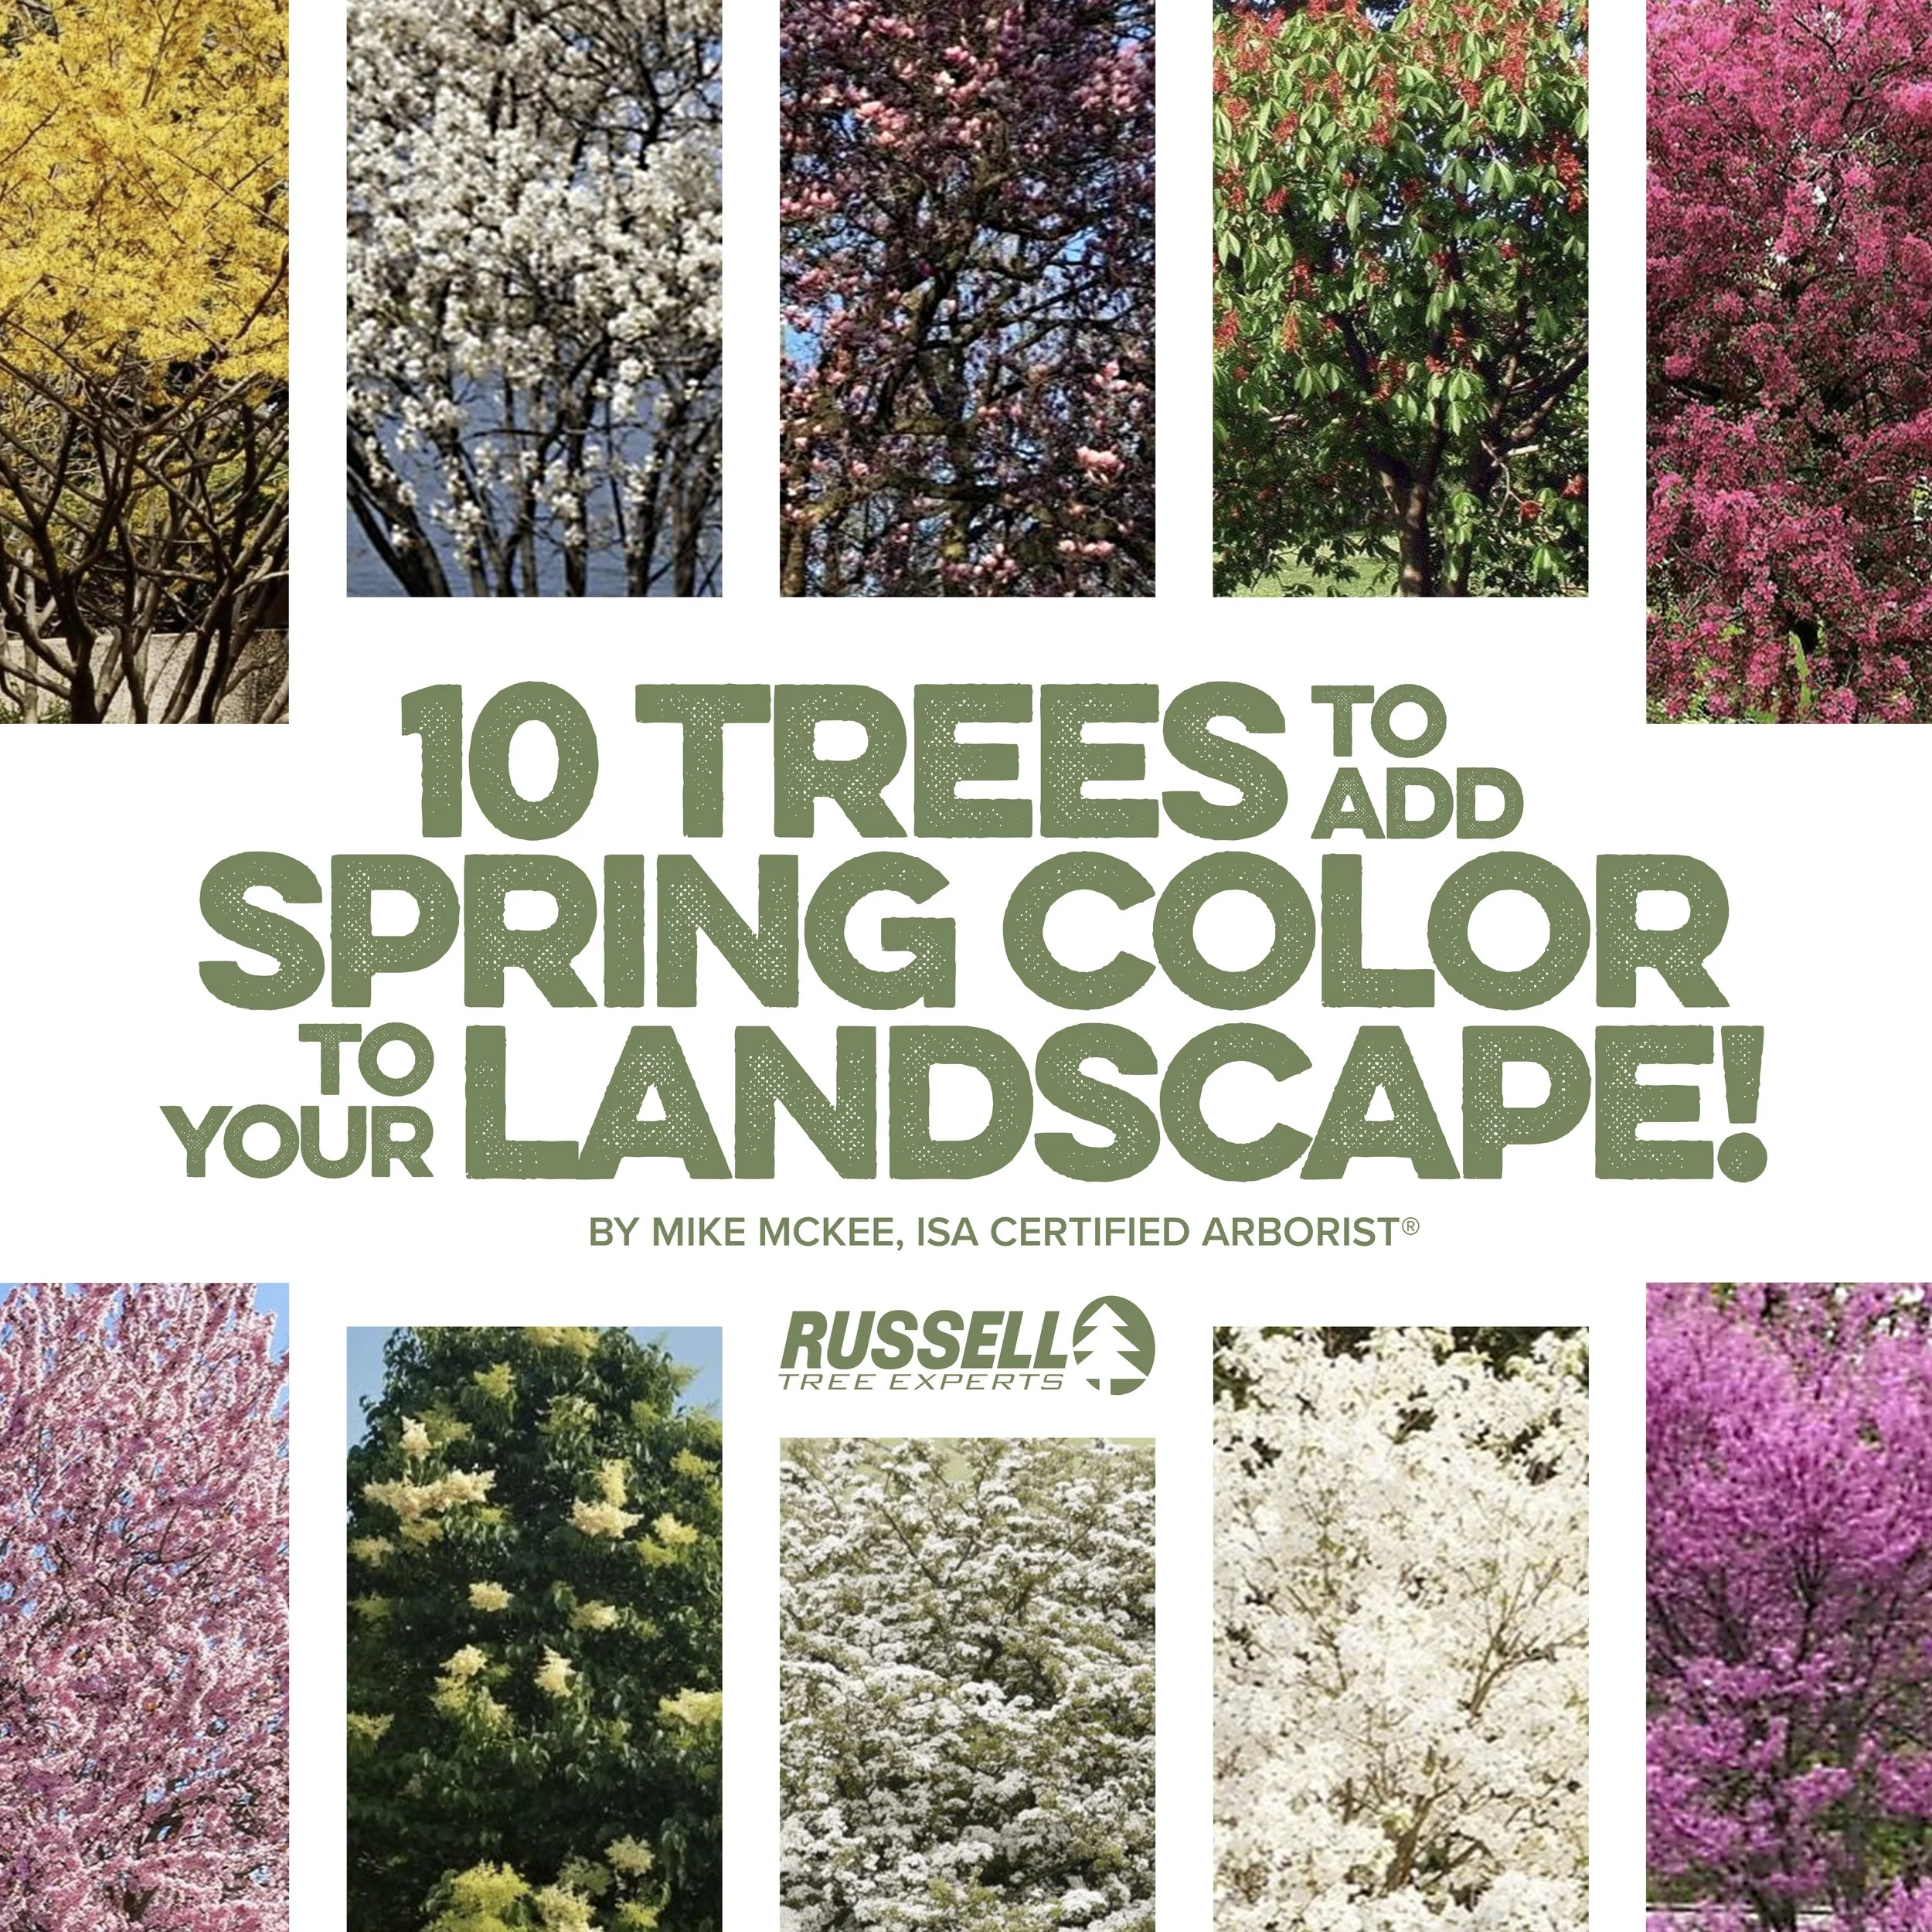
10 Trees to Add Spring Color to Your Landscape!

By Mike McKee
ISA Certified Arborist®
April 17, 2025
Flowering trees can be a great addition to any landscape. There is an unlimited range of options to add that splash of color to your property. The list is very large so I will pick 10 of my favorites that I have planted over my 35+ year career as an ISA Certified Arborist®. Flowering trees not only add a variety of colors, but additionally fragrance and many environmental benefits to pollinators, birds, and more! The timing of the blooms can be spread over several months with proper selections. There are many options among these genera, but I will concentrate on my favorites and best performers. The trees discussed in this article will stay in the small-to-medium size range.
Red Buckeye
I will start with one of my personal favorites, the red buckeye. Blooming in the April to May timeframe, this tall red blossom display is hard to beat in your landscape. This ovular shaped tree will produce red upright panicles that average 4 to 8 inches in length. This will make for a great specimen tree in your yard! If you’re an Ohio State fan, they will eventually produce buckeyes as well!
Common Name: Red Buckeye
Scientific Name: Aesculus pavia
Mature Height: 10 to 20 feet
Mature Width: 10 to 20 feet
Sun Preference: Partial to Full Sun
Spring Foliage Color: Green leaves with red flowers
Other noteworthy characteristics: Brown buckeye nuts. Brown leaves in the fall.
2. Flowering Dogwood
Dogwoods can be one of the most popular trees in central Ohio landscapes. There are many varieties which cover a wide color spectrum, mainly whites, yellows, pinks, and even some reds. These are also trees that can have all season interest due to their bark character, showy fruit, and vibrant fall color display. Cornelian cherry dogwood will be one of the first trees to bloom in the spring with small yellow flowers, but the species I prefer is flowering dogwood with its white spring bracts.
Common Name: Flowering Dogwood
Scientific Name: Cornus florida
Mature Height: 15 to 30 feet
Mature Width: 15 to 30 feet
Sun Preference: Partial to Full Sun
Spring Foliage Color: Green leaves in the spring with white flowers.
Other Noteworthy Characteristics: Red to purple fall color. Persistent red fruit in the winter.
3. Okame Cherry
Another of my favorite early flowering trees would be the Okame cherry. This tree typically blooms in March with vibrant pink flowers. This too is a compact tree that should stay under 25 feet tall. This tree was made famous with its display in Washington DC. It has a mild fragrance and attracts many pollinators.
Common Name: Okame Cherry
Scientific Name: Prunus x okame
Mature Height: 15 to 25 feet
Mature Width: 15 to 20 feet
Sun Preference: Full Sun
Spring Foliage Color: Pink flowers
4. Allegheny Serviceberry
Another tree with all season appeal would be the serviceberry. There are a few species and many cultivated varieties of serviceberry, but I prefer the Allegheny serviceberry. It produces early spring white flowers followed by edible fruit and finally, brilliant fall color!
Common Name: Allegheny Serviceberry
Scientific Name: Amelanchier laevis
Mature Height: 15 to 25 feet
Mature Width: 15 to 25 feet
Sun Preference: Partial to Full Sun
Spring Foliage Color: Green leaves with white flowers
Other Noteworthy Characteristics: Reddish orange fall color
5. PRAIRIFIRE CRABAPPLE
The crabapple is another longtime favorite among central Ohio landscapes. There are more varieties than I can count so I will just list a few of my favorites. If you are looking for white flowers, you cannot go wrong with Adirondack. My favorite pink choice would be prairiefire, with strawberry parfait coming in a close second.
Common Name: Prairifire Crabapple
Scientific Name: Malus x ‘Prairifire’
Mature Height: 15 to 20 feet
Mature Width: 15 to 20 feet
Sun Preference: Full Sun
Spring Foliage Color: Spring maroon leaves with pink flowers
Other Noteworthy Characteristics: Green leaves with red veins in the summer, bronze leaves in the fall

©Russell Tree Experts
6. Saucer Magnolia
Next on my list are magnolias. Once again, there are too many varieties to list, but the longtime favorites are the saucer magnolia, which has pink flowers, and the star magnolia which has white flowers. The saucer magnolia typically blooms around late March to early April and puts on quite the show! If you are looking for fragrance, make sure you add a sweetbay magnolia to your landscape!
Common Name: Saucer Magnolia
Scientific Name: Magnolia x soulangeana
Mature Height: 25 to 30 feet
Mature Width: 25 to 30 feet
Sun Preference: Partial to Full Sun
Spring Foliage Color: Green leaves with pink flowers
7. Eastern Redbud
Another early blooming favorite that is being produced with several new cultivated varieties is the eastern redbud! They are being developed with a variety of leaf colors, variation in bloom color, and growth habit as well, such as weeping. A classic selection that you cannot go wrong with is the straight species of eastern redbud with its beautiful pinkish purple flowers in the spring! This is the early flowering tree that is often seen along the edge of the woods in natural areas as well as in many landscapes. It flowers at a similar time as magnolia trees but is less likely to be damaged by freezing temperatures and Ohio’s wishy-washy weather.
Common Name: Eastern Redbud
Scientific Name: Cercis canadensis
Mature Height: 20 to 30 feet
Mature Width: 25 to 35 feet
Sun Preference: Partial to Full Sun
Spring Foliage Color: Dark green heart-shaped leaves with pinkish purple leaves
8. Washington Hawthorn
One of the later bloomers in the spring would be the Washington Hawthorn. This is another tree that can have all season interest with the white flowers, fragrance, red fruit, and fall color, making this a great selection for your landscape. Its abundant red fruit supports many pollinators, birds, and more!
Common Name: Washington Hawthorn
Scientific Name: Crataegus phaenopyrum
Mature Height: 25 to 30 feet
Mature Width: 15 to 25 feet
Sun Preference: Full Sun
Spring Foliage Color: Green leaves, white flowers, and red fruit
Other noteworthy characteristics: Orange and scarlet leaves in the fall
9. IVORY SILK JAPANESE TREE LILAC
Next on this list is the ivory silk tree lilac. This is a plant that produces a creamy/white plume, usually long after other trees have bloomed.
Common Name: Ivory Silk Japanese Tree Lilac
Scientific Name: Syringa reticulata
Mature Height: 20 to 30 feet
Mature Width: 15 to 25 feet
Sun Preference: Full Sun
Spring Foliage Color: Dark green leaves with creamy white plumes
Other Noteworthy Characteristics: Golden to bronze fall color. Cherry-like bark that is attractive in the winter.
10. American Witch Hazel
Last (or first) on this list is witch hazel! Some witch hazels bloom in early spring such as Jelena and vernal witch hazel, but a personal favorite (and classic) is the American witch hazel. This plant blooms in the fall with beautiful yellow color that persists into winter, sometimes up to early spring.
Common Name: American Witch hazel
Scientific Name: Hamamelis virginiana
Mature Height: 15 to 25 feet
Mature Width: 15 to 25 feet
Sun Preference: Partial to Full Sun
Spring Foliage Color: Green leaves that turn yellow in the fall and winter
This is just a small list of trees that could add a splash of color to your landscape. With a little research and planning, you can have color, fragrance, fruit, and other interesting characteristics throughout the year! Choose wisely and plan for the mature size of your plants when making selections and picking planting locations.
Please review our other articles on planting, mulching, watering, and other related topics before adding additional trees to your landscape in the coming year. For a free tree quote by one of our 20+ ISA Certified Arborists®, visit RussellTreeExperts.com/Quote or speak with our friendly, local office staff at (614) 895-7000!
ADDITIONAL ARBOR ED™ ARTICLES!

Mike McKee | Regional Manager, Russell Tree Experts
Mike graduated from Hocking College in 1983 with a degree in Natural Resources specializing in urban tree care. He has been an ISA Certified Arborist® since 1991. Mike started his career in the private industry in 1985 before becoming a municipal arborist in 1989. He retired after serving thirty years before joining us at Russell Tree Experts in September 2018. His love of trees has never waned since trying to climb up the ridges of the massive Cottonwood tree in front of his childhood home.