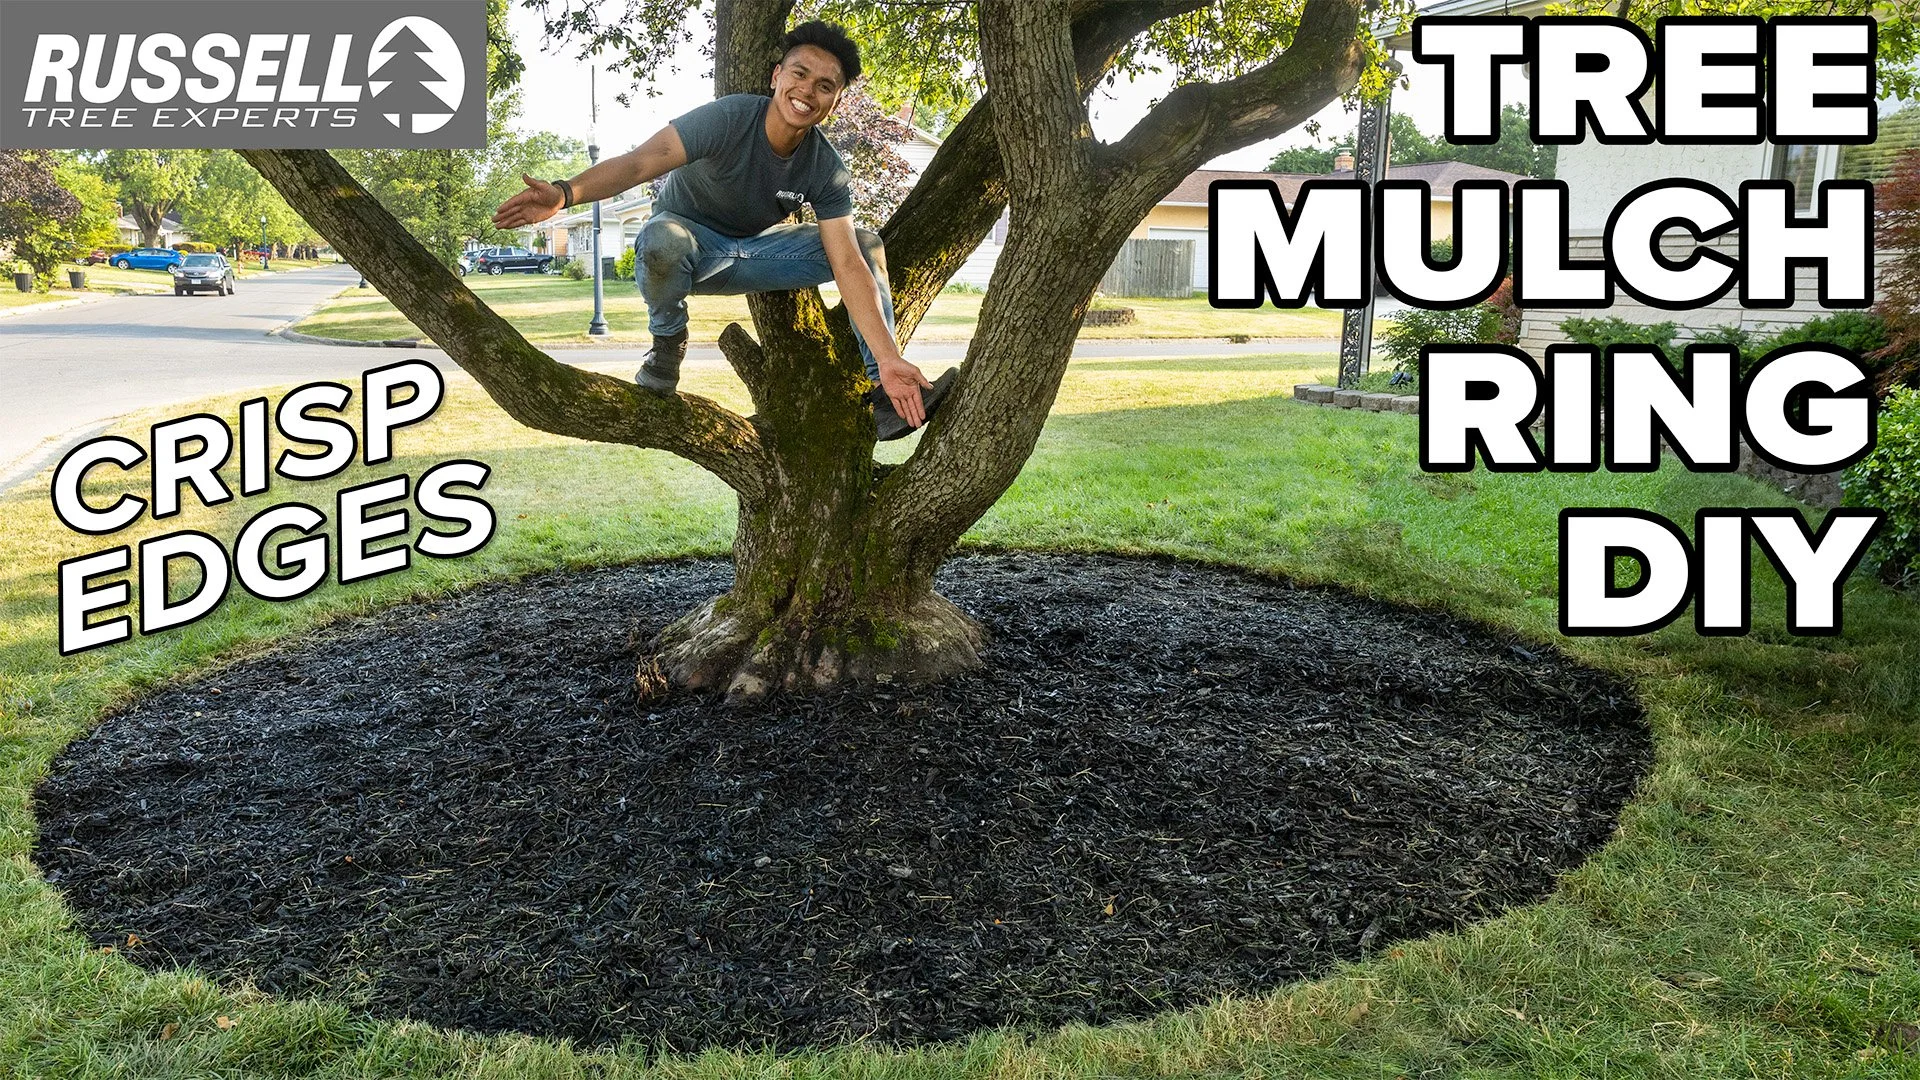
How to Mulch a Tree Ring with CRISP Edges!

By Enrique Arayata
ISA Certified Arborist® OH-7252A
September 18, 2025
In this article (and video below), we’ll be going over how to make a tree mulch ring with crisp edges! First, what is a tree mulch ring? In general, it is a circular area of organic wood chip mulch around the trunk of your tree. Sometimes the perimeter will be outlined with stone or plastic landscape edging. The benefits of creating a tree mulch ring is that if done properly, it will aid in maintaining the health of your tree and promote increased growth and vigor! We will also be going over common mistakes to be cautious of.
VIDEOS: HOW TO CREATE A TREE MULCH RING
Full-length video

Shortened video
Benefits of a Tree Mulch Ring
More Nutrients: Organic mulch contains a lot of essential nutrients like nitrogen, phosphorus, and potassium that will slowly break down and decompose for the tree to absorb. Examples of organic mulch are mulches made from wood chips, compost, or leaves. Examples of inorganic mulches that would not provide the benefit of increased nutrients are anything made of stones or synthetic materials like plastic or fabric.
Water Retention: Mulch is a natural insulator that will keep the soil warmer in the winter and cooler in the summer compared to the surrounding, ambient temperature. Mulch also retains water more effectively than grass or topsoil. Evaporation is slowed down and more water is available for the tree. This also means that less tree watering may be needed depending on the weather and season. Instead of watering every 1 to 2 days, a deep soaking once or twice per week could be completed with similar or improved results. Erosion is also minimized as mulch will lessen the impact of water droplets hitting the ground and washing away the soil.
Outcompeting Other Plants: Mulch will reduce competition of nutrients, water, and oxygen for the tree from grass, weeds, invasive plants, and more. This results in the tree having more resources to absorb to keep it growing as healthy as possible!
Minimizing Trunk Damage: A mulch ring will minimize or even eliminate any risk for trunk damage from lawn mowers or string trimmers. Someone may not be intentionally trying to damage a tree’s roots or trunk, but accidents happen when trying to mow or trim those last, stubborn blades of grass. If there’s mulch instead of grass near the trunk, then there will be no reason to bring a lawn mower or string trimmer within a close enough distance for accidental damage to occur.
Soil Decompaction: Soil compaction is bad for a tree because it minimizes gas exchange and water infiltration. A tree benefits from soil decompaction and root zone invigoration if the soil is compacted when digging up the topsoil and is replaced with porous mulch. Peo de ple are also less likely to step on mulch compared to grass which will aid in minimizing soil compaction and keeping it porous for adequate gas exchange and water infiltration.

©Russell Tree Experts
Final product of a properly mulched tree ring!
Reduced Maintenance: Although there’s an upfront time commitment with installing a tree mulch ring as well as some annual maintenance with re-edging the lines and adding mulch, less tree maintenance will be needed in the future. A tree mulch ring means less grass to mow and less weeds popping up. Revisiting the benefit of increased water retention, this means that less tree watering will be required with certain exceptions like newly planted trees and drought-like weather conditions. A properly installed tree mulch ring and a consistent watering schedule can also minimize the risk of stem girdling roots, soil compaction, drought stress, and some nutrient deficiencies. This makes for a healthier tree and lessened chance for problems that would require tree work services like fertilization, root collar excavation, root zone invigoration, or worse, tree removal.
Aesthetics: Subjectively speaking, tree mulch rings are aesthetically pleasing and can boost curb appeal! It conveys to passersby that you care about your trees and property. You can even make your neighbor Jim from three doors down envious of your lawn! If you start to notice other neighbors creating a mulch ring around their tree after creating yours, you can take pride and credit for being a trendsetter.

©Russell Tree Experts
Stem girdling roots circling around the trunk of a tree. This is a common symptom a tree mulched or planted too deeply.
Correcting an Improperly Planted Tree: This doesn’t apply to every tree. However, if you’re wanting to mulch a tree that just so happens to be planted improperly, this is a great double positive to fix the imperfection while also gaining the aforementioned benefits of tree mulching. Signs of an improperly planted tree are stem girdling roots, mulch volcanoes, and the lack of a visible root flare.
Now let’s move on with how to create a tree mulch ring and avoid some common mistakes!
How to Create a Tree Mulch Ring

©Russell Tree Experts
The ISA Arborists’ Certification Study Guide recommends a mulching depth of 2 to 4 inches and a radius of anywhere from 3 feet up to the canopy drip line of a tree.
1. Determine the size of your mulch ring! In general, aim for a mulch ring with a diameter anywhere between 6 feet wide or up to the canopy drip line for a medium-to-large sized tree. The latter is not always achievable however due to obstacles like nearby trees, plants, concrete, and more. As long as the mulch ring is at least 6 feet in diameter, it should suffice! In terms of mulch depth, 2 to 4 inches is recommended, but I like sticking closer to 2 inches deep.
2. Outline your circle and make sure the tree is centered. There are multiple, effective methods of outlining the mulch ring circle. Below are a few popular ways. One might be more effective than the other depending on your tree, such as if there’s a central leader or any low hanging limbs.
Method 1 requires a tool like a shovel or edger and some type of long, ovular, band like a piece of rope, tie down strap, belt, or exercise band. Place the tree trunk inside one end of the band and the edging tool on the other end of the band. Set the distance of the band to the desired radius of the mulch ring. Go around the tree in a circle and make a 2 to 4 inch deep cut into the ground until you have a fully outlined circle.
Method 2 requires string and a can of spray paint. Cut the string to the desired radius of your mulch ring. Leave some margin on the string so you can tie the tree trunk and spray paint can together and maintain the desired radius. On one end, tie the string gently and securely to the tree trunk and on the other end, tie the string to the spray paint can. An easy knot I recommend would be the bowline knot! Walk around the tree while applying a visible layer of spray paint to create a circular, painted outline.
Method 3 requires a long garden hose and measuring device. Lay down the garden hose in a circle around the tree to create an outline the size of your desired mulch ring. Use the measuring device to check if the tree is centered in the circle by checking for the same radius at various locations between the trunk and the hose.
Method 4 requires a measuring device and an edging tool. Measure your desired radius from the trunk of the tree to the edge of the mulch ring and mark the spot by digging 2 to 4 inches into the soil with your edging tool. Move your shovel away from the mark and repeat this process along the circumference of the tree until your circle is fully outlined.
3. Dig up the top 2 to 4 inches of topsoil within the circular outline! Be careful of any fine, fibrous tree roots. If any are present, consider using an air blower or your hands to gently remove the soil near it. If there’s any grass or weeds remaining after the top 2 to 4 inches of topsoil are removed, consider pulling them out to minimize the chance of weeds or grass growing out above the mulch. Check for a level surface and a well-defined edge and make touch-ups if needed.
4. Dampen the soil to a darker shade of brown and avoid pooling of any water. This could be considered optional on different guides for how to create a tree mulch ring, but I recommend this as a quick, low effort way to add moisture back into the soil. This is especially helpful if you are doing this in the middle of summer with any exposed roots. Avoid placing down landscape fabric between the soil and mulch. This is a common practice of the past that is slowly being phased out because studies have shown this to not be noticeably more effective at blocking weeds, because the openings can clog up with organic matter and minimize air exchange and drainage, and because the decomposed nutrients from the mulch will be blocked from improving your soil and making nutrients more available for your tree. If weeds are a concern, an optional step could be to apply a weed preventer like Preen before applying mulch.

©Russell Tree Experts
An incorrect method of applying mulch commonly known as a mulch volcano.
5. Evenly apply your mulch! Depending on the specific diameter and depth of your hole, anywhere from 1 to 4 bags could be used. Be cautious of compacting the mulch. You can lightly tamp the soil with your hands to help level the surface, but keep the mulch porous to maximize gas exchange and water infiltration. Do not cover the root flare (also known as the trunk flare) of the tree. This may be a commonly seen occurrence, but that does not mean it’s the correct way to mulch a tree. This is known as a mulch volcano and is bad for the tree! They are detrimental to a tree’s health because they encourage unwanted disease and decay and because the needed oxygen-carbon dioxide exchange for healthy growth is minimized. Keep it simple by applying a level layer of mulch. If you are concerned about water runoff, a tiny, wall-like berm could be created around the perimeter of the mulch ring and formed by hand to encourage water to remain inside the mulch.
6. Touch up the circumference of the mulch ring to make that edge look nice and crisp! You can use a tool like the sharp end of a shovel, an edger, a string trimmer, or a bed redefiner. Avoid stepping on the edge or using a heavy piece of equipment as the edge could cave in and break.

©Russell Tree Experts
Final product!
7. Water the mulch! Ideally, it is best to water the tree slowly and deeply using a watering bucket or a drip irrigation device, but you can also use a garden hose on the mist setting and apply it evenly for a couple of minutes to get the mulch damp and moist. Avoid pooling any water and do not get the trunk or leaves excessively soaked for an extended period of time because an environment for disease or decay could be created.
8. Voila, you’re finished! Time to take a step back, enjoy it, take a few pictures, show your friends and family, or whatever else you’d like to do! You might have also created a messy work zone that you may need to clean up!
~~~
In terms of future maintenance, you may annually need to redefine the edge to keep it looking crisp and you may need to add a minimal amount of mulch as it decomposes and thins out. To preserve your edge line, avoid mowing directly up to the edge and use a string trimmer to cut the grass 1-3 inches closest to the edge. In the couple of weeks immediately after installation, some individual blades of grass might pop up that you’ll need to pull out. Over time though, the amount of grass or weeds that pop up will lessen. You can also add stone around the perimeter to make it stand out even more, but this is not necessary in regards to your tree’s health.
I hope this article was insightful and useful! The videos near the beginning are a visual guide for how to create a tree mulch ring! If you’re curious to learn more, I strongly encourage checking out the related articles below on topics such as proper tree watering, tree mulching, mulch volcanoes, stem girdling roots, and more. As always, for a free tree work quote by one of our 25+ ISA Certified Arborists®, call us at (614) 895-7000 or visit RussellTreeExperts.com/Quote
[Please note: This article was revised and republished on 9/18/25 from its original publish date of 8/6/23]
Additional Arbor Ed™ Articles!


Enrique Arayata I Media Production Manager, Russell Tree Experts
Enrique is an ISA Certified Arborist® and FAA Certified Remote Pilot. In his free time, he enjoys working out, hanging out with his family and girlfriend, video production, photography, cars, technology, and cooking. Enrique has a BA in moving image production with a double minor in film studies and studio art specializing in photography from The Ohio State University, and an AA in web graphic design from DeVry University. His favorite tree is the Kwanzan cherry tree.